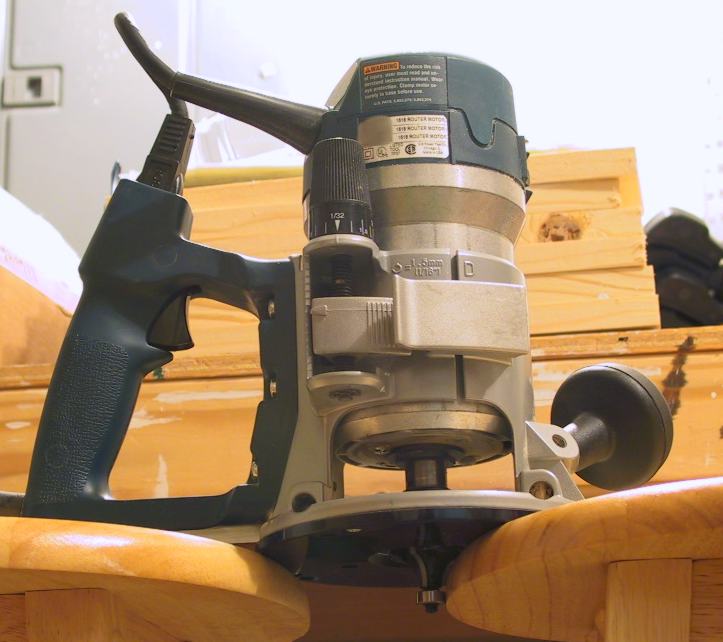
The most reliable way to prevent router tearout is to use a sharp bit, read the wood grain, take shallow passes, support fibers at the exit point, and use the correct feed direction for the router and workpiece.
For woodworkers in the United States, router tearout is a common problem when routing hardwoods, plywood, cabinet parts, furniture components, and decorative profiles. The problem is especially noticeable when a router bit reaches end grain, crosses changing grain, or exits a cut where the remaining fibers have little support.
Router tearout happens when the cutter pulls, lifts, or breaks wood fibers instead of cleanly shearing them. The solution is rarely one adjustment. Clean results usually come from combining a sharp and suitable bit with correct feed direction, controlled cutting depth, solid workholding, and support at vulnerable edges. These principles apply to both handheld routers and router tables, although the safe operating technique differs between them.
Source: m.media-amazon.com
Why Router Tearout Happens
Router tearout occurs when the cutting force lifts or breaks wood fibers rather than slicing them cleanly. The risk increases when the grain changes direction, when the cutter exits an edge, when the workpiece is poorly supported, or when too much material is removed at once.
End grain is particularly vulnerable because the fibers at the edge can become unsupported as the router bit exits. Curved workpieces can also be difficult because the effective grain direction changes around the curve. Porous or figured hardwoods, such as oak and ash, can be more challenging, but even maple, cherry, walnut, plywood, and other materials can tear under unfavorable cutting conditions.
Tearout is different from a simple rough surface caused by sanding or a dull finish. Look for chunks, lifted fibers, splintered corners, or sections where material has broken away beyond the intended cutting line. Identifying the failure pattern helps determine whether the problem is grain direction, tooling, cutting depth, support, or feed technique.
Source: s3.amazonaws.com
End-grain blowout
The bit breaks through the end of a cut and pulls unsupported fibers away from the adjoining edge.
Grain-related tearout
The cutting edge encounters grain that rises toward the bit and lifts fibers instead of shearing them.
Heavy cutting
A deep or aggressive pass puts more force into the wood and gives the cutter more material to grab.
Tool or setup problems
Dull or dirty bits, excessive vibration, poor workholding, or unsuitable bit geometry can contribute to rough cuts and tearout.
Which Materials Are More Prone to Tearout?
Wood with interlocked, wavy, figured, or diagonal grain can be less predictable than straight-grained stock. Red oak, ash, and hickory are examples of woods that can show noticeable tearout, while figured maple and other decorative hardwoods can also be difficult when the grain changes direction.
Plywood introduces another challenge because its veneers alternate grain direction between layers. The thin face veneer can chip when it is not adequately supported, particularly at an exit edge.
Straight-grained hardwood
Usually easier to route when the feed direction follows the grain and the cutter is sharp.
Figured or interlocked grain
Requires more attention to grain changes, cutting depth, and final-pass technique.
Plywood and veneered panels
Benefit from appropriate spiral or compression tooling and support of the veneer near the cut.
Read the Grain and Choose the Correct Feed Direction
The first practical step in router tearout prevention is to inspect the grain before switching on the router. Look at the edge and face of the board and determine where the fibers appear to rise or fall. Whenever possible, arrange the routing operation so the cutter works in a direction that supports rather than lifts those fibers.
For a handheld router, the conventional feed direction is generally against the bit’s rotation. When routing an outside edge, this normally means moving the router from left to right. For inside edges, the direction changes because the bit is contacting the opposite side of the opening. The exact path should always be determined from the router’s position, bit rotation, and workpiece geometry.
A router table reverses the relationship because the bit is mounted below the table. The workpiece is normally fed against the cutter’s rotation. Follow the router manufacturer’s instructions and the specific table setup rather than relying on a memorized direction alone.
The important exception is a localized area where conventional routing would lift a vulnerable section of grain. In those situations, an experienced woodworker may use a carefully controlled climb cut to change the cutting action. Because a climb cut can cause the router to pull itself into the work, it should not be treated as an ordinary pass.
Source: cdn.shopify.com
Inspect the grain
Look for grain that runs toward an edge, changes direction, or becomes unsupported near the end of the cut.
Plan the cut sequence
Route end-grain areas first when a later long-grain pass can remove minor end-grain damage.
Use conventional feed for normal routing
Feed the router or workpiece against the bit’s rotation according to the specific handheld or table setup.
Treat climb cuts as special operations
Use them only where appropriate, with light cuts, secure workholding, and enough control to resist the router’s tendency to self-feed.
Why Routing End Grain First Can Help
When a project requires routing all four edges, routing the end-grain edges first can make tearout easier to manage. Any small chip or splinter at the end can then be removed when the adjacent long-grain edge is routed. This turns a vulnerable exit point into waste that is removed during the next operation.
If the adjacent edge will remain visible and cannot be routed afterward, use a properly secured scrap backer or another method that supports the exit fibers.
End-grain first
Useful when subsequent edge routing will remove minor damage from the end-grain operation.
Backer when the edge remains visible
Support the exit fibers with sacrificial material when a later pass cannot hide the damage.
Use Sharp Bits, Suitable Bit Geometry, and Shallow Passes
A sharp router bit is one of the simplest ways to improve cut quality. A dull, dirty, damaged, or poorly maintained cutter can crush and pull fibers rather than cutting them cleanly. If a bit consistently produces burning, chatter, fuzzing, or tearout, inspect the cutting edges before changing your entire technique.
The bit should also match the operation. Straight bits can work well for many general cuts, but spiral and shear-cutting designs can change how the cutter engages the fibers. For plywood and veneered materials, bit geometry becomes especially important because the thin face veneer can chip easily.
Avoid trying to remove the full amount of material in one aggressive pass when tearout is a concern. Multiple shallow passes reduce the amount of wood engaged by the cutter at one time. They also give you opportunities to inspect the cut and change the setup before reaching the finished surface.
A practical workflow is to rough the profile first, leave a small amount of material for the final pass, and then make a light finishing pass. The exact depth depends on the bit, router, material, profile, and manufacturer’s instructions, so do not treat a specific increment as a universal rule.
Source: d4c5gb8slvq7w.cloudfront.net
Keep the cutting edges clean
Resin, pitch, and debris can interfere with cutting performance and contribute to poor results.
Inspect damaged cutters
A chipped or damaged cutting edge can leave repeated defects that look like a technique problem.
Take shallow passes
Reducing the amount removed per pass lowers cutting load and makes the router easier to control.
Leave a light finishing cut
A small final pass can remove minor ridges or surface damage left by roughing passes.
Router Speed and Feed Rate
Router speed and feed rate work together. A feed that is too aggressive can overload the cutter, while feeding extremely slowly can increase rubbing, heat, and burning. Larger-diameter bits generally require lower operating speeds than smaller bits because the cutting edge travels faster at the same spindle speed.
Use the router and bit manufacturer’s speed guidance as the starting point. Make a test cut in scrap and watch the cut quality, sound, and surface condition. Change one variable at a time so you can identify what actually improves the result.
Start with manufacturer guidance
Use the recommended speed range for the specific bit diameter and router.
Maintain a steady feed
Avoid stopping, forcing, or crawling unnecessarily through the cut.
Watch for burning
Burn marks can indicate excessive heat from feed, speed, bit condition, or material-related factors.
Support the Wood at the Exit Point
A sacrificial backer board is one of the most useful solutions for preventing router tearout at an exit edge. The backer gives the fragile fibers somewhere to bear against as the router bit leaves the workpiece. Instead of breaking away from the finished part, the cutting action continues into the scrap.
For an end-grain operation, clamp a scrap board tightly against the exit edge. The backing material should provide firm support without interfering with the router base, bearing, fence, clamps, or cutting path. Test the setup before powering the router.
A zero-clearance auxiliary fence can provide similar support on a router table. The reduced opening leaves less unsupported material immediately next to the bit. Featherboards can also help keep the workpiece pressed against the table and fence, reducing lifting, vibration, and accidental movement.
For plywood and veneered panels, a sacrificial layer can support the face veneer. Depending on the operation, masking tape, thin hardboard, MDF, or another suitable sacrificial material may help. The backing method must not interfere with the router’s guide, bearing, or safe control of the workpiece.
Source: media.popularwoodworking.com
Backer board
Clamp scrap material against the exit edge so the router bit can cut into the sacrificial material instead of unsupported project fibers.
Zero-clearance fence
Reduce the unsupported opening around the cutting area on a router table.
Featherboards
Help keep stock firmly against the table or fence when the setup permits their safe use.
Sacrificial surface
Useful for supporting thin veneers and protecting a finished face during suitable routing operations.
Backer Board Setup
Choose a scrap piece that provides continuous support at the point where the bit will exit. Align it tightly with the workpiece and clamp both pieces securely. The router should encounter the backer immediately after leaving the project material.
Make sure the clamps, backer, and workpiece cannot shift into the cutter. The sacrificial material should be considered part of the cutting setup, not an improvised hand-held support.
Match the support
Keep the backer aligned with the surface and edge that need support.
Secure everything
Use clamps or an appropriate workholding system rather than holding the backing material by hand.
Check cutter clearance
Confirm that the bit can enter the sacrificial material without contacting clamps, fixtures, or other hardware.
Climb Cutting, Curves, and Difficult Grain
Climb cutting can reduce tearout in localized problem areas because it changes the relationship between the cutter’s rotation and the workpiece. Instead of the normal feed direction, the router or workpiece moves in the same general direction as the cutter’s rotation. This can make the bit cut into the wood fibers rather than lifting them.
The trade-off is control. A climb cut can cause the router to pull itself forward or push away from the edge, making the operation more difficult to control. For that reason, climb cutting should be limited to appropriate situations and performed with a securely supported workpiece, a firm grip, and light passes.
For a handheld router, a short climb cut can sometimes be used at a known tearout-prone corner before completing the cut using the conventional direction. This is different from making the entire operation as a climb cut. On a router table, extra caution is required because the workpiece can be pulled toward the cutter. Follow the router and router-table manufacturer’s safety instructions.
Curved parts require special attention because the grain direction changes around the curve. Rather than assuming one feed direction will work equally well around the entire perimeter, identify the sections where the grain rises toward the cut. Those sections are the areas most likely to need a different strategy.
Source: finewoodworking.com
Use climb cuts only where needed
Limit the technique to localized tearout-prone areas instead of using it as the default feed direction.
Make light passes
A shallow cut is easier to control and reduces the amount of material available for the cutter to grab.
Secure the work
The workpiece must be firmly supported before using a technique that changes the normal cutting forces.
Finish conventionally when appropriate
A final conventional pass can clean up small ridges left by a controlled climb cut.
When a Spiral or Shear-Cutting Bit Can Help
If tearout continues despite correct feed direction and shallow passes, consider whether the bit geometry is appropriate. Spiral bits use angled cutting edges that shear the material rather than relying solely on the chopping action of a straight bit. Depending on the application, upcut, downcut, or compression geometry can provide different results.
For plywood and veneered panels, the desired surface determines which spiral geometry makes sense. A downcut design can help hold fibers toward the top surface, while a compression design combines opposing flute directions to support both faces when used at an appropriate cutting depth.
Straight bit
Useful for many general routing operations but can produce more abrupt cutting action in difficult grain.
Spiral bit
Uses angled flutes that provide a shearing action and can improve edge quality in suitable applications.
Compression bit
Combines upcut and downcut geometry and can be useful when both faces of sheet material need protection.
Router Tearout Troubleshooting: Find the Cause Before Changing Everything
When tearout persists, change one variable at a time. Start with the safest and simplest checks: inspect the bit, verify the feed direction, reduce the cutting depth, secure the workpiece, and test the setup on scrap. This approach helps identify the actual cause instead of randomly changing speed, bit type, and technique at the same time.
If the same tearout pattern appears repeatedly in the same section of the board, inspect the grain. If the problem follows one particular bit across different pieces of wood, inspect or replace the bit. If the problem disappears when a backer board is added, unsupported exit fibers were likely a major contributor.
Do not assume that sanding is the best fix for deep tearout. Light fuzz and very small raised fibers can often be cleaned up with appropriate sanding or scraping. Deep missing material may change the dimensions or profile of the part and can require rerouting, reshaping, filling, or remaking the component.
Source: upload.wikimedia.org
Tearout only at the exit
Check for unsupported end grain and add a properly secured backer or change the cutting sequence.
Tearout follows the grain
Reassess grain direction and consider whether a localized change in cutting direction is appropriate.
Tearout occurs everywhere
Inspect bit sharpness, cleanliness, router condition, speed, feed rate, workholding, and cutting depth.
Repeated marks at one point
Inspect the cutter for chipped edges, damage, buildup, or another defect that may be repeating with each rotation.
Plywood veneer chips
Consider the cutter geometry, face support, exit support, and whether a suitable spiral or compression bit would better match the material.
A Practical Test-Cut Sequence
Start with an offcut from the same board or a closely matching piece. Install a clean, sharp bit and verify the router settings against the manufacturer’s guidance. Secure the test piece exactly as you intend to secure the finished work.
Make a light conventional pass and inspect the result. If tearout remains, reduce the depth of cut or improve fiber support. If the problem is isolated to a particular grain transition, mark that location and evaluate whether the cut sequence or a carefully controlled specialized technique can address it.
Once the test produces the required result, repeat the setup on the finished part without changing multiple variables at once. This simple process is particularly useful for expensive hardwood, figured stock, veneered panels, and visible furniture edges.
Test on matching scrap
Use the same material and similar grain orientation whenever possible.
Change one variable
Adjust depth, feed, speed, bit, support, or direction separately so the effect is easier to identify.
Inspect before committing
Do not move directly from an uncertain test cut to an expensive finished component.
Router Safety Boundaries
Router tearout prevention should never come at the expense of basic tool control. Disconnect power before changing bits or adjusting the cutter. Keep hands away from the cutting path, secure the workpiece, wear appropriate eye and hearing protection, and follow the router manufacturer’s operating instructions.
Do not use a climb cut simply because it is described as a tearout solution. The change in cutting force can make the router self-feed and reduce control. If you are inexperienced with the technique, conventional routing combined with proper grain planning, shallow passes, and backing support is generally the better place to start.
Disconnect power for adjustments
Unplug or otherwise isolate the router before changing bits or making adjustments required by the manufacturer’s instructions.
Secure the workpiece
Prevent movement that could cause an uncontrolled cut or increase tearout.
Keep hands clear
Use appropriate handles, push blocks, featherboards, or other approved controls instead of placing hands near the cutter.
Follow manufacturer instructions
Use the router, bit, speed settings, guards, and accessories according to their documented operating limits.
Frequently Asked Questions
Q
What is the main cause of router tearout?
The most common causes are unfavorable grain direction, unsupported fibers at the exit of a cut, aggressive cutting depth, dull or unsuitable bits, and poor control of feed direction. More than one cause can occur at the same time.
Q
Does a sharp router bit prevent tearout?
A sharp bit can significantly improve cutting quality, but sharpness alone does not guarantee a tearout-free cut. Grain direction, bit geometry, cutting depth, feed rate, workholding, and fiber support also affect the result.
Q
How can I prevent router tearout on end grain?
Route the end-grain edges first when a later long-grain pass will remove minor damage. When that is not possible, use a properly secured sacrificial backer board or another suitable support method at the exit point.
Q
Should I climb cut to prevent router tearout?
A controlled climb cut can reduce tearout in specific problem areas, but it changes the normal cutting forces and can cause the router to self-feed. It should be treated as a specialized technique, performed with light cuts and secure workholding, rather than used automatically for every routing operation.
Q
Are spiral router bits better for preventing tearout?
Spiral bits can reduce chipping in some applications because their angled flutes provide a shearing action. The best geometry depends on the material and which surface needs protection. For plywood and veneered panels, downcut or compression designs may be appropriate for particular operations.
✦ Wrapping Up
Conclusion
Router tearout prevention starts with understanding how the cutter interacts with wood fibers. Read the grain, use a sharp and appropriate bit, keep the workpiece stable, and remove material in controlled passes. When a cut exits into unsupported fibers, add a properly secured backer or change the cut sequence so the vulnerable area is supported or removed later.
For difficult hardwood, figured stock, curved parts, and plywood, test the complete setup on scrap before touching the finished workpiece. If conventional routing still produces tearout, investigate the specific failure point before changing tools or techniques. A localized grain problem may require a different cut sequence or carefully controlled climb cut, while repeated defects across the entire cut may point to the bit, speed, feed, or router setup.
💡 Key Takeaway
Before your next routing operation, inspect the grain, install a clean sharp bit, plan the feed direction, secure the workpiece, and make a light test pass on scrap. If the bit exits at a vulnerable edge, support that edge with a suitable sacrificial backer before routing the finished part.