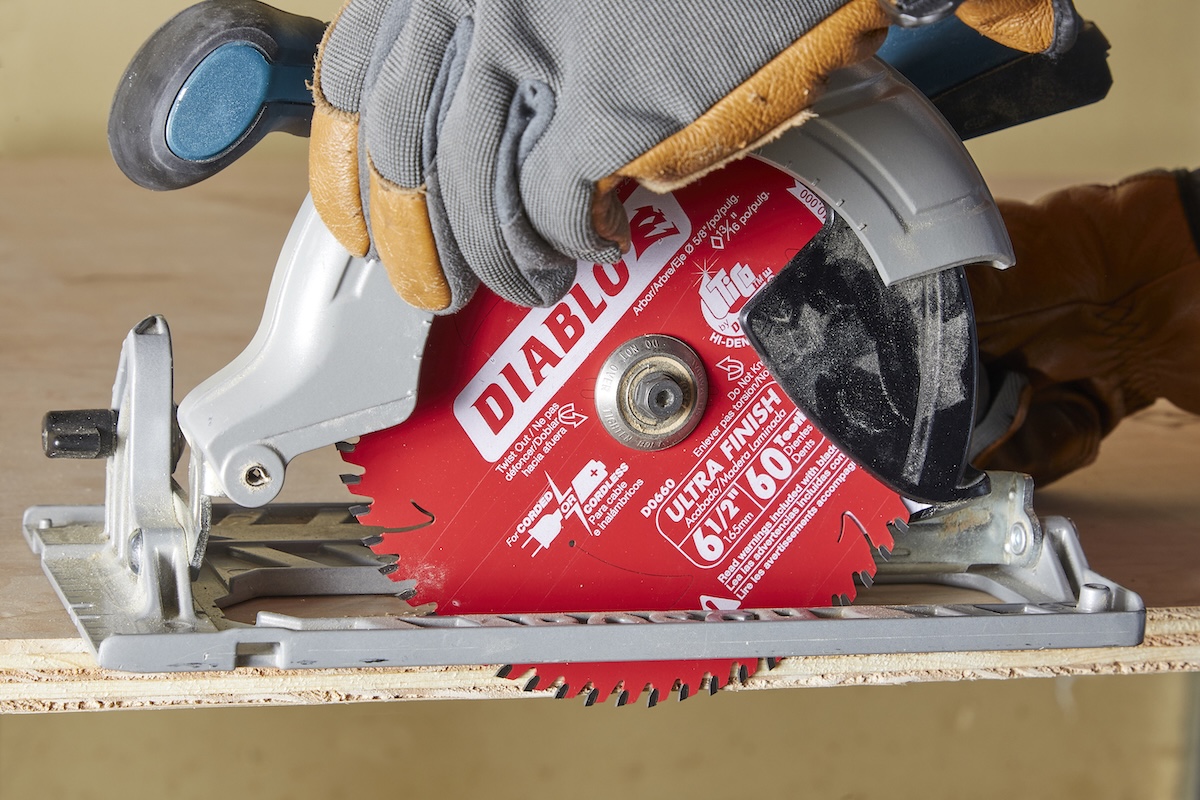
To make a circular saw bevel cut, set the saw’s bevel adjustment to the required angle, lock it securely, set the blade depth for the material, support the workpiece, align the correct sight mark with the cut line, and guide the saw steadily through the cut.
For U.S. homeowners, remodelers, and carpenters, a circular saw can handle many bevel-cutting jobs without requiring a table saw or miter saw. The technique is useful for trimming doors, cutting roof framing components, shaping plywood, making sloped edges, and preparing boards for angled joints.
A bevel cut tilts the blade relative to the face of the material. That is different from a miter cut, where the blade remains perpendicular to the material but the cut travels across the board at an angle. On a typical circular saw, the bevel mechanism changes the relationship between the blade and the saw shoe, allowing the blade to cut at angles such as 15, 22.5, 30, or 45 degrees, depending on the saw.
Accuracy depends on more than the number shown on the bevel scale. Blade thickness, saw calibration, material support, cutting direction, blade condition, and the specific saw design can all affect the finished cut. A short test cut on scrap lumber is therefore one of the most useful steps when the angle or fit matters.
Source: images.pexels.com
What Is a Circular Saw Bevel Cut?
A circular saw bevel cut is an angled cut made by tilting the saw blade away from its normal 90-degree position relative to the bottom of the shoe. At 0 degrees of bevel, the blade normally makes a square cut through the material. As the bevel setting increases, the blade leans farther and produces a sloped cut across the thickness of the board.
The bevel angle is normally read from the saw’s bevel scale. A 45-degree setting means the blade is tilted 45 degrees from its square-cut position. The exact maximum angle varies by model. Many common circular saws provide bevel capacity around 45 degrees, while some models allow angles beyond 45 degrees.
Bevel cuts are useful when the edge of one board needs to meet another surface at an angle. They are also common for decorative edges, roofing work, trimming, and construction details where a square cut would not produce the required geometry.
Source: cdn.pixabay.com
Bevel cut
Tilts the blade relative to the face of the workpiece and creates a sloped cut through the material.
Miter cut
Changes the direction of the cut across the face of the material while the blade remains at the normal square-cut orientation.
Compound cut
Combines a bevel angle with a miter angle, creating an angled cut in two planes.
Why Bevel Cuts Are Useful
A circular saw bevel cut is particularly useful when working with large boards or sheet goods that are awkward to move to a stationary saw. The handheld saw can travel across the material while the workpiece remains supported in place.
For a simple 45-degree bevel, the saw’s built-in scale and bevel stop may be sufficient. For a less common angle, such as 17 degrees or 32 degrees, it is worth verifying the setting with a digital angle finder or by making a test cut in scrap material.
Common applications
Door trimming, roof framing, plywood work, angled edges, siding details, furniture components, and construction joints.
Best accuracy practice
Make a test cut whenever the angle must match an existing part or the finished joint has little tolerance.
How to Set Up a Circular Saw for Bevel Cuts
Start with the saw powered off and disconnected from its power source. On a corded saw, unplug the cord. On a cordless saw, remove the battery. This prevents an accidental startup while you adjust the bevel, depth, or blade.
Inspect the blade, lower guard, shoe, bevel mechanism, and locking lever before cutting. The blade should be appropriate for the material and free from obvious damage. The lower guard should move as intended and return to its normal position without being held open or modified.
Place the material on a stable cutting surface. Support the workpiece so the saw can travel through the cut without the material collapsing, shifting, or squeezing the blade. Make sure the blade will not strike the support surface, clamps, sawhorses, or anything underneath the material.
Source: bobvila.com
Disconnect power
Remove the battery or unplug the saw before making adjustments or changing the blade.
Inspect the blade
Use a sharp, undamaged blade designed for the material and compatible with the saw.
Check the guard
Make sure the lower blade guard operates freely and returns to its normal position.
Support the workpiece
Provide adequate support near the cut while leaving enough clearance for the blade.
Set the Bevel Angle
Locate the bevel adjustment lever, knob, or locking mechanism. Loosen it enough to allow the shoe and saw body to tilt. Move the saw until the indicator aligns with the required angle on the bevel scale, then tighten the locking mechanism firmly.
Do not assume the scale is perfectly accurate simply because the pointer reaches a number. For a critical joint, place an angle finder against an appropriate reference surface or make a test cut in scrap material. If the test piece does not produce the required angle, investigate the saw’s calibration and setup before cutting the final workpiece.
45 degrees
A common bevel setting for angled edges and certain framing and woodworking applications.
22.5 degrees
Useful for some angled construction and woodworking joints, depending on the project design.
Custom angles
Use the saw’s scale, a digital angle finder, and a scrap test cut when an exact nonstandard angle is required.
Set the Cutting Depth
Set the blade depth according to the saw manufacturer’s instructions and the thickness of the material. A common woodworking practice is to have only a limited amount of tooth projection below the workpiece rather than exposing a large section of blade.
Remember that beveling changes the geometry of the cut. The effective cutting depth becomes smaller as the blade is tilted, so a saw that easily cuts a particular board at 90 degrees may have insufficient capacity at 45 degrees.
Check the manufacturer’s rated cutting capacity for the specific bevel angle when working near the saw’s limits.
Check clearance
Make sure the blade reaches completely through the required material without contacting the support underneath.
Consider bevel capacity
Verify cutting depth at the selected bevel angle rather than relying only on the saw’s 90-degree depth specification.
How to Make a Circular Saw Bevel Cut Step by Step
Once the angle, depth, blade, and workpiece support are ready, the actual cutting process is straightforward. The key is to maintain control of the saw and let the blade do the cutting instead of forcing the tool through the material.
For a first attempt, use scrap material of the same thickness and preferably the same material as the final workpiece. This lets you confirm the bevel angle, cut position, blade behavior, and fit before using the finished board.
Source: onekeyresources.milwaukeetool.com
1. Mark the cut
Measure carefully and mark the required cut line. Identify the waste side so the blade’s kerf does not remove material from the finished dimension.
2. Support the material
Position the board or sheet so both sides of the cut remain adequately supported without placing the blade path over a support that could be damaged.
3. Set the bevel
Adjust the saw to the required bevel angle and securely lock the adjustment.
4. Set the depth
Adjust the blade depth for the material and verify clearance beneath the workpiece.
5. Position the saw
Place the front of the shoe on the workpiece and align the appropriate sight notch or blade reference with the cut line.
6. Start the saw
Keep the blade clear of the material, activate the saw, and allow the blade to reach full operating speed before entering the cut.
7. Guide the cut
Move the saw forward smoothly while keeping the shoe firmly supported and the blade aligned with the intended path.
8. Finish safely
After the cut is complete, release the trigger and keep the saw controlled until the blade stops. Do not lift or twist the saw while the blade is still rotating.
How to Keep a Long Bevel Cut Straight
Long bevel cuts are harder to control because the tilted shoe has less stable contact with the workpiece than it does during a square cut. A straightedge or compatible guide rail can make a major difference on long cuts through plywood and other sheet materials.
Measure the distance between the guide and the blade’s cutting path before clamping the guide. Because the saw is tilted, the relationship between the shoe, blade, and guide can differ from a 0-degree setup. Make a short test cut to verify the offset rather than assuming a measurement from a square cut will transfer directly.
Keep the saw moving forward in a controlled direction. If the blade begins to drift, do not force the saw sideways to recover the line. Stop safely, allow the blade to stop, reposition the tool, and restart the cut according to the manufacturer’s instructions.
Use a guide for long cuts
A straightedge or compatible guide rail can reduce wandering and help maintain a consistent cutting path.
Clamp the guide securely
A guide that moves during the cut can ruin the angle and may contribute to loss of control.
How to Make a 45-Degree Bevel Cut
A 45-degree bevel is one of the most common settings on a circular saw. Set the bevel indicator to 45 degrees, lock the adjustment, and make a test cut before cutting the finished material.
Use the saw’s dedicated 45-degree sight mark if the model provides one. The correct sight reference can differ from the normal 0-degree mark because the blade shifts position when the saw is tilted.
After cutting the test piece, check the actual angle with a combination square, bevel gauge, or suitable angle-measuring tool. If the angle is not correct, adjust the setup rather than compensating by forcing the saw during the cut.
Check the kerf
The blade removes a narrow strip of material, so align the cut on the correct side of the marked line when dimensional accuracy matters.
Verify the finished edge
A test piece can reveal whether the saw’s 45-degree scale and sight line need a small correction.
Choosing the Right Blade and Cutting Technique
The blade should match both the saw and the material. A general-purpose blade can handle many common construction cuts, while fine-tooth blades are generally more appropriate when the visible surface needs a cleaner finish. Always follow the blade manufacturer’s compatibility and application instructions.
Bevel cutting can expose more of the blade’s cutting edge to the material and can change how the shoe contacts the workpiece. A dull, damaged, or inappropriate blade can increase resistance, produce a rough edge, and make the saw harder to control.
The number of teeth is only one part of blade selection. Tooth geometry, blade diameter, kerf, material, and the workpiece all affect cutting behavior. For plywood or finished panels, a blade designed for cleaner cuts can help reduce tear-out compared with an aggressive framing blade.
Source: images.thdstatic.com
Framing lumber
A suitable framing or general-purpose carbide-tipped blade is commonly used when speed and durable cutting are more important than a furniture-grade edge.
Plywood
A finer-tooth blade intended for plywood or finish cuts can reduce splintering on visible surfaces.
Finished wood
Use a blade intended for clean finish cuts and support the material carefully to reduce tear-out.
Unknown material
Do not assume a wood-cutting blade is suitable for metal, masonry, plastic, or composite products. Verify the blade and saw manufacturer’s instructions first.
Cutting Speed Matters
Feed the saw at a rate that allows the blade to maintain normal operating speed without forcing the motor. Pushing too aggressively can increase resistance and contribute to binding, while moving excessively slowly in one spot can create heat and burn marks.
If the saw noticeably slows during the cut, reduce feed pressure and check the setup. A blade that is dull, dirty, damaged, or unsuitable for the material can also increase cutting resistance.
Do not force the saw
Use steady forward pressure and let the blade maintain the cutting action.
Watch for binding
A pinched kerf, unsupported workpiece, or misaligned cut can increase resistance and create a kickback hazard.
Common Circular Saw Bevel Cut Problems and Fixes
Most bevel-cut problems come from setup, support, alignment, or blade selection rather than from the basic bevel mechanism itself. Check the safest and simplest causes first instead of trying to correct the cut by applying more force.
If the finished angle is wrong, first verify the bevel setting and locking mechanism. Then check whether the saw’s scale is calibrated and whether the material shifted during cutting. A short scrap test can distinguish a saw-setting problem from a marking or support problem.
Source: acmetools.com
The cut is not the correct angle
Check the bevel scale, tighten the bevel lock, verify the saw’s calibration, and make a test cut before adjusting the final workpiece.
The cut wanders
Check your grip, workpiece support, blade condition, and cut-line visibility. Use a straight guide for long cuts.
The blade binds
Stop and identify whether the material is closing on the kerf, the blade is dull, the workpiece is unsupported, or the saw is being twisted.
The edge splinters
Use a blade suited to the material and desired finish, improve workpiece support, and consider scoring the cut line when appropriate.
The saw feels unstable
Confirm the shoe is resting properly on the workpiece, the bevel lock is secure, and the workpiece is firmly supported.
The lower guard catches
Stop the operation and inspect the guard according to the manufacturer’s instructions. Never permanently hold the guard open or disable its safety function.
Why Bevel Cuts Can Feel Less Stable
When the saw is tilted, the shoe presents a different contact geometry against the workpiece. The operator may therefore notice that the saw feels different from a normal 0-degree cut. This is one reason accurate support and a firm, controlled grip matter more as the bevel angle increases.
Steep bevels can also change how the lower blade guard moves across the edge of the material. If the guard does not operate normally, do not bypass it. Follow the tool manufacturer’s instructions and have the saw serviced if the problem cannot be corrected safely.
Use both intended handles
Maintain control with the saw’s front and rear gripping areas as specified by the manufacturer.
Keep the shoe supported
Avoid allowing the saw to rock or pivot unexpectedly as the blade enters or exits the workpiece.
Circular Saw Bevel Cut Safety
A circular saw can cause severe injury if it is used incorrectly, so safe setup is part of the cutting process rather than a separate step. Read the manual for the exact saw model before operating it, particularly if the saw has unfamiliar bevel, depth, guard, or guide-rail controls.
Wear appropriate eye protection and hearing protection, and use respiratory protection when the material or work environment creates hazardous dust. Keep loose clothing, cords, hands, and other objects away from the blade path.
Never adjust the bevel, depth, blade, or accessories while the blade is rotating. Disconnect the saw from its power source before making adjustments or changing the blade.
Kickback can occur when the blade binds, stalls, or becomes misaligned. Proper support, controlled feed pressure, correct blade selection, and keeping the saw moving straight can help reduce conditions that contribute to binding. If the blade binds, do not force the tool through the material.
Source: mobileimages.lowes.com
Keep both hands on the intended grips
Use the manufacturer’s designated handles to maintain control while cutting.
Keep the blade clear before startup
Do not start the saw with the blade already pressed against the workpiece unless the specific tool instructions explicitly allow the operation.
Wait for the blade to stop
After releasing the trigger, maintain control until the blade has stopped before setting the saw down or lifting it away from the work.
Do not disable the guard
The lower guard is a safety component and should not be removed, pinned back, or permanently held open.
Check for hidden hazards
Inspect lumber for nails, screws, staples, or other embedded objects when the material or application makes them possible.
When to Stop and Get Help
Stop using the saw if the blade guard does not operate correctly, the bevel lock will not secure the saw, the blade is cracked or damaged, the tool has an electrical fault, or the saw behaves unexpectedly. A damaged power tool should be inspected or serviced according to the manufacturer’s guidance.
For specialized materials, unusual structural work, or applications outside the saw manufacturer’s stated capabilities, use the appropriate equipment and obtain qualified guidance rather than improvising a cutting method.
Damaged safety mechanism
Do not operate the saw until the issue has been properly addressed.
Unfamiliar material
Confirm that the saw and blade are designed for the material before cutting.
Frequently Asked Questions
Q
Can a circular saw make a 45-degree bevel cut?
Yes. Many circular saws are designed to make bevel cuts up to approximately 45 degrees, although the exact maximum varies by model. Set the bevel adjustment to 45 degrees, lock it securely, and use the saw’s 45-degree sight reference if provided. Verify the angle with a test cut when accuracy matters.
Q
What is the difference between a bevel cut and a miter cut?
A bevel cut tilts the blade relative to the face of the material, producing a sloped edge through the thickness. A miter cut changes the direction of the cut across the face of the material while the blade remains at its normal square-cut orientation. A compound cut combines both.
Q
Why does my circular saw cut at the wrong bevel angle?
The bevel scale may be out of calibration, the locking mechanism may not be fully secured, the workpiece may have moved, or the saw may not have been aligned correctly with the cut line. Check the setting, lock, support, and alignment, then make a test cut in scrap material before cutting the final piece.
Q
Does a bevel cut reduce the cutting depth of a circular saw?
Yes. Tilting the blade changes the geometry of the cut, so the maximum material thickness that the saw can cut in one pass is generally lower at a bevel angle than at 90 degrees. Check the manufacturer’s stated cutting capacity for the specific bevel angle.
Q
How can I make a long circular saw bevel cut straight?
Use a straightedge, compatible guide rail, or other secure guide when practical. Measure the guide offset with the saw set to the actual bevel angle, clamp the guide securely, and make a test cut. Keep the saw’s shoe firmly supported and move the tool forward without twisting it.
Q
What should I do if the circular saw blade binds during a bevel cut?
Stop forcing the saw. Release the trigger while maintaining control, wait for the blade to stop, and determine why the kerf closed or the blade became trapped. Check material support, blade condition, cutting direction, and saw alignment before restarting. Do not pull or twist a spinning blade out of a bind.
✦ Wrapping Up
Conclusion
Circular saw bevel cuts become much easier to control when the setup is correct. Set the required bevel angle, lock the adjustment, choose a suitable blade, set an appropriate cutting depth, support the material, and verify the cut with scrap material when accuracy matters.
The most important difference from a standard square cut is the changed geometry of the saw. As the blade tilts, cutting depth decreases and the shoe can feel less stable. Long cuts also benefit from a secure guide. Slow down when something feels wrong rather than trying to correct a wandering or binding saw with sideways force.
For routine construction work, a properly adjusted circular saw can produce useful bevel cuts in dimensional lumber and sheet goods. For complex compound angles, high-volume precision work, or cuts that exceed the saw’s capacity, a miter saw, track saw, table saw, or other purpose-built tool may be more appropriate.
💡 Key Takeaway
Before making the final bevel cut, set and lock the angle, verify the depth and material support, make a short test cut, confirm the resulting angle, and then complete the final cut with a steady forward motion.