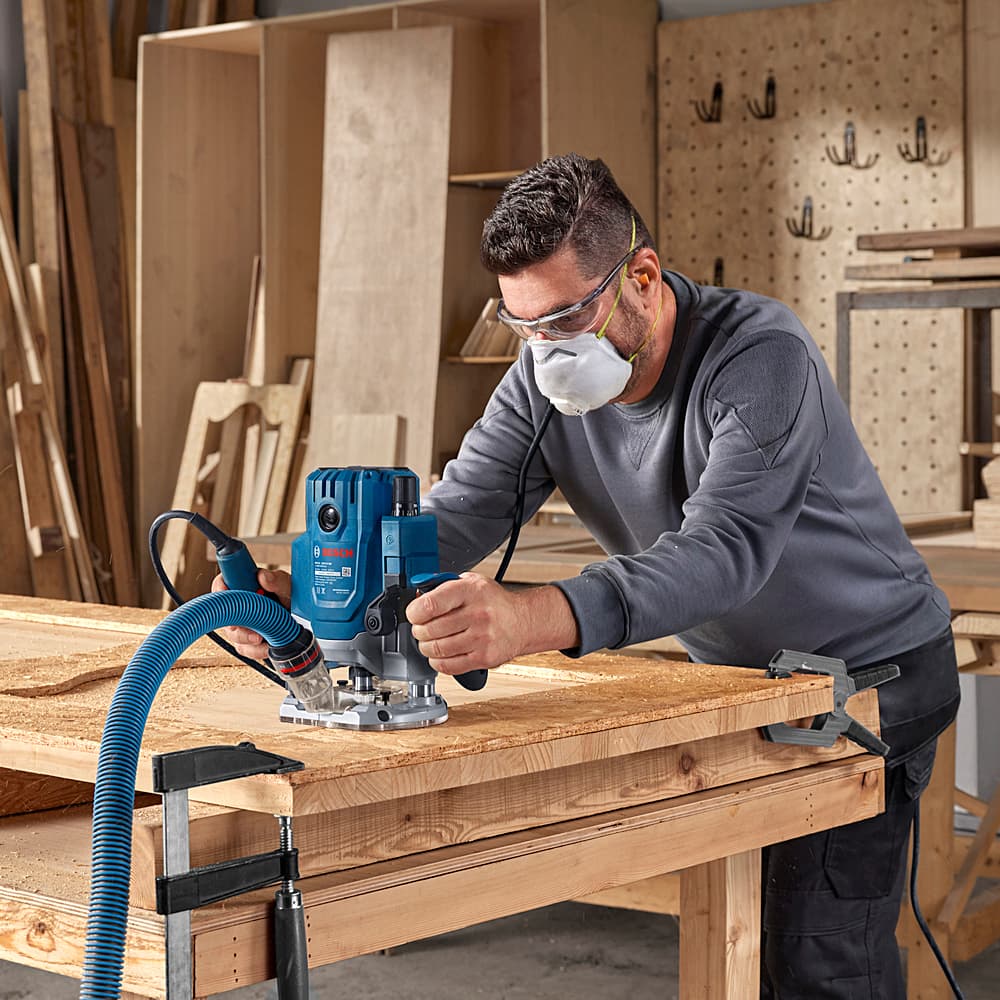
The safest way to use a wood router is to secure the workpiece, install the correct bit properly, wear appropriate eye and hearing protection, control wood dust, keep hands and clothing away from the cutter, use the correct feed direction, and disconnect power before changing bits or making adjustments.
For U.S. woodworkers, a router is a versatile but high-speed cutting tool that deserves the same deliberate setup as any other powered woodworking machine. A router bit can spin at very high speed, while the cutting action can throw chips, pull material unexpectedly, or cause a kickback when the workpiece is poorly supported or fed in the wrong direction. OSHA identifies point-of-operation contact, rotating parts, tool projection, flying chips, kickbacks, wood dust, noise, vibration, and electrical hazards among the risks associated with woodworking equipment.
A safe routing routine starts before the motor is switched on. Inspect the router and bit, make sure the bit and base are secure, clamp or otherwise restrain the workpiece, confirm the intended feed direction, choose a suitable cutting depth and speed, and verify that guards or safety accessories are correctly positioned. For professional U.S. workplaces, OSHA requirements also apply to machine guarding, electrical safety, controls, and safe maintenance practices. Home hobbyists should still follow the same basic principles and the router manufacturer’s instructions.
Source: caglasses.com
What Are the Main Hazards of Using a Wood Router?
The main router hazards are contact with the rotating bit, kickback, flying chips, tool projection, entanglement, dust exposure, excessive noise, and electrical problems. Understanding how each hazard develops makes the safety rules easier to apply rather than treating them as a checklist.
The cutting area is the most obvious danger. Router bits have sharp cutting edges and can remove material extremely quickly. Hands should never enter the cutter’s path while the router is energized. Scraps should also be removed only after the router has completely stopped and power has been disconnected when necessary.
Kickback occurs when the cutter grabs the workpiece or the operator loses control because of feed direction, inadequate support, a poor setup, or unsuitable material. OSHA specifically identifies incorrect feeding, abrupt feeding, broken stock, and poorly secured templates as potential contributors to router kickback.
Tool projection is another serious hazard. A bit that is incorrectly installed, damaged, unsuitable for the router, or operated beyond its permitted speed can break or become detached. The resulting fragments can travel at high speed. Never assume that a bit is safe simply because it fits the collet.
Source: toolbuy.com
Rotating cutter
The router bit can cause severe cuts if a hand or body part enters the point of operation while the tool is running.
Kickback
The router or workpiece can move suddenly when the cutter engages the material incorrectly or the stock is not adequately supported.
Flying debris
Wood chips, splinters, and dust can be thrown from the cutting area, making eye protection essential.
Bit failure or projection
A damaged, incorrectly secured, incompatible, or overspeeding bit can break or become detached.
Dust and noise
Routing can produce substantial airborne wood dust and high noise levels, creating hazards that continue beyond the cutting action itself.
Wear the Right Personal Protective Equipment
Eye protection should be considered basic equipment whenever a router is operating. Safety glasses or goggles help protect against chips and splinters that can leave the cutter at high speed. A face shield can provide additional coverage, but it should not be treated as a substitute for appropriate underlying eye protection unless the specific equipment and risk assessment support that use.
Hearing protection is also appropriate because routers can produce substantial noise. The exact protection needed depends on the router, bit, material, work environment, and duration of exposure. In a professional shop, follow the workplace’s hearing-conservation requirements and exposure assessment.
Respiratory protection is a separate issue from dust collection. The preferred approach is to control dust at the source using effective extraction and housekeeping. If respiratory protection is required, it should be selected and used according to the applicable workplace program and equipment instructions. Do not assume that any disposable mask provides the same level of protection.
Avoid loose clothing, dangling jewelry, unsecured long hair, and other items that could approach rotating machinery. Gloves require particular judgment around powered rotating tools because material can catch and pull a hand toward moving components. Follow the router and workplace safety instructions rather than treating gloves as automatically protective.
Source: woodcraft.com
Safety glasses or goggles
Use appropriate eye protection to reduce the risk from flying chips, splinters, and dust.
Hearing protection
Use suitable hearing protection when router noise or the surrounding shop environment creates excessive exposure.
Respiratory protection
Use appropriate respiratory protection when required after considering dust controls, exposure, and applicable workplace requirements.
Proper clothing
Keep loose sleeves, jewelry, cords, hair, and other items away from rotating components.
Should You Wear a Dust Mask When Using a Router?
A router can generate fine wood dust, so dust control should be part of the setup rather than an afterthought. Use the router’s compatible dust port when practical and connect it to an appropriate vacuum or dust-collection system. Keep the collection system maintained and clean accumulated dust from the shop.
Respiratory protection requirements vary with the material, exposure, workplace controls, and applicable regulations. Certain woods and composite materials can create additional concerns, so check the material’s safety information and the requirements that apply to your workplace.
How to Prepare a Router Before Cutting
A safe routing job begins with the router switched off and disconnected from power. Inspect the tool, bit, collet, base, cord, controls, and accessories before starting. Do not use equipment that is damaged or has a malfunctioning safety feature.
Select a router bit designed for the intended material and operation. Check the bit for cracks, damaged cutting edges, bent components, loose bearings, or other defects. Confirm that the bit’s permitted operating speed is compatible with the router’s selected speed.
Install the bit according to the router manufacturer’s instructions. The bit should be securely held by the correct collet, and the collet should be tightened with the appropriate wrench or procedure. Do not operate a router with a bit that is only partially engaged or improperly supported.
Before powering on, place the router base on a stable surface or otherwise ensure the bit is clear of the workpiece. Hold the router securely and expect starting torque. On a plunge router, make sure the plunge mechanism and depth setting are locked or functioning as intended.
Source: rockler.com
Inspect the bit
Look for cracks, chips, damaged bearings, bent parts, or other defects before installation.
Check compatibility
Confirm the bit, shank size, collet, router, material, and operating speed are appropriate for one another.
Secure the router
Make sure the motor is properly seated in its base and that required clamps, locks, and adjustment mechanisms are secure.
Secure the workpiece
Clamp or otherwise restrain the material so it cannot shift unexpectedly during the cut.
Check the cutting path
Remove obstacles, keep cords clear, and make sure the router can travel through the complete cut without contacting unintended objects.
Why Is Workpiece Security So Important?
The router should do the cutting while the workpiece stays under controlled restraint. Do not rely on your free hand or another person’s hands to hold material in place. Sudden torque or kickback can move the stock before you can react.
Use clamps, a suitable fence, a jig, a template, a router table, or another appropriate holding method. For small or irregular pieces, a purpose-built jig or clamp can keep your fingers farther from the bit while improving control.
Use the Correct Router Feed Direction
Correct feed direction is one of the most important router safety rules because the rotating cutter creates a force that can either help maintain control or pull the router unexpectedly. For a conventional handheld routing operation, feed the router against the bit’s cutting rotation rather than deliberately feeding with the rotation.
When routing an outside edge with a typical handheld router, the usual feed direction is counterclockwise around the workpiece. For an inside edge, the direction reverses relative to the path. The exact setup depends on the operation, router orientation, and which portion of the bit is cutting, so do not rely on a memorized direction without first visualizing the bit’s rotation.
A router mounted underneath a router table presents the rotation differently because the bit is inverted. In common router-table operations, the workpiece is generally fed from right to left against the cutter’s rotation. Always verify the direction before turning on the router.
Climb cutting is a specialized technique in which the tool is intentionally fed in the same general direction as cutter rotation. It can make the router pull itself or the workpiece rapidly and is therefore unsuitable as a casual shortcut for beginners. If an operation calls for climb cutting, use a controlled setup, secure the workpiece appropriately, and understand the additional loss-of-control risk.
Source: trend-usa.com
Handheld outside edges
For a typical handheld router, move counterclockwise around an outside edge so the cut is made against the bit’s rotation.
Handheld inside edges
The travel direction changes for inside edges, so identify the cutting edge and bit rotation before starting.
Router tables
With the router beneath the table, the workpiece is commonly fed from right to left against the cutter’s rotation.
Climb cuts
Climb cutting can cause a router or workpiece to move unexpectedly and should not be treated as a normal beginner routing method.
How Can You Check the Feed Direction Before Starting?
With the router powered off, look directly at the bit and identify its rotation. Then determine which part of the cutter will contact the wood and imagine the direction the router or workpiece will travel. If the cutter tends to pull the router forward instead of resisting the feed, stop and reassess the direction.
A short test on scrap material can also reveal whether the setup behaves as expected. Never use a test cut as a substitute for understanding the intended feed direction.
Router Table Safety Rules
A router table can improve control for many operations because the router remains fixed while the operator guides the workpiece. It does not eliminate the cutter hazard, however. The exposed bit still requires guarding, controlled feeding, adequate workpiece support, and safe hand placement.
Use the smallest practical opening or insert around the bit and position the fence as appropriate for the operation. A guard can reduce access to the rotating cutter, while featherboards can help maintain pressure against the fence or table. Push blocks or push sticks can keep hands farther from the cutting area when routing narrow or small stock.
Small workpieces deserve special attention because they can force the operator’s hands close to the cutter. If the stock is too small to control safely by hand, change the setup rather than trying to improve your grip. A purpose-built jig, handscrew clamp, push block, or other suitable device can extend your reach and stabilize the material.
Keep the router table stable and make sure the router is securely mounted. Controls should be readily accessible without requiring you to reach across the cutter. In professional settings, machine guarding and control requirements can be more specific, so consult the applicable OSHA requirements and the equipment manufacturer’s instructions.
Source: annaspaces.nl
Use the guard
Keep the cutter guard correctly positioned and functional whenever the operation allows it.
Use a fence
A properly adjusted fence provides predictable workpiece support and helps control the cut.
Use featherboards
Featherboards can apply controlled pressure to help keep stock against the table or fence during suitable operations.
Use push devices
Push blocks and sticks provide reach and control while helping keep hands away from the rotating bit.
Avoid unsupported small parts
If a small piece cannot be controlled while keeping your hands clear, change the setup or use a suitable jig.
When Should You Use a Router Table Instead of a Handheld Router?
A router table is useful when the workpiece is small enough to control on the table but awkward or unsafe to hold beneath a handheld router. It can also provide consistent support for repeated edge profiles and other operations.
A handheld router remains useful for large panels, oversized workpieces, or jobs where moving the material to a table is impractical. The safer choice depends on the size and shape of the workpiece, the operation, available support, and your ability to keep hands away from the cutter.
Control Dust, Electrical Risks, and Workshop Conditions
Router safety extends beyond the cutter. A clean, organized shop reduces secondary hazards such as tripping, blocked exits, dust accumulation, and damaged electrical equipment. Fine wood dust can also create health and fire concerns when allowed to accumulate.
Use dust extraction at the router whenever practical. Router tables can benefit from collection above, below, or both sides of the cutting area depending on the design. Empty or maintain collection equipment before it becomes ineffective, and clean accumulated dust from the shop using a method appropriate for the equipment and material rather than simply allowing fine dust to remain airborne.
Inspect the router’s power cord, plug, switches, and other electrical components before use. Do not operate equipment with damaged cords, missing grounding components, exposed conductors, or questionable repairs. In workplaces, electrical installations and machine grounding must meet applicable requirements.
Keep the routing area well lit and free from unnecessary objects. The operator should be able to see the workpiece, cutter area, fence, clamps, and controls without leaning into the machine. Maintain a stable stance so an unexpected movement does not easily cause a loss of balance.
Source: kunstogdesign.no
Use dust extraction
Capture dust near the point of generation with a suitable router port, shop vacuum, or dust-collection system.
Keep the floor clear
Remove offcuts, cords, and accumulated debris that could create a trip or fire hazard.
Inspect electrical equipment
Check cords, plugs, switches, and grounding arrangements before operating the router.
Maintain visibility
Use sufficient lighting so you can clearly monitor the workpiece, cutter area, guards, and controls.
Can Wood Dust From Routing Be Dangerous?
Yes. Wood dust is more than a housekeeping problem. OSHA identifies wood dust as a woodworking health hazard, and very fine dust can remain airborne or accumulate on surfaces throughout a shop. Exposure concerns depend on the type of wood, concentration, duration, and control measures.
The practical response is to reduce airborne dust at the source, maintain effective ventilation and extraction, clean accumulated dust appropriately, and use respiratory protection when required by the exposure and applicable safety program.
Safe Router Operation: A Practical Checklist
Use a short safety check before every routing session rather than relying on memory after the first cut. The same routine works for a handheld router or router table, with additional checks for fences, guards, featherboards, and push devices on table-mounted setups.
If anything feels uncertain during setup, stop the process before energizing the router. A questionable bit, unstable workpiece, damaged cord, missing guard, unclear feed direction, or unfamiliar accessory is a reason to consult the manual or obtain appropriate instruction before proceeding.
Source: upload.wikimedia.org
1. Plan the cut
Know the desired profile, cutting depth, feed direction, support method, and exit path before starting.
2. Inspect the router
Check the cord, plug, base, controls, collet, depth mechanism, and other relevant components.
3. Inspect and install the bit
Use an appropriate undamaged bit, seat it correctly in the collet, and tighten it according to the manufacturer’s instructions.
4. Secure the material
Clamp or otherwise restrain the workpiece so it cannot shift unexpectedly.
5. Install safety accessories
Use the appropriate guard, fence, featherboard, push block, jig, template, or dust collection equipment.
6. Put on PPE
Wear appropriate eye and hearing protection and use respiratory protection when required.
7. Check the starting position
Make sure the bit is clear of unintended contact and that the router can start without immediately grabbing the material.
8. Start and feed smoothly
Hold the router securely, allow it to reach operating speed, and move at a controlled rate appropriate for the material and bit.
9. Stop before reaching into the machine
Wait for the bit to stop completely before removing scraps, checking the cut, changing position, or making adjustments.
10. Disconnect power for adjustments
Unplug or otherwise disconnect the power source before changing bits, performing maintenance, or working near the cutter.
What Should You Do if the Router Starts to Kick Back?
If the router or workpiece moves unexpectedly, release control only in a way that does not place your hands in the cutter’s path and shut the tool down as safely as possible. Do not immediately restart to finish the cut.
After the router has stopped and power is disconnected, inspect the bit, workpiece, clamps, fence, feed direction, depth of cut, and operating speed. Look for damaged stock, an overly aggressive cut, an incorrect feed direction, or inadequate support. Correct the underlying problem before making another cut.
Stop and reassess
Do not continue cutting simply because the router still operates.
Inspect the bit
Check for damage, looseness, excessive buildup, or another condition that could have contributed to the event.
Check the workpiece
Look for movement, cracks, knots, fasteners, unstable grain, or inadequate clamping.
Review the feed
Confirm that the router was being fed against the cutter’s rotation for the operation.
Common Router Safety Mistakes to Avoid
Many routing accidents begin with a small setup shortcut rather than a dramatic mistake. Skipping eye protection, using a dull or damaged bit, holding a small workpiece by hand, reaching near a cutter before it stops, or feeding the router in the wrong direction can all reduce the operator’s margin for control.
Another common mistake is treating router speed as a universal setting. Larger-diameter bits generally require lower operating speeds than small bits, and the permitted speed depends on the specific bit and manufacturer. Always follow the bit and router manufacturer’s specifications rather than choosing a speed from a generic rule.
Do not use a router for a job that exceeds the tool’s intended capability. If the workpiece is too large to support safely, the bit is unsuitable for handheld use, or the operation requires a specialized machine or fixture, change the process instead of improvising around the limitation.
Source: annaspaces.nl
Starting with the bit touching the wood
Start with the cutter clear of unintended contact and establish a controlled starting position.
Holding small pieces by hand
Use an appropriate jig, clamp, push device, or alternate setup when fingers would have to approach the cutter.
Ignoring bit speed limits
Never exceed the maximum permitted speed of the bit or use a large bit at an inappropriate router speed.
Making one excessively deep pass
When the material removal is substantial, use multiple controlled passes when appropriate for the tool and operation.
Removing scraps while the bit spins
Wait for the cutter to stop completely and disconnect power when reaching into the cutter area.
Bypassing guards
Do not remove or defeat a guard or safety device simply because it makes the operation more convenient.
Frequently Asked Questions
Q
What PPE should I wear when using a router?
At minimum, appropriate eye protection is essential because routers can produce flying chips and splinters. Hearing protection is also appropriate for router operation and should be selected according to the noise exposure. Respiratory protection may be required depending on dust exposure, material, and workplace controls.
Q
What is the safest direction to feed a handheld router?
For typical handheld routing, feed against the bit’s cutting rotation. On an outside edge this commonly means moving the router counterclockwise, while inside-edge operations require the opposite path. Always identify the actual cutting edge and rotation before starting.
Q
How do I prevent router kickback?
Secure the workpiece, use the correct feed direction, avoid abrupt feeding, select an appropriate cutting depth and speed, and use suitable support or guides. Inspect the material for defects and make sure the bit is correctly installed. If the router behaves unexpectedly, stop and reassess the setup.
Q
Should I unplug a router before changing the bit?
Yes. Disconnect the router from its power source before changing bits or performing work near the cutter. Do not rely only on the switch because accidental activation can create a serious hazard.
Q
Is a router table safer than a handheld router?
Neither configuration is automatically safe for every job. A router table can provide strong support for suitable small and medium workpieces, while a handheld router can be more practical for large panels or oversized work. The safer setup depends on the workpiece, operation, support, guarding, and ability to keep hands away from the cutter.
✦ Wrapping Up
Conclusion
Safe router operation comes down to controlling the cutter, the workpiece, the direction of travel, and the surrounding environment. Start with a sound setup, use an appropriate bit and speed, secure the material, keep hands and clothing away from the cutter, wear suitable PPE, and control dust and noise.
For U.S. professional woodworking operations, OSHA requirements provide an additional framework for machine guarding, controls, electrical safety, and workplace practices. Home woodworkers should also follow the router manufacturer’s instructions and use the same fundamental precautions. If a particular operation requires a specialized guard, jig, machine, or training that you do not have, change the setup rather than improvising.
💡 Key Takeaway
Before every routing operation, stop and check five things: the bit is secure, the workpiece is secure, the feed direction is correct, your protective equipment is on, and the cutting path is clear. If any one of those checks fails, do not start the router.