
Use the right glue for the wood, joint, and conditions to get strong, clean bonds.
If you have ever watched a joint fail, you know the sting. I do too. After years in the shop, I wrote The Ultimate Wood Glue Guide to help you pick the best glue, avoid common traps, and nail perfect glue-ups with less stress. In The Ultimate Wood Glue Guide, you get plain talk, pro tips, and clear steps you can trust.

How Wood Glue Works
Wood glue grips in two ways. It soaks into the wood and locks in place. It also bonds at the surface by chemical attraction. Good bonds need clean wood, a snug fit, and the right pressure.
Moisture in wood matters. Aim for 6–12% moisture content. Too wet or too dry hurts strength. End grain acts like straws and drinks glue. Use a light size coat first, let it soak, then add a fresh coat.
Open time is the window before the glue skins over. Clamp time is how long to hold pressure. Cure time is when the bond hits full strength. The Ultimate Wood Glue Guide explains these terms so your joints last.

Types of Wood Glue and When to Use Each
Start with the main groups. Each has a sweet spot and a limit.
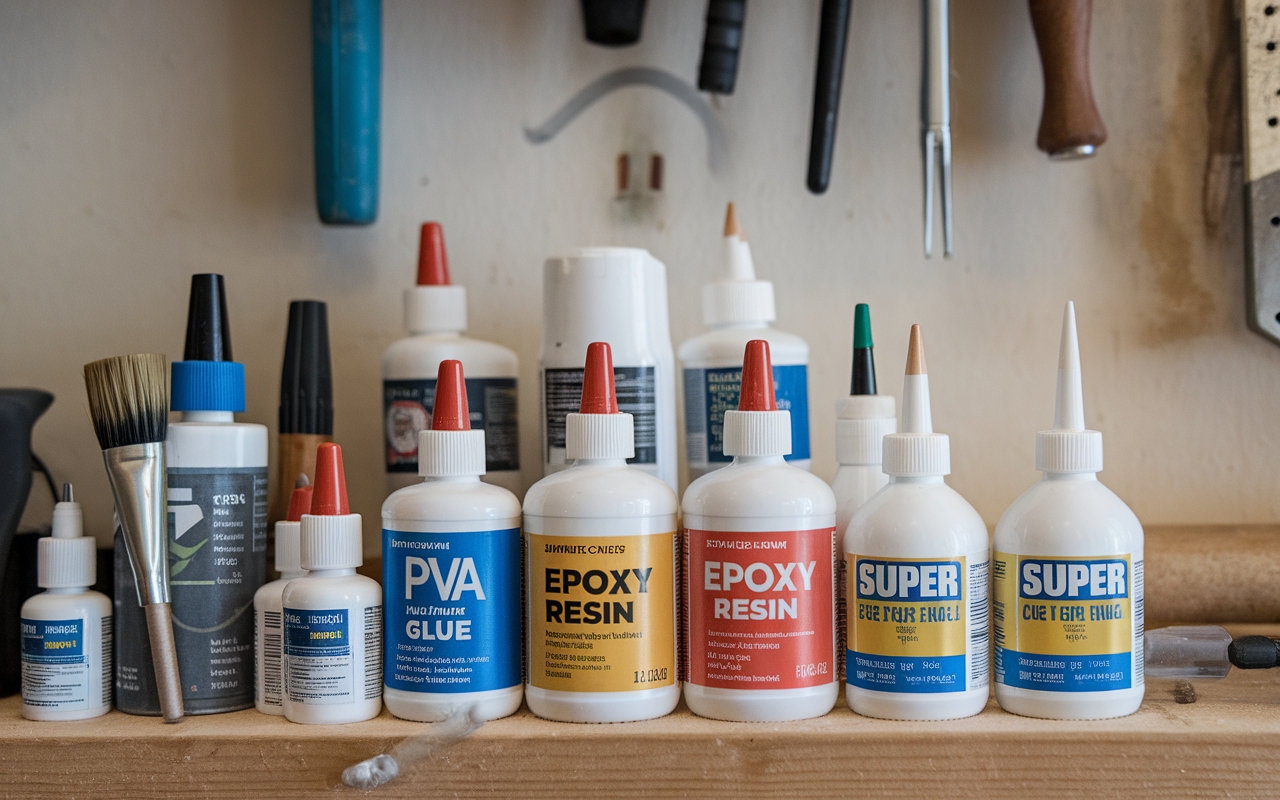
- PVA (yellow/white wood glue). Easy cleanup, fast, strong, safe. Great for edge joints, panels, face frames, and cabinets. Some versions are water-resistant or waterproof. Weak at filling gaps. Can creep under heat.
- Cross-linking PVA. Higher water and heat resistance. Good for cutting boards and kitchen use. Read labels for standards.
- Polyurethane (PU). Expands as it cures and bonds many materials. Good for tricky joints and damp wood. Needs moisture to cure. Foam does not add strength and is messy to clean.
- Epoxy. Two-part, gap-filling, very strong. Ideal for oily woods, loose joints, slabs, and outdoor use. Long open time. Needs careful mix by ratio and temperature control.
- Cyanoacrylate (CA, super glue). Very fast. Great for small repairs, miter trims, and holding parts. Not for big structural joints. Use accelerator with care.
- Hide glue (hot or liquid). Reversible with heat and moisture. Good for antiques, instruments, and complex glue-ups. Lower water resistance. Long open time with hot hide.
- Urea-formaldehyde (plastic resin). Rigid, creep-resistant. Best for bent laminations and veneers. Needs precise mix and safe handling. Not for food-contact items.
- Construction adhesive. Thick, fills gaps, bonds to many surfaces. Better for framing and rough carpentry than fine joinery.
Pro tip from my bench: For edge-glued panels I reach for aliphatic PVA. For chair repairs with loose joints, I use epoxy so I can fill gaps and reset angles. For a violin bridge, I use hot hide glue so a future repair is easy. That mix-and-match approach is why The Ultimate Wood Glue Guide is worth a bookmark.
Choosing the Right Glue for Your Project
Pick glue by project, not habit. Ask these simple checks.
- Where will it live? Indoor pieces do fine with PVA. Outdoor work does better with epoxy or a water-resistant grade.
- What joint type? Tight joinery loves PVA. Loose joints need epoxy.
- How much time do you need? Large glue-ups like tabletops need longer open time. Small trims can use fast set.
- How wet will it get? Cutting boards and bathroom shelves need waterproof or high water resistance.
- Do you need reversibility? Instruments and antiques favor hide glue.
- What wood? Oily woods like teak bond better with epoxy after a solvent wipe.
- Finish color? Some glues dry yellow or dark. Pick one that sands clean and matches the job.
Example paths:
- Dining table in oak with panel glue-up. Use cross-linking PVA with a decent open time.
- Garden bench in cedar. Use epoxy or a high-grade outdoor adhesive.
- Cutting board with end grain. Use a waterproof PVA rated for food-contact surfaces when cured.
The Ultimate Wood Glue Guide saves time by turning guesswork into a simple choice.

Strength, Water Resistance, and Standards
Not all claims mean the same thing. Look for test standards.
- ANSI/HPVA Type I. Waterproof. Passes a harsh boil test. Best for heavy water exposure.
- ANSI/HPVA Type II. Water-resistant. Survives cold-water soak. Good for kitchen and bath use.
- EN 204 (Europe). D2 for dry indoor, D3 for high humidity, D4 for exterior or frequent wetting.
Key terms that matter:
- Shear strength. How hard it is to slide the joint apart.
- Creep. Slow movement under load or heat. Urea-formaldehyde and epoxy resist creep well.
- Heat resistance. Some PVAs soften with heat. Cross-linking types handle heat better.
A good bond is usually stronger than the wood around it. When you break a test piece and see wood tear-out, you did it right. The Ultimate Wood Glue Guide leans on these standards so you can shop with confidence.
Step-by-Step: Perfect Glue-Up Every Time
Follow a clean, simple routine. It keeps stress low and strength high.
- Prep the parts
- Mill flat, square faces. Joints should slide together with light hand pressure.
- Sand to 120–150 grit. Finer grits can burnish and reduce grip.
- Dry-fit with clamps. Label parts so the real run is smooth.
- Apply and spread
- Use a small roller, brush, or glue card. Aim for full, thin coverage.
- For end grain, pre-size with a light coat. Then add a fresh coat before assembly.
- Avoid starving the joint. You want a light bead of squeeze-out.
- Clamp with the right pressure
- Softwoods: about 100–150 psi.
- Hardwoods: about 125–175 psi.
- Dense woods or end grain: up to 175–250 psi.
- Use cauls to keep panels flat and spread load.
- Cleanup and cure
- Let squeeze-out gel, then scrape with a chisel. Or wipe at once with a damp rag, but beware stain halos.
- Keep parts clamped for the maker’s stated time. Let cure 24 hours before heavy loads.
Do this, and your work will look clean and last long. The Ultimate Wood Glue Guide turns this checklist into muscle memory.

Clamping, Curing, and Shop Conditions
Glue is picky about weather. Plan for the room you work in.
- Minimum temperature. Many PVAs fail below 50°F (10°C). This is the chalk point. Cold glue can crystallize and lose strength.
- Humidity. High humidity lengthens open time but slows cure. Dry air reverses that.
- Open time ranges. Fast PVAs: 5–7 minutes. Standard: 10–15. Extended: 20–30. Epoxy varies from 5 minutes to 60 minutes or more.
- Clamp time. Many PVAs need 20–60 minutes clamped, then gentle handling. Epoxy often needs longer.
- Full cure. Most glues hit full strength in 24 hours at 70°F (21°C). Cooler rooms take longer.
My habit: Warm the shop and the glue bottle. I also stage clamps and cauls before I uncap the glue. In The Ultimate Wood Glue Guide, these small steps make big wins.

Cleanup, Repairs, and Problem-Solving
Use the right cleanup at the right time.
- PVA. Water cleanup before cure. After cure, scrape or sand.
- Polyurethane. Mineral spirits before cure. After cure, cut it out.
- Epoxy. Denatured alcohol or acetone before cure. After cure, heat and scrape or sand with a respirator.
- CA. Debonder or acetone before cure. After cure, mechanical removal.
Common issues and fixes:
- Starved joint. Add glue, reclamp, or use epoxy to fill gaps.
- Misaligned panel. Use cauls next time. For now, plane or sand flat.
- Blotchy stain near joints. Avoid over-wetting during cleanup. Scrape gelled squeeze-out instead.
- Failed end grain joint. Size coat first or add a spline or loose tenon.
I once glued a walnut top in a rush. The room was cold. The joint popped a week later. Now I check chalk temperature and add heaters when needed. Lessons like this fuel The Ultimate Wood Glue Guide.

Safety, Food Contact, and Eco Notes
Safety starts with common sense.
- Ventilation. Epoxy, polyurethane, and solvent cleanups need good airflow.
- Gloves and eye protection. Simple and smart.
- Dust control. Cured epoxy dust and sanding dust need a good mask.
Food contact facts:
- Many PVAs are safe for indirect food contact when fully cured. Check labels.
- For cutting boards, use a waterproof PVA or epoxy rated for that use.
- Avoid CA and polyurethane foam on surfaces that touch food.
Eco points:
- PVA has low odor and water cleanup. It is a good shop staple.
- Epoxy and PU need mindful use and disposal. Follow the maker’s data sheet.
Trust grows with safe, clear steps. The Ultimate Wood Glue Guide keeps that front and center.

Storage, Shelf Life, and Testing
Glue ages. Test it before a big job.
- Shelf life. Many PVAs last 1–2 years sealed. Open bottles can thicken in 6–12 months.
- Freezing. Most PVAs do not like it. If it gets chunky or stringy, replace it.
- Epoxy. Keep resin and hardener capped tight. Watch for crystals in cool weather; warm to clear.
- Polyurethane. Moisture cures it in the bottle. Purge air, cap tight, and store cool.
Quick tests:
- Smear test. Spread a thin film on scrap. It should dry smooth and clear.
- Block break. Glue two scraps, clamp, wait a day, then break. If wood tears out, the glue is good.
Small tests save big builds. That is why The Ultimate Wood Glue Guide always includes a scrap check.
Real-World Setups: My Go-To Glue Kit and Tips
Here is the simple kit I keep on the shelf.
- Standard PVA for daily joinery.
- Waterproof PVA for boards and bath work.
- Five-minute CA with accelerator for jigs and tiny trims.
- Slow-cure epoxy for slabs, odd repairs, and outdoor parts.
- Hot hide glue pellets for instruments and tricky assemblies.
Quick habits that help:
- I label every bottle with the open date.
- I keep a small roller, silicone brush, and glue cards in a bin.
- I do a dry run with clamps. Then I set a timer for clamp time.
I have made the common mistakes. Too little glue. Too much pressure. Cold shop. Rushing cleanup. The Ultimate Wood Glue Guide turns those slips into a checklist you can trust.
Frequently Asked Questions of The Ultimate Wood Glue Guide
What is the strongest wood glue?
Strength depends on the joint and prep. In tight joints, quality PVA can be stronger than the wood, while epoxy shines in gaps or on oily woods.
Can wood glue be used on painted or finished wood?
Bonds to paint or finish are weak. Strip to bare wood for real strength, or use epoxy if you cannot remove the finish.
How long should I clamp a glue joint?
Follow the label. Many PVAs need 20–60 minutes clamped and 24 hours before heavy loads; epoxy often needs longer clamp time.
Is wood glue waterproof?
Only some are. Look for ANSI Type I for waterproof and Type II for water-resistant, or EN 204 D3/D4 ratings.
What glue should I use for cutting boards?
Use a waterproof PVA that is safe for indirect food contact, or a food-safe epoxy. Avoid CA and expanding PU seams on the cutting surface.
Can I glue oily woods like teak or ipe?
Yes. Wipe with solvent, sand fresh surfaces, and use epoxy for best results. Clamp well and allow full cure.
Why did my joint fail at the glue line?
Common causes are poor fit, not enough glue, cold temps, or moving the part before cure. Fix the cause and reglue with proper prep.
Conclusion
Great glue-ups are not magic. They are a few smart choices done in the right order. You now know how to pick the right adhesive, set the shop, apply with care, and clamp with confidence.
Use The Ultimate Wood Glue Guide as your go-to plan. Start small, test on scrap, and build the habit. Ready to level up your next project? Bookmark this guide, share it with a shop friend, and drop your questions or wins in the comments.