
A hand plane shapes wood by shaving thin curls, giving you clean, flat, precise surfaces.
The Ultimate Hand Plane Guide is the kind of resource I wish I had when I first started working wood. A good hand plane can feel simple at first, but once you understand the types, setup, and technique, it becomes one of the most useful tools in the shop. In this guide, I’ll walk you through the essentials in a clear, practical way, so you can choose the right plane, use it well, and avoid the mistakes that waste time and wood.
:max_bytes(150000):strip_icc()/100673951-884f19535a4a4b408911efbc65412662.jpg)
What a Hand Plane Does and Why It Still Matters
A hand plane is a tool used to remove thin layers of wood. It can flatten boards, smooth surfaces, trim edges, and fine-tune joints. Even with modern power tools, many woodworkers still rely on planes because they give more control and a better feel for the wood.
The real value of the hand plane is precision. Instead of forcing a machine to do everything, you guide the cut yourself. That means you can work carefully, fix small problems fast, and get a finish that often needs less sanding.
Here’s why I keep a hand plane close by:
• It helps flatten twisted or uneven boards
• It leaves a smoother surface than coarse sanding
• It trims doors, joints, and edges with control
• It works quietly, with almost no dust
• It teaches you how wood behaves
In my own work, I’ve found that a hand plane often solves problems faster than reaching for another machine. When a board was slightly out of square, a few careful passes with a plane saved me from resetting an entire setup. That kind of control is hard to beat.

Main Types of Hand Planes
There are many kinds of hand planes, and each one has a job. If you try to use one plane for everything, you’ll likely fight it more than use it. The best results come when you match the plane to the task.
Block Plane
A block plane is small and easy to handle. It is often used for trimming end grain, chamfering corners, and quick touch-ups. Because of its size, it feels natural in one hand and is great for fast detail work.
Smoothing Plane
A smoothing plane is designed to leave a fine finish on wood surfaces. It removes small shavings and helps prepare a board for finishing. If used well, it can reduce sanding a lot.
Jack Plane
A jack plane is a general-purpose plane. It is longer than a block plane and useful for rough flattening, shaping, and first passes on a board. Many woodworkers see it as the workhorse of the bench.
Jointer Plane
A jointer plane is long and used to straighten edges and flatten large boards. Its length helps bridge small dips and highs, which makes it valuable when you need a board to be truly flat.
Low-Angle Plane
A low-angle plane is often praised for end grain work and difficult woods. The lower blade angle helps it cut cleanly and with less tear-out. I reach for this style when I want a very clean result on tricky grain.
Specialty Planes
Specialty planes include shoulder planes, rabbet planes, router planes, and spokeshaves. These tools handle narrow tasks that regular planes cannot do as well. They are not always needed on day one, but they become very useful as your work grows.
How to Choose the Right Hand Plane
Choosing the right plane depends on what you want to do. A beginner usually does not need a full set right away. It is smarter to begin with one or two useful planes and learn them well.
Here are the main things to consider:
• Purpose: flattening, smoothing, trimming, or joining
• Size: smaller planes are easier to control; larger ones help with flatness
• Blade angle: standard angles work for most tasks, while low-angle planes excel on end grain
• Comfort: the plane should feel balanced in your hand
• Build quality: a solid body and good blade matter more than fancy looks
If you are just getting started, I usually suggest a block plane or a good smoothing plane first. Those two cover a surprising amount of work. Later, you can add a jointer or jack plane as your projects get larger.
A mistake I made early on was buying too many tools before learning one properly. I thought more planes would mean better results, but the real skill came from understanding setup, grain direction, and blade sharpness.
Anatomy of a Hand Plane
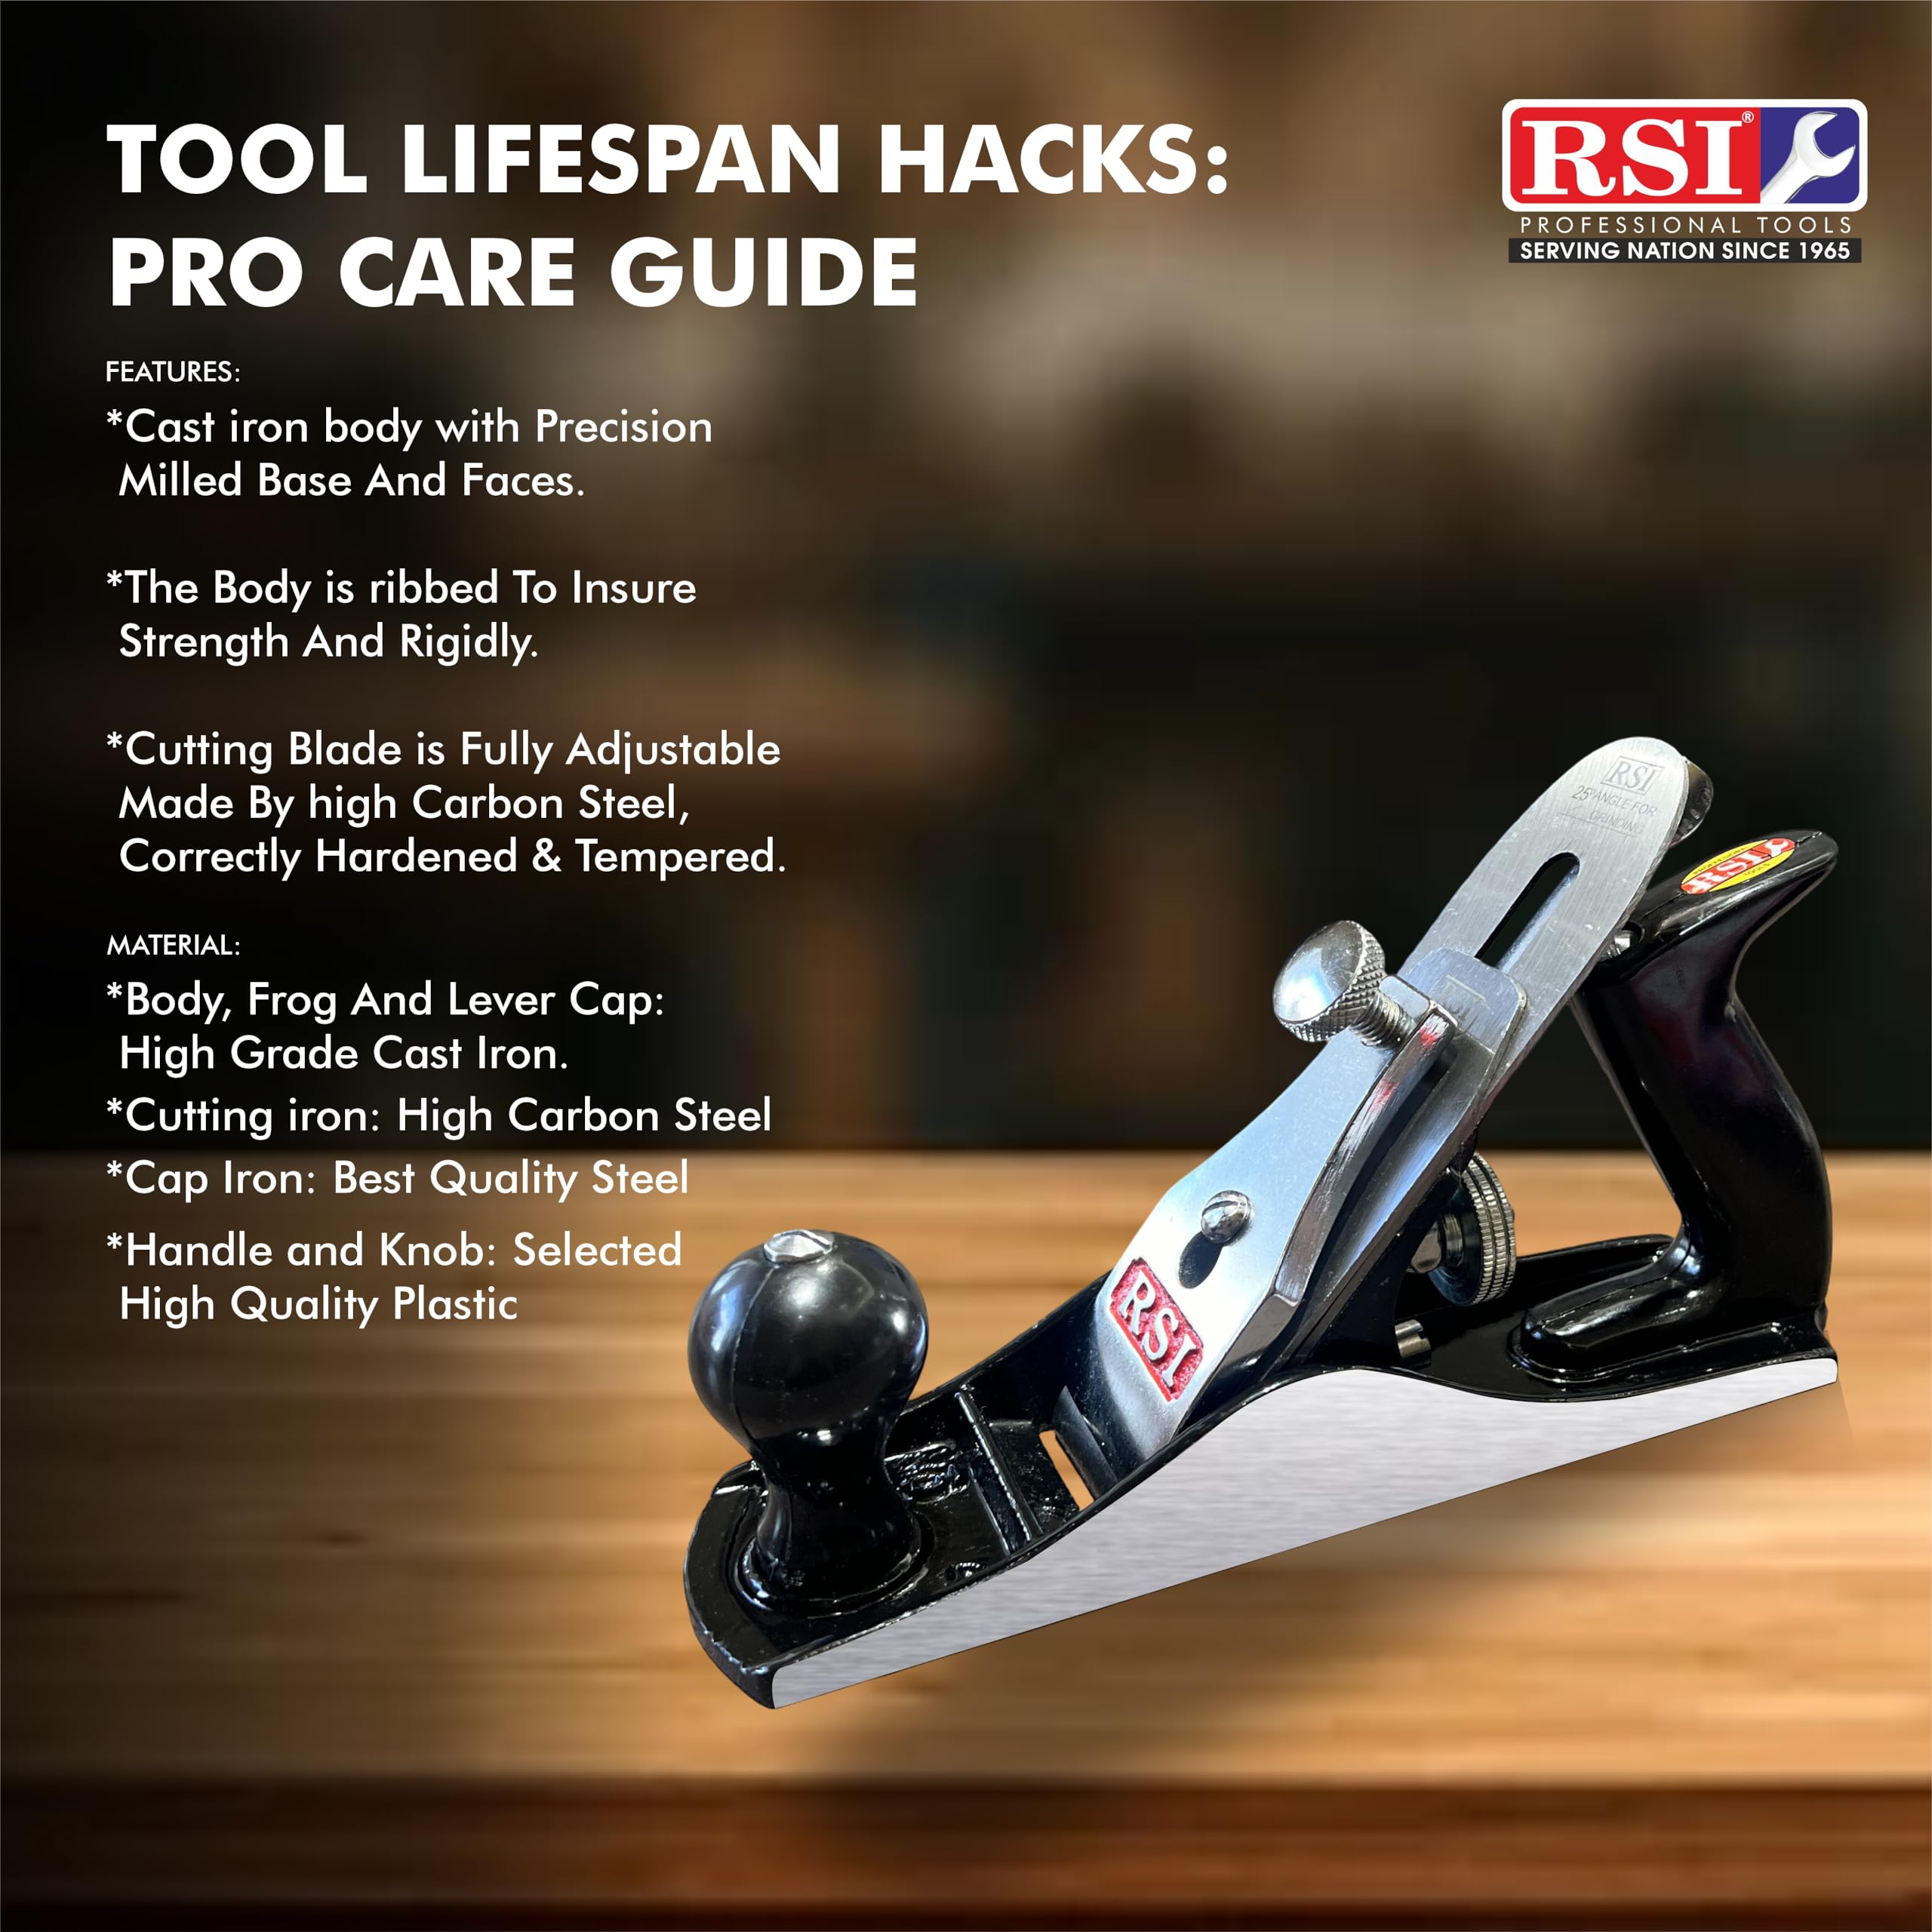
A hand plane may look simple, but each part plays a role. Once you understand the parts, troubleshooting becomes much easier. You stop guessing and start making real adjustments.
The main parts include:
• Body: the frame that holds everything together
• Blade or iron: the cutting edge that shaves the wood
• Cap iron or chipbreaker: helps control shaving flow and tear-out in some planes
• Frog: supports the blade and sets the cutting angle in many metal planes
• Depth adjuster: changes how much the blade cuts
• Lateral adjuster: helps keep the blade square to the sole
• Knob and tote: the front and rear handles for control
• Sole: the flat bottom that rides on the wood
When a plane performs poorly, the issue is often one of these parts. A dull blade, poor blade alignment, or a dirty sole can cause chatter and rough cuts. Knowing the anatomy saves time and frustration.

Setting Up a Hand Plane for Good Results
A sharp plane right out of the box is rare. In my experience, setup matters just as much as the plane itself. A little tuning can turn an average tool into one that feels smooth and reliable.
Start with these steps:
-
Check the blade sharpness
A sharp blade is essential. If it struggles or tears the wood, sharpen it before anything else. -
Flatten and clean the sole
The sole should glide smoothly. Remove rust, dirt, and high spots. -
Set the blade properly
The edge should extend just enough for a thin shaving. Too much blade makes the cut rough. -
Align the blade
Make sure the blade sits square to the sole. A crooked blade leaves uneven cuts. -
Test on scrap wood
Always test before working on your real piece. Small adjustments are easier to make on scrap.
If you hear chatter, feel drag, or see torn grain, do not force the plane. Back up, reset the blade, and check the wood direction. That small pause usually saves the project.

How to Use a Hand Plane Correctly
Using a hand plane well is partly technique and partly patience. The motion should feel smooth and steady, not rushed or forced. Let the tool do the work.
A simple method:
• Stand with your body balanced
• Start with firm pressure on the front knob
• Push forward in a straight line
• Shift pressure toward the back as the plane moves
• Keep the sole flat on the wood
• Make overlapping passes for even results
Work with the grain whenever possible. When the grain changes direction, reverse your path or adjust the cut depth. If the plane catches, the grain is usually telling you something important.
I still remember the first time I got perfect curl shavings from a tuned plane. It felt like the tool was singing. That is one reason many woodworkers love hand planes so much: the feedback is immediate and deeply satisfying.
Hand Plane Maintenance and Sharpening
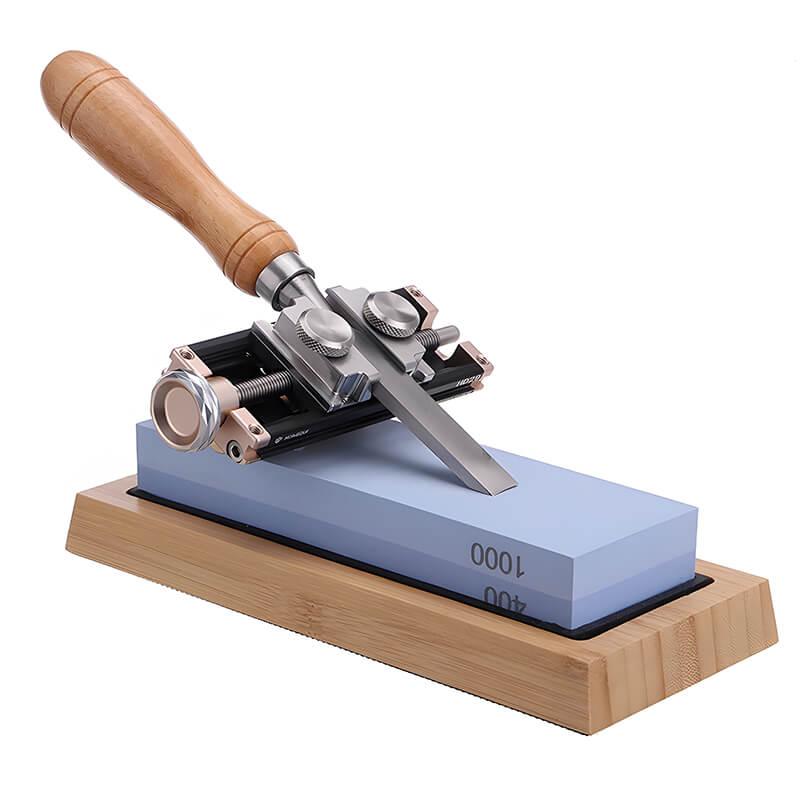
A hand plane is only as good as its edge and condition. Maintenance is not complicated, but it must be consistent. If you take care of the tool, it will keep giving clean results for years.
Good maintenance habits include:
• Wiping the blade and body after use
• Keeping the sole clean and lightly waxed
• Sharpening before the blade gets too dull
• Checking for rust in damp shops
• Storing the plane in a dry place
Sharpening is one of the most important skills in woodworking. A sharp blade cuts with less effort, leaves a cleaner surface, and reduces tear-out. Most woodworking references agree that edge sharpness is central to both quality and safety.
A dull plane often leads to more force, and more force leads to poor control. That is where mistakes happen. If your plane seems hard to push, do not assume the tool is bad. The edge may simply need sharpening.
Common Problems and How to Fix Them
Even good planes can misbehave. The good news is that most problems have simple causes. Once you know what to look for, you can fix them quickly.
Tear-Out
Tear-out happens when the plane lifts fibers instead of slicing them cleanly. It is common on figured wood or when planing against the grain. Try a lighter cut, sharpen the blade, or work in the other direction.
Chatter
Chatter shows up as a rough, uneven surface. It may mean the blade is loose, the cut is too deep, or your grip is unstable. Tighten the tool and reduce the cut.
Uneven Shavings
If one side of the blade cuts more than the other, the blade may be misaligned. Adjust the lateral setting and test again on scrap.
Hard Pushing
If the plane feels stubborn, the blade may be dull or set too deep. It can also happen if the sole is dirty or the wood is especially hard. Start with the easiest fix: sharpen and reset.
Plane Skipping
Skipping can happen when the sole does not stay flat on the wood or when the workpiece is unstable. Make sure the board is secure and your body motion is smooth.

Best Uses for a Hand Plane in Real Projects
A hand plane is useful in more situations than many beginners expect. It is not just for antique-style woodworking. It fits modern shops, repairs, and everyday fixes.
Common uses include:
• Flattening boards before joinery
• Truing edges for glue-ups
• Smoothing surfaces before finish
• Trimming doors that rub
• Chamfering sharp corners
• Cleaning up saw marks
• Tuning joints for a tight fit
One of my favorite real-world uses is fitting a door or cabinet edge by hand. A tiny adjustment with a plane can make the difference between a sticking door and a perfect swing. That level of control is one reason many pros still keep planes on the bench even when they own powerful machines.
What Beginners Should Know Before Buying
If you are new to hand planes, do not get pulled in by shiny branding alone. A plane should work well, feel good, and be easy to tune. Price matters, but so does consistency.
Before buying, check:
• Blade quality
• Body flatness
• Ease of adjustment
• Comfort in hand
• Availability of replacement blades
• Reviews from trusted woodworkers
Also think about the wood you plan to use. If you work with hardwoods or figured grain, a low-angle plane can be a smart choice. If you need a versatile tool for general shop work, a smoother or jack plane may be better.
A trusted industry perspective often repeats the same advice: start simple, learn sharpening, and practice on scrap. That is still the most reliable path I have seen.
Frequently Asked Questions of The Ultimate Hand Plane Guide
What is the best hand plane for beginners?
A block plane or a smoothing plane is usually the best place to start. They are easier to control and useful for many common tasks.
How sharp should a hand plane blade be?
Very sharp. A well-sharpened blade should slice wood cleanly with little effort and leave thin, even shavings.
Why is my hand plane tearing the wood?
Tear-out usually happens because the grain is changing direction, the blade is dull, or the cut is too deep. Try a lighter cut and work with the grain.
Do I need many hand planes?
Not at first. One or two good planes can handle a lot of work while you build skill and learn what you need next.
How often should I sharpen a hand plane?
Sharpen whenever the plane starts to feel harder to push or leaves a rougher surface. Frequent light sharpening is better than waiting too long.
Conclusion
The Ultimate Hand Plane Guide comes down to a few simple ideas: choose the right plane, keep the blade sharp, and learn to read the wood. Once you do that, the tool becomes far less intimidating and far more useful. It can flatten, smooth, trim, and refine with a level of control that is hard to match.
If you are just starting out, focus on one plane and get comfortable with its feel. If you already have experience, sharpen your setup habits and pay closer attention to grain direction. Either way, the more you use a hand plane, the more natural it becomes, so take the next step and put these tips into practice on your next project.