
The ultimate marking tool guide helps you choose the right tool, mark accurately, and work faster with less waste.
If you have ever stared at a project and wondered which tool will give you the cleanest line, the best layout, or the most reliable result, you are in the right place. The Ultimate Marking Tool Guide brings together the tools, techniques, and real-world know-how you need to mark with confidence, whether you are working on construction, woodworking, sewing, crafting, or DIY repairs. I have spent enough time on jobs where a bad mark led to a bad cut to know this: accurate marking is not a small step, it is the step that protects the whole project.
What marking tools are and why they matter
Marking tools are the tools you use to place lines, points, angles, and measurements on a surface before cutting, drilling, sewing, or building. They help turn an idea into a plan you can actually follow. In simple terms, they are the bridge between measurement and action.
In The Ultimate Marking Tool Guide, the key lesson is that good marking saves time, money, and materials. A small mistake in marking can spread across an entire project like a crack in glass. That is why professionals treat marking as part of the build, not just prep work.
Common marking tools are used in many fields:
- Construction: for layout, framing, and alignment
- Woodworking: for joinery, cuts, and repeat marks
- Metalwork: for scribing, center points, and precision layout
- Sewing and crafts: for fabric lines, seams, and patterns
- Home projects: for shelves, hardware, and repairs
From my own experience, the best projects usually start with a clean layout and the right marking tool in hand. When I rushed the marking step early in my career, I often paid for it later with crooked cuts and wasted material.
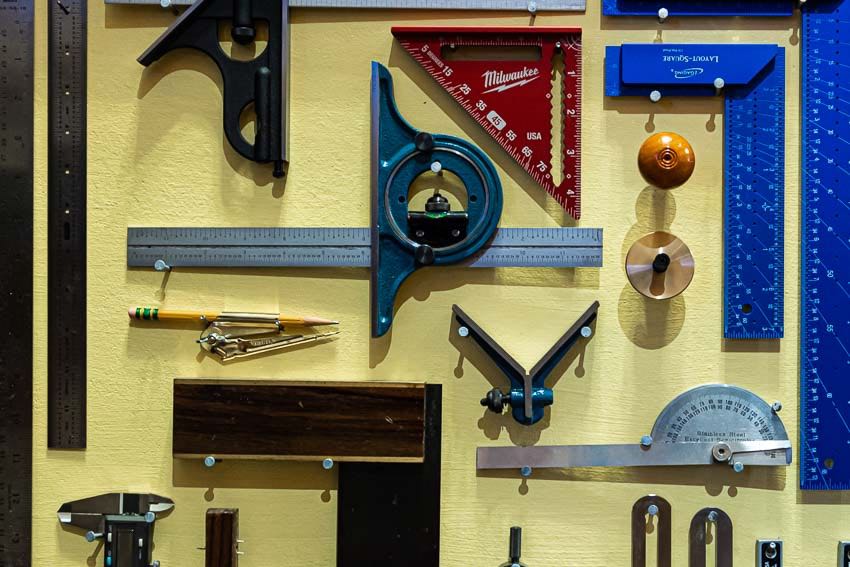
The main types of marking tools
The Ultimate Marking Tool Guide covers a wide range of tools because no single tool works for every surface or job. Choosing the right one depends on what you are marking, how precise you need to be, and whether the mark must be temporary or permanent.
Measuring and layout tools
These tools help you place measurements before you make any mark.
- Tape measure: useful for long spans and general measuring
- Ruler: best for short, straight measurements
- Combination square: useful for checking 90-degree and 45-degree angles
- Try square: helps verify straight edges and right angles
- Framing square: common in carpentry and layout work
Writing and scribing tools
These tools create the actual mark on the surface.
- Carpenter pencil: great for wood and rough surfaces
- Mechanical pencil: ideal for finer, sharper lines
- Chalk line: best for long straight lines on large surfaces
- Scribe: used for metal and hard materials
- Marking knife: common in woodworking for accurate cut lines
- Fabric marker or chalk: used for sewing and textile work
Angle and alignment tools
These tools help you transfer angles and keep lines true.
- Bevel gauge: copies and transfers angles
- Speed square: fast and handy for quick layout work
- Protractor: helps measure and mark angles
- Laser level: useful for straight reference lines across distance
Specialty marking tools
Some jobs need tools made for one purpose.
- Center punch: marks drilling points on metal
- Compass or divider: draws circles and repeats spacing
- Awl: creates starter marks in wood, leather, or soft materials
- Chalk wheel: works well on dark or large surfaces
In practice, the best tool is not always the fanciest one. It is the one that gives you a clear, repeatable mark on your material without causing damage or confusion.
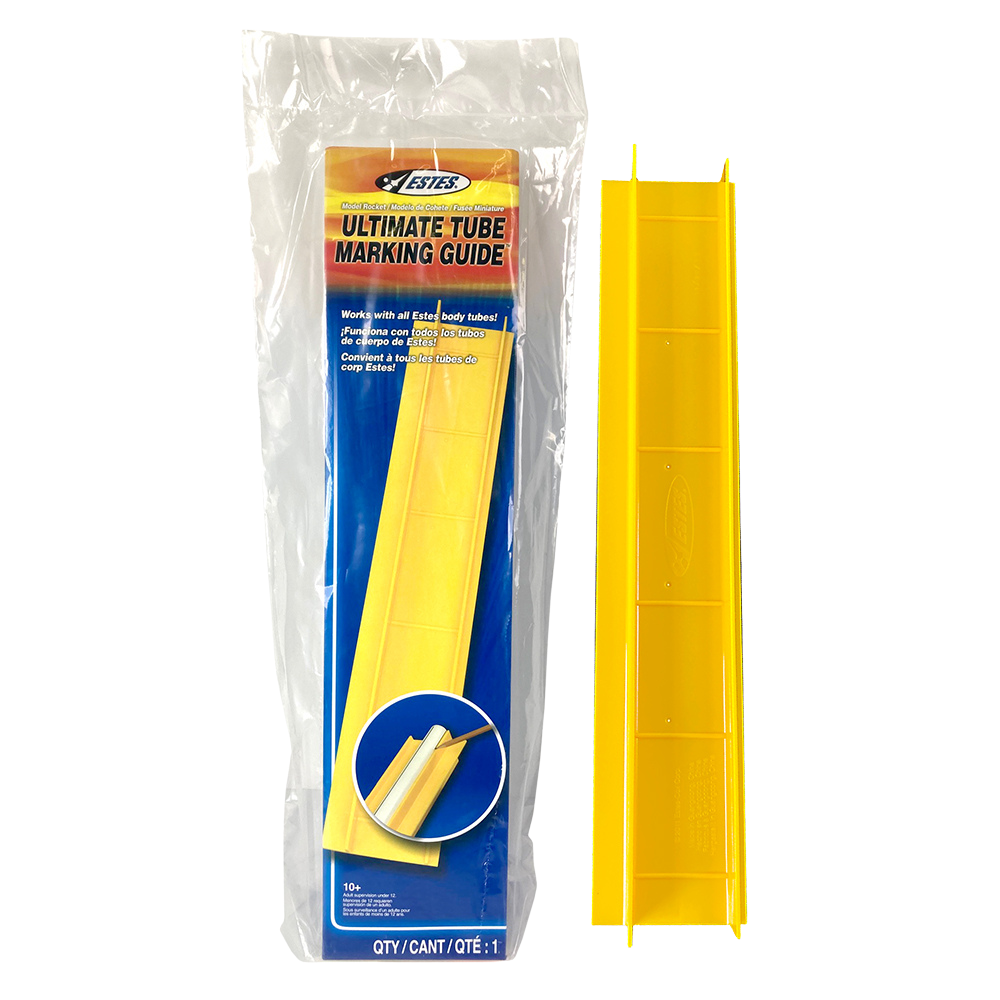
How to choose the right marking tool
The Ultimate Marking Tool Guide is not just about naming tools. It is about matching the tool to the job. That is the part many beginners miss.
Here are the main things to think about:
- Material: wood, metal, fabric, plastic, drywall, or concrete
- Precision: rough layout or fine-detail work
- Visibility: whether the line needs to stand out
- Permanence: temporary chalk mark or lasting scribe line
- Surface texture: smooth, rough, soft, or reflective
- Environment: indoor, outdoor, dusty, wet, or bright
A few practical examples help:
- For rough lumber, a carpenter pencil works well because it does not need a perfect surface.
- For metal, a scribe or center punch is better because pencil marks can vanish.
- For fabric, tailor’s chalk or a fabric pen is safer than a pencil.
- For large exterior layouts, chalk lines and laser levels make the process much easier.
A mistake I see often is people buying one “all-purpose” marker and expecting it to handle everything. It rarely does. A good marking setup is more like a toolbox than a single wand.
Marking tools by material
Different materials behave in different ways. If you use the wrong marking tool, the line may smudge, disappear, or damage the surface.
Wood
Wood is one of the easiest materials to mark, but it still needs the right tool.
- Carpenter pencil for rough marks
- Mechanical pencil for fine work
- Marking knife for precise joinery
- Try square for straight reference lines
Woodworkers often prefer a marking knife when accuracy matters because it creates a fine cut line instead of a thick graphite mark. That tiny difference can improve fit on joints and edges.
Metal
Metal needs sharper, more durable marks.
- Scribe for clean lines
- Center punch for drill points
- Soapstone for temporary layout
- Permanent marker for general work
If you have ever watched a pencil disappear on brushed steel, you know why metal marking is its own skill. Clean metal often needs a scratch or punch to hold the mark.
Fabric
Fabric marks need to be visible but also safe.
- Tailor’s chalk
- Fabric pen
- Dressmaker’s pencil
- Tracing wheel for pattern transfer
Always test a fabric marker on a hidden spot first. Some inks fade with heat, while others may leave a mark that is hard to remove.
Concrete and masonry
These surfaces are rough and dusty, so stronger tools work best.
- Chalk line
- Lumber crayon
- Construction marker
- Spray chalk for short-term layout
Concrete work often depends on visibility. A line that looks fine indoors may disappear in direct sun or dust.

How to use marking tools correctly
The Ultimate Marking Tool Guide is only useful if the tools are used well. Good technique matters just as much as the tool itself.
Follow these steps for cleaner marking:
-
Measure twice before marking.
A fast mark is not useful if the number is wrong. -
Use a stable reference edge.
Always start from the same side or face when possible. -
Keep your marking tool sharp or clean.
A dull pencil or dirty scribe makes messy lines. -
Use light pressure first.
You can darken a line later, but you cannot erase a deep mistake. -
Check your mark before cutting or drilling.
A quick double-check can prevent costly errors.
A small tip from years of hands-on work: if you are laying out multiple pieces, mark them all from the same reference point. That keeps the whole set consistent. It is a simple habit, but it can save an entire afternoon.
Benefits of using the right marking tools
Using the right marking tool gives you more than neat lines. It improves the whole workflow.
Better accuracy
Accurate marks lead to accurate cuts, holes, seams, and joins. This is the biggest reason professionals care so much about marking.
Less waste
When marks are correct, you waste fewer materials. That matters with lumber, sheet goods, fabric, and metal.
Faster work
Good marking tools reduce second-guessing. You spend less time correcting mistakes and more time finishing the job.
Safer projects
Clear marks help prevent bad cuts, misaligned parts, and unstable installs. That can reduce accidents and rework.
More professional results
A project often looks better because of what happened before the first cut. Clean marking shows in the final finish.
The truth is, marking tools are quiet heroes. They do not get the same attention as saws or drills, but they often decide whether the rest of the job goes smoothly.
Common mistakes to avoid
One reason The Ultimate Marking Tool Guide matters is that marking mistakes are so easy to make and so annoying to fix.
Watch out for these errors:
- Using the wrong tool for the surface
- Marking from different reference edges
- Pressing too hard on soft materials
- Ignoring tool wear or dull points
- Trusting a dirty or damaged measuring tool
- Rushing layout on complex cuts
- Forgetting to test ink on fabric or coated surfaces
I learned early that a “good enough” mark is often not good enough at all. On paper it seems minor, but on a real project, one small drift can throw off the whole build.
How professionals keep marking accurate
Experienced builders, makers, and crafters use simple habits to stay precise.
- Keep tools clean and dry
- Store pencils, scribes, and markers in one place
- Sharpen pencils often
- Replace worn blades or tips
- Use jigs and stops for repeat marks
- Label reference faces on parts
- Recheck measurements before transfer
A lot of accuracy comes from routine. Professionals build habits that remove guesswork. Think of it like tuning a guitar before a show: the setup is not glamorous, but everything sounds better after.
Maintenance and care tips
The Ultimate Marking Tool Guide would not be complete without care and maintenance. A good tool lasts longer and gives better results when you take care of it.
For pencils and markers
- Keep caps on when not in use
- Store them away from heat
- Replace worn leads or ink refills
- Do not leave them in direct sunlight for long periods
For scribes and knives
- Keep tips sharp
- Wipe off debris after use
- Store safely to avoid dulling or injury
- Use a protective cover when possible
For layout tools
- Check squares and rulers for damage
- Keep measuring edges clean
- Avoid dropping precision tools
- Calibrate laser tools as needed
A lot of people spend money replacing tools that only needed care. A quick clean and proper storage can extend tool life more than you might expect.
Best marking tool choices for common jobs
If you want a fast starting point, this simple breakdown helps.
- DIY home projects: tape measure, pencil, combination square
- Carpentry: carpenter pencil, marking knife, framing square
- Fine woodworking: marking knife, try square, mechanical pencil
- Metal fabrication: scribe, center punch, soapstone
- Sewing and fashion work: tailor’s chalk, fabric pen, tracing wheel
- Large layout work: chalk line, laser level, chalk wheel
When in doubt, start with the surface and the final cut. The mark should support the work, not fight it.
Frequently Asked Questions of The Ultimate Marking Tool Guide
What is the most useful marking tool for beginners?
A carpenter pencil and a tape measure are the easiest tools to start with. They work for many simple jobs and are forgiving on rough surfaces.
Is a marking knife better than a pencil?
For fine woodworking, yes, often it is. A marking knife can create a cleaner, thinner line that helps improve fit and accuracy.
Why do metalworkers use scribes instead of pencils?
Pencil marks can rub off smooth metal surfaces too easily. A scribe cuts a visible line into the surface, which lasts longer and stays clearer.
Can I use one marking tool for every material?
You can, but it is not ideal. Different materials need different tools for the best visibility, accuracy, and surface safety.
How do I keep marking lines from smudging?
Use the right marker for the surface and avoid touching the line too early. For delicate jobs, test the material first and choose a tool that dries or sets properly.
Conclusion
The Ultimate Marking Tool Guide comes down to one simple idea: better marking leads to better results. When you choose the right tool, use it carefully, and build a few smart habits, your projects become cleaner, faster, and far less stressful.
If you remember just one thing, let it be this: the mark is not a small step. It is the beginning of the finished work. Start using the right marking tool for each job, and you will notice the difference almost right away.
If this guide helped you, explore more practical tool tips, save it for your next project, or leave a comment with your favorite marking tool and why you trust it.