
Complete woodworking tool guide: essential tools, uses, and tips to build skills and projects.
I’ve spent years in small shops and pro shops building furniture and fixing things. This Complete Woodworking Tool Guide collects what works. You’ll find tool lists, buying tips, shop setup, maintenance, and project ideas. Read on to save time, avoid mistakes, and choose tools that match your goals.

Why a Complete Woodworking Tool Guide Matters
A good guide helps you pick tools that fit your needs and budget. The Complete Woodworking Tool Guide focuses on tools, safety, and how to grow skills step by step. Knowing which tools to buy first saves money and keeps projects fun. This guide explains the why and how so you can start, improve, or upgrade with confidence.

Core Categories of Woodworking Tools
A clear map of tools makes learning faster. The Complete Woodworking Tool Guide groups tools into categories so you can plan shopping and skills.
Measuring and Layout Tools
- Tape measure — basic and accurate for most cuts.
- Combination square — checks squareness and marks lines.
- Marking gauge — sets consistent mortise and tenon depths.
- Pencil and marking knife — use a knife for cleaner layout lines.
Hand Tools
- Hand saws — crosscut and rip saws for controlled cuts.
- Chisels — 1/4", 1/2", 3/4", and 1" for joinery and cleanup.
- Block plane — trims edges and fits joints.
- Wooden mallet — used with chisels and joinery.
Power Tools
- Circular saw — versatile for ripping and crosscutting sheet goods.
- Jigsaw — cuts curves and odd shapes.
- Power drill/driver — drilling, countersinking, and driving screws.
- Random orbital sander — smooths surfaces without swirl marks.
- Router — cuts grooves, edges, and makes joinery.
- Table saw — central station for accurate rip and cross cuts (optional but powerful).
Sharpening and Maintenance
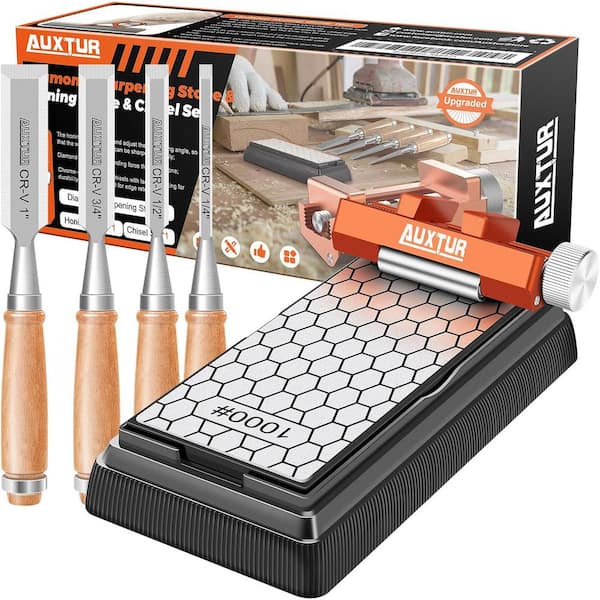
- Bench stones — keep chisels and plane irons sharp.
- Honing guide — helps consistent bevel angles.
- Lubricant and rust prevention — protect metal surfaces.
Fastening, Clamping, and Joinery
- Bar clamps and pipe clamps — hold pieces while glue dries.
- Spring clamps — quick setup and light pressure.
- Doweling jigs, pocket hole jigs — for fast, strong joints.
Finishing Tools
- Brushes and foam applicators — for varnish, shellac, and oil.
- Rags and tack cloth — clean dust before finish.
- Fine sandpaper — 220–320 grit for finish prep.
Safety Gear
- Eye protection — glasses or goggles.
- Hearing protection — earmuffs or plugs.
- Dust mask or respirator — protect lungs from fine dust.
- Push sticks and featherboards — keep hands clear near blades.
This Complete Woodworking Tool Guide covers both basic and advanced tools so you can scale up. I often tell beginners to start with a few hand tools and a circular saw. As skills grow, add a router and a table saw.

How to Choose Tools: Buying Tips and Priorities
Pick tools that match projects and space. The Complete Woodworking Tool Guide recommends priorities and a buying path.
- Start with safe basics — measuring tools, chisels, a good hand plane, and clamps. These teach technique and are low cost.
- Buy used for big tools — table saws and planers can be found used for less. Inspect the fence and motor before buying.
- Focus on fit, not brand — comfortable handles and clear adjustments matter more than a logo.
- Balance budget and quality — buy the best you can afford for cutting edges and motors.
- Consider warranty and service — easy repairs extend tool life.
From my shop experience, cheap clamps fail first. Spend a little more on bar clamps and a decent plane. That single choice saved me time and frustration.

Setting Up a Practical Woodworking Shop
A functional shop improves quality and safety. Use the Complete Woodworking Tool Guide to plan your space.
- Workbench — solid surface with bench vise. It’s the shop’s heart.
- Table saw placement — leave space for long cuts and outfeed.
- Storage — pegboards, cabinets, and labeled bins keep tools visible.
- Lighting — bright, shadow-free light over benches and saws.
- Dust collection — a small shop vac and a portable dust extractor cut fine dust exposure.
- Power — plan circuits for heavy tools. Use grounded outlets.
I worked in a cramped garage for years. Adding a simple dust port and a workbench made everything easier. Small changes reduce errors and improve the flow of projects.
Tool Care, Sharpening, and Safety
Keeping tools sharp and safe is part of the Complete Woodworking Tool Guide. Dull blades are dangerous and slow.
- Sharpen daily or weekly depending on use. A sharp chisel cuts clean and requires less force.
- Clean and oil metal surfaces to prevent rust. Use paste wax on cast-iron tops.
- Check cords and plugs on power tools. Replace damaged cords immediately.
- Use guards and push tools at table and router tables. Never remove safety features.
- Replace sanding discs and blades when worn. Worn tools strain motors and give poor cuts.
I learned this the hard way when a dull blade threw work off by a full inch. Now I sharpen before every big job. It saves time and keeps cuts accurate.

Project Examples and Tool Lists by Skill Level
This section uses the Complete Woodworking Tool Guide to match tools to projects you can build today.
Beginner: small projects, low risk
- Tools: tape measure, combination square, circular saw, cordless drill, random orbital sander, basic chisel set, clamps.
- Projects: bookshelf, cutting board, simple stool.
- Tip: Practice safe cuts and measure twice.
Intermediate: joinery and finish work
- Tools: table saw or better circular saw setup, router, jigsaw, hand plane, dovetail saw, drill press.
- Projects: cabinet, dining chair, drawer chest.
- Tip: Learn to use a router and set fences accurately.
Advanced: precision and production
- Tools: jointer, planer, high-end table saw, mortiser, bandsaw, dust collection system.
- Projects: fine furniture, complex cabinetry, musical instruments.
- Tip: Focus on setup and tool alignment for repeatable results.
The Complete Woodworking Tool Guide helps you move through these levels deliberately. When I moved from beginner to intermediate, adding a router opened many new joinery options.

Common Mistakes and How to Avoid Them
Avoid the usual pitfalls with the Complete Woodworking Tool Guide.
- Buying too many tools at once. Start small and buy as needs arise.
- Skipping measuring steps. Measure and mark once, then cut.
- Using dull blades. Keep edges sharp for safety and finish.
- Ignoring safety gear. Eye and ear protection are cheap compared to medical bills.
- Poor shop layout. Plan space to move stock safely around tools.
A common mistake I made was rushing projects to buy a new tool. That led to wasted material. Buy based on a project plan, not impulse.

Frequently Asked Questions of Complete Woodworking Tool Guide
What tools should I buy first as a complete beginner?
Start with measuring tools, a reliable tape measure, combination square, a basic chisel set, clamps, a circular saw, and a cordless drill. These let you complete simple projects and learn skills.
Is a table saw necessary for woodworking?
A table saw is very useful but not required at first. Many projects can be completed with a circular saw, straightedge, and router.
How often should I sharpen my chisels and plane irons?
Sharpening frequency depends on use. For regular hobby work, hone before each major session and sharpen fully when performance drops.
Can I buy used tools safely?
Yes, if you inspect them. Check alignment, motor run, table flatness, and look for rust or missing parts before buying a used tool.
How do I choose between corded and cordless power tools?
Choose based on work type. Corded tools offer constant power for long projects. Cordless tools are portable and fine for light to medium tasks.
What safety gear is essential in a small shop?
At minimum, use eye protection, hearing protection, and a dust mask or respirator. Use push sticks and guards for cutting tools.
Conclusion
This Complete Woodworking Tool Guide gives a clear path from beginner tools to a full shop. Choose tools that match projects. Keep tools sharp and your space safe. Start small, learn deliberately, and upgrade as you need to. Try one new tool or technique this week and build a simple project to practice what you learn. Leave a comment with your next project or subscribe to follow more shop tips and tool reviews.