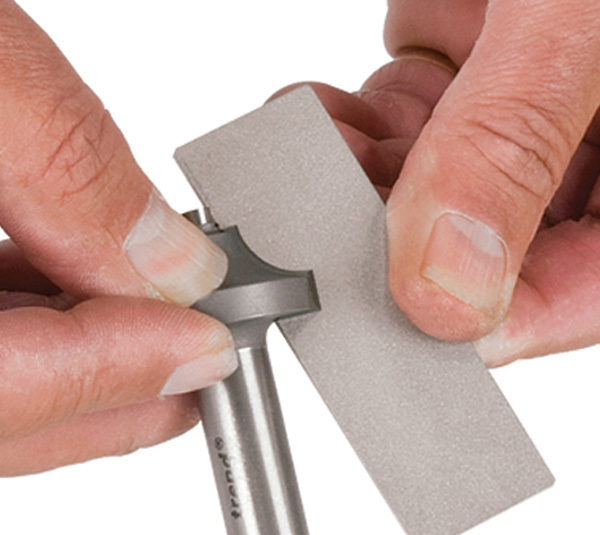
Most carbide router bits can be lightly honed with a fine diamond abrasive to refresh a dull cutting edge, but sharpening should remove very little material and should preserve the bit’s original geometry.
For U.S. woodworkers, router bit sharpening is usually a maintenance job rather than a complete regrinding operation. A bit that has started leaving burn marks on oak, maple, plywood, or MDF may only need cleaning and a few controlled honing passes. Carbide-tipped bits are especially suited to light touch-ups with a diamond hone because carbide is harder than ordinary sharpening stones.
The critical distinction is between honing and regrinding. Honing refreshes an existing cutting edge by removing a small amount of material from the appropriate flat face. Regrinding restores damaged or worn geometry and generally requires specialized equipment. If a bit has major chips, a damaged profile, a bent shank, a loose carbide tip, or significant dimensional wear, professional sharpening or replacement is usually more appropriate than aggressive DIY grinding.
Source: yaffa-cdn.s3.amazonaws.com
What Is Router Bit Sharpening?
Router bit sharpening is the process of restoring a worn cutting edge so the bit can shear material cleanly again. For routine workshop maintenance, the process is more accurately described as honing because you are normally removing a very small amount of material rather than rebuilding the cutter’s original geometry.
Most woodworking router bits use tungsten carbide cutting edges because carbide resists wear well. Carbide is also brittle and requires an abrasive capable of cutting it effectively. Diamond abrasives are commonly used for this reason. High-speed steel router bits can also be sharpened, but their sharpening requirements and geometry may differ from carbide-tipped cutters.
The safest DIY approach is conservative: clean the bit, inspect the cutting edges, use a fine diamond hone, and make controlled passes on the correct flat surface. The goal is to restore a keen edge, not to reshape the cutter.
Source: images.finewoodworking.com
Honing
A light maintenance operation that refreshes an existing edge while removing only a small amount of material.
Regrinding
A more substantial sharpening operation that restores worn or damaged geometry and is normally better handled with professional grinding equipment.
Profile preservation
The original diameter, relief, rake, and cutting profile affect the way a router bit cuts, so unnecessary material removal can change the finished result.
Why a Sharp Router Bit Matters
A sharp bit cuts wood fibers more effectively and normally requires less cutting effort than a dull edge. When a bit becomes dull, the router may produce more heat, burning, fuzzy surfaces, rough edges, or increased tear-out. Those symptoms can also have other causes, including incorrect router speed, feed rate, bit selection, or resin buildup, so sharpening should not be treated as the automatic solution to every poor cut.
A clean, sharp bit also makes it easier to maintain consistent results when routing joinery, profiles, dados, rabbets, or decorative edges. The effect is especially noticeable when working with abrasive sheet goods such as plywood and MDF.
Honing Versus Sharpening a Damaged Bit
Light edge dulling is a reasonable candidate for honing. A small nick may sometimes be repaired professionally, but removing enough carbide by hand to eliminate a significant chip can alter the cutter’s geometry. A bit with a badly damaged carbide tip, cracked carbide, a bent shank, or a damaged bearing should not be treated as a simple honing job.
How to Tell When a Router Bit Needs Sharpening
Start by inspecting and cleaning the bit rather than immediately reaching for a sharpening stone. Pitch, resin, glue residue, and compacted dust can build up on cutting edges and increase friction. After cleaning, inspect the carbide under good light, preferably with a magnifying loupe.
A router bit that is genuinely dull may show a rounded or polished cutting edge rather than a crisp edge. In use, it may leave burn marks, require more effort to feed, produce a rougher surface, or create more tear-out than it did previously. A change in cutting behavior is useful evidence, but it should be considered alongside router speed, feed rate, cutting depth, material, and bit condition.
Source: cwsonline.com.au
Burn marks
New or increasing burning can indicate a dull edge, although excessive router speed, a slow feed rate, or resin buildup can also cause heat.
Rough surfaces
Fuzzy edges, visible cutter marks, or a noticeably poorer finish can indicate edge wear.
More cutting resistance
If the same setup suddenly requires noticeably more effort, inspect the bit before changing multiple machine settings.
Visible edge damage
Small wear can sometimes be honed, while large chips, cracks, or missing carbide generally call for professional evaluation or replacement.
Clean Before You Sharpen
Cleaning is one of the most overlooked parts of router bit maintenance. Remove pitch and resin with a cleaner that is appropriate for the bit and its components. Use a soft brush rather than an aggressive metal brush on carbide cutting edges. If the bit has a bearing, follow the bearing manufacturer’s cleaning and lubrication guidance rather than soaking the bearing in a solvent that could remove its lubricant.
After cleaning, inspect the edge again. If the cutting surface looks crisp and the bit returns to normal performance, sharpening may not be necessary.
What You Need for Router Bit Sharpening
For light maintenance, the equipment list is short. The most important item is a suitable diamond abrasive that lets you reach the flat cutting faces without contacting parts that should retain their original geometry.
A fine diamond hone is usually the practical starting point for routine touch-ups. Some sharpening systems provide multiple grits, such as a coarser surface for more worn edges and a finer surface for routine honing. There is no universal grit that is correct for every router bit, so follow the sharpener manufacturer’s guidance and favor controlled material removal.
Source: media.popularwoodworking.com
Diamond hone or diamond file
Use a narrow, controlled abrasive that can reach the flat face of the cutter without interfering with the profile.
Cleaning supplies
Use a suitable bit cleaner and a soft brush to remove pitch, resin, and debris before honing.
Magnifying loupe
Magnification helps reveal rounded edges, chips, burrs, and uneven contact that are difficult to see with the naked eye.
Stable work surface
A secure bench or simple holder makes it easier to keep the bit steady and maintain consistent contact.
Eye protection
Wear appropriate eye protection whenever handling cutting tools, abrasives, or operations that can produce particles.
Choosing a Diamond Grit
For routine carbide touch-ups, a fine diamond surface around 600 grit is a practical starting point because it removes material gradually. A coarser surface around 300 to 325 grit can be useful when the edge is more worn, but it also increases the risk of removing more carbide than necessary. A finer surface around 1,000 to 1,200 grit can be used when a sharpening system calls for additional refinement.
These numbers are working ranges rather than a universal prescription. The correct choice depends on the bit condition, abrasive type, and the amount of material that actually needs to be removed. When only a small touch-up is required, start finer and use light pressure.
Lubrication and Swarf
Some diamond hones are designed for use with water, while others recommend a particular honing or lapping fluid. Follow the abrasive manufacturer’s instructions. Lubrication can help carry away swarf, the fine material removed during honing, and can make the process more controlled. Wipe the abrasive and bit clean when finished.
How to Sharpen a Router Bit Step by Step
The basic process is simple: remove the bit, clean and inspect it, identify the correct flat cutting face, make a small number of light diamond-hone passes, repeat the same treatment on every cutter, and inspect the result. The most important part is controlling how much material you remove.
Disconnect the router from power before removing the bit. Never sharpen a router bit while it is installed in the router. The cutter should be completely stationary and handled as a sharp cutting tool.
Source: bestwoodcarvingtool.com
1. Remove the router bit
Unplug or otherwise isolate the router from its power source, remove the bit, and place the router in a stable position.
2. Remove removable accessories
If the bit has a removable pilot bearing or other hardware that could interfere with honing, remove it according to the manufacturer’s instructions.
3. Clean the cutter
Remove pitch, resin, dust, and other buildup so you can see the actual cutting edge.
4. Inspect the carbide
Use good lighting and magnification to distinguish ordinary dulling from chips, cracks, loose carbide, or major damage.
5. Identify the flat face
On common carbide-tipped router bits, the flat face behind the cutting edge is the surface normally honed for a light touch-up. Do not casually grind the profile or alter the cutter’s designed angles.
6. Make light honing passes
Hold the diamond hone against the existing flat face and use gentle, controlled strokes. Let the abrasive remove the material rather than applying heavy pressure.
7. Match the treatment on every cutter
Use the same general number of passes and similar pressure on each cutter. Equal treatment helps preserve balance.
8. Inspect the edge
Stop frequently and inspect the edge. The objective is a clean, consistent cutting edge, not a large newly ground bevel.
9. Clean and protect the bit
Remove abrasive residue, dry the bit as appropriate, and lubricate or reinstall bearings according to their instructions.
10. Test with a shallow cut
Use a suitable piece of scrap material and a conservative cutting setup to verify the bit’s performance before starting a finished workpiece.
How Many Strokes Should You Use?
There is no universal stroke count because bit condition, abrasive grit, carbide grade, and sharpening technique vary. For a routine touch-up, a reasonable starting approach is a few light passes per cutter, followed by inspection. Some established woodworking guidance describes roughly four to six or about half a dozen light passes as a useful maintenance range, but the correct stopping point is the condition of the edge rather than a fixed number.
If the edge is not improving after a small number of controlled passes, do not simply increase pressure or keep grinding. Reinspect the bit for chips, geometry problems, contamination, or damage that requires professional sharpening.
How to Keep a Multi-Cutter Bit Balanced
Balance matters because the cutters rotate at high speed. If one cutter has significantly more material removed than another, the cutting loads and geometry can become uneven. Count strokes or otherwise use a consistent process on every cutter, and inspect the edges side by side before reinstalling the bit.
What You Should Not Sharpen by Hand
The biggest sharpening mistake is treating every dull router bit as though it only needs more grinding. Router bits are precision cutting tools, and their geometry determines diameter, cutting angle, clearance, chip evacuation, and profile. Removing material from the wrong surface can permanently change those characteristics.
For ordinary touch-ups, concentrate on the appropriate flat face. Avoid grinding the decorative profile or outside diameter simply to make the edge look sharper. On a round-over, ogee, chamfer, cove, or other profiled bit, changing the profile can change the finished shape of the workpiece.
Source: burnettetools.com
Do not grind the profile casually
Changing the profiled surface can alter the diameter and shape of the cut.
Do not change hook or rake geometry
These angles are part of the cutter’s design and should not be modified during routine hand honing.
Do not remove large amounts of carbide
Heavy material removal is better handled by a sharpening service with the correct grinding equipment and fixtures.
Do not use a damaged bit as though it were merely dull
Cracked carbide, loose tips, major chips, bent shanks, and severe profile damage require a more careful decision.
When Professional Sharpening Makes More Sense
Professional sharpening is appropriate when the bit needs its geometry restored rather than simply touched up. A professional service can use dedicated fixtures and grinding equipment to control the cutter’s dimensions and angles. This is especially valuable for expensive profile bits, specialty cutters, production tooling, and bits used for dimensionally critical joinery.
Professional service is also worth considering when you cannot confidently identify the correct sharpening face or when the bit requires substantial material removal. The cost should be compared with replacement cost, the value of the bit, and the importance of retaining its original profile.
When Replacement Is the Better Option
Replacement can make more sense when carbide is badly chipped, the steel body is damaged, the shank is bent, a bearing seat is damaged, or repeated sharpening has reduced the bit’s dimensions enough to affect the job. A profile bit used for precision joinery deserves particular caution because even a small dimensional change can affect how parts fit together.
Router Bit Sharpening Safety and Common Mistakes
Router bit sharpening combines sharp metal edges, abrasive particles, and sometimes powered grinding equipment, so safety should come before speed. For routine hand honing, remove the bit from the router, secure your work, wear eye protection, and avoid placing fingers directly in the path of the cutting edge.
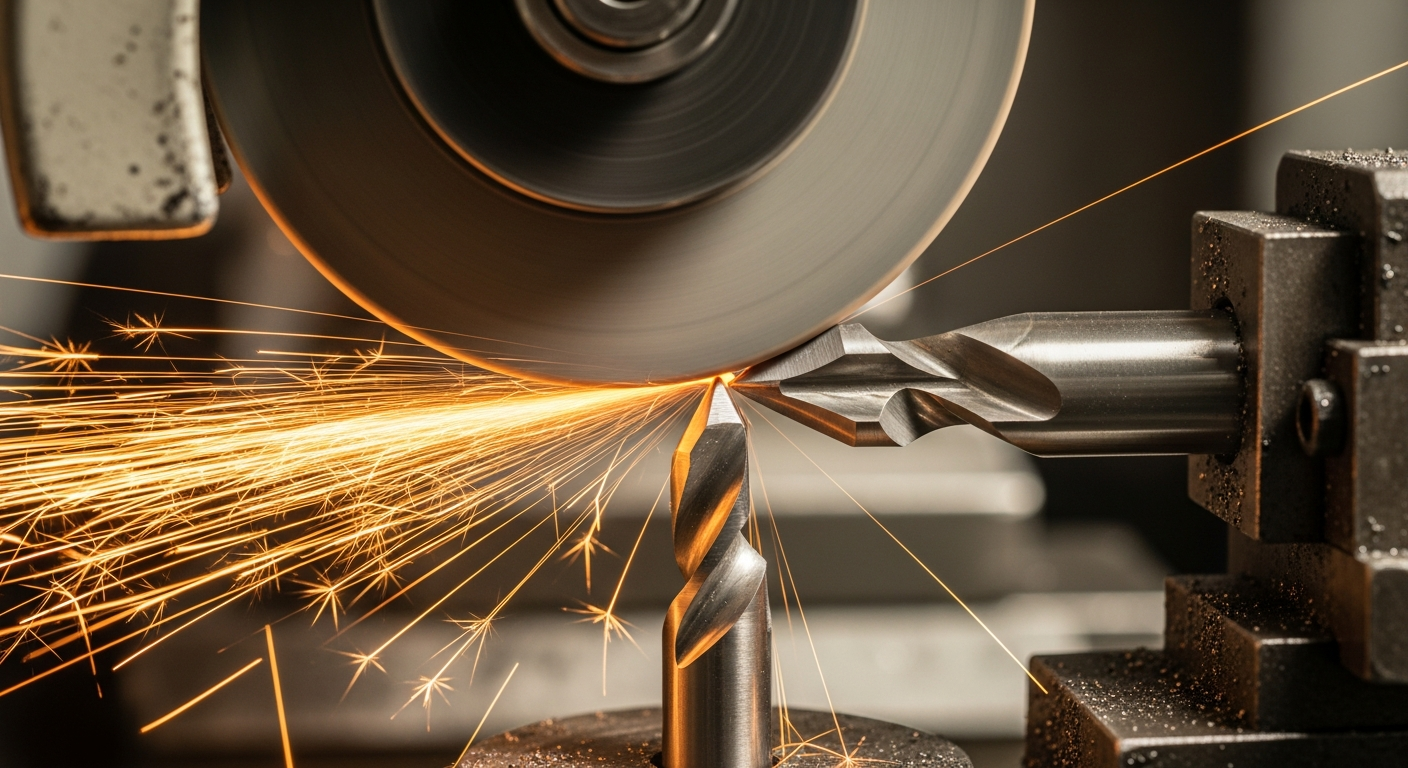
Powered grinding requires additional caution. A high-speed grinder or rotary tool can remove carbide quickly and can also generate heat and airborne particles. Do not improvise a powered sharpening setup unless the abrasive, speed, fixturing, and technique are appropriate for the cutter. For routine maintenance, a hand diamond hone gives much more control over material removal.
Source: woodgears.ca
Sharpening a bit while installed
Never attempt to hone or grind a router bit while it remains mounted in a powered router.
Using excessive pressure
Heavy pressure can remove too much material and makes it harder to maintain consistent geometry.
Sharpening only one cutter
Unequal treatment can create uneven cutting loads and vibration.
Grinding the wrong surface
Changing the profile, rake, or clearance can alter the way the bit cuts.
Ignoring airborne particles
Avoid creating unnecessary dust during sharpening. Use appropriate ventilation, dust control, and personal protective equipment for the abrasive and material being worked.
Skipping the final inspection
A bit should be checked for chips, loose carbide, bearing problems, and clean installation before returning to service.
A Simple Failure Check
If the sharpened bit still burns, chatters, or leaves a poor finish, stop before removing more carbide. First confirm that the bit is clean and that all cutters were treated evenly. Then check router speed, feed rate, cutting depth, material, collet condition, and bearing condition. A sharp bit can still produce poor results when the machine setup is wrong.
If the bit remains poor after those checks, inspect the cutting edges under magnification. A chip, incorrect profile, damaged carbide joint, or excessive wear may indicate that the bit needs professional sharpening or replacement.
How to Extend the Life of Sharpened Router Bits
Sharpening is only one part of router bit maintenance. Keeping cutters clean, storing them so the edges cannot collide, and using appropriate cutting parameters can reduce unnecessary wear. Pitch and resin should be removed before buildup becomes heavy, especially when routing softwood species with high resin content.
Use the correct router speed for the bit diameter and follow the bit manufacturer’s recommendations. Avoid forcing a dull or overheated bit through the workpiece, and use multiple shallow passes when a cut requires significant material removal. A sharp bit still needs a suitable feed rate and cutting depth to avoid excessive heat and tear-out.
Source: wonkeedonkeetrend.co.uk
Clean after use
Remove pitch, resin, and debris before buildup makes inspection and cutting performance more difficult.
Protect the cutting edges
Store bits individually or in a holder that prevents carbide edges from striking other tools.
Inspect the shank and collet
Keep the shank and collet clean and free of debris so the bit seats securely and runs properly.
Maintain bearings
Bearing-guided bits need clean, properly functioning bearings. Follow the bearing manufacturer’s maintenance guidance.
Use sensible cutting parameters
Correct speed, feed rate, and depth of cut reduce unnecessary heat and loading on the bit.
A Practical Maintenance Routine
After a routing session, inspect the bit before putting it away. If you see pitch or resin, clean it. If the cutting edge looks dull but undamaged, plan a light honing session rather than waiting until the bit performs poorly. During the next use, make a shallow test cut and compare the surface with your normal results.
This approach keeps sharpening conservative. Instead of waiting until a cutter needs significant material removal, you can use light maintenance honing to delay the point at which professional regrinding becomes necessary.
Frequently Asked Questions
Q
Can you sharpen carbide router bits?
Yes. Carbide router bits can be honed with diamond abrasives because diamond is hard enough to cut carbide. For routine maintenance, use a fine diamond hone and remove only a small amount of material from the appropriate flat cutting face. Significant damage or geometry changes are better handled by a professional sharpening service.
Q
What is the best grit for sharpening router bits?
There is no single best grit for every condition. A fine diamond abrasive around 600 grit is a practical starting point for many routine carbide touch-ups. A coarser 300 to 325 grit surface can remove material more quickly when an edge is substantially worn, while a finer 1,000 to 1,200 grit surface can be used for additional refinement when appropriate. The lighter the required touch-up, the more useful it is to start with a fine abrasive.
Q
Which part of a router bit should you sharpen?
For common carbide-tipped router bits, light honing is normally performed on the flat face of the cutter behind the cutting edge. Avoid casually grinding the profiled outside surface because changing it can alter the bit’s diameter and cutting profile. The exact geometry varies by cutter design, so follow the bit manufacturer’s sharpening instructions when available.
Q
How many times can a router bit be sharpened?
There is no universal number because it depends on the bit design, carbide thickness, amount removed during each sharpening, and whether professional grinding restores the geometry. Light hand honing can be performed multiple times, but eventually the bit may become dimensionally unsuitable or require professional regrinding. Profile bits and dimension-critical cutters deserve particular attention because every sharpening can affect their finished dimensions.
Q
Why is my router bit still burning wood after sharpening?
Sharpening may not be the only variable. Check whether the bit is clean, whether every cutter was honed evenly, and whether the router speed, feed rate, and cutting depth are appropriate for the bit and material. A slow feed can increase heat, while excessive cutting depth can overload the bit. If the bit still performs poorly after those checks, inspect it for chips, incorrect geometry, bearing problems, or other damage.
Q
Should I sharpen a router bit or buy a new one?
Lightly dull but otherwise sound bits are good candidates for careful honing. Professional sharpening can make sense for higher-value or specialized bits when the geometry needs restoration. Replacement is often more practical when the carbide is badly chipped, the shank or body is damaged, the profile has become unsuitable for the job, or the cost and effort of sharpening approach the cost of a replacement.
✦ Wrapping Up
Conclusion
Router bit sharpening is most useful when treated as controlled maintenance rather than aggressive grinding. For a common carbide-tipped bit that is clean but beginning to dull, a fine diamond hone can refresh the existing edge with only a small amount of material removal. The key is to work on the correct flat surface, use light pressure, treat every cutter consistently, and stop as soon as the edge is restored.
More serious wear changes the decision. Major chips, damaged carbide, altered profiles, bent shanks, or dimension-critical cutters may require professional sharpening or replacement. If a bit does not improve after a conservative touch-up, investigate the bit’s condition and the router setup rather than simply grinding away more material.
💡 Key Takeaway
For your next router bit that starts cutting poorly, clean it first, inspect it under good light, then use a fine diamond hone for a few controlled passes on the correct flat cutter face. Treat every cutter equally and test the result on scrap before returning to the finished project.