Router burn marks usually mean the cutter is generating too much heat instead of removing wood efficiently. The most common causes are a dull or dirty bit, excessive RPM, feeding too slowly, pausing during the cut, taking too much material in one pass, or routing wood that is especially prone to burning.
For woodworkers in the United States, router burn marks are a common finishing problem when routing hardwoods such as cherry, hard maple, and other dense or resinous species. A dark brown or black streak along a routed edge is usually a sign of heat buildup at the cutting edge. The solution is not always simply to sand harder; first identify why the cutter overheated so the problem does not return on the next pass.
The most useful troubleshooting approach is to check the bit first, then examine RPM and feed rate, followed by cutting depth, grain direction, and your movement through corners. A sharp, clean bit that is operated within the manufacturer’s recommended speed range and kept moving smoothly will generally produce less heat than a dull, dirty cutter that lingers in the cut.
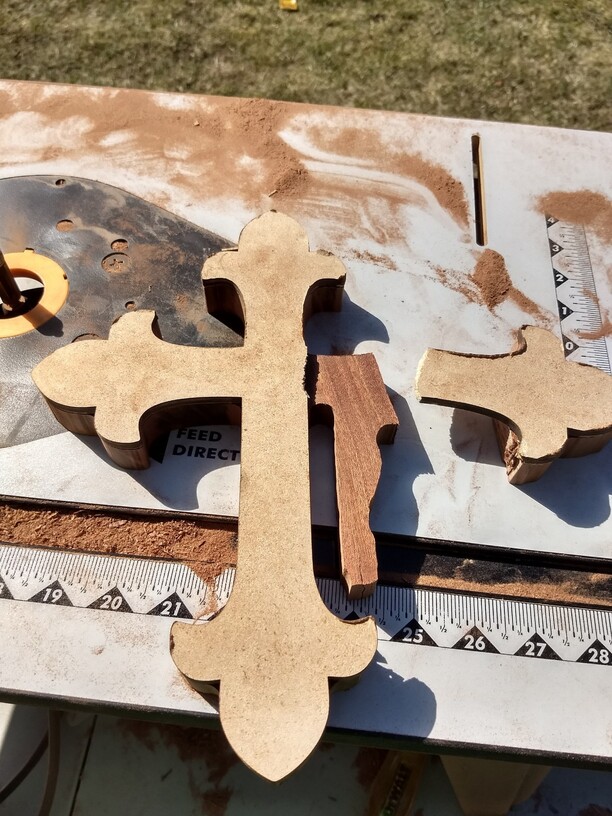
Source: community.glowforge.com
What Are Router Burn Marks?
Router burn marks are dark brown, black, or discolored areas left on wood after a router bit passes over the surface. They are usually caused by excessive heat at the cutting interface. Instead of producing clean chips, the cutter may spend too much time rubbing against the workpiece, allowing heat to build up in a small area.
The appearance can vary with the wood species, cutter geometry, bit condition, RPM, feed rate, and cutting direction. A short dark streak at the end of a routed edge may indicate that the operator slowed down or paused, while continuous discoloration along a profile can point toward a dull bit, unsuitable speed, or an overly heavy cut.
Source: woodweb.com
Light scorch
A shallow brown discoloration that may disappear with moderate sanding.
Dark burn
A deeper black or dark brown area that may require scraping, a corrective routing pass, or additional material removal.
Localized corner burn
A mark concentrated around a corner or transition, often associated with slowing or stopping while repositioning the router.
Why Does Wood Burn During Routing?
Routing creates heat through the cutting process, but a properly adjusted cutter removes chips efficiently. When the bit rubs more than it cuts, heat can accumulate at the cutter and workpiece. The problem becomes more noticeable when the router stays in one area for too long.
This explains why simply moving more slowly is not necessarily safer for the wood. A very slow feed can leave each cutting edge in contact with the material longer. The practical target is a controlled, continuous feed that produces a clean cut without chatter, excessive resistance, or hesitation.
Cutting
A sharp edge shears wood fibers and carries material away as chips.
Rubbing
A dull edge or very light chip load can increase friction and heat.
Heat buildup
Extended contact, high rim speed, poor chip evacuation, or pauses can concentrate heat in the workpiece.
The Most Common Causes of Router Burn Marks
Start with the simplest causes before changing several settings at once. A clean, sharp bit and a smooth feed are often enough to eliminate burning. If the problem remains, evaluate RPM, bit diameter, depth of cut, wood species, grain direction, and chip evacuation.
Source: static.wixstatic.com
Dull router bit
A worn cutting edge has to work harder and can rub rather than shear the wood cleanly. Replace or professionally sharpen a bit that has lost its edge.
Dirty or pitch-covered bit
Resin, pitch, and other buildup can interfere with clean cutting and increase friction. Clean the bit using a method approved for the cutter and finish.
RPM too high
Excessive rotational speed increases cutter rim speed and can increase heat, particularly with larger-diameter bits.
Feed rate too slow
Moving too slowly can keep the cutter in contact with the same area for too long and reduce the amount of material removed by each cutting edge.
Pausing during the cut
Stopping at a corner, changing body position, or hesitating around an inside curve can concentrate heat in one spot.
Cut too deep
Removing a large amount of material in one pass increases the load on the router bit and can make heat buildup more likely.
Burn-prone wood
Species such as cherry and hard maple can show scorch marks readily when the cutting conditions are not well matched to the material.
How Bit Diameter Changes the Problem
Router speed should be considered in relation to bit diameter, not just the number displayed on the router. A larger cutter has a higher rim speed at the same RPM because its cutting edge travels a greater distance with every revolution.
That is why a speed that works for a small straight bit may be inappropriate for a large raised-panel or profile bit. Follow the bit manufacturer’s maximum RPM guidance and use the router manufacturer’s recommendations as the operating boundary.
Small bits
They generally operate at higher RPM than large profile cutters, subject to the manufacturer’s specifications.
Large bits
They normally require reduced RPM because their cutting edges have greater rim speed at the same spindle speed.
Test cuts
Use scrap from the same material to evaluate the combination of bit, RPM, feed rate, and cutting depth before routing the finished workpiece.
How to Stop Router Burn Marks
The safest troubleshooting sequence is to change one variable at a time. Begin with the cutter, then adjust speed and feed, reduce the amount removed per pass, and finally examine grain direction and difficult transitions. Test every change on scrap before returning to the finished piece.
Do not increase feed speed without maintaining control of the router and workpiece. The goal is a steady feed that produces chips and a clean surface, not simply the fastest possible movement.
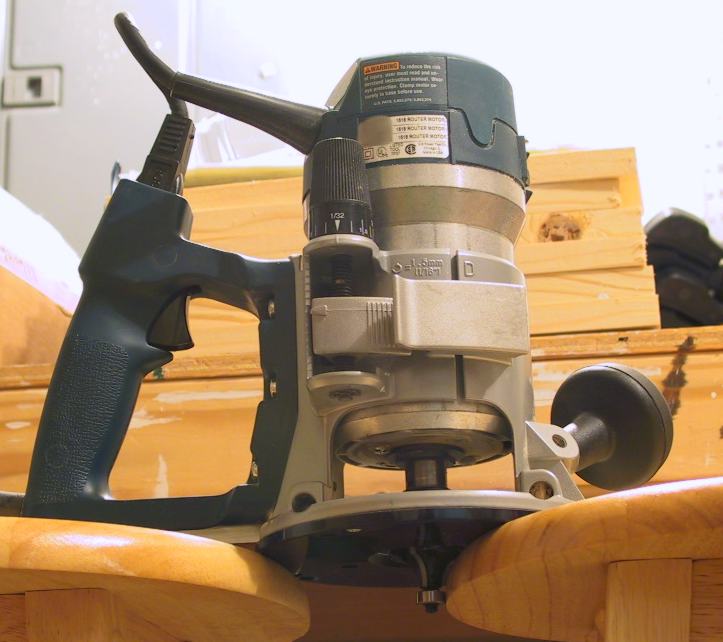
Source: upload.wikimedia.org
1. Inspect the bit
Turn off and unplug the router before inspecting or removing the bit. Look for dull edges, resin buildup, chipped carbide, or other damage.
2. Clean or replace the bit
A clean, sharp cutter should be the starting point for troubleshooting. Replace a damaged bit rather than trying to compensate for it with machine settings.
3. Check the RPM
Compare the bit diameter and router setting with the manufacturer’s recommendations. Reduce RPM when the selected cutter or material requires it.
4. Maintain a smooth feed
Keep the router or workpiece moving continuously through the cut. Avoid stopping in the material, especially around corners and transitions.
5. Reduce cutting depth
If the bit is removing substantial material, use multiple controlled passes rather than forcing the full profile in one pass.
6. Make a light finishing pass
A shallow final pass can remove remaining machine marks while placing less load on the cutter.
7. Recheck grain direction
Change the setup or cutting approach when grain direction causes tear-out or forces you to hesitate in a difficult section.
A Practical Troubleshooting Order
If a router suddenly starts leaving burn marks, do not immediately change every setting. Stop the machine, inspect the cutter, and determine whether the marks are continuous or concentrated in specific areas. This distinction can narrow the likely cause.
Continuous burning along much of the profile points toward conditions such as bit sharpness, RPM, feed rate, or cutting load. Burning that appears mainly at corners or transitions is more consistent with hesitation, difficult grain, or a change in feed movement.
Burning everywhere
Check bit condition, cleanliness, RPM, feed rate, and cutting depth first.
Burning only at corners
Look for pauses, slowdowns, difficult grain transitions, and awkward body positioning.
Burning only in certain wood
Test a lower speed and controlled feed on scrap while staying within the bit manufacturer’s limits.
Burning after several passes
Inspect the bit for resin buildup or dulling and check whether repeated passes are generating unnecessary heat.
What Good Results Look Like
A successful routing setup should produce a consistent surface with minimal discoloration, no obvious scorching, and a feed motion that feels controlled rather than forced. The cutter should remove material cleanly without excessive smoke, chattering, or repeated hesitation.
If a test cut still burns after the bit has been verified and the speed and feed have been adjusted, stop and reassess the bit geometry, material, cutting depth, and machine setup rather than simply pushing the router faster.
How to Remove Router Burn Marks
Light router burn marks can often be removed by sanding or scraping. The best method depends on the shape of the routed profile and how deeply the wood has been discolored. Avoid removing large amounts of material just to eliminate a shallow scorch mark.
For a curved profile, use a sanding block or sanding material that follows the existing contour. Aggressive flat sanding can change the shape of the profile and create a new problem.
Source: foromadera.com
Light marks
Start with controlled sanding and use progressively finer abrasive as the discoloration disappears.
Deep marks
A sharp scraper or a thin corrective routing pass may remove less material than trying to sand deeply into a shaped profile.
Grooves and concave profiles
Use a contoured sanding pad or appropriately shaped scraper so the original profile remains intact.
Burned end grain
End grain can hold discoloration more stubbornly and may require additional material removal.
When Sanding Is Enough
Sanding is usually appropriate when the mark is shallow and the surrounding profile does not need to retain a precise dimension. Work evenly rather than concentrating all pressure on the dark spot, because a depression or flattened edge can become more visible than the original burn.
For a shaped edge, preserve the contour as you progress through the abrasive grits. If the discoloration remains after reasonable sanding, consider whether scraping or a very light corrective cut will remove it more predictably.
When to Re-Rout the Profile
A dark or persistent burn can sometimes be removed efficiently by routing a fresh, thin layer from the affected profile. This approach works only when the workpiece has enough material available and the new cut will not change an important dimension.
Secure the workpiece properly, verify the router setup, and correct the original cause before making the new pass. Otherwise, the new pass can reproduce the same burn marks.
Router Speed and Feed Rate: Finding the Balance
RPM and feed rate work together. Lowering RPM can reduce rim speed, while increasing feed rate changes how much material each cutting edge removes during its contact with the workpiece. Either adjustment can affect the finish, so the correct combination depends on the bit, material, diameter, and machine.
There is no single RPM or feed rate that prevents burning on every router, bit, and species. Use the manufacturer’s limits as the starting boundary and make controlled test cuts. For example, a variable-speed router may allow you to reduce speed for a burn-prone hardwood, while a fixed-speed router may require a lighter pass and a faster, controlled feed.
Source: images.pexels.com
Too much RPM
Can increase rim speed, heat, vibration, and the likelihood of burning, especially with larger cutters.
Too little RPM
Can produce a rough or choppy cut and may not be appropriate for a particular bit design.
Too slow a feed
Can cause the cutter to spend too much time rubbing in one location.
Too fast a feed
Can overload the cutter, produce rough surfaces, increase tear-out, or make the router difficult to control.
Why Larger Bits Need More Attention
The outside edge of a large bit travels much farther per revolution than the edge of a small bit. As a result, using the same RPM for both cutters does not create the same cutting conditions. This is why manufacturer speed charts typically call for lower maximum speeds as bit diameter increases.
When working with a large profile cutter, make sure the router is rated for the bit and that the bit manufacturer’s maximum RPM is not exceeded. A large cutter should never be treated like a small straight bit simply because both fit the same collet.
Wood Species and Grain Direction Matter
Some woods show burning more readily than others. Cherry and hard maple are frequently identified as burn-prone species, and dense or resinous material can also require careful control of speed and feed. This does not mean a particular species will always burn; cutting conditions still determine the amount of heat generated.
Grain direction also changes how the cutter behaves. Routing against difficult grain can produce tear-out, which may tempt the operator to slow down or hesitate. Those slowdowns can contribute to localized burning. Plan the cut so the router remains stable and the feed can stay consistent.
Source: images.unsplash.com
Cherry
Can show router burns readily, particularly when the cutter pauses or the speed and feed are poorly matched.
Hard maple
Can also burn during routing and may benefit from careful speed, feed, and bit-condition control.
End grain
Can behave differently from long grain and may require extra attention around transitions.
Figured grain
Can change cutting behavior quickly, making test cuts and controlled passes especially useful.
Why Corners Burn So Easily
Corners are common burn locations because the operator may slow down to reposition the router, change direction, or maintain control. Inside curves can be particularly demanding because the cutting path changes rapidly.
A useful preparation method is to perform the motion without the router running. This dry run helps identify where your hands, body, clamps, cord, and workpiece position could force you to pause. Once the cutting path is familiar, the powered pass can be more continuous.
Common Mistakes That Make Burning Worse
The most common troubleshooting mistake is changing several settings at the same time. If you lower RPM, change feed rate, replace the bit, and alter cutting depth simultaneously, you may improve the cut without knowing which factor solved the problem. A controlled test makes future adjustments easier.
Another mistake is treating every burn as a sanding problem. Removing the discoloration without correcting the cause can leave the next edge burned again. Prevention is usually easier than repeatedly repairing the finished surface.
Source: woodweb.com
Using a dull bit
Do not compensate for a damaged cutter by changing technique alone.
Stopping inside the cut
Plan your movement before starting and reposition your body before entering difficult areas.
Running every bit at maximum speed
Maximum router RPM is not automatically the correct operating speed for every cutter.
Taking one heavy pass
Multiple controlled passes can reduce cutting load and make the final pass easier to manage.
Ignoring the bit manufacturer’s limits
Never exceed the stated maximum RPM or use a cutter in a machine setup that is not approved for that application.
Routing without a test cut
Scrap from the same board or material can reveal burning, tear-out, and dimensional issues before the finished piece is damaged.
When Burning Signals a Bigger Problem
Stop using the router if the bit is visibly damaged, the cutter vibrates abnormally, the collet cannot hold the bit securely, or the machine behaves differently from normal. A burn mark by itself is usually a cut-quality problem, but abnormal vibration, loose tooling, or damaged carbide creates a separate safety concern.
Disconnect power before inspecting the bit or making adjustments. Use appropriate eye and hearing protection, secure the workpiece, and follow the router and bit manufacturer’s operating instructions.
Frequently Asked Questions
Q
Why does my router bit burn wood even when it is sharp?
A sharp bit can still burn if the RPM is too high, the feed rate is too slow, the bit is too large for the selected speed, the cut is too deep, or the wood is particularly prone to burning. Pausing in one location can also create a localized burn.
Q
Should I increase or decrease router speed to stop burn marks?
Do not assume that one adjustment always works. If the bit is running too fast for its diameter or the material, reducing RPM can help. If the router is already within the appropriate speed range, maintaining a smooth feed and avoiding pauses may be more useful. Always stay within the bit and router manufacturer’s limits.
Q
Does feeding the router faster prevent burning?
A controlled increase in feed rate can reduce the time the cutter spends rubbing against the same area, which may reduce burning when the existing feed is too slow. However, feeding too aggressively can overload the bit, create tear-out, or reduce control. Aim for a smooth feed that produces a clean cut.
Q
How do I remove deep router burn marks?
For shallow marks, controlled sanding or scraping may be enough. For darker marks that extend into a routed profile, a light corrective routing pass can remove the damaged surface if the workpiece has sufficient material. Preserve the original dimensions and correct the cause of the burn before making the new cut.
Q
Why do cherry and maple burn so easily with a router?
Cherry and hard maple are commonly recognized as woods that can show routing burns readily. Their behavior does not mean burning is unavoidable. Sharp tooling, suitable RPM, controlled feed, light passes, and avoiding pauses can reduce the likelihood of scorching.
✦ Wrapping Up
Conclusion
Router burn marks are usually a symptom of excessive heat at the cutting surface. The most useful response is to identify whether the heat came from a dull or dirty bit, excessive RPM, an overly slow feed, a heavy pass, a pause in the cut, difficult grain, or a combination of these factors.
Start with a sharp, clean bit and verify the appropriate operating range for the cutter. Then make a test cut and adjust one variable at a time. Keep the router moving smoothly, use lighter passes when necessary, and give burn-prone woods such as cherry and hard maple extra attention.
If a burn has already appeared, repair it according to its depth and location. Light scorch marks can often be sanded or scraped, while deeper marks may require removing a thin layer with a controlled corrective pass.
💡 Key Takeaway
Before routing the finished workpiece, make a test cut in matching scrap with a clean, sharp bit. Verify the manufacturer’s RPM limit, use a controlled feed without pauses, and make lighter passes when the cutter is removing substantial material.