The most reliable way to prevent circular saw tearout is to use a sharp blade suited to the material, support the workpiece continuously, set the blade only slightly deeper than the material, keep the saw moving steadily against a guide, and orient the finished face appropriately for the saw.
For homeowners, DIYers, cabinet builders, and contractors working in the United States, circular saw tearout is most noticeable when cutting plywood, veneered panels, melamine-faced sheet goods, and other materials with fragile surface layers. A rough edge is usually not caused by one mistake alone. Blade geometry, tooth count, cutting depth, workpiece support, feed control, and the direction in which the teeth leave the material all affect the result.
The good news is that most tearout can be reduced substantially without buying a different saw. Start with the blade and the material, then control the cut with proper support and a straight guide. For particularly visible plywood edges, add a scored cut line, painter’s tape where appropriate, or a zero-clearance guide or auxiliary base. These methods work because they give the fibers more support as the teeth pass through them.
Source: off.co.jp
What Causes Circular Saw Tearout?
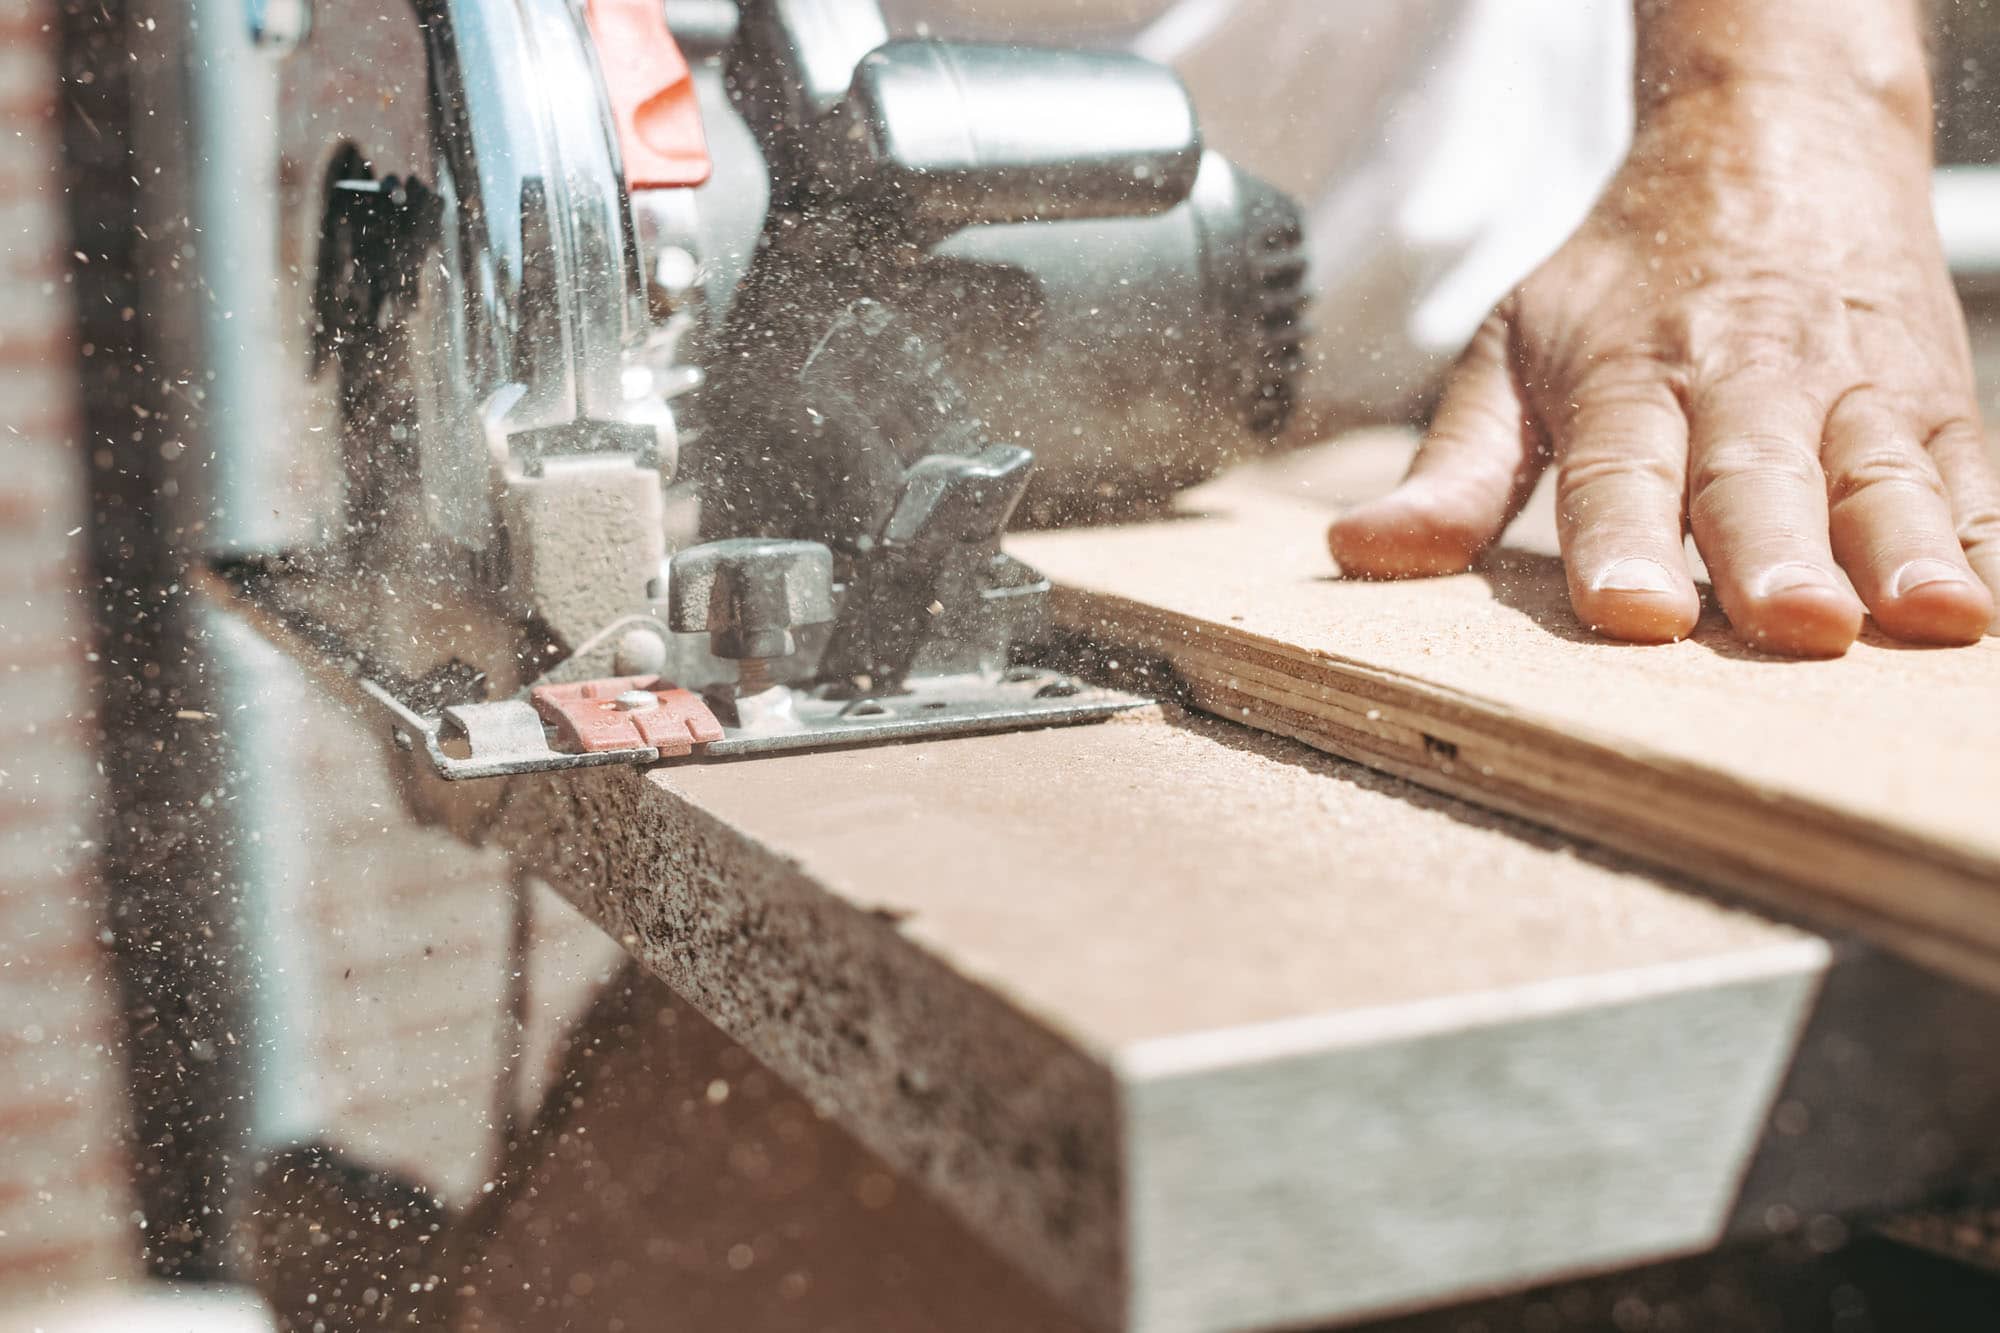
Circular saw tearout happens when the blade pulls, lifts, or breaks wood fibers instead of leaving a cleanly supported kerf. It is especially common in plywood because the outer veneer can be thin and fragile while the layers underneath have different grain directions.
A handheld circular saw normally cuts upward through the material: the teeth enter from the underside and leave through the upper face. The exit side therefore deserves particular attention because unsupported fibers can break away as the teeth emerge. When the visible face of a plywood panel matters, placing that face downward is often an effective first step.
Tearout is also affected by blade design. A coarse construction blade removes material quickly but is intended for speed and general carpentry rather than furniture-quality edges. A finer blade with more teeth and geometry suited to plywood or finishing work makes smaller cuts and generally leaves a cleaner edge.
Workpiece movement creates another problem. If a sheet bows away from the support surface, the fibers around the kerf can flex before the blade reaches them. If the cutoff drops while the blade is still engaged, the unsupported edge can splinter. A stable cutting surface addresses both problems.
Source: klium.be
Blade geometry
Tooth shape, tooth count, hook angle, kerf, and sharpness influence how aggressively the blade removes material and how well it supports the cut edge.
Material structure
Thin veneer, cross-grain fibers, laminate surfaces, and brittle sheet goods are more sensitive to unsupported cutting than ordinary framing lumber.
Poor support
Sagging or moving material allows fibers to flex and can also pinch the blade, creating both tearout and a potential kickback hazard.
Excessive blade depth
A blade set much deeper than necessary exposes more teeth below the workpiece and can make the cut less controlled.
Tearout Versus a Rough Cut
Tearout is different from the normal roughness of a construction cut. A framing blade may leave a visibly rough edge even when it is working correctly. Tearout is the uncontrolled breaking or splintering of fibers along or beyond the intended kerf. If the project requires a cabinet, furniture, trim, or exposed plywood edge, blade selection and fiber support become much more important.
Rough but controlled
The blade follows the intended line but leaves a coarse edge because its tooth geometry is designed for fast material removal.
Tearout
Fibers break away from the intended cut line, producing chips, splinters, or sections of missing veneer.
Choose the Right Circular Saw Blade
Blade selection is one of the fastest ways to improve cut quality. For plywood and finished sheet goods, use a sharp carbide-tipped blade specifically intended for plywood, finish work, or the material being cut. Coarse framing blades are useful for construction work, but they are usually a poor choice when the edge must be clean.
There is no single tooth count that works perfectly for every circular saw and every material. On common 7 1/4-inch saws, a blade in the roughly 40- to 60-tooth range can be a useful starting point for cleaner plywood cuts, while specialized finishing blades may use still more teeth. Always compare the blade’s intended application, diameter, arbor size, maximum rated RPM, and the saw manufacturer’s requirements.
More teeth are not automatically better for every job. A very fine blade can remove material more slowly and may not be appropriate for thick stock, wet lumber, or demanding rip cuts. The goal is to match the blade to the material and the type of cut rather than simply choosing the highest tooth count available.
Source: megadepot.com
Plywood and veneer
Choose a fine-tooth blade labeled for plywood, finishing, or similar sheet goods when edge quality is important.
Framing lumber
A coarse construction blade is normally appropriate when speed matters more than a furniture-quality edge.
Melamine and laminated panels
Use a blade specifically rated for laminate or melamine when possible because the hard surface layer can chip easily.
Dull or damaged blade
Replace or properly service a blade that is dull, damaged, cracked, badly set, or contaminated with buildup. Do not try to compensate for a defective blade with technique alone.
Why Tooth Count Matters
Tooth count changes how many teeth engage the material during the cut and how aggressively each tooth removes material. A fine-tooth blade generally takes smaller bites and can reduce splintering in thin veneer. However, tooth count must be considered together with tooth geometry, blade quality, material thickness, saw power, and the type of cut.
Do not use tooth count alone
Two blades with the same number of teeth can produce different results because their tooth shape, hook angle, carbide geometry, and kerf may differ.
Set the Blade Depth Correctly
Set the blade so it extends only slightly below the bottom of the workpiece. For many straight cuts through sheet goods, roughly 1/8 to 1/4 inch of additional blade exposure is a practical starting point, but the exact setting depends on the saw, material thickness, cutting setup, and manufacturer instructions.
The reason is simple: unnecessary blade exposure increases the amount of blade below the workpiece without improving the cut. A shallow, properly adjusted cut keeps the operation more controlled and reduces the amount of exposed tooth area.
Always disconnect power before adjusting the blade depth. After placing the saw on the workpiece or guide rail, check the setting again because an accessory or guide can change the relationship between the saw base and the material.
Source: inserv.lv
Measure from the actual cutting setup
Set the depth with the saw resting in the same position it will use during the cut, including any compatible guide rail or auxiliary base.
Avoid excessive exposure
Do not set the blade much deeper than the material requires simply because the saw can reach that depth.
Check bevel cuts separately
A bevel changes the blade’s relationship to the material, so verify adequate cutting depth after changing the bevel angle.
Why Blade Depth Affects Tearout and Safety
Correct blade depth is primarily a control and safety issue, but it can also influence edge quality. A blade that is excessively exposed can make the cut more aggressive and increases the amount of rotating blade below the panel. Correct depth should therefore be part of the tearout-prevention setup rather than an afterthought.
Before adjustment
Disconnect the saw from its power source and wait for the blade to stop completely.
After adjustment
Confirm that the blade guard moves freely and that the blade remains compatible with the saw and cutting setup.
Support the Workpiece and Control the Cut
Continuous support is one of the most useful ways to prevent splintering on sheet goods. Place the plywood on a stable sacrificial surface such as rigid foam board or properly arranged scrap material so the sheet remains supported throughout the cut. The support should not interfere with the blade or create a hidden hazard from nails, screws, or other objects.
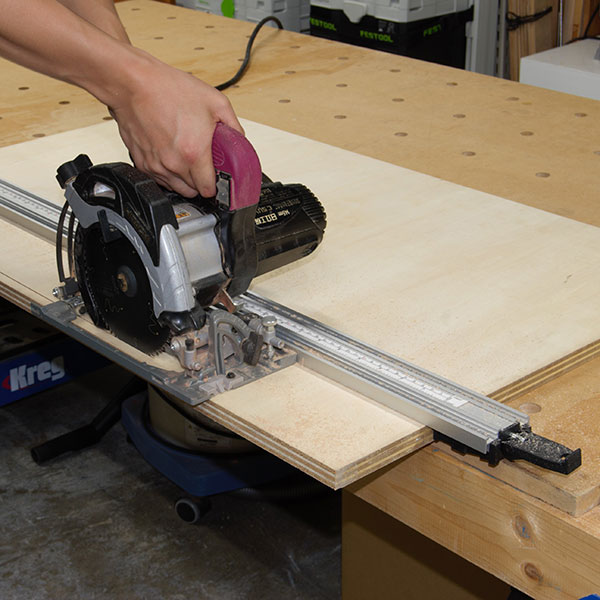
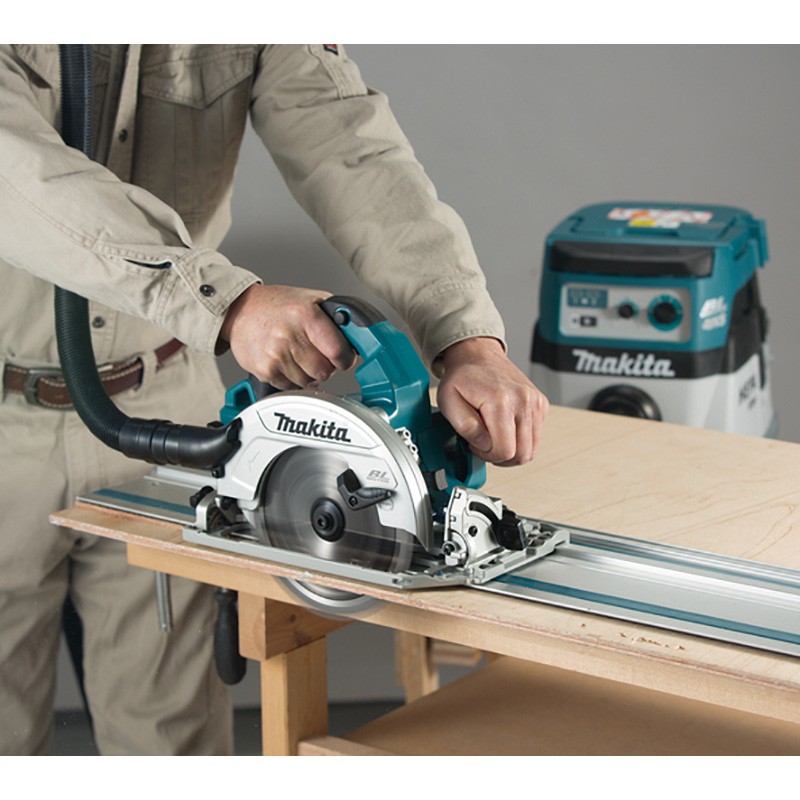
For long cuts, a guide rail or a properly clamped straightedge keeps the saw moving along the intended path. The guide should be secured so it cannot shift while cutting. When using a conventional straightedge, account for the distance between the saw blade and the edge of the saw’s shoe.
Feed the saw at a steady rate that allows the blade to maintain its normal operating sound and speed. Do not force the saw through the material, and do not stop halfway through a cut unless there is a specific reason to do so safely. Excessive pressure can cause the saw to wander, while an unnecessarily slow feed can create heat and burning with some blade and material combinations.
Source: diyhomedepot.vn
Support both sides
Keep the keeper section and cutoff section supported so the material does not drop or twist before the blade completes the cut.
Clamp the guide
A guide that moves even slightly can force the saw sideways and ruin an otherwise clean edge.
Keep the saw moving naturally
Apply steady forward pressure without forcing the base sideways against the guide.
Protect the cut surface
If the finished face is important, orient it appropriately and add scoring, tape, or zero-clearance support when needed.
Use Painter’s Tape or Score the Cut Line
Low-tack painter’s tape placed over the cut line can help hold fragile surface fibers together during some plywood cuts. A more direct approach is to score the finished surface along the layout line with a sharp utility knife before sawing. Scoring severs the surface fibers at the boundary so the blade is less likely to pull them beyond the intended line.
Test the tape or scoring method on an offcut first. Tape performance varies with the material and adhesive, and excessive pressure from a knife can damage a veneer or finish.
Tape
Apply the tape firmly over the intended cut area, mark the cut accurately, and remove the tape carefully after cutting.
Scoring
Use a straightedge and make a controlled shallow score exactly on the intended line before the main cut.
Use Zero-Clearance Support for High-Quality Edges
A zero-clearance guide or auxiliary base supports the material fibers immediately beside the blade. Instead of leaving a relatively wide opening around the blade, the support is fitted closely around the cutting path. This can significantly reduce fiber movement and is particularly useful when working with thin veneer or other delicate sheet goods.
A practical version for a compatible circular saw is an auxiliary hardboard or similar thin subplate attached to the saw shoe, followed by a controlled cut through the subplate to create an opening matched to that specific saw and blade setup. The exact construction must preserve the saw’s normal operation and must not compromise the blade guard.
A zero-clearance base is not a universal accessory. The modified base can change guard clearance, saw depth, bevel range, or other operating characteristics. If the guard does not function correctly with the modification, remove the accessory and use another tearout-control method.
Source: abild-byg.dk
Best use
Use zero-clearance support when edge quality is especially important and ordinary blade selection and workpiece support are not sufficient.
Fit matters
The opening must match the specific saw, blade, and cutting configuration rather than being copied from another tool.
Guard function comes first
Never use a modification that prevents the blade guard from operating as intended.
When a Guide Rail Is Better Than a Straightedge
A purpose-built guide rail can make long sheet-goods cuts easier because the saw follows a controlled reference surface. Many guide systems also include an edge or strip positioned close to the blade, which can provide additional support at the cut. A clamped straightedge remains a practical alternative when occasional cuts do not justify a dedicated rail.
Guide rail
Useful for repeated or long straight cuts where alignment and consistent control matter.
Straightedge
Useful for occasional cuts when you can accurately measure the saw’s offset from the guide.
Frequently Asked Questions
Q
Which side of plywood should face up when using a circular saw?
With a typical handheld circular saw, the blade enters from the underside and exits through the upper face. If the appearance of one face matters most, placing that finished face down generally keeps the more visible surface on the blade-entry side. Check the behavior of your particular saw and blade before making an important finished cut.
Q
What blade is best for preventing circular saw tearout?
Use a sharp carbide-tipped blade designed for plywood, finishing, or the specific sheet material. For a common 7 1/4-inch saw, a fine-tooth blade around 40 to 60 teeth can be a useful starting point for cleaner plywood cuts, while specialized blades may use more teeth. The blade’s tooth geometry and intended application matter as much as the tooth count.
Q
Does painter’s tape really prevent plywood tearout?
Painter’s tape can reduce splintering by helping hold fragile surface fibers together, but it is not guaranteed to eliminate tearout. Results depend on the plywood, veneer, adhesive, blade, and cutting direction. For the cleanest results, combine tape with a suitable sharp blade, solid support, and controlled cutting.
Q
Why does my circular saw still tear out with a new blade?
Check the workpiece support, blade depth, cutting direction, feed control, and the blade’s suitability for the material. A new blade can still chip plywood if the sheet is unsupported, the visible face is positioned poorly, the blade is too coarse for the finish requirement, or the cutoff drops during the final part of the cut.
Q
Can I prevent tearout by cutting more slowly?
Not necessarily. A controlled feed rate is better than either forcing the saw or moving so slowly that the blade overheats or burns the material. If tearout persists, first correct blade selection and workpiece support. Slowing down alone does not compensate for an unsuitable blade or unsupported fibers.
Q
Is a zero-clearance base safe on a circular saw?
It can be useful when properly designed for the specific saw, but it requires caution because an auxiliary base can affect the blade guard and cutting geometry. Use only a setup that preserves normal guard operation and follows the saw manufacturer’s instructions. If a modification interferes with a safety guard, do not use it.
✦ Wrapping Up
Conclusion
Circular saw tearout prevention is mostly about controlling how the blade meets and leaves the material. Start with a sharp blade suited to the job, orient the workpiece correctly, support the sheet continuously, set the blade to an appropriate depth, and guide the saw steadily. For fragile plywood and visible edges, scoring, painter’s tape, or a properly designed zero-clearance support can provide another layer of control.
Do not sacrifice safety to improve the appearance of an edge. Keep hands out of the cutting path, use the saw’s guards as designed, inspect the blade before cutting, secure the workpiece, and keep the saw within its rated operating requirements. If the cut still splinters, troubleshoot the setup systematically rather than simply applying more pressure or changing several variables at once.
💡 Key Takeaway
For your next plywood cut, use a sharp fine-tooth blade, place the finished face appropriately, support the entire sheet, set the blade only slightly deeper than the material, clamp a guide, and make a steady cut. Test the setup on an offcut before cutting the final panel.