For most through-cuts, set a circular saw so the blade extends only slightly below the workpiece, generally no more than about one tooth or roughly 1/8 to 1/4 inch below the material. Maximum cutting depth depends on the saw, blade diameter, and bevel angle.
For homeowners, DIYers, and contractors in the United States, circular saw cutting depth is usually measured in inches and is one of the first settings to check before cutting lumber, plywood, or sheet goods. A common 7-1/4-inch circular saw may have a maximum straight-cut capacity around 2-1/2 inches, but that does not mean the blade should always be set that deep. Maximum capacity and proper operating depth are two different measurements.
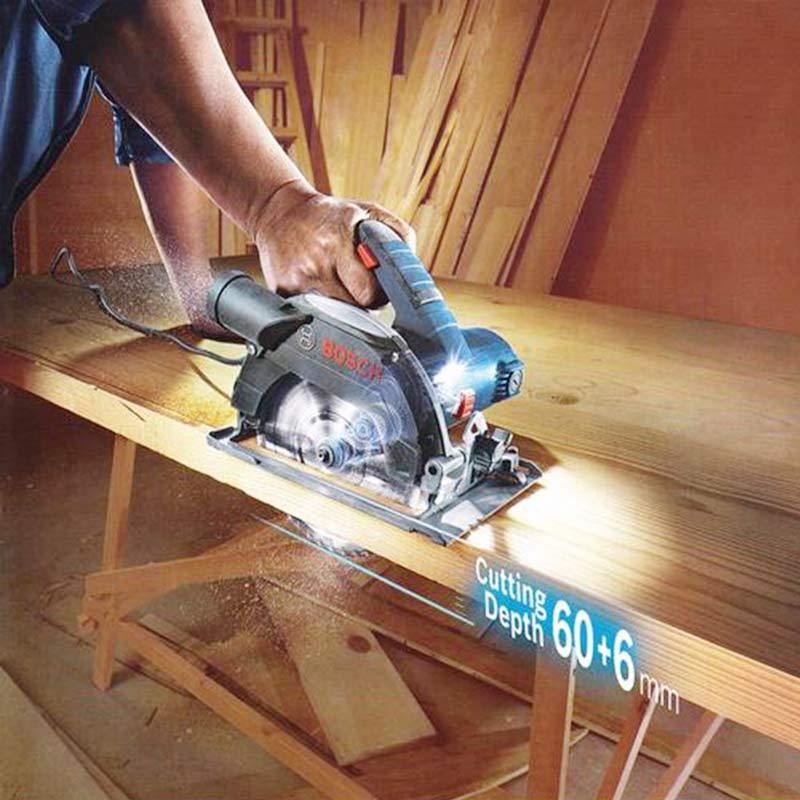
The correct setting is normally based on the thickness of the material and the type of cut. For a standard through-cut, the blade should project only slightly below the workpiece. Too little depth can prevent the blade from completing the cut, while excessive blade exposure can increase the amount of exposed tooth area and may increase kickback risk. Bevel cuts also reduce available cutting depth because the blade approaches the material at an angle.
This guide explains how cutting depth is determined, how to calculate whether a saw can cut a particular board, how to adjust the depth, why 45-degree cuts are shallower, and what to check when a circular saw cannot cut through the material. Always follow the operating instructions for the specific saw and blade you are using.
Source: cotebrico.fr
What Is Circular Saw Cutting Depth?
Circular saw cutting depth is the maximum distance the saw blade can extend below the saw’s base or shoe and therefore the maximum thickness of material the tool can cut in a single pass under a stated cutting angle. Manufacturers normally publish cutting capacity at a specific angle, most commonly 90 degrees.
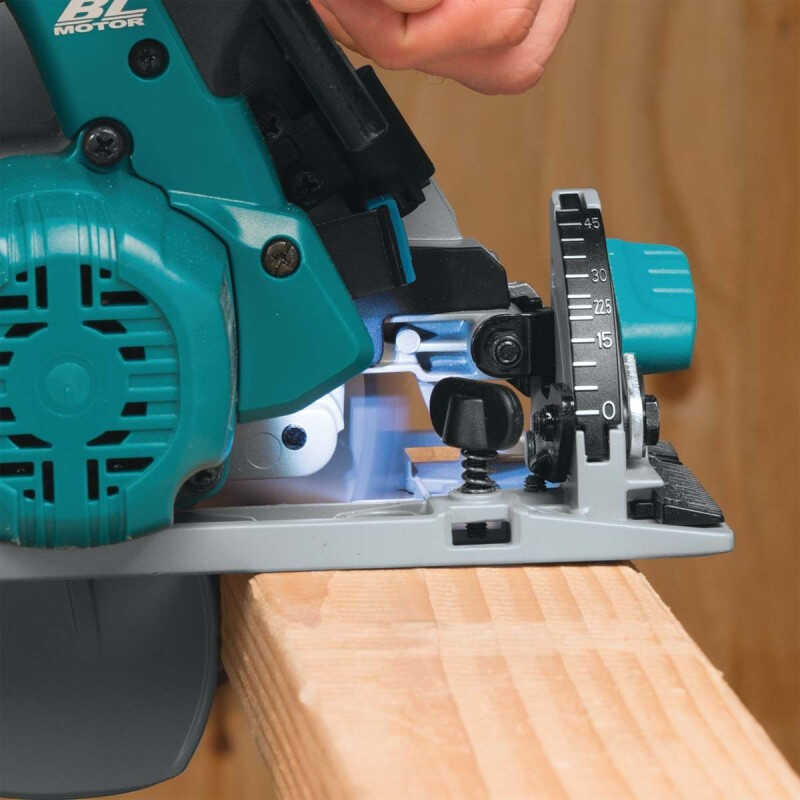
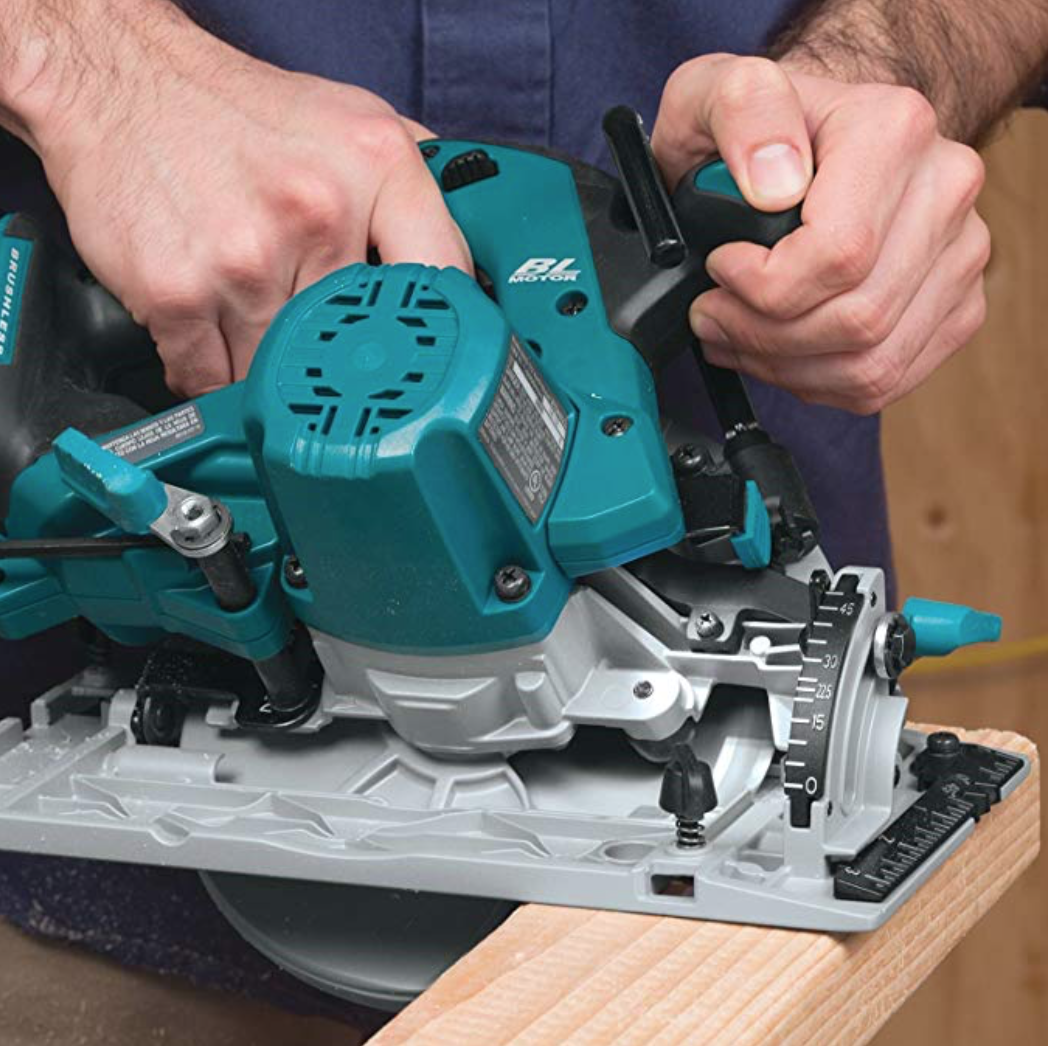
The depth scale on a circular saw is usually connected to an adjustable mechanism that moves the shoe relative to the blade. Raising or lowering the shoe changes how much of the blade is exposed below the workpiece. The actual cut depth should be checked against the material rather than assuming that the maximum setting is appropriate.
Cutting depth should also be distinguished from blade diameter. A 7-1/4-inch blade refers to the blade’s overall diameter, not to a 7-1/4-inch cutting depth. Only part of that diameter can project below the shoe, and the saw’s housing, arbor position, shoe design, and adjustment range determine the actual capacity.
Source: my.kresstools.com
Maximum cutting depth
The greatest material thickness a particular saw can cut at a specified angle and configuration.
Set cutting depth
The blade exposure selected for the actual job. It should normally be only slightly greater than the workpiece thickness for a through-cut.
Bevel cutting depth
The available cutting capacity when the saw is tilted away from 90 degrees. It is normally lower than the straight-cut capacity.
Why Maximum Depth and Working Depth Are Different
A saw’s maximum capacity tells you whether the tool can physically handle a particular thickness. It does not tell you where to set the depth adjustment for every cut. For example, if a board is 1-1/2 inches thick and the saw can cut more than 2-1/2 inches at 90 degrees, setting the blade to its maximum depth would expose considerably more blade than necessary.
A shallower setting keeps less of the blade exposed below the workpiece. Manufacturer manuals commonly recommend limiting blade projection below the material to about one tooth or less than a full tooth, depending on the model.
Use capacity as a limit
Treat maximum cutting depth as the upper capability of the tool, not the default depth setting.
Set depth for the material
Adjust the blade to suit the thickness of the workpiece and the specific cut.
How Deep Can a Circular Saw Cut?
There is no single cutting depth that applies to every circular saw. Blade diameter and saw construction create different capacity ranges. In the U.S. market, 7-1/4-inch circular saws are common for framing and general construction, while 6-1/2-inch models are common for lighter work and cordless applications. Larger saws can cut substantially thicker material.
As a general reference, many 7-1/4-inch circular saws provide roughly 2-1/2 to 2-5/8 inches of maximum cutting capacity at 90 degrees. Some models differ, so the specification for the exact saw should always take precedence. At 45 degrees, the available capacity is commonly closer to about 2 inches, although the exact figure varies by model.
Larger saws can provide greater capacity. For example, some 10-1/4-inch circular saws are designed to cut 4x material in a single pass, with published 90-degree capacities approaching 3-13/16 inches. Compact saws may have capacities around 1 to 1-1/2 inches. These figures demonstrate why blade diameter alone should not be used to predict the exact depth of a particular tool.
Source: matixlumber.com
6-1/2-inch circular saw
Often provides a maximum 90-degree capacity around 2-1/8 inches, depending on the model.
7-1/4-inch circular saw
Many common models provide roughly 2-1/2 to 2-5/8 inches of maximum depth at 90 degrees.
10-1/4-inch circular saw
Designed for deeper cuts and may provide roughly 3-13/16 inches of capacity at 90 degrees on suitable models.
Compact circular saw
Smaller blades provide shallower capacity but can be useful for plywood, trim, flooring, and other thinner materials.
Can a 7-1/4-Inch Circular Saw Cut a 2×4?
Yes. A standard U.S. 2×4 has an actual thickness of about 1-1/2 inches, so a typical 7-1/4-inch circular saw has enough 90-degree cutting capacity to pass through it in one cut. Set the blade for the actual 1-1/2-inch thickness rather than using the saw’s maximum depth.
The same principle applies to common framing lumber such as 2×6 and 2×8 boards. Check the actual material thickness and compare it with the saw’s published cutting capacity. A board may fit within the saw’s maximum straight-cut capacity but still require a different approach if the cut is made at an angle.
Measure actual thickness
Nominal lumber dimensions do not equal the finished dimensions. Use the actual thickness when setting blade depth.
Check the saw specification
Confirm the manufacturer’s maximum capacity at the angle you intend to use.
How to Set Circular Saw Cutting Depth
Set the blade depth before starting the cut and verify the setting with the saw disconnected from power. The exact adjustment mechanism varies between models, but the basic process is similar for most handheld circular saws.
For a standard through-cut, place the saw shoe against the edge of the workpiece and adjust the blade so that only a small amount of tooth projects below the material. Many manufacturers specify no more than one tooth or about 1/4 inch below the workpiece. If the saw’s manual gives a different instruction, follow that specific instruction.
Source: cdiscount.com
1. Disconnect the saw
Unplug a corded saw or remove the battery pack from a cordless saw before adjusting blade depth.
2. Identify the material thickness
Measure the actual thickness of the workpiece instead of relying on nominal dimensions.
3. Release the depth adjustment
Loosen the depth lever, knob, or other adjustment mechanism according to the saw’s manual.
4. Position the shoe
Hold the shoe flat against the workpiece or align it with the saw’s depth-setting procedure.
5. Set the blade exposure
Raise or lower the saw until the blade extends only slightly below the workpiece.
6. Lock the adjustment
Tighten the depth lever or knob securely so the setting cannot move during the cut.
7. Verify before powering on
Check that the blade guard operates freely, the blade is correctly installed, and the workpiece is properly supported.
What Does One Tooth Below the Material Mean?
The one-tooth guideline means that when the saw shoe rests on the material, the bottom of the blade should extend only enough for a tooth to project beyond the underside. The exact appearance depends on blade geometry, tooth design, and the saw itself.
This setting is intended to provide enough blade engagement to complete a through-cut without exposing an unnecessarily large portion of the blade. Some manuals use a maximum projection such as 1/4 inch, while others describe the setting as less than a full tooth.
Too shallow
The blade may fail to completely separate the material or may require an awkward second pass.
Appropriately shallow
The blade clears the material with limited exposure below the workpiece.
Too deep
More blade is exposed than necessary, which can increase the consequences of accidental contact and may contribute to rougher or less controlled cuts.
How Bevel Angle Changes Cutting Depth
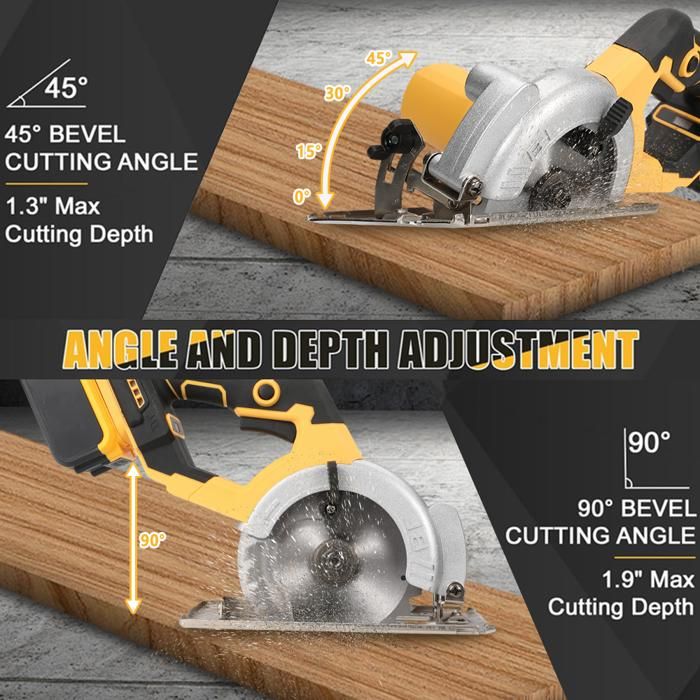
Tilting a circular saw for a bevel cut reduces its effective cutting depth. At 90 degrees, the blade cuts perpendicular to the surface. At 45 degrees, the blade travels through the material at an angle, so a larger path through the material is required and less material thickness can be cut compared with the same saw at 90 degrees.
The reduction is not identical across all saws. The geometry of the saw, blade diameter, shoe design, and maximum bevel range all affect the published capacity. Always use the cutting-capacity specification for the exact bevel angle when planning a deep angled cut.
For example, a saw that can cut approximately 2-1/2 inches at 90 degrees may have a 45-degree capacity near 1-3/4 to 2 inches. The exact value should be taken from the manufacturer’s specifications rather than estimated from the 90-degree rating.
Source: static-src.com
90-degree cut
Usually provides the greatest cutting depth because the blade is perpendicular to the material.
45-degree cut
Provides less maximum thickness capacity because the blade is tilted through the workpiece.
Other bevel angles
Intermediate angles can have different capacities, so consult the saw’s depth scale or manual for the required setting.
Why You Should Not Estimate Bevel Capacity From the 90-Degree Number
The maximum 90-degree cutting depth cannot be treated as the maximum depth at every angle. If a project requires a deep bevel cut, check the manufacturer’s specification for that angle and perform a test cut on scrap material when appropriate.
A bevel adjustment also changes how the shoe contacts the material. Make sure the shoe is fully supported and the bevel mechanism is locked before beginning the cut.
Check the angle
Confirm the actual bevel setting before judging whether the saw has enough capacity.
Check the capacity
Use the manufacturer’s published capacity for that angle instead of assuming the 90-degree rating applies.
What Determines a Circular Saw’s Maximum Cutting Depth?
Blade diameter is one of the biggest factors, but it is not the only one. The arbor location, shoe design, blade guard, depth-adjustment range, and overall saw geometry determine how much of the blade can project below the base.
A larger blade generally provides more potential cutting capacity because its radius is greater. However, the actual specification belongs to the complete saw rather than the blade alone. Installing a blade that is not approved for the tool can create compatibility and safety problems.
Blade kerf and tooth design can also affect cutting performance, but they should not be confused with maximum depth. A thin-kerf blade may remove less material, while a blade with a different tooth configuration may be better suited to ripping, crosscutting, plywood, laminate, or another application. Neither feature automatically changes the saw’s mechanical maximum depth.
Source: acmetools.com
Blade diameter
Larger blade diameters generally allow greater maximum cutting depth.
Saw geometry
The relationship between the blade, arbor, shoe, and housing determines the usable depth range.
Bevel angle
Increasing the bevel angle normally decreases available cutting capacity.
Depth adjustment range
The adjustment mechanism determines how far the shoe can move relative to the blade.
Blade compatibility
The replacement blade must match the saw’s permitted diameter, arbor, and other manufacturer requirements.
Blade Diameter Versus Cutting Depth
Blade diameter and cutting depth describe different things. A 7-1/4-inch blade is 7-1/4 inches across, while a saw using that blade may have a maximum 90-degree cutting depth of roughly 2-1/2 inches. The difference exists because the saw’s shoe and arbor position limit how much of the circular blade can extend beneath the workpiece.
This distinction is useful when replacing a blade. Never select a larger blade simply because you want more depth. The saw should be used only with the blade diameter and specifications approved by its manufacturer.
Blade size is not cut depth
The blade diameter identifies the blade’s size, while cutting depth describes how thick a workpiece the saw can cut.
Use approved blade sizes
Follow the saw manual for blade diameter, arbor dimensions, blade type, and maximum rated speed.
How to Choose the Right Cutting Depth for Common Materials
The correct depth depends on the material thickness and the type of cut. For ordinary through-cuts in plywood, dimensional lumber, and sheet goods, set the blade slightly deeper than the material rather than automatically using the saw’s maximum setting.
For a partial-depth cut, such as a shallow groove or controlled notch, do not use the normal through-cut setting. Measure and mark the required depth, then follow the saw manufacturer’s instructions for making that type of cut. A partial-depth operation may require additional control and a different setup from a standard crosscut or rip cut.
Source: cotebrico.fr
1/2-inch plywood
Set the blade only slightly below the plywood for a through-cut, while considering what is underneath the sheet.
3/4-inch plywood
A small amount of tooth exposure below the sheet is generally sufficient for a through-cut.
2×4 lumber
Because a typical 2×4 is about 1-1/2 inches thick, a common 7-1/4-inch saw can normally cut it in one 90-degree pass when properly set.
2×6 lumber
A typical 2×6 is about 1-1/2 inches thick, so its thickness is similar to a 2×4 even though the board is wider.
Thicker beams
If the material exceeds the saw’s published capacity, use a different cutting method or a larger saw designed for the required thickness rather than forcing the circular saw beyond its rating.
What If the Material Is Too Thick for One Pass?
Do not force a circular saw through material that exceeds its rated capacity. Depending on the project and material, the appropriate solution may be a larger circular saw, a different saw type, or a planned multi-step cutting method that is specifically supported by the tool and safe for the application.
For structural lumber or other critical construction components, the cutting method should also account for the required final dimensions, support, and the possibility of hidden fasteners or utilities. If the work involves a building component and you are unsure about the appropriate method, consult the applicable project specifications or a qualified professional.
Do not force the tool
Excessive pressure can reduce control and may contribute to binding or kickback.
Use a suitable tool
Choose equipment whose published cutting capacity is adequate for the material and required cut.
Frequently Asked Questions
Q
How deep should a circular saw blade be set?
For most through-cuts, set the blade only slightly deeper than the material. Many circular saw manuals recommend that no more than one blade tooth or about 1/4 inch of blade extends below the workpiece. Use the specific instruction in your saw’s manual if it differs.
Q
How deep can a 7-1/4-inch circular saw cut?
Many 7-1/4-inch circular saws have a maximum cutting depth of roughly 2-1/2 to 2-5/8 inches at 90 degrees. The exact capacity varies by model, and the capacity is lower at bevel angles such as 45 degrees.
Q
Can a circular saw cut a 2×4 in one pass?
Yes. A standard U.S. 2×4 is approximately 1-1/2 inches thick, which is within the 90-degree capacity of most full-size 7-1/4-inch circular saws. Set the blade to the actual thickness of the lumber plus only a small amount of additional exposure.
Q
Does a 45-degree cut reduce circular saw cutting depth?
Yes. A bevel cut normally has less cutting capacity than a 90-degree cut because the blade enters the material at an angle. Check the saw’s published cutting capacity for the specific bevel angle before starting a deep angled cut.
Q
Why is my circular saw not cutting all the way through?
First check that the depth adjustment is set correctly and locked. Then compare the material thickness with the saw’s published cutting capacity at the selected angle. Also verify that the correct blade diameter is installed and that the blade is properly seated. If the saw reaches its rated maximum depth but still cannot complete the cut, the material may simply be too thick for that tool or angle.
Q
Is deeper blade exposure better for a circular saw?
Not for normal through-cuts. More blade exposure is generally unnecessary when a shallow setting will complete the cut. Excessive exposure can increase the amount of blade below the workpiece and may increase kickback risk and the consequences of accidental contact. Follow the depth-setting guidance for your specific saw.
✦ Wrapping Up
Conclusion
Circular saw cutting depth is controlled by the relationship between the blade, saw shoe, material thickness, and cutting angle. The maximum capacity printed in a saw’s specifications tells you the greatest thickness the tool can handle under stated conditions, but it is not the correct everyday depth setting.
For common U.S. woodworking and construction cuts, set the blade only slightly below the workpiece so the cut can pass completely through without exposing unnecessary blade. A typical 7-1/4-inch circular saw can handle common framing lumber such as a 2×4 in one 90-degree pass, while thicker materials may require a larger saw or another cutting method. Bevel cuts have lower capacity, so always check the manufacturer’s specifications for the selected angle.
Before cutting, disconnect power while adjusting depth, secure the workpiece, lock the depth and bevel controls, keep your hands clear of the blade path, and allow the blade to reach full speed before entering the material. If the required cut exceeds the saw’s rated capacity, change the tool or cutting method rather than forcing the saw.
💡 Key Takeaway
Measure the actual material thickness, set the circular saw blade only slightly deeper than the workpiece, verify the saw’s rated capacity for the cutting angle, lock the adjustment securely, and make a controlled test cut when accuracy matters.