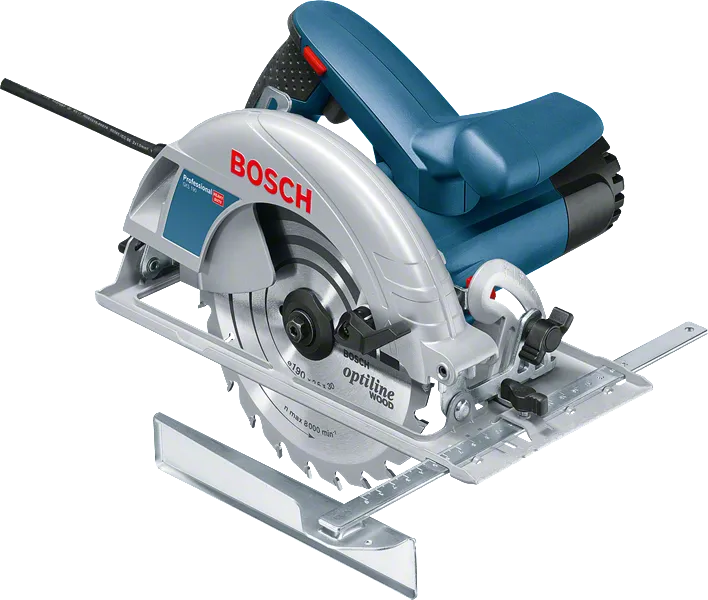
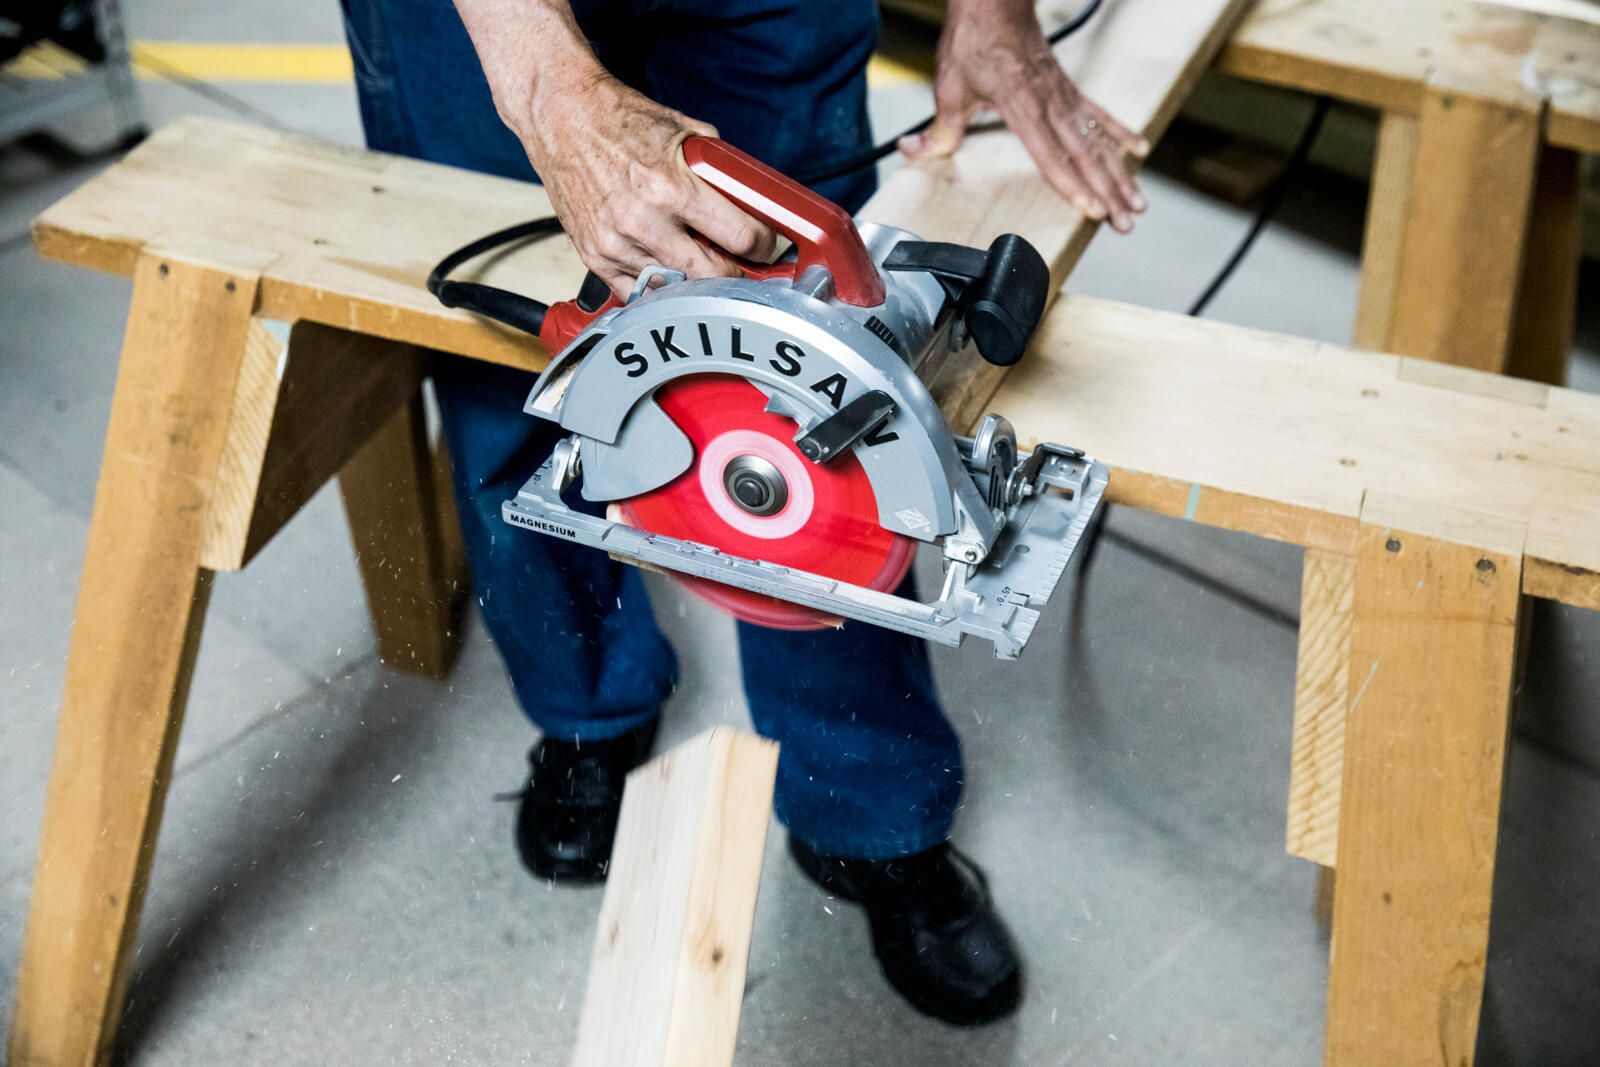
A proper circular saw setup means installing the correct blade, setting the cutting depth and bevel angle, securing and supporting the workpiece, checking the blade guard, and establishing a clear cutting path before the saw is powered on.
For DIYers, remodelers, and carpenters in the United States, a circular saw is commonly used for cutting dimensional lumber, plywood, OSB, trim stock, and other approved materials. The quality and safety of the cut depend heavily on setup. A correctly adjusted saw is easier to control, while poor blade depth, weak workpiece support, or a loose adjustment can contribute to binding, inaccurate cuts, or kickback.
Before using any circular saw, read the manual for the exact model because blade size, arbor dimensions, cutting capacity, bevel range, and adjustment mechanisms vary. The general setup process is similar across many handheld saws, but the manufacturer’s instructions take priority when they differ from a general guide.
Source: bosch-professional.com
What You Need Before Setting Up a Circular Saw
Start with the saw, an approved blade, the manufacturer’s blade-changing wrench if required, a stable work surface, clamps when needed, a measuring and marking tool, and appropriate personal protective equipment. For straight cuts, a speed square, straightedge, rip fence, or compatible guide rail can make setup much more repeatable.
The work area should be clean enough that the saw can move without the cord, battery, offcuts, clamps, or other objects interfering with the cut. For large sheets such as 4-by-8-foot plywood, support the sheet so it does not sag into the kerf as the cut progresses. Poor support can pinch the blade and increase the risk of kickback.
For corded saws, route the power cord away from the cutting path. For cordless models, install the battery only after the blade and adjustments have been checked. Remove the battery or unplug the saw before changing a blade or making adjustments.
Source: milwaukeetool.com
Correct saw and blade
Verify the blade diameter, arbor size, rotation direction, and other requirements in the saw manual. Never install a blade that does not match the tool specifications.
Stable work support
Use sawhorses, a workbench, sacrificial supports, or another stable setup that keeps the material supported without interfering with the blade.
Basic safety equipment
Use appropriate eye protection and hearing protection. Manage dust according to the material being cut and the manufacturer’s instructions.
Measuring and guiding tools
Keep a tape measure, pencil, square, clamps, and a straightedge or compatible guide available when the cut requires precision.
Check the Saw Before Making Adjustments
Inspect the lower guard before use. It should move freely and return to its protective position without sticking. Also inspect the blade for damage, missing or damaged teeth, excessive buildup, or other problems. A dull or damaged blade can increase friction and make the saw harder to control.
Check the shoe for damage and confirm that the depth and bevel adjustment mechanisms move normally. Do not use the saw if a critical guard or adjustment component is damaged or does not function as intended.
Lower guard
Confirm that it moves freely and closes properly when the saw is removed from the workpiece.
Blade condition
Use a sharp, suitable blade with no visible damage and with mounting specifications that match the saw.
Adjustment locks
Make sure depth and bevel locks can tighten securely before operation.
How to Set the Circular Saw Blade Depth
Set the blade depth according to the thickness of the material. The general goal is to have only a small portion of the blade extending below the workpiece rather than exposing a large section of blade. Manufacturer instructions commonly describe this as exposing less than one full tooth below the material.
A practical way to check the setting is to disconnect the saw from its power source, place the saw beside the material, and adjust the shoe until the blade projects only slightly farther than the material thickness. Tighten the depth adjustment securely and recheck it before powering the saw.
Avoid relying on a single universal measurement because blade diameter, tooth geometry, material thickness, and saw design differ. Some consumer guides use a fixed amount such as about 1/4 inch below the material, while some manufacturers specify exposure based on tooth height. When those instructions differ, use the manual for your specific saw.
Source: homedepot.com
Disconnect power first
Remove the battery or unplug a corded saw before adjusting blade depth.
Match depth to material
Adjust the shoe so only a small portion of the blade extends below the workpiece.
Lock the adjustment
Tighten the depth lever or knob firmly enough that the setting cannot shift during the cut.
Recheck before cutting
Confirm the depth after tightening because some adjustment mechanisms can move slightly as they are locked.
Why Blade Depth Matters
Too much blade exposure places more blade below the workpiece than necessary and can increase the amount of moving blade exposed during the operation. An overly deep setting can also make the cut harder to control. A shallow setting may fail to cut through the material completely.
Correct depth also helps the blade work efficiently through the material. If the saw begins to slow significantly, vibrate, or require excessive force, stop and investigate rather than simply pushing harder.
Too deep
Creates unnecessary blade exposure and may make control more difficult.
Too shallow
May leave an incomplete cut or require the operator to force the tool.
Correct setting
Allows the blade to pass fully through the material while minimizing unnecessary exposure.
Set the Bevel Angle and Check the Shoe
For a standard square cut, set the saw at 0 degrees so the blade is perpendicular to the shoe. For a bevel cut, loosen the bevel adjustment, tilt the shoe to the required angle, and tighten the adjustment securely. Common bevel settings include 22.5 and 45 degrees, but the available range depends on the saw.
Before making a precision bevel cut, make a test cut on scrap material. The scale on the saw provides the intended setting, but the actual cut can be affected by the tool’s design, blade thickness, alignment, and how the saw is guided.
The shoe should sit flat on the material during a normal cut. If the shoe rocks, catches on an obstruction, or loses contact with the workpiece, stop and correct the setup. A tilted or unstable shoe can cause the blade to wander or bind.
Source: skil.com
For a 90-degree cut
Set the bevel scale to 0 degrees and verify the shoe is firmly locked.
For a bevel cut
Set the required angle using the saw’s bevel scale, tighten the adjustment, and verify the angle with a test cut when accuracy matters.
Check shoe stability
Make sure the base sits flat and moves smoothly across the material without rocking.
Use a Test Cut for Precision Work
A test cut is especially useful when the exact location of the blade relative to the saw’s guide mark matters. Mark a line on scrap material, make a short cut, and compare the actual kerf with the intended line. If necessary, adjust how you position the saw or guide rather than assuming the printed shoe markings are perfectly aligned for every application.
This approach is useful when installing cabinets, cutting trim, preparing furniture parts, or making repeated cuts where a small alignment error could accumulate.
Test before valuable material
Use scrap from the same or similar material when practical.
Measure the actual cut
Check where the blade removes material instead of relying only on the shoe’s printed marks.
Set Up the Workpiece and Cutting Guide
Secure the material before cutting and arrange the supports so the blade will not become trapped as the cut opens. The goal is to keep the workpiece stable while allowing the cutoff portion to separate without closing on the blade.
For short crosscuts, a speed square or similar square can act as a guide. Position the square so the saw shoe can run against its straight edge while the blade follows the marked line. For long rip cuts, use a rip fence, straightedge, or compatible guide rail. A straight guide is particularly useful when breaking down plywood or other sheet goods.
When using a clamp or guide, make sure it cannot interfere with the saw shoe, blade, guard, cord, or battery. The guide should be firmly secured and positioned on the correct side of the cut.
Source: finehomebuilding.com
Crosscut
Use a square or short straightedge when cutting across the width of a board.
Rip cut
Use a rip fence or straight guide to maintain a consistent distance from the reference edge.
Sheet goods
Support large plywood and OSB panels across their surface so the material does not sag and pinch the blade.
Cut on the waste side
Mark the desired dimension clearly and position the blade so the kerf removes material from the scrap side rather than the finished piece.
How to Position Supports for Plywood
Large plywood panels need enough support to remain stable throughout the cut. Place supports on both sides of the cutting area or use a sacrificial cutting surface that supports the sheet without damaging the blade. Keep the planned cut path clear of hidden screws, clamps, or other objects.
Do not arrange supports so that the two sides of the kerf squeeze together as the cutoff falls. The material should remain supported without creating pressure against the blade.
Prevent sagging
Support large panels across the area surrounding the cut instead of relying on one small contact point.
Protect the blade path
Know where the blade will pass through the sheet and keep supports and fasteners out of that path.
Allow the cutoff to separate
Arrange the support so the kerf does not close around the blade as the material is cut.
Set Up a Straight Guide
For a long straight cut, a clamped board, straightedge, or compatible guide rail can provide a physical reference for the saw shoe. Measure the offset between the saw blade and the edge of the shoe that will contact the guide. Position the guide using that offset rather than placing it directly on the intended blade line unless the guide system is specifically designed to indicate the cut.
After clamping the guide, verify that it is parallel to the intended cut and that the saw can travel its full length without the motor housing or guard contacting the guide.
Measure the offset
Account for the distance between the blade and the guide-contacting edge of the saw shoe.
Clamp securely
The guide should not move when the saw shoe presses against it.
Make a test pass
For important work, verify the guide position with scrap material before cutting the finished piece.
Final Safety Check Before and During the Cut
Before switching on the saw, perform one final check: the correct blade is installed, the blade is secure, the guard moves properly, the depth and bevel settings are locked, the material is supported, the guide is secure, and the cutting path is clear. Keep both hands away from the blade path and maintain a stable stance.
Start the saw with the blade clear of the material and allow it to reach operating speed before entering the workpiece. Keep the shoe flat and guide the saw smoothly. Do not force the saw to compensate for a dull blade, excessive material resistance, or a misaligned cut.
If the cut begins to wander, do not twist the saw sideways to force it back onto the line. Release the trigger, keep the saw stable, and wait for the blade to stop. Then identify why the cut wandered and restart from a safe position if appropriate.
Kickback can occur when the blade binds, becomes pinched, or becomes misaligned. If the blade binds, do not pull the saw backward while it is still rotating. Stop the tool and allow the blade to come to a complete stop before addressing the problem.
Source: hearstapps.com
Keep hands clear
Never place a hand beneath the workpiece or near the blade’s path.
Use both handles when appropriate
Follow the saw manufacturer’s instructions for hand placement and use the auxiliary handle whenever the cutting situation allows.
Avoid blind cuts
Before cutting into existing walls or concealed areas, identify potential wiring, plumbing, fasteners, and other hidden hazards.
Wait for a complete stop
Do not lift the saw from the workpiece or set it down until the blade has stopped and the lower guard has returned to its protective position.
Control dust and debris
Use appropriate dust extraction where supported and keep your face out of the direct path of chips and dust.
Circular Saw Setup Checklist
Use this short checklist immediately before a cut. If any answer is no, correct the setup before starting the saw.
Blade
Is the blade the correct size, type, and mounting specification for the saw and material?
Guard
Does the lower guard move freely and close correctly?
Depth
Is the blade depth adjusted only as far as needed to cut through the material?
Bevel
Is the bevel angle correct and the adjustment securely locked?
Workpiece
Is the material stable and supported so the blade will not be pinched?
Guide
If accuracy requires one, is the square, fence, or straightedge secure and correctly positioned?
Cut path
Is the blade path clear of clamps, fasteners, cords, hands, and hidden hazards?
What to Do If the Saw Binds or Kicks Back
If the blade binds or the saw kicks back, release the trigger and hold the saw still until the blade stops completely. Do not attempt to pull the tool backward while the blade is rotating. Once the tool is safe, inspect the blade, cutting depth, alignment, workpiece support, and guide position.
A binding problem can result from inadequate support, a closing kerf, a dull or damaged blade, excessive feed pressure, or a cut that is being forced sideways. Correct the underlying condition before attempting another cut.
Stop the tool
Release the trigger and keep the saw motionless until the blade has completely stopped.
Find the cause
Check for blade binding, material movement, insufficient support, incorrect depth, blade damage, or forced steering.
Reset the setup
Correct the problem and verify the saw and workpiece are stable before restarting.
Do not repeat a dangerous setup
If the cause cannot be identified or a safety component is damaged, stop using the tool and consult the manufacturer’s instructions or a qualified professional.
Frequently Asked Questions
Q
How deep should a circular saw blade be set?
Set the blade only deep enough to pass through the workpiece. A common manufacturer recommendation is to have less than one full tooth visible below the material. Some consumer guides use approximately 1/4 inch of blade exposure below the material. Because recommendations can vary by saw and blade, follow the manual for your specific model.
Q
What should I check before using a circular saw?
Check the blade condition and compatibility, lower guard operation, blade depth, bevel setting, adjustment locks, workpiece support, guide position, and cutting path. For corded saws, make sure the cord is routed away from the blade. For cordless saws, install the battery only after setup and adjustment work is complete.
Q
Should the good side of plywood face up or down when using a circular saw?
For many conventional circular saws, the finished side is commonly placed face down because the blade’s tooth movement can produce more splintering on the exit side. However, blade design and saw configuration can affect the result. Make a test cut on scrap when the appearance of the finished surface matters.
Q
Do I need a guide for a circular saw?
You can make freehand cuts, but a square, rip fence, straightedge, or guide rail can improve consistency and accuracy. A guide is particularly useful for long plywood cuts or repeated cuts where maintaining a straight path by eye is difficult.
Q
Why does my circular saw keep wandering from the cut line?
Possible causes include poor blade alignment, excessive feed pressure, a dull or unsuitable blade, an unstable workpiece, an incorrectly positioned guide, or trying to turn the saw while the blade is engaged. Stop rather than forcing the saw back onto the line. Check the setup and make a test cut after correcting the problem.
Q
Can I use any circular saw blade on my saw?
No. Use only blades that match the saw’s specified diameter, arbor configuration, mounting requirements, and intended material or application. Using an incorrect blade can create an unsafe condition and may damage the tool.
✦ Wrapping Up
Conclusion
A good circular saw setup starts before the trigger is pulled. Choose the correct blade, disconnect power while making adjustments, set the cutting depth to the material thickness, establish the correct bevel angle, and secure the workpiece so it cannot shift or pinch the blade. For accurate cuts, add a square, rip fence, straightedge, or compatible guide rail.
The most important safety principle is to prevent the blade from binding while keeping your hands away from its path. Keep the shoe flat, guide the saw without forcing it, and stop completely if the cut begins to go wrong. When a saw, blade, guard, or adjustment mechanism does not function correctly, do not improvise a repair or bypass a safety feature.
💡 Key Takeaway
Before your next cut, use this sequence: select the correct blade, disconnect power, set the depth, set the bevel, secure the material, position the guide if needed, check the guard and cutting path, then make a controlled test cut before moving to the finished workpiece.