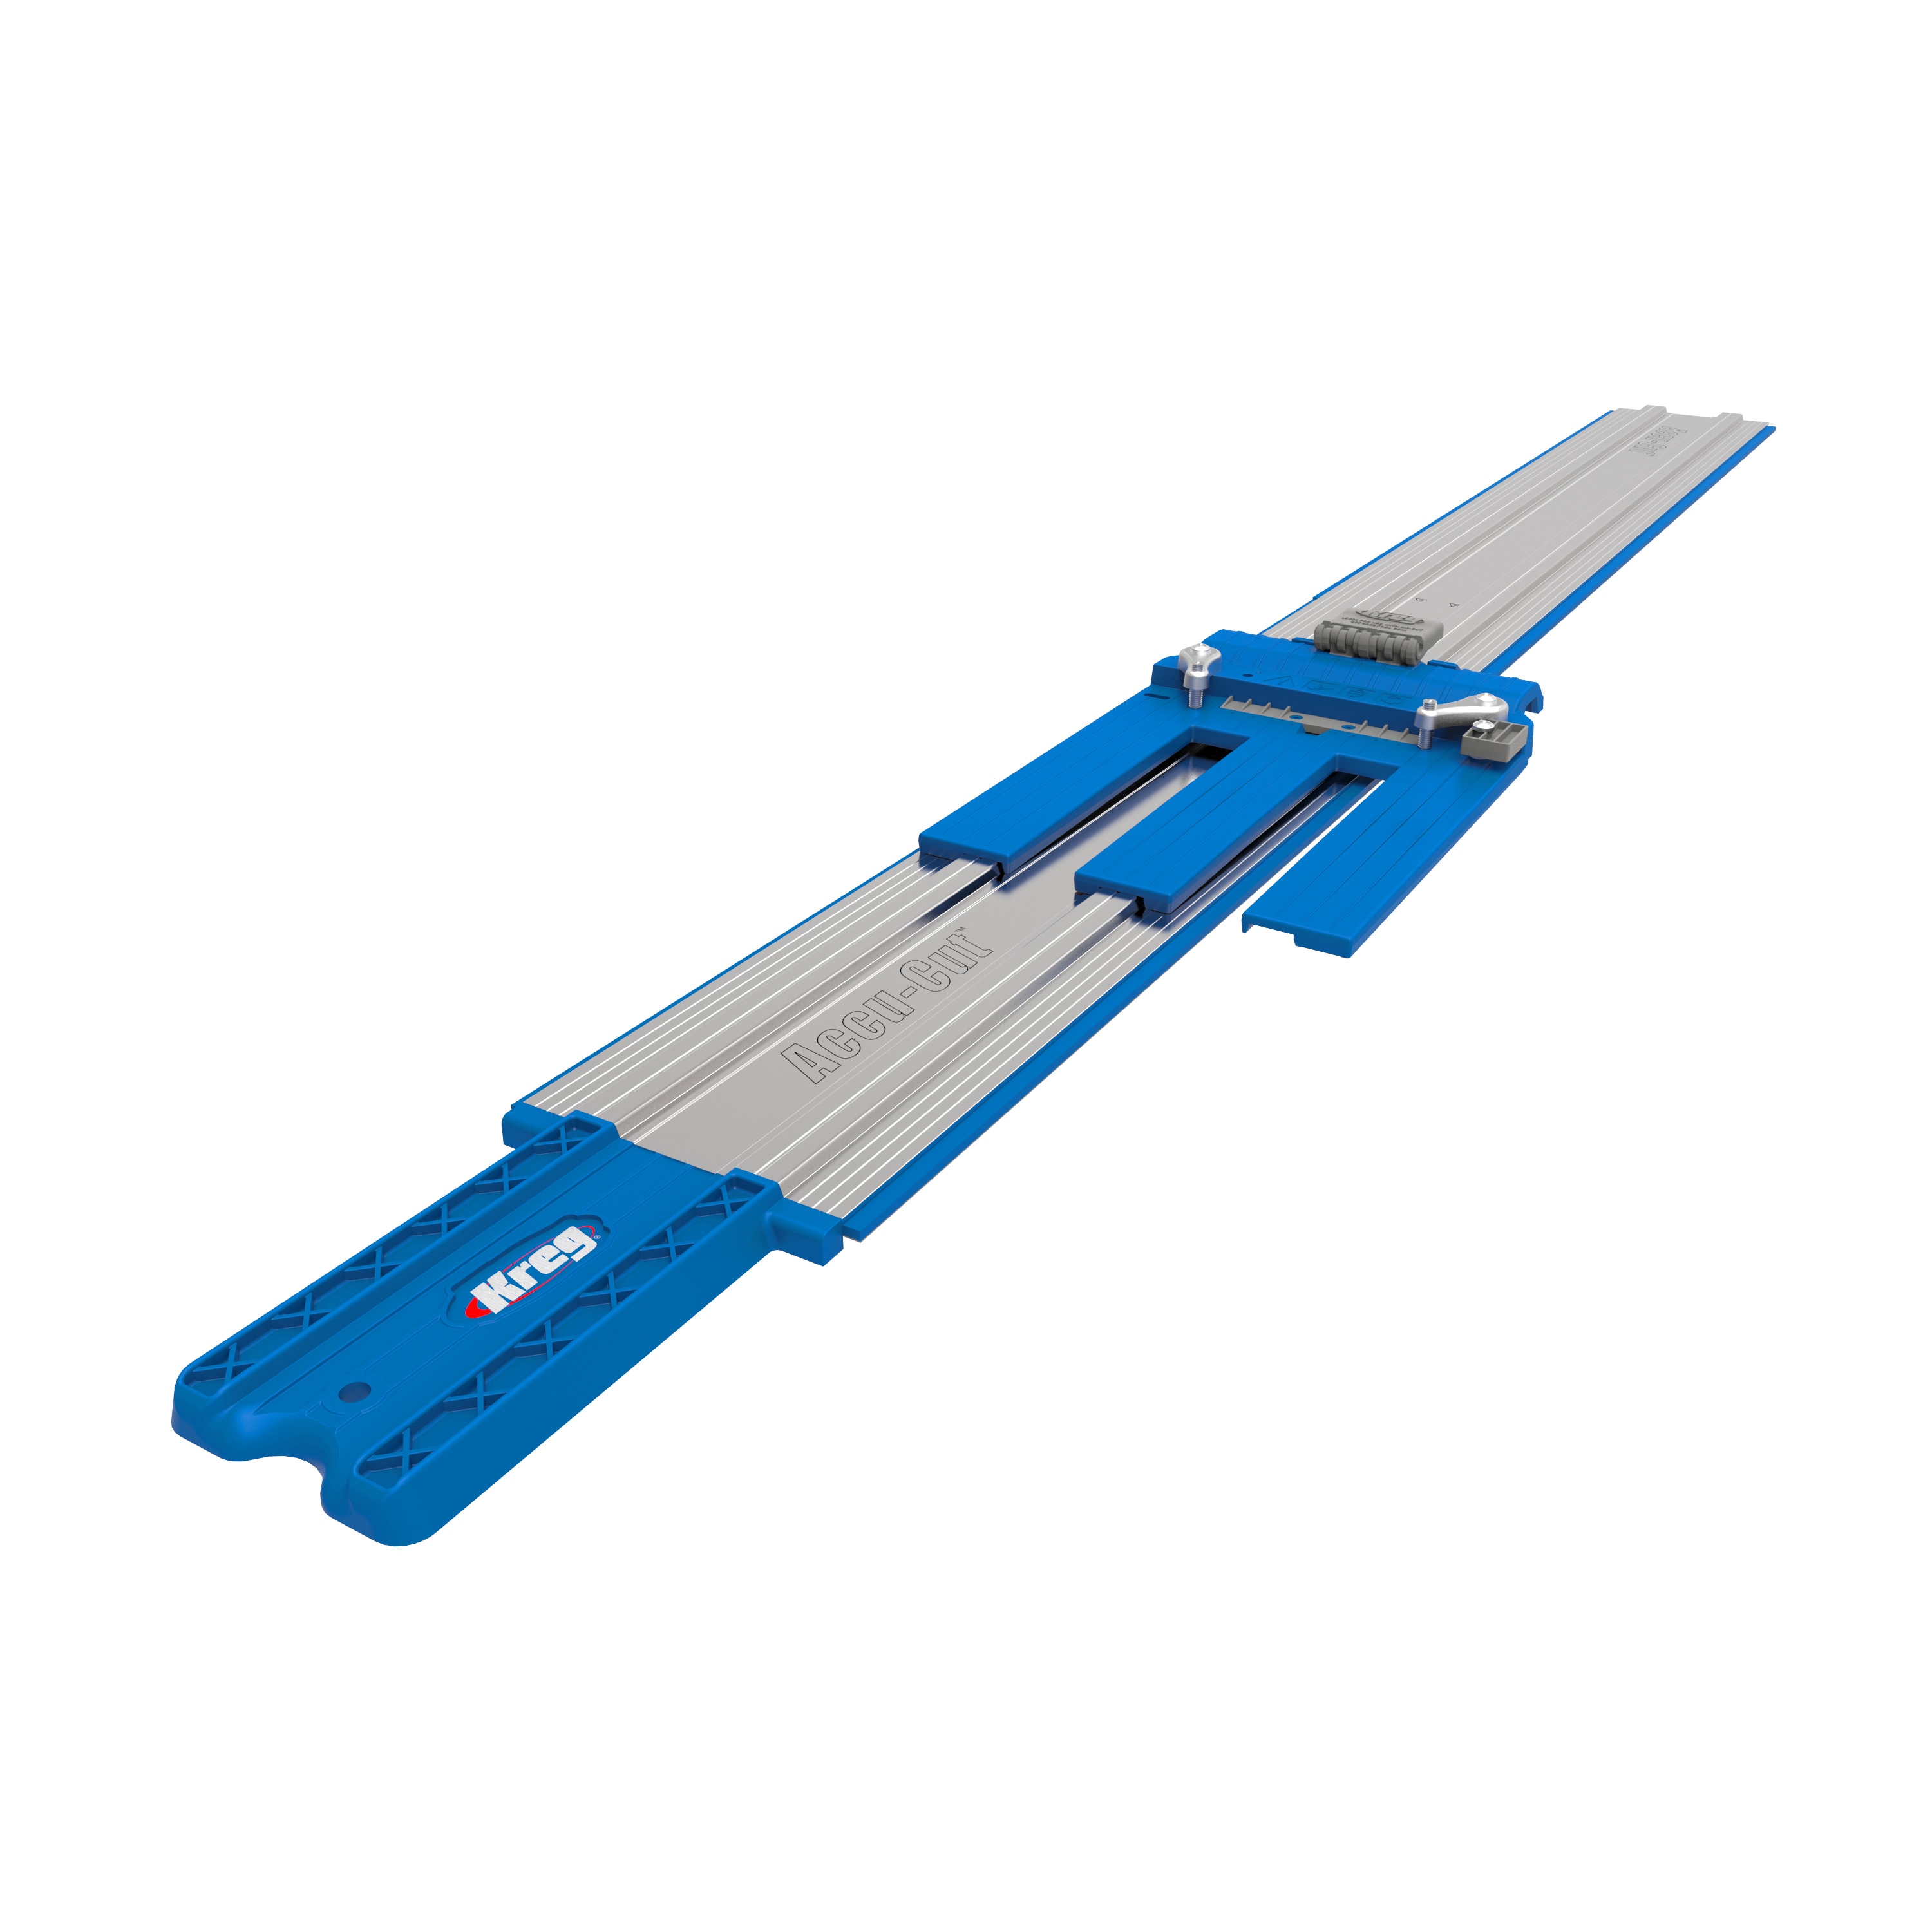
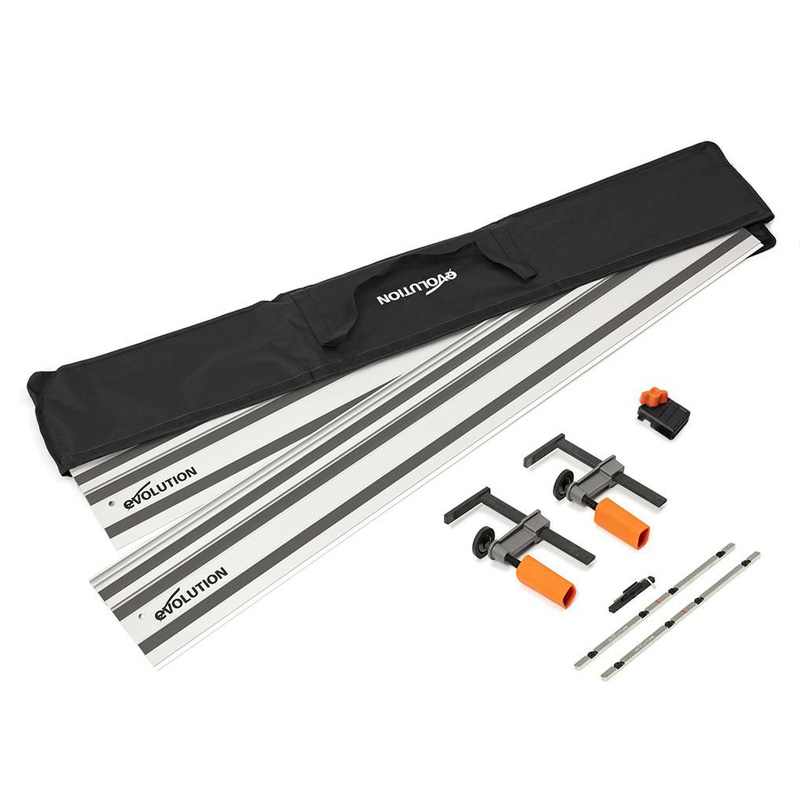
A circular saw guide rail is a straight track that keeps a compatible circular saw moving along a controlled path, making long rip cuts, crosscuts, and panel cuts easier to align and repeat accurately.
For U.S. homeowners, remodelers, cabinet installers, and woodworkers, a circular saw guide rail can turn a conventional circular saw into a more controlled cutting system. This is especially useful when breaking down 4-by-8-foot plywood, MDF, melamine panels, doors, flooring, or other large sheet goods that are awkward to move across a table saw.
A guide rail does not automatically make every circular saw compatible. Some saws ride directly on a dedicated track, while others need a manufacturer-specific adapter or a universal saw plate. The rail must also be positioned correctly, supported by the workpiece, and secured when the application requires it. The most important setup checks are compatibility, rail alignment, saw-to-rail fit, blade position, cutting depth, and workpiece support.
Source: lowes.com
What Is a Circular Saw Guide Rail?
A circular saw guide rail is a long, rigid track that guides a saw along a predetermined cutting path. Instead of keeping the saw straight only by hand or by following a pencil line, the saw base or an attached adapter runs against the rail’s guide surface.
Most modern guide rails are made from extruded aluminum and use a raised rib, channel, or other interface that works with a compatible saw or adapter. Many also have an anti-slip surface underneath and a replaceable or sacrificial splinter strip along the cutting edge.
The basic principle is simple: align the rail with the desired cut, secure the material and rail as necessary, place the saw correctly on the track, and push the saw forward while keeping the base engaged with the rail. The rail controls lateral movement while the blade performs the cut.
Source: woodcraft.com
Guide rail
The straight aluminum track that establishes the cutting path.
Saw interface
The base, guide channel, adapter, or saw plate that keeps the circular saw aligned with the rail.
Anti-slip strips
Rubberized or high-friction material underneath the rail that helps resist movement on the workpiece.
Splinter guard
A sacrificial strip positioned close to the blade path that can help reduce tear-out and provide a visual cutting reference after it is correctly trimmed.
Guide Rail vs. Rip Fence
A guide rail and a circular saw rip fence both help control a cut, but they work differently. A rip fence normally references the edge of the workpiece and is useful for repeated cuts at a set distance from that edge. A guide rail can be placed directly along a marked cut line, which is particularly useful when the desired cut is not parallel to an existing edge.
For large plywood panels, a guide rail is often more convenient because the saw travels over the stationary material while the operator moves the saw rather than trying to move the entire panel.
How Does a Circular Saw Guide Rail Work?
The guide rail works by limiting sideways movement while allowing the saw to travel forward along the length of the track. A compatible saw base fits against a raised guide rib or inside a matching channel. Proper adjustment leaves enough clearance for smooth travel without allowing excessive side-to-side movement.
The cutting edge of the rail can also act as a reference. On systems with a splinter guard, the guard is normally trimmed by the compatible saw during initial setup so its edge corresponds to the blade’s cutting position. This means the operator can position the rail edge directly on the intended cut line rather than estimating the distance between the pencil line and the blade.
Some conventional circular saws require an adapter or universal saw plate to connect them to a track. Other circular saws are designed specifically for their manufacturer’s guide rail system. The manufacturer’s compatibility information should take priority over assumptions based only on similar-looking rail profiles.
Source: grainger.com
Direct track compatibility
Some plunge or track-compatible circular saws are designed to sit directly on a specific guide rail.
Adapter compatibility
Some conventional circular saws can use a guide rail through a dedicated adapter or saw plate.
Universal guide systems
Certain aftermarket systems use an adjustable base or sled to accommodate multiple circular saw designs.
Why the Rail Can Improve Cut Accuracy
A freehand circular saw cut depends heavily on the operator maintaining the intended direction. A guide rail provides a physical reference that limits sideways deviation. This can make long cuts more repeatable, particularly when cutting sheet goods where even a small deviation can become obvious over several feet.
The rail does not correct every source of inaccuracy. A dull or inappropriate blade, poorly supported material, excessive saw movement, incorrect bevel settings, or an improperly adjusted saw-to-rail fit can still produce a poor cut.
How to Use a Circular Saw Guide Rail
Start with a compatible saw, rail, blade, and a stable work surface. For large panels, support the material sufficiently so the cut does not close on the blade or allow the offcut to drop unexpectedly. Disconnect the saw from power before making mechanical adjustments or installing an adapter.
The exact procedure varies by manufacturer, but the following sequence covers the main setup principles for most guide rail systems.
Source: toolstation.com
1. Confirm compatibility
Check the saw model, rail model, adapter, and any required accessories against the manufacturer’s compatibility information.
2. Prepare the workpiece
Place the panel on stable supports that allow the blade to pass through the waste without striking the supports.
3. Mark the cut
Mark the intended cut location clearly, especially when setting up a new rail or an unfamiliar saw.
4. Position the rail
Align the rail’s cutting reference with the intended blade path or use the manufacturer’s specified offset.
5. Secure the rail
Use the rail’s anti-slip surface and compatible clamps when additional holding force is required.
6. Adjust the saw
Set the saw or adapter so the base runs smoothly with minimal unwanted side play.
7. Check the blade position
With the saw disconnected from power, verify that the blade will follow the intended cut and that the depth and bevel settings are correct.
8. Make the cut
Start the saw according to its instructions, allow the blade to reach operating speed, and move the saw steadily along the rail without forcing it.
9. Check the result
Inspect the cut for straightness, tear-out, burning, or unexpected deviation before repeating the setup on additional material.
How to Align the Guide Rail With the Cut Line
The easiest alignment method is to use the rail’s cutting edge or splinter guard as the reference when the system is designed for that purpose. Place the edge on the intended cut line and confirm the rail extends far enough in both directions for the saw to enter and exit safely.
If the rail does not provide a blade-edge reference, measure the offset from the rail to the blade and transfer that measurement to the workpiece. Make a test cut in scrap material before cutting expensive plywood, finished panels, or doors.
How to Connect Two Guide Rails
Long cuts can require more than one rail. Compatible connector bars or joiner sets are designed to align adjacent rails end to end. Slide the connectors into the appropriate channels, bring the rail sections together, and tighten the fasteners according to the connector manufacturer’s instructions.
After joining the rails, inspect the joint before cutting. The transition should be straight and secure, with no raised edge that could interfere with the saw base. A small alignment error at a rail joint can become visible as the saw travels farther down the cut.
Choosing the Right Circular Saw Guide Rail
Choose a guide rail based first on compatibility and the type of cuts you make. Rail length, connection options, clamping, splinter protection, and portability matter after the saw-to-rail interface is confirmed.
For occasional plywood work, a shorter rail or universal guide system may be sufficient. For cabinet installation, flooring, remodeling, or frequent sheet-good breakdown, a longer track or a system that accepts extensions can reduce setup time.
Source: walmart.com
Saw compatibility
Verify whether the saw runs directly on the rail or requires a specific adapter or saw plate.
Rail length
Choose a rail long enough to guide the saw through the complete cut. For large panels, consider a system that can be extended.
Rail width and profile
The physical shape of a rail matters because accessories such as parallel guides, clamps, and adapters may depend on the exact extrusion.
Clamping system
If you regularly cut slippery materials, make bevel cuts, or work near an unsupported edge, compatible rail clamps can provide additional security.
Splinter guard
A replaceable anti-splinter strip can make blade alignment easier and may reduce chipping along the cut edge.
Portability
A shorter rail is easier to transport, while connected rails can cover long cuts but require more storage and setup.
Guide Rail Length for Common U.S. Sheet Goods
A standard U.S. plywood sheet is commonly 4 feet by 8 feet, so the required rail length depends on whether the cut runs across the 4-foot dimension or along the 8-foot dimension. A rail that is longer than the cutting distance is generally easier to use because the saw can start and finish while remaining supported by the track.
For an 8-foot rip cut, a single shorter rail may not be long enough. A connected rail system can provide the necessary length, provided the connector maintains alignment.
Cuts up to about 4 feet
A rail around 48 to 55 inches can provide useful coverage, depending on the saw’s starting and ending position.
Cuts across a full 8-foot panel
Use a sufficiently long rail or connect compatible rail sections to cover the full travel distance.
Door trimming
A medium-length rail is often practical because the cut is usually much shorter than a full sheet-good rip.
Guide Rail or Dedicated Track Saw?
A conventional circular saw with a compatible guide rail can be a practical way to add guided cutting without replacing the saw. A dedicated track saw, however, is designed around the rail system and often integrates the saw base, plunge mechanism, rail adjustment, and splinter protection as one system.
The appropriate choice depends on the work rather than a universal claim that one system is better. Someone who already owns a compatible circular saw may only need a rail or adapter. Someone doing frequent plunge cuts and sheet breakdown may benefit from a purpose-built track saw system.
Circular Saw Guide Rail Safety and Accuracy Checks
A guide rail helps control the saw, but it does not remove the hazards of a circular saw. Follow the saw manufacturer’s safety instructions, wear appropriate eye and hearing protection, control dust where practical, and keep hands away from the blade path.
Before cutting, verify that the blade can pass through the workpiece without contacting the rail, clamps, supports, or other hardware. The workpiece should be supported so it cannot shift unexpectedly or pinch the blade during the cut.
Disconnect the saw from its power source before adjusting the saw-to-rail fit, installing or removing an adapter, changing the blade, or performing other mechanical adjustments. For cordless saws, remove the battery when the manufacturer’s instructions call for it.
Source: amazon.com
Keep the rail stable
Use compatible clamps when the anti-slip surface alone does not provide sufficient security for the application.
Keep the workpiece supported
Support large panels and offcuts so they remain stable throughout the cut.
Check blade clearance
Make sure the blade will not strike clamps, supports, the rail, or the surface underneath.
Avoid forcing the saw
Excessive feed pressure can affect cut quality and may increase the chance of an unwanted saw reaction.
Use the correct blade
Select a blade appropriate for the material and saw, and replace blades that are damaged or excessively worn.
Signs the Guide Rail Setup Is Correct
The saw should travel smoothly along the rail without binding or excessive lateral movement. The rail should remain aligned during the cut, the blade should follow the intended path, and the cut should show no unexplained wandering, burning, or excessive tear-out.
If the saw feels loose on the rail, do not compensate by pushing harder. Stop and inspect the rail interface, adjustment mechanism, adapter, and rail condition.
When to Stop and Recheck the Setup
Stop cutting if the rail shifts, the saw binds, the blade begins to burn the material unexpectedly, the saw no longer travels smoothly, or the cut starts moving away from the intended path. Disconnect power before investigating mechanical problems.
A damaged rail, worn anti-slip strip, loose connector, distorted adapter, or incorrect saw adjustment can all affect accuracy. Replace damaged components rather than relying on improvised repairs in the saw’s guide interface.
Common Circular Saw Guide Rail Problems
Most guide rail problems come from incorrect compatibility, poor alignment, excessive clearance between the saw and rail, rail movement, or inadequate workpiece support. Troubleshoot the simplest and safest causes first.
Source: acmetools.com
The saw moves sideways on the rail
Check the rail adjustment mechanism, adapter fit, and compatibility. The saw should have enough clearance to slide but not excessive lateral play.
The rail moves during the cut
Clean the underside of the rail and workpiece, verify the anti-slip strips, and add compatible clamps when appropriate.
The cut is not straight
Check rail alignment, saw-to-rail clearance, rail joints, blade condition, and whether the workpiece shifted during cutting.
The cut edge is chipped
Check blade selection, blade condition, cutting direction, splinter guard alignment, and support beneath the workpiece.
The saw binds
Stop the saw and disconnect power before checking the workpiece support, blade depth, kerf closure, rail position, and saw alignment.
The blade does not follow the rail edge
Verify that the splinter guard was trimmed for the correct saw and cutting configuration and that the saw or adapter is correctly positioned.
Why a Guide Rail May Not Fit Your Circular Saw
Guide rails are not universally interchangeable. Two rails can look similar while using different guide ribs, channels, or accessory interfaces. Some manufacturers provide adapters for specific circular saw models, while others design rails for dedicated plunge or track saws.
Before buying an adapter or rail, identify the exact saw model number and compare it with the manufacturer’s compatibility information. This is more reliable than assuming that a rail will fit because its width or appearance is similar to another system.
Maintenance and Storage for Guide Rails
Keep the rail clean, straight, and free from debris that could interfere with the saw base or reduce the grip of the anti-slip material. Fine sawdust can accumulate in channels and around adjustment points, so inspect these areas periodically.
Store long rails where they are unlikely to bend or become damaged. Avoid leaning them in a way that places constant pressure on one point. For connected systems, separate the sections when the manufacturer’s storage instructions recommend it.
Inspect the splinter guard periodically. A worn or damaged strip may no longer provide a reliable visual cutting reference. Replacement procedures vary by system.
Source: toolstation.com
Clean the guide surface
Remove sawdust and debris that could affect smooth saw travel.
Inspect anti-slip material
Check for contamination, peeling, excessive wear, or damage.
Check rail straightness
A bent or damaged rail can transfer its error directly to the cut.
Protect the splinter guard
Avoid crushing or damaging the strip during transportation and storage.
Frequently Asked Questions
Q
Can I use a guide rail with a regular circular saw?
Sometimes. Some circular saws are designed to work with a specific guide rail through a dedicated adapter, while some aftermarket systems use an adjustable saw plate or sled. Check the exact saw model and the rail manufacturer’s compatibility information before using the system.
Q
Do circular saw guide rails need clamps?
Not always. Many rails use anti-slip material that can keep the track stationary during ordinary cuts. Clamps provide additional security and can be useful when cutting at an angle, working with slippery material, making demanding cuts, or when any rail movement would create a problem.
Q
How long should a circular saw guide rail be?
The rail should cover the saw’s travel for the complete cut and provide enough support for the saw at the beginning and end. For a full-length cut on an 8-foot sheet of plywood, a system that can span the required distance with a sufficiently long rail or connected sections is more practical than a short track.
Q
Can I connect two circular saw guide rails?
Yes, when the rail system is designed for joining. Use the manufacturer’s compatible connector hardware and check that the joint is straight, tight, and free of a step that could interfere with the saw base.
Q
Why is my circular saw guide rail cut not straight?
Check the rail alignment, saw-to-rail clearance, rail movement, connector joint, blade condition, bevel setting, and workpiece support. A loose saw interface or a rail that shifts during the cut can cause the blade to move away from the intended path.
Q
Does a guide rail prevent tear-out?
A guide rail can help control the saw, but it does not guarantee a tear-out-free cut. Splinter guards, the correct blade, proper blade sharpness, appropriate cutting technique, and good material support all affect the finished edge.
✦ Wrapping Up
Conclusion
A circular saw guide rail provides a controlled path for making long, straight, and repeatable cuts with a compatible saw. It is particularly useful for U.S. woodworking, remodeling, cabinet, flooring, and DIY projects involving large sheet goods such as standard 4-by-8-foot panels.
The most important part of choosing a guide rail is not the rail’s appearance or length alone. Confirm compatibility with the exact saw model, make sure the saw-to-rail interface is properly adjusted, align the rail with the intended cut, support the workpiece correctly, and secure the rail when the application requires it.
When accuracy matters, make a test cut in scrap material before committing to an expensive panel. A properly matched and maintained guide rail can make a conventional circular saw substantially easier to control without turning the setup into a substitute for every function of a table saw or dedicated track saw.
💡 Key Takeaway
Before your next cut, identify your exact circular saw model, verify the compatible guide rail or adapter, align the rail with the intended blade path, secure the workpiece and rail, and make a controlled test cut before working on the final material.