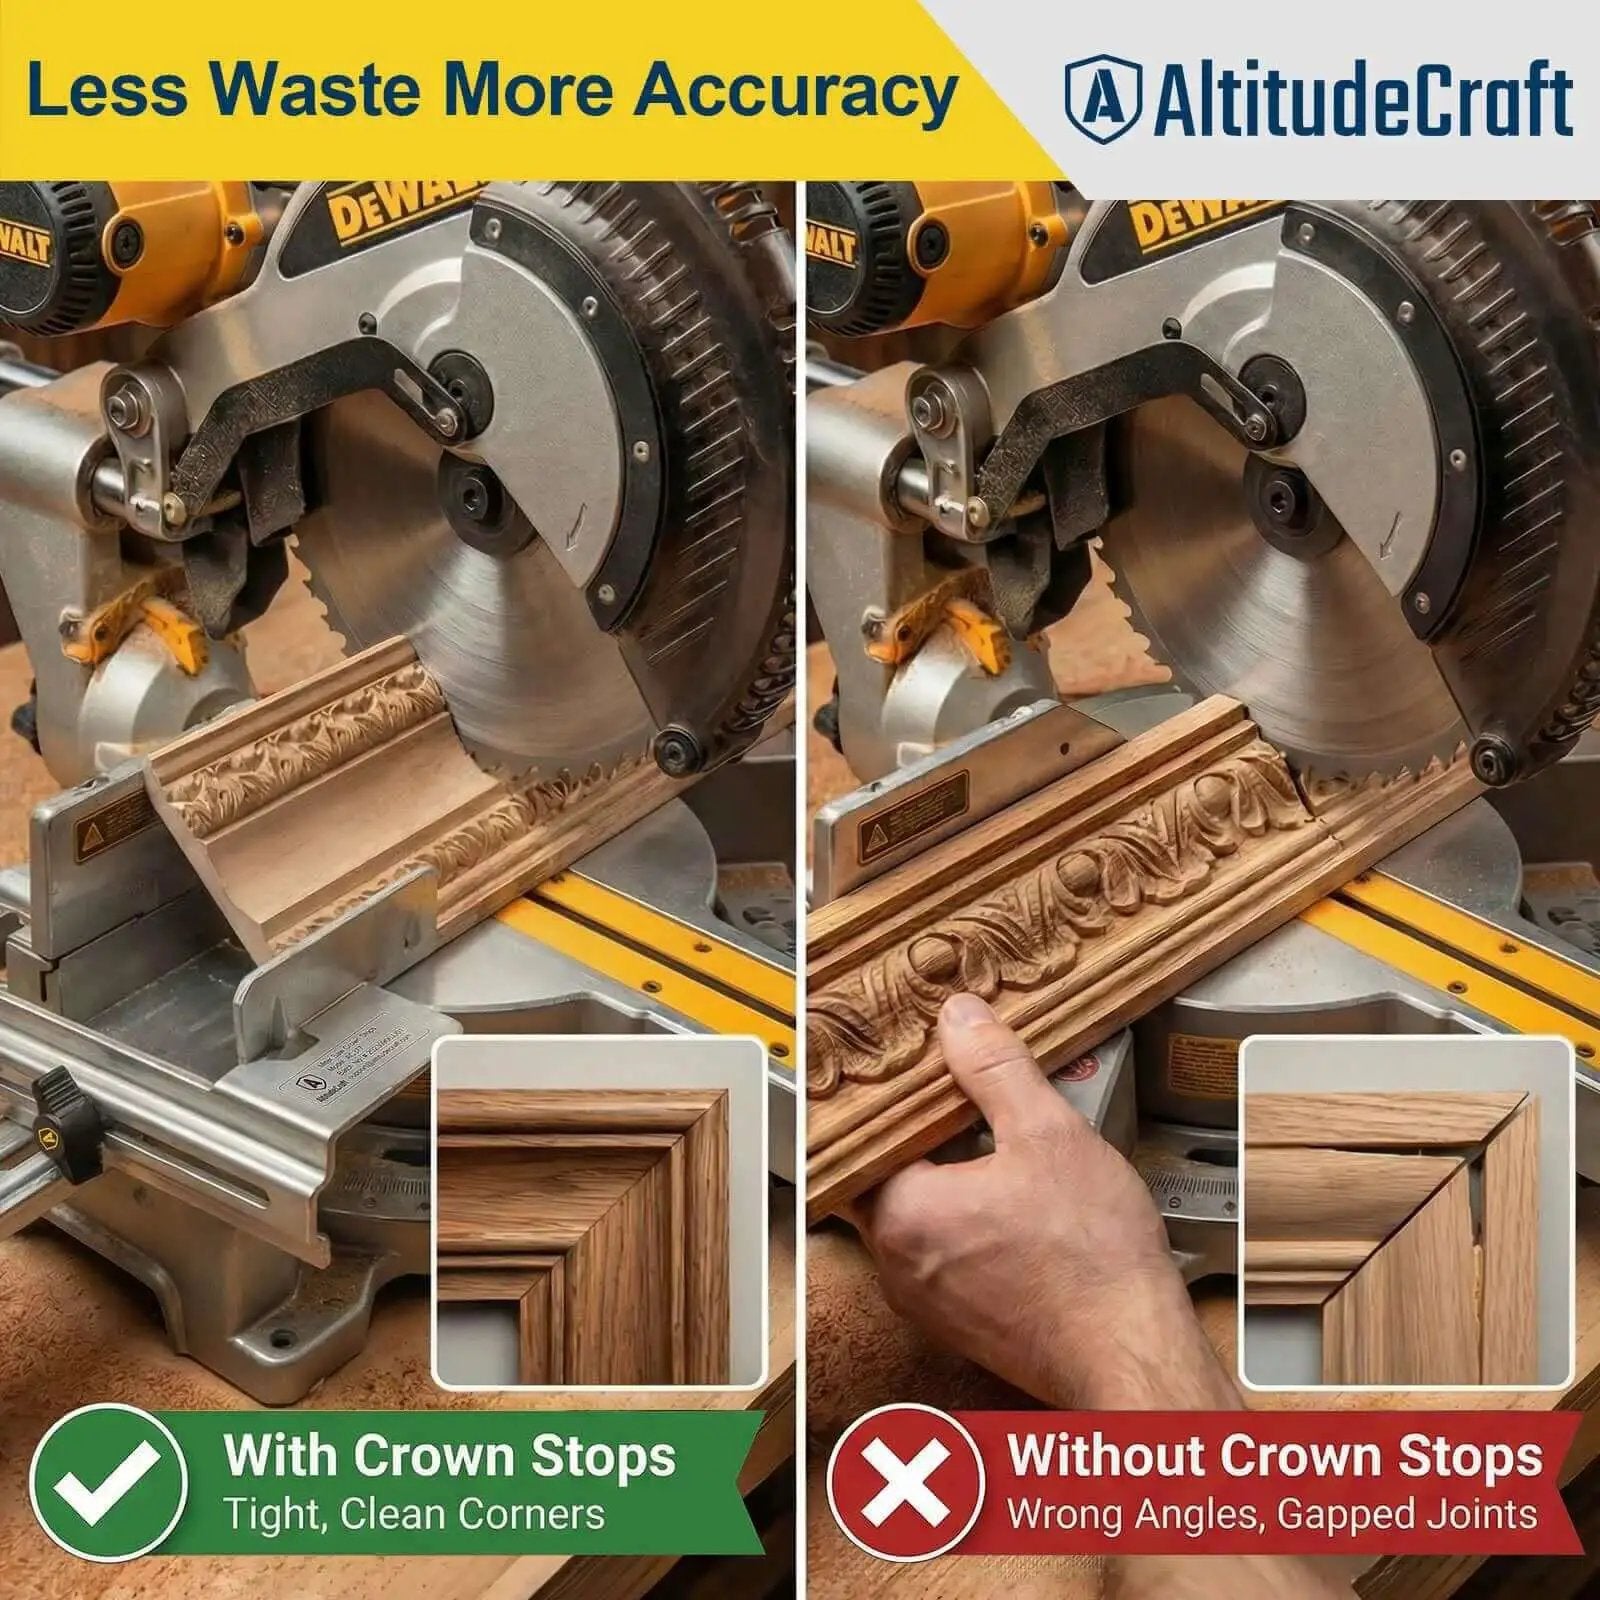
Miter saw crown stops are adjustable supports that hold crown molding in a repeatable position against the saw fence and table. They make nested crown molding cuts easier by keeping the molding at a consistent spring angle while the saw makes the miter cut.
For U.S. trim work, crown molding is commonly installed around inside and outside corners, and many common profiles use a 52/38 spring-angle arrangement. When crown molding is cut nested against a miter saw fence, keeping the molding in exactly the same position for every cut matters because even a small change in its position can alter the resulting corner. Crown stops provide a physical reference for the ceiling-side edge of the molding so the workpiece can be positioned consistently.
A crown stop is not the same thing as a miter detent, bevel stop, or work clamp. It does not automatically make an inaccurate saw accurate, and it should not be used to clamp the molding against the fence. Manufacturer instructions show that crown stops must be compatible with the particular saw, securely tightened, adjusted for the molding, and kept clear of the blade path. The exact installation method also varies between saw models.
Source: toolsid.com
What Are Miter Saw Crown Stops?
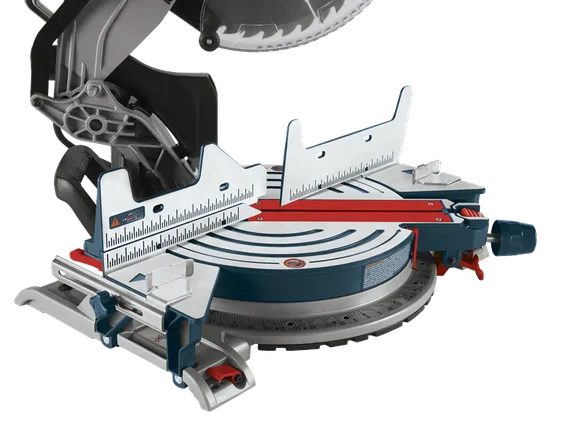
Miter saw crown stops are small adjustable brackets or supports designed specifically for holding crown molding in a repeatable position. Depending on the saw, the stops may attach to the saw base, extension table, fence area, or another manufacturer-provided mounting point.
When crown molding is nested, the molding is placed upside down and backward compared with its installed orientation. The wall-contact edge rests against the fence while the ceiling-contact edge rests on the saw table or against the crown stops. This creates a stable reference position that allows the molding to be cut with a consistent orientation.
The main benefit is repeatability. Without a stop, the operator has to reproduce the molding’s position manually for each cut. A crown stop gives the molding a defined physical location, which can make a series of matching cuts easier to set up and reproduce.
Different manufacturers use different designs. DEWALT’s DW7084, for example, uses left and right crown stops to position crown molding vertically against compatible saw fences. Bosch’s MS1233 uses left and right supports and is designed for nesting crown molding against the fence for simple miter cuts without beveling. Makita also offers adjustable two-piece crown molding stopper sets for selected saw models.
Source: bearingscanada.com
Primary function
Hold crown molding in a repeatable nested position against the saw’s fence and base.
What they do not do
They do not automatically set the correct miter angle, correct a misaligned fence, or safely clamp the workpiece.
Typical design
Most sets use two adjustable supports so the molding can be positioned on either side of the blade.
Main advantage
Repeatable positioning reduces the need to manually recreate the molding’s orientation for every cut.
Crown Stops vs. Crown Molding Detents
These terms describe different parts of a miter saw. A crown stop is a physical workpiece support. A crown molding detent or bevel pawl is part of the saw’s angle-setting system. Some miter saws include special detents or adjustment features for common crown molding angles, while separate crown stops physically locate the molding.
This distinction matters because installing a crown stop does not change the saw’s angle calibration. If the saw is not properly aligned, the crown stop can provide repeatable positioning while the resulting cuts are still inaccurate.
Crown stop
Positions and supports the molding.
Miter detent
Provides a repeatable setting for the horizontal miter angle.
Bevel stop
Provides a repeatable setting for the blade’s bevel angle.
Why Use Crown Stops for Crown Molding?
The biggest reason to use crown stops is consistency. Crown molding has a shaped profile and is normally installed at an angle between the wall and ceiling. When it is nested on a miter saw, its position has to remain consistent for the angle calculation to produce the intended joint.
A stop establishes a physical reference point for the molding. Once the stop has been adjusted to the particular profile, the same type of molding can be returned to approximately the same position for subsequent cuts. This is particularly useful when cutting multiple pieces for a room or when making matching left- and right-hand corner components.
Crown stops can also make the setup easier to repeat after changing the miter angle or moving between left- and right-side cuts. However, the operator still needs to verify the orientation, mark the correct end of the workpiece, and confirm the angle with scrap material.
Manufacturer documentation for several common U.S. miter saw systems describes crown stops as an aid for holding or positioning crown molding. The specific mounting location and supported saw models differ, so a stop designed for one saw should not be assumed to fit another saw.
Source: woodcraft.com
Repeatability
The molding returns to a defined position instead of relying entirely on hand placement.
Faster setup
Once adjusted, the stops can reduce repeated measuring and repositioning.
Consistent corner pieces
A stable molding position helps produce more consistent matching parts.
Reduced setup uncertainty
The stop gives the operator a physical reference for where the molding should sit.
Do Crown Stops Make Crown Molding Cuts More Accurate?
They can improve positioning consistency, but they cannot compensate for every source of cutting error. The saw’s fence alignment, miter angle, bevel angle when applicable, molding spring angle, workpiece condition, and operator technique still affect the finished joint.
A crown stop is therefore best viewed as one part of an accurate cutting setup. If two pieces repeatedly produce a gap even though the molding position is consistent, check the saw’s angle settings and the actual wall or corner geometry rather than simply moving the stop.
How to Install and Adjust Miter Saw Crown Stops
Installation must follow the instructions for the specific saw and crown-stop model. Some stops attach through threaded holes in the saw base, while others use clip nuts, slots, or designated mounting points. Do not drill or modify the saw unless the manufacturer specifically provides instructions for doing so.
Before installing an accessory, switch off the saw and disconnect it from its power source. This is a basic precaution because installation and adjustment place your hands near the cutting area. Manufacturer instructions for crown-stop accessories specifically call for disconnecting the saw before installation, adjustment, or removal.
Source: lowes.com
Step 1: Confirm compatibility
Check the exact miter saw model against the crown-stop manufacturer’s compatibility list.
Step 2: Disconnect the saw
Turn the saw off and disconnect the power source before installing or adjusting the stops.
Step 3: Install the mounting hardware
Use only the mounting hardware and locations specified for the accessory.
Step 4: Position the stops
Place the left and right stops where they will support the molding without entering the blade’s travel path.
Step 5: Nest the molding
Place the crown molding in the intended nested orientation, with the appropriate edges against the fence and table.
Step 6: Adjust the supports
Move the stops until the molding rests naturally and consistently against the fence and the supporting surfaces.
Step 7: Tighten securely
Tighten the knobs or fasteners firmly according to the manufacturer’s instructions.
Step 8: Perform a dry run
With the saw off, move the head through its intended travel to confirm that the blade, guard, and saw head will clear the stops and molding.
Step 9: Test on scrap
Make a test cut using scrap molding before cutting the finished material.
Signs the Crown Stop Is Adjusted Correctly
The molding should sit firmly in its intended nested position without needing excessive hand pressure. The wall-contact and ceiling-contact surfaces should rest against the correct reference surfaces, and the molding should not rock when positioned for the cut.
The blade should have a clear path through the workpiece without contacting the stop. The stop should support the molding rather than act as a clamp. If the molding moves significantly when you release your hand, reposition the support or review the manufacturer’s setup instructions.
Stable molding
The molding remains in the intended orientation without rocking.
Clear blade path
The blade and guard have sufficient clearance from the crown stop.
Repeatable position
A second piece of the same profile can be placed against the stops in the same orientation.
Secure hardware
The stop does not shift when normal workpiece pressure is applied.
How to Cut Crown Molding Using Crown Stops
Once the stops are installed and adjusted, the cutting process begins with identifying the corner and which side of the molding must be saved. For a typical 90-degree inside or outside corner, the required miter direction depends on whether the piece is the left or right member of the joint.
For nested crown molding, the workpiece is commonly positioned upside down and backward relative to how it appears on the wall. This means the fence represents the wall side and the saw table represents the ceiling side. That orientation is useful because the molding’s spring angle is preserved while the saw makes a straightforward miter cut.
Do not assume every crown profile uses the same spring angle. Common U.S. crown molding is often described as 52/38, but 45-degree spring-angle profiles and other profiles exist. The physical shape of the molding determines how it should be nested and which settings are appropriate.
Use a scrap piece to confirm the setup before cutting expensive finished molding. A test piece also allows you to verify whether the actual corner is square. A theoretical 90-degree corner and a real room corner do not always produce the same result.
Source: amazon.com
Identify the corner
Determine whether the cut is for an inside corner, outside corner, or another joint.
Identify the piece
Decide whether you are cutting the left or right member of the corner.
Confirm molding orientation
Nest the molding consistently against the fence and crown stop rather than changing its orientation between cuts.
Set the miter angle
Use the angle specified by the saw instructions and the molding setup, then lock the miter adjustment.
Check clearance
Lower the saw head without powering the blade to verify that the blade and guard clear the stop and workpiece.
Make the test cut
Use scrap material first and inspect the resulting joint.
Why Scrap Testing Matters
Crown molding joints are sensitive to small setup differences. A test cut lets you verify the molding orientation, miter direction, stop position, and actual corner geometry before consuming finished material.
If the joint is open at the front or back, do not immediately assume the crown stop is the problem. Check whether the molding shifted, whether the saw is accurately set, whether the correct end was cut, and whether the wall or ceiling corner differs from 90 degrees.
A Simple Left-and-Right Cut Check
Before cutting finished material, label a scrap piece with its intended room location. Mark the wall side and ceiling side if the profile makes the orientation difficult to recognize. This prevents the common mistake of making a technically clean cut on the wrong end of the molding.
Common Crown Stop Problems and How to Fix Them
Most crown-stop problems fall into a few categories: incorrect compatibility, poor positioning, loose hardware, incorrect molding orientation, or insufficient clearance. Troubleshoot them in that order rather than immediately changing the cutting angle.
If the molding moves between cuts, first inspect the stop hardware and the contact points. If the stop is secure but the molding still shifts, confirm that the molding is actually nested against the intended fence and table surfaces. A warped or twisted piece can also make a repeatable stop appear inconsistent.
If the cut is consistently wrong in the same direction, inspect the saw’s miter and bevel settings where applicable. A crown stop establishes the workpiece position; it does not calibrate the saw.
Source: toolnut.com
Molding shifts during cutting
Check that the stops are firmly tightened and that the molding is properly nested against the fence and table.
Blade hits or approaches the stop
Stop the setup and reposition the accessory according to the manufacturer’s instructions. Never operate the saw with a crown stop in the blade path.
Cuts are consistently angled incorrectly
Check the saw’s miter and bevel settings and verify the molding’s spring angle.
Left and right pieces do not match
Verify the workpiece orientation, cut direction, and which end of each piece is being saved.
The stop will not mount
Recheck the exact saw model and accessory compatibility instead of forcing the hardware into an unsuitable mounting location.
The molding rocks on the stop
Inspect the profile and stop adjustment. A different stop position may be necessary for the molding size or shape.
Do Not Use the Crown Stop as a Clamp
A crown stop is intended to position or support the molding, not to replace a workpiece clamp. DEWALT’s crown-stop instructions specifically warn that the accessory should not be used as a clamp and that the material must remain firmly against the fence.
If your saw’s manual requires a clamp for the particular operation, use the specified clamping method while keeping the clamp, stop, blade, guard, and saw head clear of one another.
What If Your Saw Has No Crown Stops?
Some miter saws do not include dedicated crown stops, and accessory compatibility varies. A manufacturer-approved crown-stop accessory may be available for some models. If not, the saw’s manual may describe another supported method for cutting nested crown molding.
A shop-made support can sometimes be used in woodworking, but it must not interfere with the blade, guard, sliding mechanism, fence, or other safety features. For a model-specific solution, the manufacturer’s instructions should take priority over a generic jig design.
Choosing Crown Stops for Your Miter Saw
The first selection criterion is compatibility with the exact saw model. Crown stops are not universal simply because they have a similar shape. Mounting holes, base geometry, fence design, and available clearance can differ between saws.
For example, DEWALT documents the DW7084 for a specific group of miter saws, while Bosch lists the MS1233 for specific Bosch models and explicitly identifies models that it does not support. Makita likewise lists individual crown molding stopper sets for particular miter saw families.
The second consideration is how you intend to cut crown molding. If you frequently make nested cuts, a dedicated two-piece crown stop can make repeatable positioning more convenient. If you normally cut crown molding flat using compound angles, the usefulness of a fence-mounted or table-mounted crown stop may be different.
The third consideration is adjustment range. The stop needs to accommodate the molding’s physical profile and provide stable support without creating interference with the blade or guard.
Source: boschtools.com
Model compatibility
Verify the accessory against the exact saw model and version.
Mounting method
Confirm that the required holes, slots, clip nuts, or other mounting hardware are present and supported.
Adjustment range
Make sure the stop can accommodate the height and profile of the crown molding you use.
Blade clearance
The installed stop must remain outside the blade’s travel path.
Cutting method
Choose a setup that matches whether you normally cut crown nested or flat.
Examples of Manufacturer-Specified Crown Stops
DEWALT’s DW7084 is documented for multiple DEWALT miter saw models and uses left and right stops. Bosch’s MS1233 is designed for several Bosch miter saws and allows crown molding to be nested against the fence for miter cuts without beveling. Makita’s 192628-9 is a two-piece adjustable crown molding stopper set listed for selected Makita saws.
These examples show why model verification matters. The correct accessory is determined by the saw’s mounting design and the manufacturer’s compatibility information, not simply by the accessory’s appearance.
DEWALT DW7084
A two-stop crown molding accessory documented for several DEWALT miter saw models.
Bosch MS1233
A left-and-right crown stop kit designed for specified Bosch miter saw models.
Makita 192628-9
A two-piece adjustable crown molding stopper set for selected Makita miter saws.
Frequently Asked Questions
Q
Are crown stops necessary for cutting crown molding?
No. Crown molding can be cut using other supported methods, including cutting the molding flat with appropriate compound settings. Crown stops are useful because they provide a repeatable physical reference when nesting crown molding against the fence and table.
Q
Do crown stops work with every miter saw?
No. Compatibility is model-specific. Manufacturers list particular saw models for their crown-stop accessories, and some accessories explicitly exclude certain models. Always check the exact saw model before purchasing or installing a crown stop.
Q
Can I use a crown stop as a clamp?
No. A crown stop is intended to position or support the molding, not clamp it. If your saw manual calls for a clamp, use the approved clamp while ensuring that it does not interfere with the blade, guard, stop, or saw movement.
Q
What angle should I use for crown molding?
There is no single angle that applies to every crown molding profile and every cutting method. Common U.S. crown molding is often associated with a 52/38 spring angle, and nested cutting may use a 45-degree miter for certain setups. Other profiles and cutting methods require different settings. Use the molding manufacturer’s information and your saw’s instructions, then verify the setup with scrap.
Q
Why are my crown molding corners still gapped when I use crown stops?
A crown stop only controls the molding’s position. A gap can also result from an incorrect miter or bevel setting, an incorrectly oriented workpiece, a molding profile with a different spring angle, a misaligned saw, or a wall or ceiling corner that is not exactly 90 degrees. Test the cut on scrap and troubleshoot those variables before changing the stop position.
Q
Should I use crown stops on both sides of the blade?
Many manufacturer-designed crown-stop kits include left and right supports so the molding can be positioned on either side of the blade. Whether both are installed or used for a particular cut depends on the accessory design and the saw manufacturer’s instructions.
✦ Wrapping Up
Conclusion
Miter saw crown stops are simple positioning accessories with an important job: they give crown molding a repeatable reference point during nested cuts. By keeping the molding consistently located against the fence and table, they can make repeated crown cuts easier to set up and reproduce.
They are not a substitute for saw calibration, correct angle selection, proper workpiece support, or careful measurement. The best results come from combining a compatible crown-stop setup with the correct molding orientation, a secure workpiece position, a clear blade path, and a scrap test before cutting finished material.
For U.S. trim work, where common crown profiles and 90-degree room corners are often used as starting points, crown stops can simplify the physical positioning of the molding. The actual profile and the real corner should still determine the final setup.
💡 Key Takeaway
Check your exact miter saw model against the crown-stop manufacturer’s compatibility list, install the stops with the saw disconnected from power, adjust them to the molding profile, verify blade clearance, and make a scrap test before cutting the finished crown molding.