
Wood oils protect, enrich, and seal timber with a natural, low-gloss finish.
If you want a warm, hand-rubbed look that ages well, this is for you. In The Complete Wood Oils Guide, I share pro-level methods, honest pros and cons, and field-tested picks so you can choose, apply, and maintain the right oil with confidence. I have finished everything from cutting boards to decks, and this is the way I teach crews and clients. Stick with The Complete Wood Oils Guide and you’ll avoid sticky cures, blotches, and wasted weekends.

What Are Wood Oils?
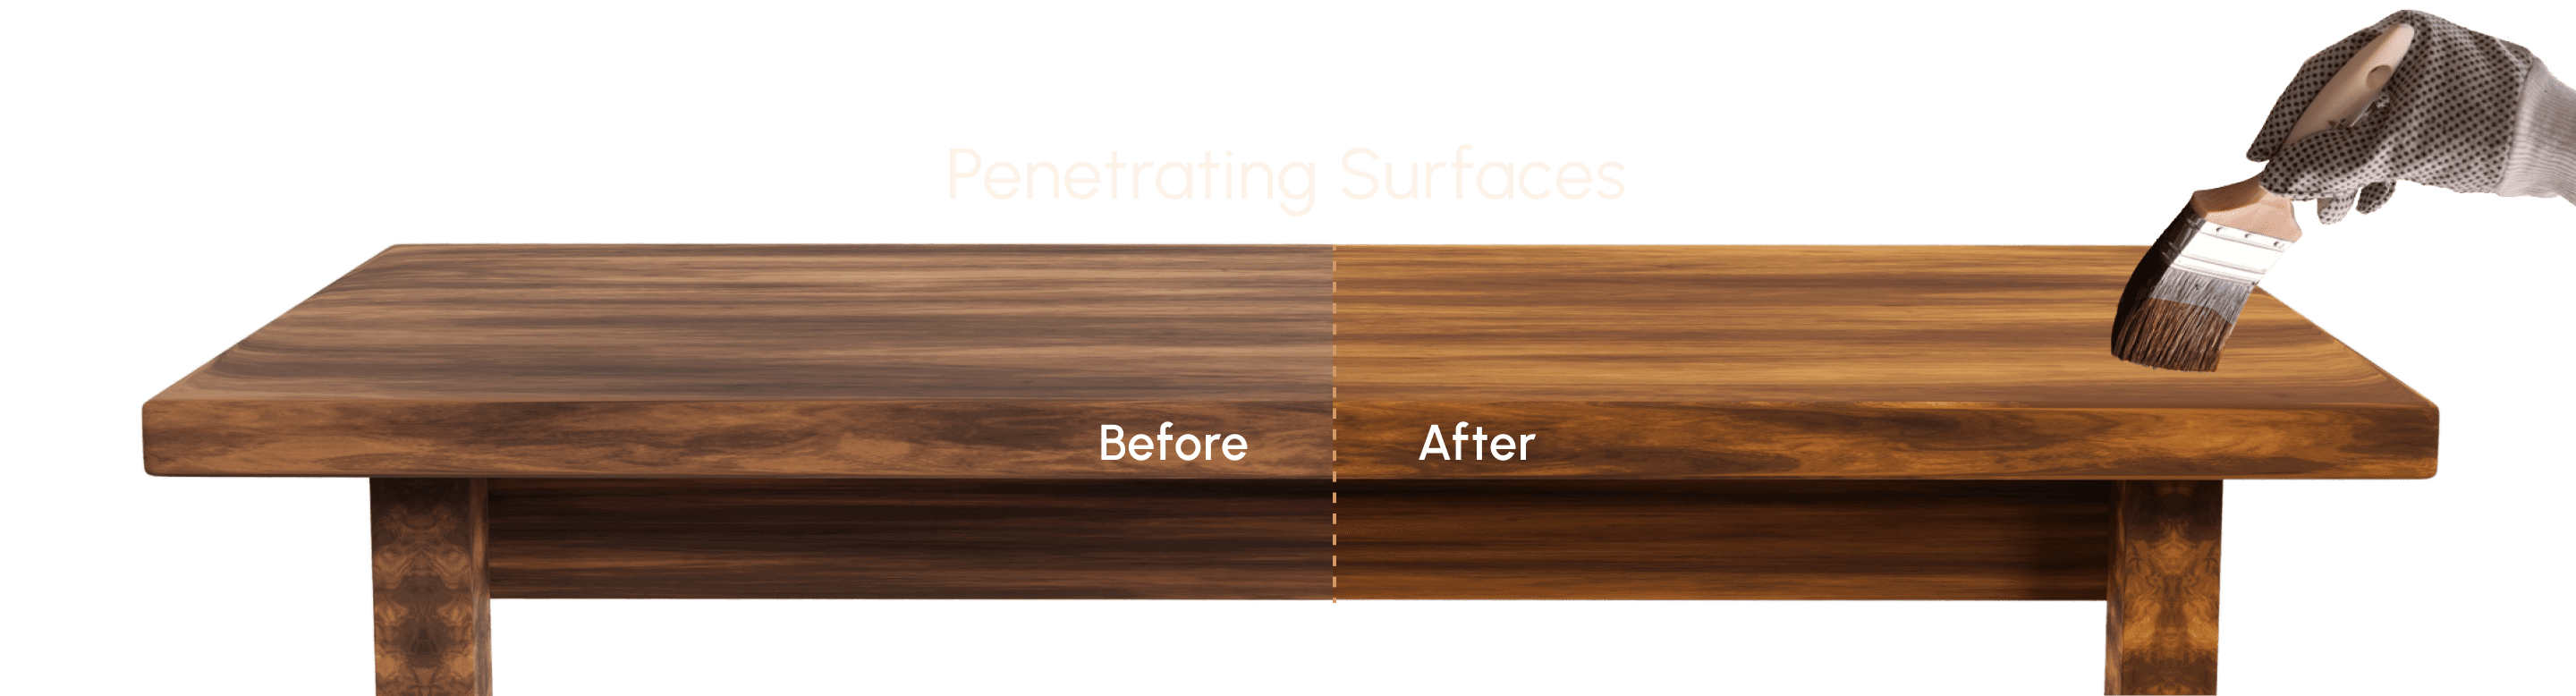
Wood oils are finishes that soak into wood fibers and cure to protect from the inside out. The Complete Wood Oils Guide explains that these oils emphasize grain, add depth, and keep a natural feel. They differ from film finishes like polyurethane that sit on top.
There are two main types:
- Drying oils cure by reacting with oxygen and form a solid network. Examples include tung and linseed.
- Non-drying or semi-drying oils stay liquid or gel-like. Examples include mineral oil and some nut oils.
Key benefits:
- Easy to apply and repair. You can spot-fix dings without sanding the whole piece.
- Low-sheen, natural look. Ideal for furniture, cutting boards, and handrails.
- Great grip and feel. Perfect for items you touch often.
Main limits:
- Not as tough as thick film finishes. High-traffic floors or wet outdoor areas need more care.
- Less UV resistance. Sunlight can dull or darken oiled wood without additives.
Use The Complete Wood Oils Guide to match oil type to project demands, then prep and apply it right.

Types of Wood Oils and When to Use Them
Choosing among oils can feel confusing. The Complete Wood Oils Guide breaks them down by behavior, use case, and cure speed.
Drying oils:
- Tung oil: High water resistance, flexible, and ages well. Great for tabletops and outdoor furniture with maintenance. Cures slow; pure tung needs multiple thin coats.
- Linseed oil: Warm tone, common and affordable. Raw linseed cures very slow. Boiled linseed oil dries faster due to added dryers but can amber more. Polymerized linseed cures faster than raw and glows nicely.
- Danish oil: Usually an oil/varnish/solvent blend. Easy wipe-on, wipe-off. Builds slight film and offers better protection than straight oil.
Non-drying or semi-drying oils:
- Mineral oil (USP/food-grade): Safe for cutting boards and butcher blocks. Needs frequent reapplication since it never cures hard.
- Walnut oil: Food-friendly once cured. Can polymerize slowly. Avoid if nut allergies are a concern in your space.
- Teak oil: A marketing term; often a blend with solvents and resins. Good for dense exotics but check labels.
Oil-wax blends and hardwax oils:
- Oil-wax blends: Add wax for a soft luster and better water beading. Great for furniture, shelves, and trim.
- Hardwax oils: Modern options that cure harder than straight oil. Often low-sheen, repairable, with solid durability for floors and furniture.
In The Complete Wood Oils Guide, remember that the label matters more than the name. Always read the technical data, solids content, and curing notes.

Choosing the Right Oil for Your Project
To pick well, think about where and how the piece lives. The Complete Wood Oils Guide suggests asking simple questions.
Match to use and location:
- Indoor, light wear: Danish oil or oil-wax blends for warmth and quick results.
- Indoor, food contact: USP mineral oil, pure tung, or polymerized linseed after full cure. Confirm food-contact compliance on the label.
- Outdoor, shaded: Pure tung or a blend with UV additives. Plan seasonal refresh.
- Outdoor, full sun: Consider oil first, then a UV-stable topcoat, or shift to a film finish.
Match to wood species:
- Open grain (oak, ash): Oils pop the grain and look rich. Flood and wipe for even soak.
- Tight grain (maple, birch): Can blotch. Use a wash coat or very thin first coat.
- Oily exotics (teak, ipe): Use dewaxed shellac sealer or wipe with solvent before oiling for better bond.
Desired look and feel:
- Warm amber: Linseed-based or Danish oil.
- Neutral to pale: Tung oil or light hardwax oil.
- Satin sheen: Oil-wax blend or Danish oil with more coats.
Quick answers to common questions:
- Is tung oil waterproof? It is highly water resistant once cured, but not fully waterproof.
- Will oil yellow over time? Most oils amber slightly; linseed tends to amber more than tung.
The Complete Wood Oils Guide favors test boards. Wipe on a small area first to confirm tone and absorption.

Step-by-Step: How to Apply Wood Oil Like a Pro
A clean, smooth base is everything. The Complete Wood Oils Guide shows a simple, repeatable process that avoids sticky cures.
Prep:
- Sand to 180–220 grit for most pieces. Go to 320 on dense woods to limit blotch.
- Vacuum dust and wipe with a dry, clean cloth. Avoid wet rags that raise grain.
- For oily exotics, wipe quickly with a solvent before the first coat.
Application:
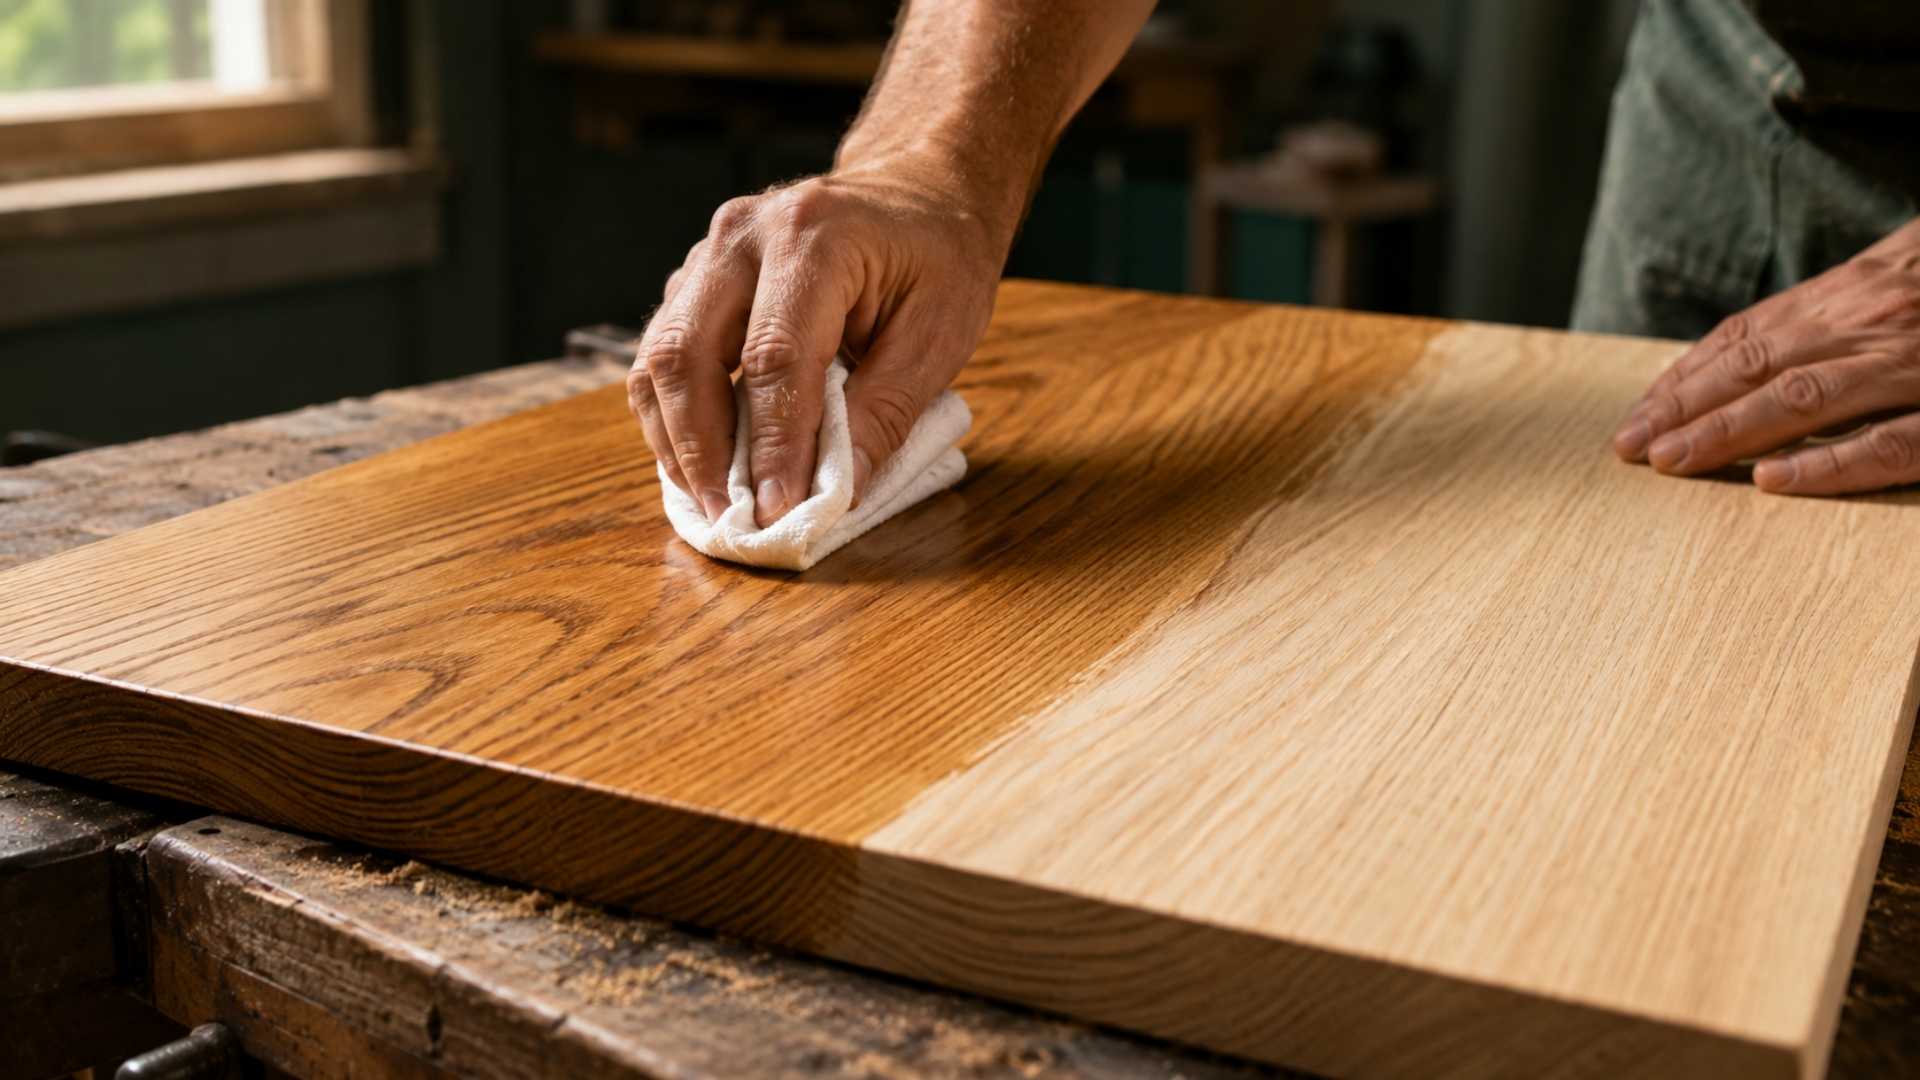
- Stir, do not shake. Apply a thin, even coat with a lint-free cloth or pad.
- Let the oil soak for 10–20 minutes. Keep the surface wet by adding a little more if dry spots appear.
- Wipe off all excess until the surface looks even and almost dry to the eye.
Between coats:
- Wait for the recommended recoat time. Many oils need 8–24 hours per coat.
- Lightly buff with a gray pad or 400 grit to knock down nibs. Remove dust.
- Add 2–5 coats total. More coats add depth and some water resistance.
Pro technique:
- Wet-sand the second coat at 400–600 grit to make a slurry. Wipe across the grain to fill pores. Then wipe clean with the grain.
Curing and safety:
- Let the final coat cure for several days before heavy use.
- Oil-soaked rags can self-heat. Lay flat to dry on nonflammable surfaces, then dispose as directed.
The Complete Wood Oils Guide tip: Thin coats plus complete wipe-off beats thick, gummy coats every time.

Maintenance, Repair, and Troubleshooting
Oil finishes shine when it is time to fix or refresh. The Complete Wood Oils Guide keeps upkeep simple.
Routine care:
- Dust often and clean with a damp cloth. Avoid harsh cleaners.
- Refresh with a light coat whenever the surface looks dry or dull.
Spot repairs:
- White water rings: Warm the area with a hair dryer on low, then re-oil and buff.
- Scratches: Scuff with 400 grit, reapply oil, wipe off, and blend the edges.
- Dents: Steam with a damp cloth and hot iron for a few passes, let dry, then re-oil.
Common problems:
- Sticky, never-dry surface: Too much oil left on top or recoated too soon. Wipe with a solvent, let flash, and apply a very thin coat.
- Blotchy patches: Uneven absorption. Sand back lightly and apply thinner coats or pre-seal.
The Complete Wood Oils Guide rule: Fix small areas fast. That is the beauty of oil finishes.
Performance, Durability, and Environmental Notes
Know what oil can and cannot do. The Complete Wood Oils Guide sets clear expectations.
Durability:
- Water: Tung oil resists water better than linseed. Oil-wax and hardwax do well with spills when cured.
- Heat: Hot cups can mark oil films. Use coasters and add coats for protection.
- UV: Natural oils darken in sun. Look for UV additives or recoat more often outdoors.
Indoor air quality:
- Solvent-heavy blends may off-gas. Vent well and follow safety sheets.
- Low-VOC and plant-based options exist. They cure slower but smell milder.
Testing and benchmarks:
- Many makers run simple droplet tests. If water beads for 10–15 minutes without darkening, you are in a good place.
- Scratch and rub tests help gauge readiness. If a cloth drags and leaves no mark, the coat is dry to handle.
The Complete Wood Oils Guide suggests keeping a finish journal. Note brand, date, coats, and results so you can repeat wins.
Real-World Examples and Lessons Learned
Here are field notes that stick. They come straight from shop floors and client homes. The Complete Wood Oils Guide works best with real stories.
Cutting boards:
- USP mineral oil is the simple path. Flood, soak, and wipe weekly at first, then monthly.
- For a longer window, use pure tung, let it cure fully, then buff with a board cream.
Dining tables:
- Danish oil gives a great day-one glow. Add a paste wax for feel, then refresh yearly.
- If you need more spill resistance, switch to a hardwax oil. It is a smart middle ground.
Outdoor chairs:
- Pure tung with a UV additive did well on a covered porch. A quick spring coat kept them fresh.
- Fully exposed pieces fared better with an oil base plus a marine varnish top later.
Big lessons:
- Thin coats cure better. Thick coats trap solvents and stay tacky.
- Wipe every inch. Missed wipe-off is the top cause of sticky spots.
- Test boards are cheap insurance.
The Complete Wood Oils Guide bottom line: Respect cure time and you will love the feel for years.
Cost, Coverage, and Reading Product Labels
You can save money and time if you read labels. The Complete Wood Oils Guide teaches a quick checklist.
Coverage and cost:
- Dense woods need less oil; soft woods drink more.
- Expect 200–400 square feet per quart per coat as a starting range. Adjust by species and porosity.
- Higher solids often mean fewer coats but a higher upfront price.
Label terms that matter:
- Pure vs blend: Pure oils cure slower but look classic. Blends add resins for speed and durability.
- Polymerized: Heat-treated to cure faster and harder. Great for furniture.
- VOC content: Lower is better for air quality, but may increase cure time.
- Food contact notes: Look for compliance statements for cutting boards and counters.
Buying smart:
- For large jobs, sample sizes pay off. Test tone and cure before buying gallons.
- Keep lids tight and decant into small bottles to reduce skinning.
The Complete Wood Oils Guide mantra: Buy the oil that fits the job, not the trend.

Common Myths and Mistakes
There is a lot of lore around oils. The Complete Wood Oils Guide separates fact from myth.
Myths to ignore:
- More oil means more protection. Wrong. Excess oil stays gummy. Thin, wiped coats win.
- Oil makes wood waterproof. Not true. It is water resistant at best.
- All “teak oils” are the same. No. They are blends and vary widely.
Mistakes to avoid:
- Skipping surface prep. Poor sanding leads to blotches and rough feel.
- Recoating too soon. Trapped solvents extend cure and can cause print-through.
- Ignoring rag safety. Lay rags flat to dry. Do not ball them up.
Quick checks before you start:
- Does the wood blotch? If yes, thin first coat or pre-seal.
- Will the piece see sun? Plan UV help or a different finish.
Use The Complete Wood Oils Guide as your checklist. It keeps your finish plan calm and clear.
Alternatives and Complementary Finishes
Sometimes you need a hybrid path. The Complete Wood Oils Guide shares solid combos.
Oil-then-wax:
- Adds silky feel and easy repair. Great for desks and shelves.
- Buff lightly every few months to refresh sheen.
Oil-then-varnish:
- Start with oil for depth, then top with varnish for tougher wear.
- Sand very lightly before varnish to help bond.
Hardwax oils:
- One- or two-coat systems that cure hard yet remain spot-repairable.
- Ideal for floors and busy homes that want a natural look.
Seal and color options:
- Dewaxed shellac can seal tricky woods before oil.
- Water-based stains can tone color first, then oil-wax to finish.
The Complete Wood Oils Guide encourages you to match looks, life, and labor. Pick the path that fits your priorities.
Frequently Asked Questions of The Complete Wood Oils Guide
Is tung oil food safe for cutting boards?
Yes, once fully cured, pure tung oil is considered food-contact safe by many woodworkers. Always check the label and allow full cure time.
How many coats of oil do I need?
Most projects look great with 2–5 thin coats. Dense woods often need fewer coats, while open-grain woods may need more.
Can I put polyurethane over an oil finish?
Yes, after the oil is fully cured and lightly scuffed. Make sure the product labels confirm compatibility.
Why is my oil finish still sticky after two days?
Too much oil stayed on the surface or you recoated too soon. Wipe with a solvent, let it flash off, then apply a very thin coat.
What is the difference between boiled and raw linseed oil?
Raw linseed oil cures very slowly. Boiled linseed oil uses dryers to speed curing but can amber more.
Conclusion
You now have a clear path from prep to upkeep. Use what you learned in The Complete Wood Oils Guide to pick the right oil, apply thin coats, and keep a log so you can repeat great results. Small tests, light hands, and patient cures will reward you with a rich, lasting finish.
Ready to start? Choose a project, make a test board, and follow the steps above. If you found The Complete Wood Oils Guide helpful, share it, subscribe for more shop-tested tips, or leave a question and I will help you troubleshoot.