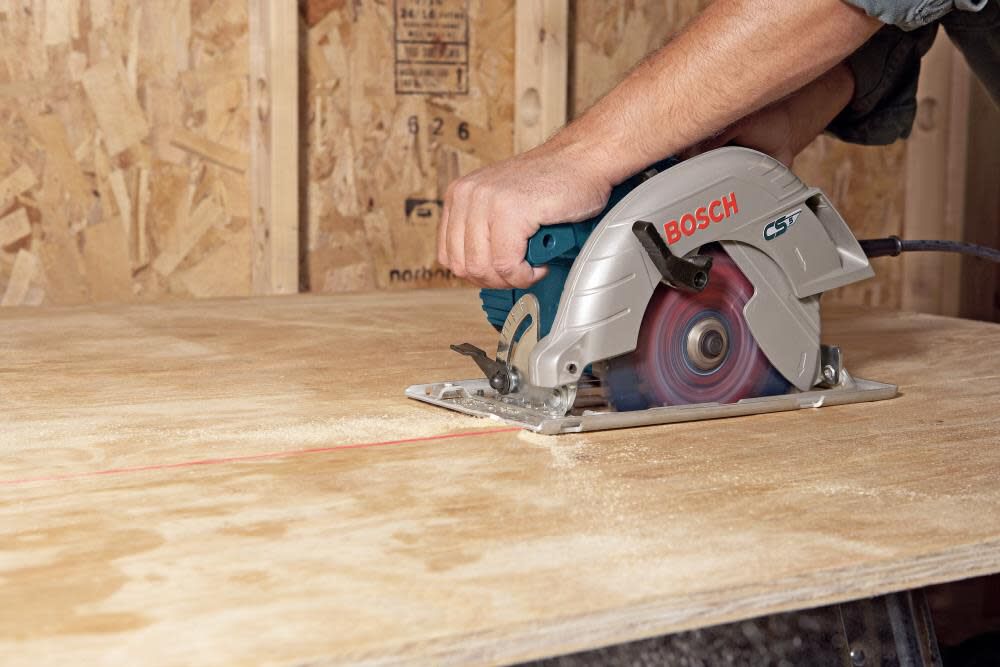
To make a clean circular saw crosscut, mark the board accurately, support the workpiece on a stable cutting surface, set the blade depth correctly, use a suitable sharp blade, keep the saw shoe flat, and guide the saw steadily through the cut.
Across U.S. home workshops, garages, remodeling projects, and construction sites, a circular saw is commonly used to cut dimensional lumber, plywood, and other wood products to length. A crosscut runs across the grain rather than along it, making it useful for shortening boards, cutting framing members, trimming plywood, and preparing parts for assembly.
A handheld circular saw can make accurate crosscuts, but the quality depends heavily on setup. A straight reference line alone does not guarantee a square cut. The workpiece needs stable support, the blade needs to match the material and desired finish, and the saw needs to move at a controlled rate without forcing the blade. For repeated or highly precise crosscuts, a guide, crosscut jig, or dedicated crosscutting system can make alignment easier.
Source: woodsmithvideoedition.com
What Is a Circular Saw Crosscut?
A circular saw crosscut is a cut made across the grain of a piece of wood. On a typical board, that means cutting across its width or shortening it to a specified length. The opposite operation is a rip cut, which follows the direction of the grain.
Crosscuts are common when cutting 2×4 lumber, deck boards, trim stock, plywood panels, shelving material, and other wood products. A handheld circular saw is especially useful when the material is too large to handle comfortably on a smaller saw or when the work needs to be completed at the jobsite.
The goal of a good crosscut is not simply to separate the material. For many projects, the cut should also be square, accurately positioned, reasonably clean, and free from unnecessary splintering. Those results come from controlling the blade, workpiece, and reference point throughout the cut.
Source: fan-mir.ru
Crosscut
Cuts across the grain and is commonly used to shorten boards or cut parts to length.
Rip cut
Cuts generally along the grain and is commonly used to reduce the width of boards or panels.
Bevel crosscut
Cuts across the grain while the saw is tilted to create an angled edge.
Compound cut
Combines an angled bevel with an angled plan cut and requires additional setup and control.
When Is a Circular Saw Better Than a Miter Saw?
A circular saw is useful when the workpiece is large, the cut must be made in place, or portability matters. A miter saw is often more convenient for repeated crosscuts of manageable boards because the blade travels along a controlled pivot and the fence establishes a consistent reference.
If you need many identical crosscuts, especially where tight dimensional accuracy is important, a miter saw, crosscut station, or properly built circular saw jig may reduce setup time and variation. A circular saw remains practical for occasional cuts, large stock, remodeling work, and situations where transporting a larger machine is inconvenient.
What You Need Before Making the Cut
Before switching on the saw, prepare the workpiece, cutting area, blade, and measurement tools. Good preparation reduces the need to reposition material while the blade is moving and makes it easier to maintain a straight cutting path.
Use a stable work surface that supports the material on both sides of the intended cut. The support should not allow the board or panel to sag into the blade path. For sheet goods, a sacrificial foam or cutting surface can support the panel while leaving room for the blade to pass without striking the floor or bench.
Check the saw before use. The blade should be appropriate for the material, properly installed, and free of obvious damage. The upper and lower blade guards should operate as designed. In U.S. construction workplaces, OSHA requires portable power-driven circular saws covered by its construction standard to have guards above and below the base plate or shoe, with the lower guard returning to the covering position when the saw is withdrawn from the work.
Source: acmetools.com
Circular saw
Use a saw appropriate for the material thickness and cutting task, with functioning guards and controls.
Correct blade
Select a sharp blade intended for the material and the desired balance between speed and cut quality.
Tape measure and square
Use accurate measuring and layout tools to establish the cut location and verify squareness.
Clamps or guide
Use clamps or an appropriate guide when they improve stability and accuracy without interfering with the saw.
Eye and hearing protection
Wear appropriate eye protection and hearing protection where noise exposure warrants it.
How Deep Should the Circular Saw Blade Be?
Set the blade so it extends only as far below the workpiece as needed to complete the cut. Excessive blade exposure increases the amount of rotating blade below the material without providing a benefit to the cut.
The exact adjustment depends on the saw and material thickness, so use the tool manufacturer’s instructions for the appropriate setting. After adjustment, confirm that the shoe remains flat against the workpiece and that the blade can complete the cut.
How Should the Workpiece Be Supported?
Support the material so the cut does not cause the workpiece to close on the blade or fall unpredictably. For a board, place supports where they hold the main piece and cutoff securely. For plywood, support the panel broadly rather than balancing it across narrow sawhorse rails.
Do not place a support directly where the blade will travel. Before cutting, trace the planned blade path and verify that the blade will pass through the material and sacrificial surface without contacting a clamp, bench, sawhorse, or other object.
How to Make a Straight Circular Saw Crosscut
The most reliable process is to measure, mark, support, align, and then make one controlled cut. Do not rush the setup simply because the cutting portion takes only a few seconds.
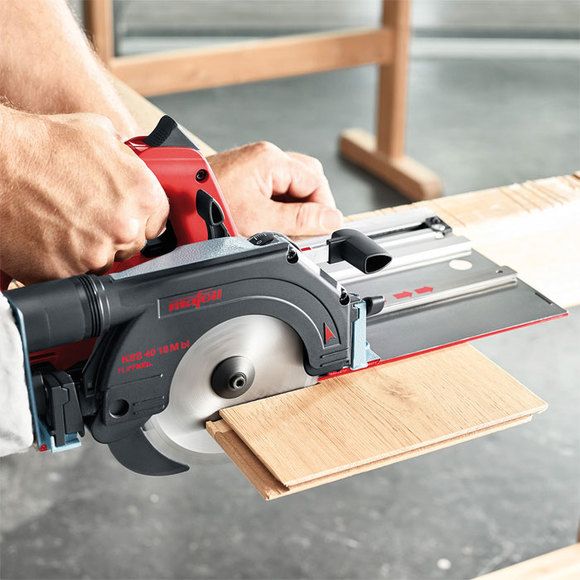
For an occasional crosscut in dimensional lumber, the saw’s built-in reference marks may be sufficient if you are comfortable controlling the tool. For more consistent results, clamp a straight guide or use a crosscut jig. A guide gives the saw shoe a physical reference instead of requiring you to steer the saw solely by eye.
Source: popularwoodworking.com
1. Measure the required length
Measure from a known reference edge and mark the intended cut location clearly.
2. Mark the cut line
Use a square to draw a line across the board. Extend the line far enough to remain visible while positioning the saw.
3. Account for the kerf
The blade removes a strip of material called the kerf. Position the saw so the correct side of the blade follows the layout line rather than accidentally cutting away the finished dimension.
4. Secure the workpiece
Clamp the material when appropriate and make sure the support system cannot shift during the cut.
5. Position the saw
Place the front of the shoe on the workpiece with the blade clear of the material. Check that the blade path, cord or battery position, and cutoff area are unobstructed.
6. Start the saw before entering the material
Follow the manufacturer’s starting procedure and allow the blade to reach operating speed before beginning the cut.
7. Guide the saw steadily
Keep the shoe flat and advance the saw smoothly along the cut line or guide without twisting the tool.
8. Complete the cut without forcing the blade
Let the blade maintain its intended cutting action. Excessive pressure can reduce control and may cause binding or a rough cut.
9. Finish and withdraw safely
After the blade clears the workpiece, release the trigger according to the tool instructions and keep the saw stable until the blade stops.
Using a Straightedge Guide for More Accurate Crosscuts
A straightedge guide can improve accuracy because the saw shoe follows a physical reference. Measure the distance between the guide edge and the blade, position the guide accordingly, and clamp it securely. Make a test cut on scrap material before committing to the finished workpiece.
A purpose-built crosscut jig can go a step further by combining a straight guide with a perpendicular reference edge. This allows the workpiece to register against the jig in a repeatable position, which is useful when making several boards to the same length.
Check the guide before cutting
Make sure the guide is straight, firmly secured, and positioned on the correct side of the cut.
Test on scrap
A test cut can reveal an offset between the guide and blade before the finished material is cut.
Choosing a Blade for Circular Saw Crosscuts
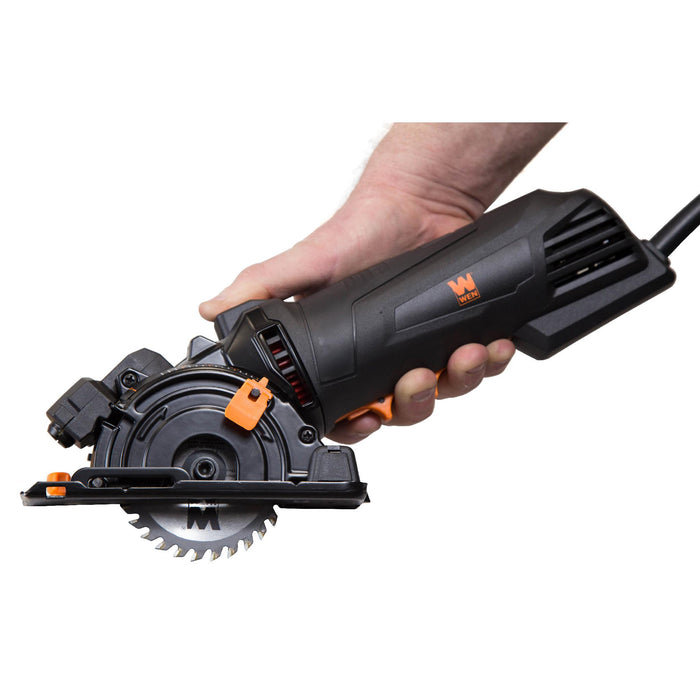
Blade selection affects cut speed, edge quality, and how much cleanup may be required. A blade designed for rough framing work may remove material quickly but leave a rougher edge than a blade designed for finish cutting.
Tooth count is one useful variable, but it should not be considered in isolation. Lower-tooth-count blades generally emphasize faster material removal, while higher-tooth-count blades can produce cleaner edges when used with suitable material and cutting technique. Always verify that the blade diameter, arbor specification, and rated speed are compatible with the saw.
For finish-oriented crosscuts in plywood, hardwood, trim, or other materials where edge quality matters, a suitable higher-tooth-count carbide blade can be more appropriate than a coarse framing blade. For construction cuts where the edge will be hidden or further processed, a general-purpose or framing blade may be sufficient.
Source: wenproducts.com
Dimensional lumber
A general-purpose or framing-oriented carbide blade is often practical when speed and durability matter more than a furniture-grade edge.
Plywood and sheet goods
A blade intended for plywood or finish cutting can reduce splintering compared with a coarse framing blade.
Hardwood and visible edges
A suitable finer-tooth blade can improve edge quality, but stable support and controlled feeding remain necessary.
Damaged or dull blade
Replace or properly maintain a blade that is damaged, excessively dull, or producing abnormal cutting behavior.
Why Do Circular Saw Crosscuts Splinter?
Splintering can result from the blade’s tooth geometry, material structure, blade condition, unsupported fibers, or cutting technique. Plywood and veneered panels can be particularly sensitive because their thin face layers can chip as the teeth exit the material.
If the visible face matters, determine how the particular saw and blade leave the cleanest edge. Circular saw blade rotation and the direction in which teeth enter and exit the workpiece affect which surface receives more tearout. Make a test cut on scrap when appearance is important rather than assuming every saw and blade combination behaves identically.
Use a sharper, appropriate blade
A blade suited to the material can reduce unnecessary tearing compared with an unsuitable or worn blade.
Improve support
Backing the material properly can reduce unsupported fibers at the cut.
Use controlled feed
Avoid forcing the saw or moving it erratically through the workpiece.
Circular Saw Crosscut Safety and Common Mistakes
The blade is the main hazard, but safe operation also depends on preventing unexpected movement of the material and maintaining control of the saw. OSHA identifies blade contact, kickback, and flying particles as hazards associated with handheld circular saws.
Keep your hands away from the line of cut and never place a hand directly in front of or behind the blade path. Do not reach underneath the workpiece while the saw is running. Keep bystanders away from the cutting area, and direct the saw and material so that a potential ejected fragment does not travel toward another person.
Kickback is possible when the blade binds, catches the material, or the workpiece moves in a way that interferes with the blade. OSHA notes that kickback is generally more likely during ripping than crosscutting, but crosscutting still requires proper support, blade selection, and control.
Source: powertoolsgb.co.uk
Do not remove or defeat the blade guard
The guard is a primary protective feature. If it does not operate correctly, stop using the saw until the problem is addressed.
Do not cut unsupported stock
Material that shifts, drops, or closes around the blade can compromise control.
Keep hands outside the cut path
Never hold the workpiece in a location where a slip could put your hand near the blade.
Do not force a binding saw
If the saw slows, binds, or behaves unexpectedly, stop safely and determine the cause instead of pushing harder.
Wait for the blade to stop
Do not set the saw down, lift it from a cut, or handle the cutoff in a way that exposes you to the moving blade.
Inspect damaged blades
Cracked or otherwise damaged blades should be removed from service rather than reused.
What Should You Do If the Saw Starts Binding?
If the saw begins to bind, pull back only according to the manufacturer’s safe operating procedure and avoid twisting or forcing the tool. If the blade is still rotating, maintain control and keep your hands away from the cutting path. Once the saw is safely stopped and disconnected from its power source when required, inspect the workpiece, support arrangement, blade condition, and cutting depth.
Common causes include inadequate support, a workpiece closing on the blade, a dull or damaged blade, incorrect blade installation, or an awkward cutting position. Correct the underlying setup before restarting the cut.
Stop and inspect
Do not continue cutting through abnormal resistance until you understand why it occurred.
Check the support
Make sure the workpiece is not sagging, shifting, or pinching the blade.
Check the blade
Verify that the blade is suitable, correctly installed, and in usable condition.
Common Crosscutting Mistakes to Avoid
Many inaccurate crosscuts come from setup rather than from a problem with the saw. Measuring from different reference edges, forgetting the kerf, cutting with an unsupported cutoff, or steering the saw away from the layout line can all change the final dimension.
Another common mistake is trying to improve accuracy by moving more slowly while applying excessive side pressure. The better approach is to establish a reliable reference and allow the saw to move through the material without twisting.
Cutting directly on the finished dimension
Account for the blade kerf so the remaining piece finishes at the intended measurement.
Relying only on a pencil line
For repeated or high-accuracy cuts, use a square, straightedge, or crosscut jig.
Poor material support
Unsupported material can sag and alter the cut or cause binding.
Forcing the saw
Excessive feed pressure can reduce control and produce rough or inaccurate cuts.
Frequently Asked Questions
Q
Can a circular saw make a perfectly square crosscut?
A circular saw can make a square crosscut, but accuracy depends on measurement, support, saw control, and the reference system used. For occasional cuts, a combination square and careful technique may be enough. For repeated cuts, a properly aligned crosscut jig or guide provides a more consistent reference.
Q
What blade is best for circular saw crosscuts?
The appropriate blade depends on the material and required finish. Coarser blades are useful for fast construction cuts, while finer-tooth blades are generally better suited to cleaner finish cuts in plywood, hardwood, and other visible materials. Always match the blade diameter, arbor, material rating, and maximum speed to the saw.
Q
Should I use a guide when crosscutting with a circular saw?
A guide is not mandatory for every crosscut, but it can make accurate cuts easier. A straightedge guide provides a physical reference for the saw shoe, while a crosscut jig can provide both a guide and a square registration edge. Test the setup on scrap material before cutting finished stock.
Q
Why does my circular saw crosscut leave a rough edge?
A rough edge can result from a dull or unsuitable blade, excessive feed pressure, poor support, vibration, or the blade’s tooth pattern. Check the blade first, then verify that the workpiece is fully supported and that the saw is moving steadily. For finish work, consider a blade specifically intended for cleaner cuts.
Q
Can I crosscut plywood with a circular saw?
Yes. A circular saw is commonly used to crosscut plywood and other sheet goods. Support the panel broadly, use a suitable blade, mark the cut carefully, and consider a straightedge guide for long or highly visible cuts. A test cut can help determine which face and blade combination produces the cleanest edge.
Q
How do I prevent kickback during a circular saw crosscut?
Reduce the conditions that can cause binding: support the workpiece correctly, use a suitable sharp blade, set the cutting depth appropriately, keep the saw shoe flat, and avoid twisting or forcing the saw. Keep your hands away from the blade path and follow the operating instructions supplied with the specific saw.
✦ Wrapping Up
Conclusion
Circular saw crosscuts are straightforward once the workpiece and saw are set up correctly. The essential sequence is to measure accurately, mark the cut, support the material, select a suitable blade, set the depth, establish a reliable reference, and guide the saw smoothly through the material.
For rough construction cuts, careful freehand control may be sufficient. When the cut edge will remain visible or several pieces must be identical, a suitable blade and a properly secured guide or crosscut jig can make the process more consistent. Safety should remain part of every cut: keep hands out of the blade path, maintain the guards, control the workpiece, and never continue through unexpected binding without first finding the cause.
💡 Key Takeaway
Before your next crosscut, make one test cut on scrap material. Use it to verify the measurement, blade position, squareness, support, and edge quality before cutting the finished piece.