
The Ultimate Planer Guide helps you choose, use, and maintain the right planer with less guesswork.
If you want smoother boards, cleaner cuts, and better results in your shop, this guide will walk you through the full process with the kind of practical detail that saves time and avoids mistakes. I’ve spent enough hours dealing with snipe, tear-out, dull blades, and bad setup to know that a good planer is only half the story. The rest is knowing how to use The Ultimate Planer Guide the right way, from choosing the right machine to getting consistent, professional-looking results.

What The Ultimate Planer Guide Really Means
The Ultimate Planer Guide is a complete roadmap for understanding, buying, setting up, and using a planer well. A planer is a tool that removes thin layers of wood so your boards come out flat, even, and ready for joinery or finishing. Whether you are a hobby woodworker or a pro, The Ultimate Planer Guide helps you make better choices and avoid the common mistakes that ruin stock.
At its core, this guide covers three things:
• How to pick the right planer for your work
• How to set it up for clean, accurate cuts
• How to keep it running well over time
I like to think of a planer as a kitchen knife for lumber. In the wrong hands, it can make a mess. In the right hands, it turns rough material into something precise and usable. That is why The Ultimate Planer Guide matters so much.
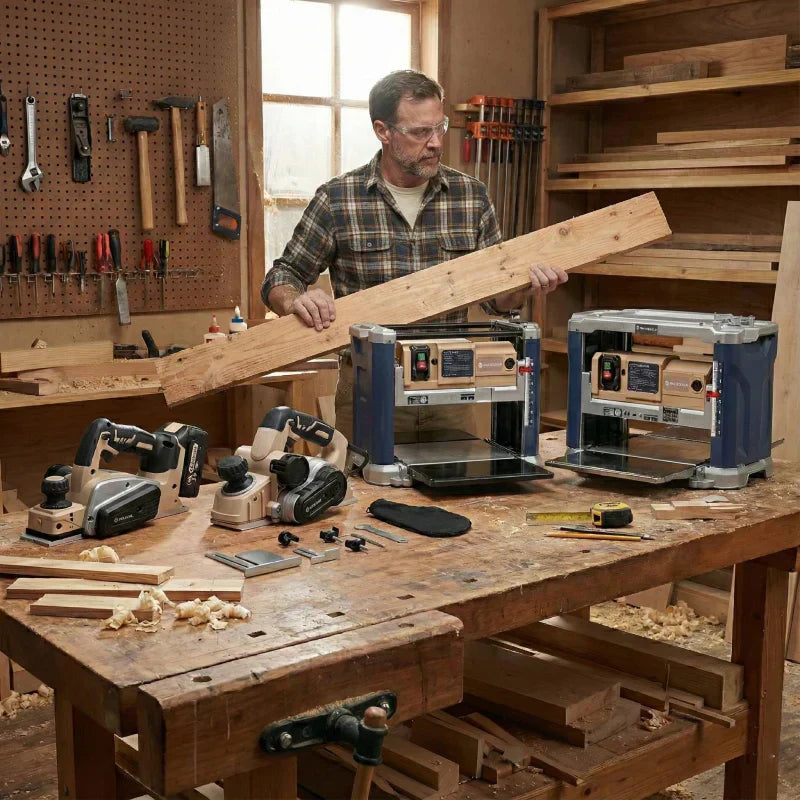
Why Planers Matter in Woodworking
Planers are not just about making wood thinner. They help control thickness, improve flatness, and make projects fit together the way they should. If you have ever tried to build a table from rough boards that were all a little different, you already know how valuable that is.
A planer can help with:
• Uniform board thickness for cabinets, tables, and shelves
• Better glue-ups because boards line up more cleanly
• Smoother surfaces that need less sanding
• Faster prep work compared with hand tools alone
One lesson I learned early was that a planer does not fix bad lumber by magic. It can make a board more usable, but it cannot fully correct a twisted or severely bowed piece without smart prep. That is where The Ultimate Planer Guide becomes useful. It teaches you how to work with the tool, not against it.

Types of Planers You Should Know
Not all planers work the same way. The model you choose depends on your space, budget, and workload. Understanding the differences is one of the most important parts of The Ultimate Planer Guide.
Benchtop Planers
Benchtop planers are compact and popular with home woodworkers. They are easier to move and usually cost less than larger units. They work well for smaller shops and occasional use.
Best for:
• Small workshops
• DIY furniture projects
• Users who need portability
Limitations:
• More noise than many expect
• Can struggle with very wide or very dense boards
• May show more snipe if not set up carefully
### Portable Planers
Portable planers are similar to benchtop units, but they are often built for jobsite use. They are easy to carry and useful when you need to bring the tool to the work, not the other way around.
Best for:
• Contractors
• Remodelers
• Temporary setups
Stationary Planers
Stationary planers are heavier and built for serious shop use. They usually offer better stability, stronger motors, and higher capacity. If your work volume is high, this type is often worth the investment.
Best for:
• Professional shops
• High-volume production
• Wide or thick stock
The right choice depends on what you make most often. That is a theme you will see again and again in The Ultimate Planer Guide: the best planer is the one that fits your actual work, not just the one with the biggest specs.

How to Choose the Right Planer
Buying a planer can feel overwhelming if you focus only on price. A smarter approach is to match the tool to your daily needs. The Ultimate Planer Guide makes that choice easier by breaking it into a few simple factors.
Motor Power
More power helps the planer handle harder woods and deeper cuts. A weaker motor may slow down or bog down when working with oak, maple, or thick stock. If you plan to use hardwood often, don’t undersize the motor.
Cutting Width
Think about the widest boards you use most often. A planer with a larger width capacity gives you more flexibility, but it also tends to cost more. For many users, a 12-inch or 13-inch model is enough.
Depth of Cut
The depth of cut affects how much material the machine removes in one pass. Deeper cuts can speed up work, but they also raise the risk of tear-out and stress on the tool. In real use, lighter passes usually give better results.
Feed Rate
Feed rate controls how fast wood moves through the planer. A slower feed can improve finish quality, while a faster feed may save time. I usually recommend starting with a conservative setting until you know how the machine behaves.
Noise and Dust Control
Planers are loud. They also create a lot of chips and dust. Good dust collection is not a luxury. It is part of making the tool safe, clean, and efficient.
When choosing a machine, ask yourself:
• What kind of wood do I use most?
• How wide are my average boards?
• Do I need portability or shop stability?
• How important are finish quality and noise control?
The Ultimate Planer Guide works best when your decision is based on real use, not just marketing claims.

Setting Up Your Planer for Better Results
Setup matters more than many beginners realize. A well-made planer can still give poor results if it is not leveled, aligned, or tuned correctly. This is one of the biggest takeaways from The Ultimate Planer Guide.
Level the Infeed and Outfeed Tables
If the tables are not aligned, the board may dip or rise as it enters or exits the machine. That can create snipe or uneven thickness. Use a reliable straightedge and check the surfaces carefully.
Check the Knives or Cutterhead
Dull knives leave rough cuts and increase tear-out. If your planer uses replaceable blades, inspect them often. If it has a helical or spiral cutterhead, keep the inserts in good shape and replace worn ones as needed.
Test with Scrap Wood
Before running expensive boards through the machine, test it on scrap. This is a simple habit that has saved me from wasting good lumber more times than I can count. It gives you a fast read on feed, cut quality, and possible setup issues.
Make Small Adjustments
Do not try to take too much off in one pass. Small adjustments are safer and usually produce cleaner results. When in doubt, take less material and make another pass.
A good setup is like tuning a guitar. It may seem slow at first, but once it is right, everything sounds better.
How to Use a Planer Safely
Safety should always be part of The Ultimate Planer Guide. Planers may look simple, but they can cause serious injury if used carelessly. The goal is to work cleanly, calmly, and with full control.
Follow these habits:
• Wear eye and hearing protection
• Keep hands away from the cutterhead area
• Avoid loose clothing and jewelry
• Support long boards with rollers or stands
• Feed boards steadily without forcing them
One mistake I see often is pushing too hard. That can strain the motor, increase chatter, and create uneven cuts. Let the machine do the work. If it feels like you need to fight it, stop and check the setup.
Also, never plane boards with hidden nails, screws, or staples. Metal can ruin knives fast and may damage the cutterhead. A quick inspection saves money and avoids accidents.

How to Get Smoother, Cleaner Cuts
A planer can give you excellent results, but only if you use the right technique. The Ultimate Planer Guide would not be complete without the practical habits that improve cut quality.
Read the Grain
Wood grain direction affects tear-out. When possible, feed the board in the direction that feels smoother to the touch. If the grain reverses, take lighter passes.
Take Light Cuts
Heavy cuts are tempting because they feel faster. In reality, they often create more tear-out and more stress on the machine. Thin passes are usually cleaner and more predictable.
Rotate Boards If Needed
Some boards have twist, cup, or bow. You may need to flatten one face with a jointer or straightedge first before running them through the planer. That is the best way to avoid chasing the wood in circles.
Use Sharp Blades
Sharp blades make a huge difference in finish quality. If your cut looks fuzzy, chipped, or uneven, dull blades may be the reason. I have seen users blame the machine when the real issue was simply worn cutters.
Use Proper Dust Collection
Good dust removal helps the board move smoothly and keeps chips from interfering with the cut. It also reduces cleanup and improves visibility around the machine.
These small habits add up. Like brushing a coat of paint in thin layers, the final result looks better when you go slow and steady.

Common Planer Problems and How to Fix Them
Even the best planer can act up. The point of The Ultimate Planer Guide is not to promise perfection. It is to help you fix problems fast and keep working.
Snipe
Snipe is a deeper cut at the beginning or end of a board. It often happens when the board is not supported well or the machine is not leveled correctly.
Fixes:
• Support long boards on both ends
• Check table alignment
• Take lighter cuts
• Keep feed pressure steady
Tear-Out
Tear-out happens when the cutter lifts and rips wood fibers instead of slicing them cleanly. It is common in figured woods like maple, cherry, or walnut.
Fixes:
• Take thinner passes
• Check blade sharpness
• Feed with the grain where possible
• Use a helical cutterhead if your budget allows
Chatter Marks
These are small ripples or repeating marks on the surface. They often point to vibration, dull blades, or loose machine parts.
Fixes:
• Tighten fasteners
• Check blade balance
• Reduce cut depth
• Make sure the planer sits on a stable surface
Inconsistent Thickness
If boards come out uneven, the issue may be misalignment or improper feed.
Fixes:
• Recheck calibration
• Clean rollers
• Inspect infeed and outfeed settings
• Test with a known flat board
A lot of frustration disappears once you learn to spot the cause instead of guessing. That is one of the most practical lessons in The Ultimate Planer Guide.

Maintenance Tips That Extend Planer Life
A planer works best when you treat it like an important tool, not a disposable one. Regular care improves performance and helps the machine last longer. This part of The Ultimate Planer Guide is simple, but it saves money.
Keep up with these tasks:
• Remove dust and chips after use
• Check blades or inserts for wear
• Lubricate moving parts as recommended by the maker
• Inspect belts, rollers, and fasteners
• Store the planer in a dry space
I learned the value of maintenance the hard way after ignoring chip buildup for too long. The machine started feeding poorly, and the surface quality dropped fast. Once I cleaned it properly and checked the rollers, the problem was gone.
A clean planer is like a clean windshield. Everything works better when you can see and move clearly.
How to Choose Between Budget and Premium Models
Price matters, but so does long-term value. In The Ultimate Planer Guide, the real question is not “What is cheapest?” It is “What gives me the best return for my type of work?”
Budget models can be fine if you:
• Work on small projects
• Use the planer occasionally
• Do not need wide capacity
• Can tolerate a bit more setup and tuning
Premium models make more sense if you:
• Plane often
• Work with hardwood regularly
• Need better finish quality
• Want stronger dust control and reduced vibration
Industry groups and tool reviewers often note that cutterhead design, motor strength, and frame stability have a big impact on final performance. That matches what many woodworkers see in real shops. Higher quality machines often save time because they need less tweaking and deliver more consistent output.
If you are unsure, think about the next three years, not just today. The right machine should fit where your work is going.
Best Practices for Beginners
If you are new to planers, start simple. The fastest way to improve is to build good habits early. The Ultimate Planer Guide is especially useful here because it helps you avoid expensive beginner mistakes.
Start with these basics:
• Read the manual before the first use
• Practice on scrap lumber first
• Take light passes
• Keep boards flat and supported
• Clean the machine after each session
Also, do not expect the planer to solve every lumber problem. It is one tool in the workflow. Sometimes you need a jointer, a sander, or a better board selection process to get the result you want.
The beginners who improve fastest usually share one trait: they are patient. They do not rush the first setup or the first cut. That patience pays off fast.
Frequently Asked Questions of The Ultimate Planer Guide
What is the main purpose of a planer?
A planer makes wood boards a consistent thickness and improves surface quality. It is used to prepare lumber for furniture, cabinets, shelves, and other woodworking projects.
How do I reduce snipe on a planer?
Reduce snipe by supporting long boards, taking lighter cuts, and checking that the infeed and outfeed tables are aligned. Steady feed pressure also helps keep the board level through the cut.
Is a helical cutterhead worth it?
For many woodworkers, yes, especially if they work with hardwoods or figured grain. A helical cutterhead often gives smoother cuts, less tear-out, and quieter operation than straight knives.
How often should planer blades be replaced?
That depends on how often you use the machine and what wood you cut. If the planer starts leaving rough, fuzzy, or uneven surfaces, it is time to inspect the blades and likely replace or rotate them.
Can a planer flatten a warped board?
A planer can help, but it usually cannot flatten a badly warped board by itself. You often need to flatten one face first or use a jointer-style process before planing both sides to thickness.
Conclusion
The Ultimate Planer Guide is really about getting better results with less stress. When you know how to choose the right machine, set it up well, and use it with care, the planer becomes one of the most reliable tools in your shop.
The biggest lessons are simple: start with the right machine, take light cuts, keep the blades sharp, and do regular maintenance. If you apply those habits, you will get cleaner boards, fewer mistakes, and a smoother workflow overall.
Use this guide as your checklist the next time you shop, set up, or troubleshoot a planer. And if you want to keep improving, explore more woodworking resources, compare tool options carefully, and leave a comment with your own planer tips or questions.