
Woodworking joints are the backbone of strong, lasting projects, and the right joint depends on purpose, strength, and skill level.
If you have ever built a table that wobbled, a box that split at the corners, or a cabinet that looked great but felt weak, you already know why joinery matters. The Ultimate Woodworking Joint Guide will help you understand the main joint types, when to use them, and how to choose the best one for clean, durable results.
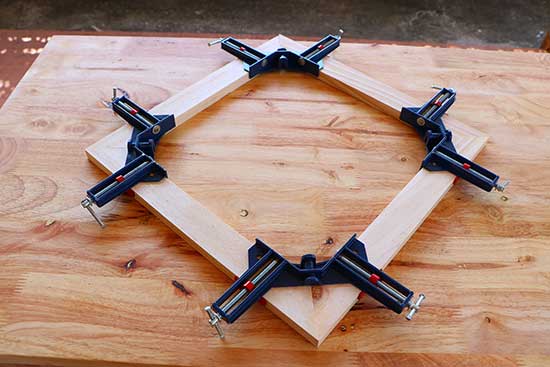
What Woodworking Joints Are and Why They Matter
Woodworking joints are the ways two or more pieces of wood connect. Some joints are simple and fast. Others take more time but give far better strength and beauty. In my own shop work, I learned early that a good joint can save a project, while a poor joint can ruin even expensive lumber.
The best joint is not always the strongest one on paper. It is the one that fits the job, the wood type, and the stress the piece will face. A dining chair, for example, needs different joinery than a floating shelf or picture frame.
Good joinery affects:
• Strength and durability
• Appearance and finish quality
• Movement control as wood expands and contracts
• Ease of assembly and repair
• Project speed and tool needs
Wood is a living material, even after it is cut and dried. That is why joinery is part engineering and part craft. The more you understand it, the more confident your builds will feel.
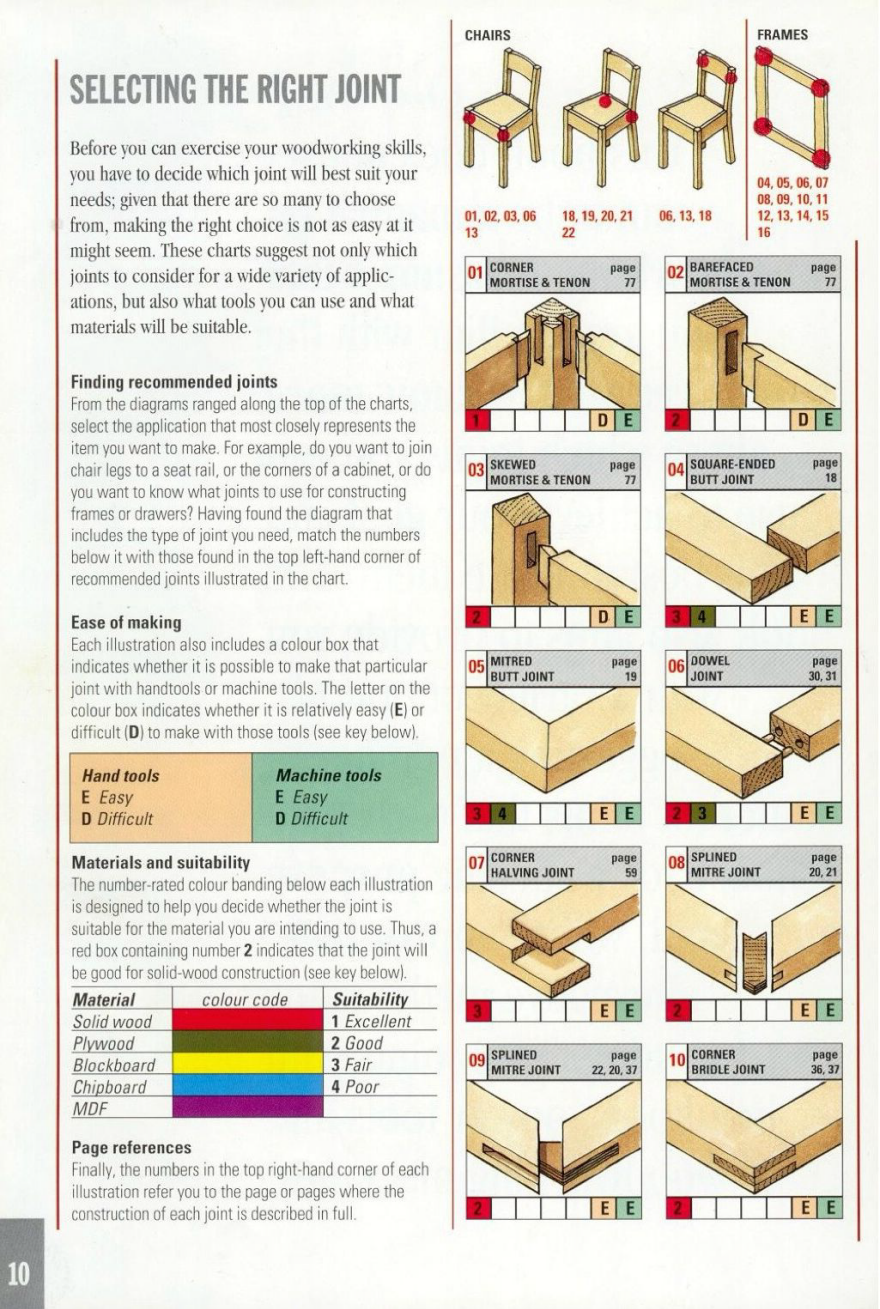
The Main Types of Woodworking Joints
There are many woodworking joints, but a handful show up again and again in real projects. Each one has a sweet spot. I still keep a few favorite joints in rotation because they solve most common build problems without overcomplicating the work.
Butt Joint
A butt joint is the simplest joint. One board meets another at the edge, end, or face. It is quick, easy, and often used in beginner projects.
It is not very strong by itself. For that reason, it usually needs glue, screws, nails, dowels, or reinforcement from another method.
Best for:
• Basic boxes
• Temporary builds
• Simple frames
• Hidden joints inside furniture
Miter Joint
A miter joint joins two pieces at angled cuts, usually 45 degrees. It gives a clean, polished look, especially on frames and trim.
It looks elegant, but it is not naturally strong. I have found that without reinforcement, a miter joint can fail under stress or movement, especially on larger pieces.
Best for:
• Picture frames
• Decorative trim
• Small boxes
• Cabinet face details
Lap Joint
A lap joint overlaps two pieces of wood so they share load across a larger surface. This makes it stronger than a plain butt joint.
It is one of those joints that feels simple but works very well. When cut cleanly, it gives solid alignment and dependable strength.
Best for:
• Frames
• Furniture parts
• Cross supports
• Light structural work
Mortise and Tenon Joint
The mortise and tenon joint is one of the strongest and oldest woodworking joints. A tenon fits into a matching mortise cut into another piece. It has been used for centuries in furniture and frame construction because it resists racking very well.
In my experience, this is the joint that separates casual builds from serious ones. It takes more time, but the result often lasts for years.
Best for:
• Chairs
• Tables
• Doors
• Frames
• Heavy furniture
Dovetail Joint
The dovetail joint is famous for strength and beauty. Its interlocking shape makes it hard to pull apart, which is why it is often used in drawers and fine boxes.
This joint takes practice. The first few times I cut dovetails, I spent more time fitting and adjusting than I expected. But once you learn the feel of it, the payoff is worth it.
Best for:
• Drawer boxes
• Jewelry boxes
• Fine casework
• Decorative joinery
Dowel Joint
A dowel joint uses round wooden pins to align and strengthen two pieces. It is neat, efficient, and common in modern furniture production.
It is a good choice when you want hidden joinery without complex cuts. The key is accuracy. If the holes do not line up well, the joint can weaken fast.
Best for:
• Cabinet assembly
• Furniture
• Shelf builds
• Panel alignment
Biscuit Joint
A biscuit joint uses a thin, oval wooden piece inserted into matching slots. The biscuit swells with glue and helps align the pieces.
It is great for alignment, but it is not the strongest joint on its own. I like it for panel glue-ups and face frame work where flush alignment matters.
Best for:
• Table tops
• Panel assembly
• Edge joining
• Face frames
Pocket Hole Joint
A pocket hole joint uses angled screws driven into one board from a hidden hole. It is fast, beginner-friendly, and useful for many shop builds.
I often recommend it for people who want clean results with minimal fuss. Still, it is best used where the screws will not be heavily exposed to stress or moisture.
Best for:
• Face frames
• Cabinets
• Quick furniture
• Utility projects
Tongue and Groove Joint
A tongue and groove joint fits one board’s ridge into another board’s slot. This helps boards stay aligned while still allowing some wood movement.
It is common in flooring, paneling, and cabinet backs. It is also a smart choice when you need a neat seam across wider surfaces.
Best for:
• Flooring
• Wall paneling
• Cabinet backs
• Wide boards
How to Choose the Right Joint for Your Project
Choosing a woodworking joint is easier when you think about three things: strength, movement, and appearance. Not every project needs a fancy joint, and not every joint belongs in every build.
Ask yourself:
• Will the joint carry weight?
• Will the wood move with humidity changes?
• Will the joint be visible?
• Do I need speed or maximum strength?
• What tools do I have?
For example, a bookshelf needs joints that handle load and resist sagging. A picture frame needs clean corners more than brute strength. A dining chair needs joints that fight wobble and repeated stress.
Here is a simple rule I use in the shop:
• If the project is decorative, focus on appearance
• If the project carries weight, focus on strength
• If the project must be fast, choose a practical joint
• If the wood will move a lot, allow for expansion and contraction
This is where The Ultimate Woodworking Joint Guide becomes useful in real life. It is not about memorizing every joint. It is about matching the right one to the job.

Tools and Skills You Need for Clean Joinery
You do not need a massive shop to make strong joints. But you do need accurate tools and a careful hand. Even the best joint fails when the cuts are sloppy.
Helpful tools include:
• Tape measure and marking gauge
• Square and combination square
• Chisels
• Handsaw or table saw
• Router
• Drill and bits
• Clamps
• Mallet
• Dovetail saw or jigsaw, depending on the joint
Skills that matter most:
• Measuring accurately
• Marking clearly
• Cutting to the line
• Dry fitting before glue-up
• Sanding without changing the fit
One mistake I made early was rushing the fit. I thought glue would hide tiny gaps. It does not. Glue can fill small spaces, but it is not a magic fix for bad cuts.
Strength, Stability, and Wood Movement
Wood does not stay the same size all year. It expands and contracts with moisture. That means a joint must hold tight while still letting the wood breathe a little.
This is why some joints fail in the real world even if they look fine in the shop. A joint that seems perfect in dry weather may loosen later in a humid room or a warm garage.
Important points to remember:
• End grain glues poorly compared with face grain
• Cross-grain joints need room for movement
• Long grain to long grain glue joints are usually strongest
• Mechanical reinforcement helps in high-stress builds
The Forest Products Laboratory has long noted that wood performance depends on species, moisture, grain direction, and joint design. That matches what I have seen firsthand: smart joinery is always about more than just glue.
Common Mistakes to Avoid
Most joinery problems come from a few easy-to-fix habits. I have made almost all of them at some point, and so have many other woodworkers I have worked with.
Avoid these mistakes:
• Skipping dry fit tests
• Using too much glue
• Ignoring grain direction
• Relying on glue alone for end grain joints
• Cutting joints before checking dimensions twice
• Clamping too hard and starving the joint of glue
• Forgetting about seasonal wood movement
A joint should feel like a handshake, not a wrestling match. Too loose and it fails. Too tight and it may crack or refuse to seat properly.
Best Woodworking Joints for Common Projects
Different projects call for different joinery choices. Here is a practical way to think about it.
Furniture
For furniture, strength and movement control matter most. Mortise and tenon, dowel joints, pocket holes, and lap joints all show up often.
Best options:
• Mortise and tenon for chairs and tables
• Dowels for hidden strength
• Pocket holes for quick assembly
• Lap joints for supports and rails
Cabinets
Cabinets need speed, repeatability, and solid alignment. They also benefit from joinery that works well with sheet goods.
Best options:
• Pocket holes
• Dowel joints
• Biscuit joints
• Rabbets and dados for panels and shelves
Drawers
Drawers take daily abuse, so the corners need to stay tight.
Best options:
• Dovetail joints
• Dowel joints
• Rabbet joints for simpler builds
Frames and Trim
For frames, appearance often matters more than load.
Best options:
• Miter joints
• Bridle joints
• Dowel-reinforced miters
Boxes
Boxes can be simple or fancy, depending on use.
Best options:
• Butt joints for quick utility boxes
• Dovetails for fine boxes
• Rabbets for clean, sturdy corners
Reinforcing Joints for Extra Strength
Sometimes a joint needs help. That is normal. Reinforcement is not a sign of weakness. It is smart building.
Useful reinforcement methods include:
• Glue for long grain joints
• Screws for hidden mechanical support
• Nails for quick assembly
• Dowels for alignment and strength
• Biscuits for edge alignment
• Splines for added surface area
• Corner blocks for frame support
I like to think of reinforcement as seatbelts for wood joints. The joint may work on its own, but the extra support gives peace of mind.
Finishing and Sanding Around Joints
A joint can be strong and still look rough if the finish work is sloppy. After assembly, inspect every seam and corner.
Good finish steps:
• Scrape away squeeze-out before it hardens
• Sand lightly to avoid rounding crisp edges
• Check for gaps under bright light
• Fill small flaws only when needed
• Match the finish to the wood species
Be careful not to over-sand a joint line. I have seen edges softened so much that a crisp miter looked tired and blurry. Clean joinery should still look like joinery, not melted corners.
Frequently Asked Questions of The Ultimate Woodworking Joint Guide
What is the strongest woodworking joint?
The mortise and tenon joint is often considered one of the strongest for furniture and frames. It resists racking well and holds up under long-term use when cut and fitted properly.
What is the easiest woodworking joint for beginners?
The butt joint is the easiest to start with because it needs the fewest cuts and skills. For a stronger beginner option, pocket holes are also very popular and forgiving.
Are dovetail joints better than pocket holes?
Dovetail joints are stronger and more traditional, especially for drawers and fine boxes. Pocket holes are faster and easier, but they are usually better for utility work or hidden joinery.
Do I always need glue for woodworking joints?
Not always, but glue helps many joints become much stronger. Some joints also rely on mechanical fasteners or shape alone, especially when wood movement must be considered.
Which joint is best for a wooden table?
Mortise and tenon is a top choice for table bases because it handles stress and movement well. For table tops, biscuit joints or dowels can help with alignment during glue-up.
Conclusion
The Ultimate Woodworking Joint Guide comes down to one simple idea: the best joint is the one that fits the job. Strength, looks, tools, and wood movement all matter, and the right choice can make your project cleaner, safer, and longer lasting.
If you remember only a few things, make them these: cut accurately, test fit before glue, and choose joints based on real use, not just tradition. The more you practice, the more natural joinery becomes, and the better your work will feel in your hands.
Try one new joint on your next project, compare the results, and keep learning from each build. If this guide helped, explore more woodworking tips, save it for later, or leave a comment with the joint you want to master next.