
A Reference Face Guide is a structured system to capture and use facial references.
If you work with faces, you need a Reference Face Guide. I’ve built them for studios, indie projects, and AI workflows, and I’ve seen how a smart guide removes guesswork and speeds up results. In this complete Reference Face Guide, I’ll show you proven methods, tools, and examples so you can build a reliable face library, draw or model with accuracy, and avoid common pitfalls.
What Is a Reference Face Guide?
A Reference Face Guide is a framework for collecting, labeling, and using face images and scans in a consistent way. It covers angles, lighting, expressions, and metadata so you can find the exact shot you need fast. Think of it as the rulebook and toolkit for every portrait, character, or dataset you create.
A strong guide supports drawing, 3D, photography, and AI. It includes diversity, ethical sourcing, and clear naming rules. It helps you solve one core problem: repeatable, accurate faces across time and teams.
Why Reference Faces Matter
When your references are scattered, your results drift. A Reference Face Guide keeps everything steady and repeatable. It saves time, reduces risk, and improves quality across many tasks.
Key benefits:
- Faster workflow. You find the right angle or light in seconds.
- Higher accuracy. Proportions and forms stay true from sketch to render.
- Better training data. Clean labels and variety help AI models generalize.
- Consistency across teams. Everyone uses the same standards.
- Stronger storytelling. Expressions and lighting match the mood you want.

Core Elements of a Solid Reference Face Guide
A good Reference Face Guide balances detail with ease of use. Aim for clear folders, simple labels, and full coverage of real-world cases.
Include:
- Angles and views. Front, profile, 3/4, top-down, and low angles.
- Lighting sets. Flat light, Rembrandt, split, rim, backlight, daylight, and mixed light.
- Expressions. Neutral, happy, anger, fear, sadness, surprise, disgust, plus micro changes using FACS.
- Landmarks and proportions. Brow, nose base, canthi, tragus, philtrum, jaw angle, hairline.
- Diversity. Age, gender expression, skin tone, face shape, and cultural features.
- Metadata. Lens, focal length, exposure, white balance, pose labels, and consent notes.
- Ethics and rights. Clear model releases, usage rights, and storage rules.
My studio rule of thumb: if a shot helps make one decision faster, it belongs in the guide.
Step-by-Step: How to Build Your Own Reference Face Library
Follow this process to set up a Reference Face Guide that scales.
- Define your use cases. Drawing studies, character sheets, 3D modeling, or AI training.
- Plan your coverage. Pick angles, lighting sets, and expressions you will always capture.
- Create a folder schema. PersonID > Angle > Light > Expression. Keep it simple.
- Standardize file names. Model_A01_front_50mm_neutral_D65_001.jpg.
- Capture with intent. Use a prime lens, same distance, and a color card for balance.
- Label right away. Add EXIF notes, tags, and a CSV or JSON with metadata.
- Add diversity. Balance faces across age, tones, and features to avoid bias.
- Back up and version. Store local and cloud copies, plus a changelog.
- Review and prune. Remove duplicates and fix mislabeled shots each quarter.
Pro tip from experience: shoot a five-minute set per model. One angle per minute. You will keep momentum and avoid fatigue.

Techniques: Using Reference Faces in Drawing, 3D, Photography, and AI
Drawing and Concept Art
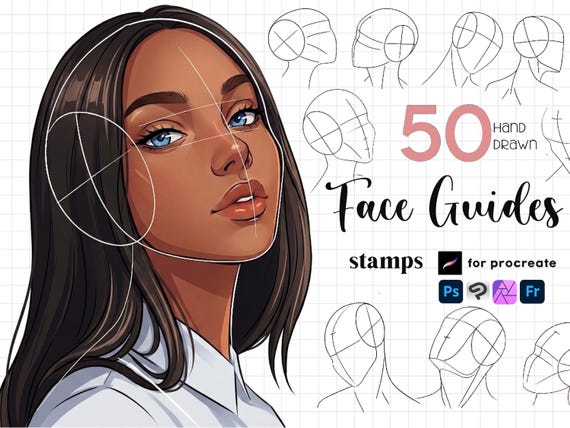
- Block big shapes first. Use the Loomis head or simple planes.
- Map landmarks lightly. Eye line, nose line, mouth thirds, and jaw curve.
- Pick one light direction. Shadows define form more than details.
- Study expressions. Compare neutral vs smile to see muscle shifts.
3D Modeling and Texturing
- Use front and side orthographic shots at the same focal length.
- Align landmarks, not edges. Eyes, nose base, and ear height drive scale.
- Check perspective. 85mm is a safe start for faces.
- Build a texture library. Include pores, freckles, and varied specular maps.
Photography and Scanning
- Control distance and lens. Longer lenses reduce distortion.
- Keep a repeatable light rig. Key, fill, and rim at set angles.
- Add a gray card and a ruler. You will thank yourself later.
AI and Machine Learning
- Balance classes. Equal angles, ages, tones, and gender expressions.
- Label FACS or at least six basic expressions.
- Document consent, usage limits, and any model constraints.
The more you stick to your Reference Face Guide, the more your results look clean and pro.

Advanced Tips: Anatomy, Angles, and Consistency
Mastery comes from small habits done well. These details lift your work.
- Anatomy anchors. Think skull planes: forehead, zygomatic, maxilla, mandible.
- Angle mapping. Mark 0°, 30°, 45°, 60°, and 90° with tape on the floor.
- Lens discipline. 50–85mm for portraits, 100–135mm for tight crops.
- Foreshortening checks. Flip the canvas or viewport often.
- Color accuracy. Set white balance with a color checker.
- Expression sets. Neutral pass, then emotion pass. Keep one eye line for both.
From my early projects, I learned to lock focal length first. Most “drawing errors” were lens errors in the source shot.

Ethical and Legal Considerations
A trustworthy Reference Face Guide protects people first. It also protects your project.
- Consent and model releases. Always get written consent that covers your use.
- Copyright and licensing. Know who owns the photo and for how long.
- Privacy and storage. Remove EXIF GPS if not needed. Use secure cloud storage.
- Bias awareness. Audit representation across your library twice a year.
- Clear takedown path. If a model revokes consent, remove assets fast.
When in doubt, ask a legal pro. It is cheaper than a dispute.
Common Mistakes and How to Fix Them
I have made most of these. Here is how to dodge them.
- Mixed focal lengths in one set. Fix by standardizing lens and distance.
- Weak labels. Fix by making a short naming template and sticking to it.
- Poor diversity. Fix by setting quotas for features and tones.
- Overlit faces. Fix by turning lights off until form reads.
- Chasing details too early. Fix by blocking big shapes first.
- Ignoring expression changes. Fix by studying FACS and comparing pairs.
If you fix only lenses and labels, you will see a sharp jump in quality.
Tools, Templates, and Resources
You do not need fancy gear to start, but the right tools help.
- Capture. DSLR or mirrorless, 50–85mm prime, tripod, and a simple light kit.
- Software. Lightroom or Darktable for cataloging, PureRef for boards, and Blender or Maya for 3D.
- Annotations. Krita or Photoshop for landmark callouts.
- Checkers. Color card, gray card, and a ruler or ArUco marker.
- Templates. CSV or JSON schema for metadata, plus a printable shot list.
- Automation. Renaming tools and ExifTool for batch metadata edits.
Start lean. As your Reference Face Guide grows, add scripts and presets.
Frequently Asked Questions of Reference Face Guide
What is a Reference Face Guide used for?
It is used to collect, label, and apply face references with consistency. Artists, photographers, 3D teams, and AI users rely on it to speed up accurate work.
How many angles should I include?
Cover front, profile, and 3/4 as a base. Add top-down and low angles if you design dynamic scenes or stylized characters.
What lens is best for face references?
A 50–85mm lens on full frame is a safe range. It reduces distortion while keeping features clear.
How do I label expressions well?
Use neutral plus six basics: happiness, sadness, anger, fear, surprise, and disgust. Add short notes on intensity or FACS units when possible.
Do I need model releases for my reference library?
Yes, if the faces are identifiable and you plan to share, publish, or train AI. Keep all releases stored with the files and track usage limits.
How can I reduce bias in my face dataset?
Set representation goals and audit them twice a year. Track age, skin tone, face shape, and cultural features to keep balance.
Can I build a Reference Face Guide on a budget?
Yes. Use a phone with a 2x lens, a window as key light, and free software. Good labels and steady angles matter more than expensive gear.
Conclusion
A strong Reference Face Guide is your quiet superpower. It turns scattered photos into a clear system that boosts accuracy, speed, and trust. Start small, lock your lens and labels, and grow a library that works on every project you touch.
Pick one project and build a five-angle, two-light, three-expression set today. Share your wins, ask questions, and subscribe for new templates and workflows tailored to creative teams and AI builders.