
Woodworking jigs save time, improve accuracy, and make repeatable cuts much easier.
If you’ve ever wished your saw cuts were cleaner, your joints lined up better, or your projects felt less like guesswork, this guide is for you. I’ve spent years using jigs in real shop work, and the biggest lesson is simple: the right jig turns a hard task into a reliable one. In this guide to The Ultimate Woodworking Jig Guide, I’ll walk you through what jigs do, which ones matter most, how to choose or build them, and the mistakes that can ruin your results.

What a woodworking jig is and why it matters
A woodworking jig is a helper tool that guides a cut, drill, or layout task. It keeps your work steady and helps you repeat the same result again and again. That is why The Ultimate Woodworking Jig Guide starts with the basics: jigs are not fancy extras. They are accuracy tools.
In plain terms, a jig does two big jobs. First, it reduces human error. Second, it saves time when you need consistency across multiple parts.
A good jig can help with:
• Straight cuts
• Repeated hole placement
• Exact angles
• Safer routing
• Cleaner joinery
• Better glue-ups and assembly
I learned this the hard way on an early cabinet build. I tried to “eyeball” shelf pin holes with a tape measure and a square. By the third panel, the spacing drifted just enough to cause a bad fit. After that, I made a simple drill jig, and the whole process became faster and cleaner.
The real value of The Ultimate Woodworking Jig Guide is understanding this: a jig is not just about convenience. It is about control. And in woodworking, control is everything.
The main types of woodworking jigs
There are many jigs, but most fall into a few common groups. If you understand these, you can solve most shop problems without buying a dozen specialty tools.
Cutting jigs
These guide the saw or blade so the cut stays true. Common examples include:
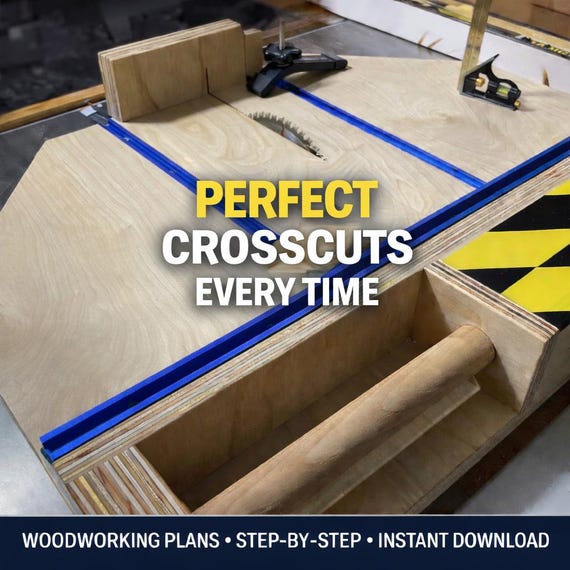
• Crosscut sleds for table saws
• Miter jigs for angled cuts
• Rip fences and straight-edge guides
• Circular saw guide tracks
Cutting jigs matter because even a small error gets repeated across every board. A sled or guide can make a basic saw feel much more accurate.
Drilling jigs
These help you place holes in the right spot and at the right angle. Examples include:
• Shelf pin drilling jigs
• Pocket hole jigs
• Dowel drilling jigs
• Hardware mounting jigs
Drilling jigs are often the fastest way to improve build quality. I use them most when I need clean spacing or when parts must match exactly.
Routing jigs
These guide a router for shape, edge, or joinery work. Common versions include:
• Template routing jigs
• Circle cutting jigs
• Dovetail routing jigs
• Mortise jigs
Routing jigs are especially useful when one mistake could ruin a part. They help you make the same shape over and over with less risk.
Assembly jigs
These help hold parts in place while glue or fasteners go in. Examples include:
• Corner clamping jigs
• Box squaring jigs
• Frame assembly fixtures
• Spacer blocks
These are the quiet heroes of the shop. They may not look exciting, but they can save you from crooked frames and twisted boxes.

How to choose the right jig for your project
The best jig is not always the most advanced one. It is the one that solves your specific problem with the least fuss. That idea is at the heart of The Ultimate Woodworking Jig Guide.
Start by asking three questions:
• What task do I repeat often?
• Where do my mistakes happen most?
• Do I need speed, accuracy, safety, or all three?
If you build cabinets, a shelf pin jig and a crosscut sled may be worth more than a dozen specialty tools. If you build small boxes, a miter jig and a corner clamp jig may matter more.
A few practical tips help here:
• Pick a jig that matches your skill level
• Choose simple tools before complex ones
• Make sure the jig is stable and easy to adjust
• Test it on scrap wood first
• Store it where you can reach it fast
I have seen many woodworkers buy a beautiful jig they rarely use. The problem is not the jig itself. The problem is that it solved a task they almost never had. The best jig is the one that earns its place on your bench.
How to build a jig that works well
A jig does not need to be complicated. In fact, some of the best ones are built from plywood, hardwood scraps, screws, and patience. The key is to make it accurate, repeatable, and easy to use.
Here is a simple process I rely on:
-
Define the exact task
Be specific. “Help me drill shelf pin holes evenly” is better than “make drilling easier.” -
Measure the critical points
Find the dimensions that must stay exact. These are your reference points. -
Build in stages
Make a rough version first. Test it before you add time-consuming details. -
Check for square and fit
Use reliable tools like a framing square, combination square, or stop block. -
Test with scrap
Never trust a jig on your final board until it passes a scrap test. -
Improve the weak spots
If it slips, flexes, or binds, fix that before real use.
I once rushed a router template for a drawer pull pattern and skipped the scrap test. The router bit followed the template well, but my reference mark was off by a hair. That tiny mistake showed up on every drawer front. It taught me that a jig only works as well as the setup behind it.
Materials and tools that make jigs more reliable
Jigs are often made from simple materials, but the choice of material changes how well they work. Strong, flat, and stable material usually matters more than looks.
Good jig materials include:
• Plywood for general use
• MDF for flat templates and routing patterns
• Hardwood strips for fences and stops
• Acrylic or polycarbonate for visibility in some setups
• Aluminum track or angle for durability in advanced jigs
Useful tools for jig building include:
• Combination square
• Tape measure
• Clamp set
• Drill and driver
• Straight edge
• Sharp pencil or marking knife
• Router or circular saw
• Sandpaper for tuning edges
The best shop habit I know is simple: keep jig parts straight and clean. A warped fence or rough stop block can throw off the whole build. Even a great design fails if the material moves or the edges are sloppy.
Safety benefits of woodworking jigs
A lot of people think of jigs as accuracy tools only, but they also improve safety. That part often gets overlooked. When your hands stay farther from the blade or bit, the work gets safer.
Jigs can help safety by:
• Holding small parts so your hands stay clear
• Reducing the need to freehand cuts
• Limiting kickback risk on some setups
• Keeping the work steady during drilling or routing
• Supporting long boards so they do not wobble
That said, a jig is not a magic shield. You still need to use guards, push sticks, proper clamps, and good judgment. I trust jigs, but I never trust them blindly. If a setup feels awkward or unstable, I stop and reset it.
Common mistakes to avoid with woodworking jigs
Even simple jigs can go wrong if you rush them. Most problems come from setup, not design.
Watch out for these mistakes:
• Building before measuring the real problem
• Using warped scrap or soft material
• Skipping test cuts
• Forgetting to label reference edges
• Making the jig too complex
• Not clamping it securely
• Ignoring blade or bit clearance
One of the biggest mistakes is assuming a jig will fix bad technique. It will not. It only makes good technique easier to repeat. If your baseline setup is off, the jig will repeat the same mistake very efficiently.
Another common issue is overbuilding. A jig with too many knobs, stops, or moving parts can slow you down. The best jigs feel obvious after five seconds of use.
Best woodworking jigs for beginners
If you are just starting out, do not try to build everything at once. A few core jigs can make a huge difference right away. These are the ones I would recommend first in The Ultimate Woodworking Jig Guide.
• Crosscut sled
Great for safer, square cuts on a table saw
• Drill guide jig
Helps keep handheld drilling straight
• Pocket hole jig
Useful for fast joints in furniture and casework
• Stop block setup
Excellent for repeat cuts of the same length
• Router circle jig
Handy for tabletops, cutouts, and round parts
These jigs teach you the big woodworking habit: repeatability. Once you get that, your projects start looking cleaner without requiring expensive machinery.
Advanced jigs for more precise work
After the basics, you may want jigs that support more complex joinery and fine work. These are especially useful when you want production-level consistency at home.
Examples include:
• Dovetail jigs for repeatable joinery
• Mortise and tenon jigs
• Tenoning jigs for the table saw
• Edge banding jigs
• Box joint jigs
• Template routing fixtures
Advanced jigs are powerful, but they often demand better setup and tuning. I have found that small calibration steps matter a lot more here than people expect. A tiny misalignment can turn a perfect joint into a frustrating redo.
If you are new to advanced jigs, start with one project and one jig. Learn it deeply before moving on. That approach saves money and keeps your results more predictable.
How professional woodworkers think about jigs
Most experienced woodworkers do not see jigs as separate from the work. They see them as part of the workflow. The jig is there to remove friction.
Professionals tend to use jigs for:
• Speed on repeat jobs
• Precision on visible joinery
• Safety on smaller parts
• Standardization in batch production
• Less fatigue during long sessions
Industry guidance on woodworking safety and machine use consistently points to secure workholding, clear setup, and proper guarding as major safety factors. Jigs support all three when they are built and used correctly.
The deeper lesson is this: a shop with good jigs usually runs calmer. Less measuring. Less guessing. Less waste. That is why The Ultimate Woodworking Jig Guide matters even if you are not a full-time cabinetmaker.
Maintenance and storage for woodworking jigs
A jig only stays useful if it stays accurate. Dust, warping, loose screws, and damaged edges can all weaken it over time.
To keep jigs in good shape:
• Store them flat when possible
• Keep them away from moisture
• Check fences and stops for wear
• Replace loose fasteners
• Re-square important reference faces
• Label each jig clearly
I also like to mark each jig with its purpose and the key measurement it uses. That small habit saves time months later when I pull it out again. It is like leaving notes for your future self.
Frequently Asked Questions of The Ultimate Woodworking Jig Guide
What is the most useful woodworking jig for beginners?
A crosscut sled is often the best first jig because it improves both safety and accuracy on a table saw. A simple drill guide is also very helpful for learning clean, straight holes.
Can I make good jigs from scrap wood?
Yes, many great jigs are made from plywood scraps, MDF, or leftover hardwood. The key is using flat, stable material and testing the jig before real use.
Do expensive jigs work better than homemade ones?
Not always. A well-made homemade jig can work just as well as a store-bought one if it is square, stable, and built for the task.
How do I know if a jig is accurate enough?
Test it on scrap wood and measure the result, not just the jig itself. If the test pieces match the needed size and angle consistently, the jig is doing its job.
What should I do if my jig keeps slipping?
Add better clamping, improve the base grip, or redesign the contact points. Slippage usually means the jig lacks support or the work surface is not secure enough.
Conclusion
The best way to think about The Ultimate Woodworking Jig Guide is this: jigs are small tools with a big payoff. They improve accuracy, make repeat work easier, and help turn tricky steps into calm, repeatable routines. When you choose the right jig, build it well, and test it carefully, your projects get cleaner and your shop gets more efficient.
Start with one or two jigs that solve your biggest frustrations, then refine from there. If you want, explore more shop setup ideas, build a test jig this week, or leave a comment with the jig that saves you the most time.