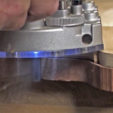
Router pattern routing uses a shaped template and a bearing-guided router bit or guide bushing to reproduce the template shape accurately on a workpiece. It is especially useful for making matching furniture parts, curved components, openings, inlays, and other repeated shapes.
For U.S. woodworkers, router pattern routing is one of the most practical ways to turn a carefully shaped master template into multiple consistent parts. Instead of trying to draw, saw, sand, and manually refine every piece to the same dimensions, you make one accurate template and use the router to transfer its profile to the remaining workpieces.
The basic process is straightforward: make the template accurately, rough-cut the workpiece so only a small amount of material remains, secure the template firmly, select a compatible bearing-guided bit or guide bushing, set the cutting depth, and make controlled passes. The quality of the final parts depends heavily on template accuracy, secure workholding, correct bit selection, grain direction, and safe router handling.
Pattern routing is sometimes used interchangeably with template routing. The terms describe closely related techniques, although the exact setup can differ depending on whether the template is above or below the workpiece and whether the router uses a bearing-guided bit or a guide bushing.
Source: finewoodworking.com
What Is Router Pattern Routing?
Router pattern routing is a woodworking method in which a router follows a physical pattern or template while cutting the workpiece to match that pattern. The template provides the reference surface, while a bearing on the router bit or a guide bushing keeps the cutting path aligned with the desired shape.
The technique is particularly useful when a project contains several parts that must match. Chair components, table legs, cabinet parts, curved aprons, drawer fronts, handles, cutting-board shapes, and decorative components can all benefit from a reusable pattern. Once the master template is correct, the same reference can be used for additional parts or future projects.
The router does not automatically make a bad template accurate. It reproduces the reference it follows. A bump, flat spot, unwanted corner, or incorrect dimension in the template can therefore appear on every part. That is why template preparation is the most important accuracy step in the process.
Source: rockler.com
Template
The master shape that establishes the final profile, opening, curve, or other geometry.
Bearing-guided bit
A router bit with a bearing that rides against the template edge while the cutter removes material.
Guide bushing
A collar mounted in the router base that follows the template while a separate cutter performs the cutting.
Workpiece
The material being shaped. It is normally rough-cut before routing so the router removes only a controlled amount of waste.
Pattern Routing vs. Template Routing
In woodworking, pattern routing and template routing are often used to describe the same general technique. The important practical distinction is not the name but how the template, bearing, bit, and workpiece are positioned. A top-bearing pattern bit is commonly used with a template above the workpiece when routing by hand, while a bottom-bearing flush-trim bit can be used when the template is below the workpiece. Router-table setups can reverse the practical orientation because the router is mounted underneath the table.
The correct setup depends on the router, bit, workpiece thickness, template position, and whether you are working on an inside or outside profile.
How to Make a Router Pattern Template
A good template should be rigid enough to remain stable, have a smooth and accurate reference edge, and provide enough surface area for the router bearing or guide bushing to follow. Common template materials include MDF, tempered hardboard, plywood, and acrylic. The best material depends on the job, how often the template will be reused, and whether visibility through the template matters.
For many general woodworking projects, a flat sheet of MDF or hardboard is practical because it is easy to cut and sand. Plywood can be useful when greater durability or a larger template is required. Acrylic is useful when you need to see the workpiece or layout underneath the template.
Source: woodsmith.com
1. Transfer the design
Place the drawing, paper pattern, or measured layout on the template material and mark the final shape carefully.
2. Rough-cut the template
Use a jigsaw, bandsaw, or another suitable cutting method to remove waste while leaving a small amount of material outside the final line.
3. Refine the edge
Sand or file the template until the reference edge is smooth and accurately follows the intended shape.
4. Check symmetry
For mirrored furniture components or repeated curves, compare centerlines, radii, and corresponding edges before using the template.
5. Add registration features
Where appropriate, add centerlines, reference marks, holes, stops, or lead-in areas that make repeat positioning easier.
Why Template Accuracy Matters
The template controls the finished shape, so small errors can be repeated across every part. A template edge should be free of saw marks, dents, abrupt flats, and unwanted bumps. If the final shape is intended to be symmetrical, verify the centerline before routing.
A useful improvement is to create a small lead-in area on the template where practical. This gives the bearing a stable reference before the cutter reaches the actual workpiece profile. It can also make the beginning and ending of a cut more controlled.
Use a stable material
Choose material that will not flex significantly during routing or change shape easily during normal shop use.
Smooth the reference edge
The bearing follows the edge, so every imperfection can influence the finished workpiece.
Keep reusable templates labeled
Mark the intended project, orientation, reference face, and important dimensions so the template can be reused correctly.
Choosing the Right Router Bit or Guide Bushing
The router bit or guide system determines how the cutter follows the template. For straightforward outside profiles, a bearing-guided pattern bit or flush-trim bit is often the simplest choice because the bearing directly contacts the template edge.
A pattern bit normally has its bearing positioned on the shank side of the cutting edges. This makes it useful when the template is mounted above the workpiece with a handheld router. A flush-trim bit places the bearing at the opposite end of the cutting edges and is useful in setups where the template is below the workpiece or where the router-table orientation makes the bearing accessible.
Guide bushings provide another option. The bushing follows the template while the cutting bit sits inside the bushing. Because the bushing is usually larger than the cutter, the resulting cut is offset from the template edge. That offset must be included in the template dimensions.
Source: woodcraft.com
Top-bearing pattern bit
Useful when a handheld router follows a template positioned above the workpiece.
Bottom-bearing flush-trim bit
Useful when the bearing needs to follow a template positioned below the workpiece or in appropriate router-table arrangements.
Double-bearing bit
A bit with bearings at both ends can provide flexibility when the template may need to be referenced from either side.
Guide bushing and straight bit
Useful for interior patterns, grooves, inlays, and plunge-routing applications where the bushing follows a template.
Spiral or shear-cut bit
Can reduce tear-out in difficult grain situations compared with a basic straight cutter, although the correct feed direction and setup remain essential.
Guide Bushing Offset Calculation
When using a guide bushing, calculate the radial offset as: (bushing outside diameter minus cutter diameter) divided by 2. For example, if a guide bushing has a 5/8-inch outside diameter and the cutter is 3/8 inch in diameter, the difference is 1/4 inch. Dividing that by two gives a 1/8-inch radial offset.
That offset means the template cannot simply be made the same size as the desired cut. The direction of the offset also matters because an outside template and an inside template do not use the same dimensional relationship. Test the setup on scrap before committing to an expensive workpiece.
For bearing-guided bits
The bearing generally matches the cutting diameter, so the template edge can directly define the workpiece profile.
For guide bushings
Account for the radial difference between the bushing and cutter when designing the template.
For unfamiliar setups
Make a test template and test cut first rather than relying on an assumed offset.
How to Pattern Route a Workpiece
The safest and most repeatable workflow is to rough-cut the workpiece first and leave only a small amount of material for the router to remove. Asking a router bit to remove a large amount of stock in one pass increases cutting load and can make the operation harder to control.
Before routing, verify that the bit is fully seated and securely tightened, the template is firmly attached, the workpiece is supported, and the router depth is set correctly. The bearing should remain in reliable contact with the template throughout the cut.
Source: lowes.com
1. Prepare the workpiece
Trace the template shape and rough-cut the workpiece with a bandsaw or jigsaw, staying slightly outside the final profile.
2. Position the template
Align the template using centerlines or other registration marks and place it on the correct face of the workpiece.
3. Secure everything
Use clamps, suitable double-sided tape, screws, or a dedicated jig depending on the project. The template must not shift during routing.
4. Set the router
Install the appropriate bearing-guided bit or guide-bushing setup and adjust depth so the cutter removes only the intended material.
5. Test the setup
Run a test cut on scrap when the bit, template, material, or setup is unfamiliar.
6. Make controlled passes
Keep the router flat and stable, maintain bearing contact with the template, and feed the tool in the manufacturer’s recommended direction.
7. Inspect the result
Check the profile, corners, grain-related tear-out, and any areas where the bearing may have lost contact.
How Much Material Should You Leave for Routing?
Leave only enough material for the router bit to remove efficiently and predictably. A common woodworking approach is to rough-cut close to the template rather than leaving a large amount of waste. The exact allowance depends on the material, curve, bit diameter, router power, and stability of the setup.
For a delicate curve or difficult grain, leaving a smaller and more controlled amount of waste can reduce the force required from the router. If the workpiece is still far outside the template, remove additional waste with a bandsaw or jigsaw before routing.
Signs of a good setup
The router moves steadily, the bearing stays against the template, the cutter removes a controlled amount of material, and the workpiece remains securely supported.
Signs of excessive cutting load
The router slows noticeably, chatters, burns the wood, produces large chips, or becomes difficult to control.
What to do if the load is too high
Stop the router, reassess the setup, remove more waste mechanically if necessary, and use a shallower or more controlled pass.
Avoid Tear-Out, Chatter, and Other Pattern Routing Problems
The most common pattern-routing problems are not caused by the template concept itself. They usually come from grain direction, excessive material removal, an unstable template, an inappropriate bit, insufficient support, or an unsafe feed strategy.
Wood grain changes direction around curves and at transitions from long grain to end grain. A cutter that performs cleanly on one section can produce tear-out on another. Rather than trying to solve every problem by increasing bit diameter, reduce the amount of material being removed and consider a shear-cut or spiral bit when appropriate.
Source: popularwoodworking.com
Tear-out at the end grain
Reduce the remaining waste, support vulnerable areas, make lighter passes, and consider a suitable spiral or shear-cut bit.
Chatter
Check template rigidity, workholding, bit condition, router stability, cutting depth, and feed rate.
Burn marks
Avoid lingering in one area, use a sharp bit, remove material efficiently, and select a suitable router speed for the cutter and material.
Template movement
Stop routing immediately and improve the attachment method. A template that moves can ruin the workpiece and create a hazardous situation.
Bearing loses contact
Check template thickness, workpiece geometry, router orientation, and whether the bearing has enough stable reference surface.
Uneven plywood edge
Use a template with a smooth edge and consider a bearing large enough to bridge small voids when the template material has layered construction.
Feed Direction and Climb Cutting
A conventional router cut normally moves the router against the cutter’s rotation so the tool tends to feed in a controlled manner rather than pulling itself along the workpiece. Climb cutting reverses that relationship and can dramatically increase the chance of the router pulling forward. Although experienced woodworkers sometimes use controlled climb cuts for specific tear-out situations, it is not an appropriate default technique for beginners or an operation to perform casually on a router table.
If tear-out is the concern, first look for safer solutions: reduce the amount of material left for the final pass, change the cutting direction around vulnerable grain, support the exit area, use a sharper bit, or use a suitable shear-cut or spiral bit. Practice on scrap before attempting any specialized feed technique.
Router Pattern Routing Safety
Wear appropriate eye protection and hearing protection, secure loose clothing and hair, and keep hands away from the cutter. Make sure the router bit is properly installed and the workpiece cannot shift. Disconnect power before changing bits or making adjustments.
For router-table pattern routing, use appropriate guards, featherboards, starter pins, fences, or dedicated jigs when applicable. Small workpieces deserve particular attention because they can be difficult to control close to a rotating cutter. A purpose-built holding jig can keep hands farther from the cutting area.
Pattern Routing Applications and When to Use It
Pattern routing is most valuable when a project contains shapes that are difficult to reproduce consistently by ordinary layout and cutting methods. The template acts as a physical reference, making it possible to duplicate curves, corners, openings, and profiles with less manual refinement.
For one simple straight cut, a straightedge and router edge guide may be faster. Pattern routing becomes more useful when the shape is irregular, curved, repeated, or difficult to lay out accurately by hand.
Source: woodsmith.com
Duplicate furniture parts
Create one accurate leg, apron, arm, bracket, or other component and use it as the reference for matching pieces.
Curved panels and aprons
Templates make smooth curves repeatable and reduce the amount of hand shaping required.
Cutting-board shapes
A template can help reproduce handles, rounded outlines, and other repeated board shapes.
Cabinet and furniture openings
Templates and guide bushings can produce consistent openings, grooves, and other interior shapes.
Inlays
A guide bushing and template can establish matching recesses and inserts when the offset is correctly calculated.
Jigs and fixtures
Pattern routing can create repeatable shapes for shop-made fixtures and workholding components.
When Pattern Routing Is Not the Best Method
Pattern routing is not automatically the fastest method for every shape. A straightedge, edge guide, table saw, bandsaw, jigsaw, CNC router, or other tool may be more appropriate depending on the geometry and production requirements.
If the shape is simple and straight, an edge guide may require less setup. If a large number of complex parts must be produced with computer-controlled repeatability, CNC routing may be more suitable. For a single rough shape, a bandsaw followed by sanding may also be sufficient.
Frequently Asked Questions
Q
What is the difference between a pattern bit and a flush-trim bit?
Both are bearing-guided router bits, but their bearing positions differ. A pattern bit generally has the bearing on the shank side of the cutters, while a flush-trim bit generally has the bearing at the end of the cutter. The correct choice depends on where the template is positioned relative to the workpiece and how the router is being used.
Q
What is the best material for a router template?
MDF, tempered hardboard, plywood, and acrylic can all work. MDF and hardboard are easy to shape and are practical for many shop templates. Plywood can provide greater durability, while acrylic is useful when visibility through the template is important. The material should be flat, stable, and capable of providing a clean reference edge.
Q
How thick should a router pattern be?
There is no single thickness that works for every project. The template must be thick enough to remain rigid and provide reliable bearing or bushing contact. Around 1/4-inch hardboard is commonly useful for many templates, while thicker MDF or plywood may provide greater stability or a wider bearing surface for larger work.
Q
Can I use a guide bushing for pattern routing?
Yes. Guide bushings are useful for interior patterns, grooves, inlays, and other template-guided cuts. Unlike a bearing-guided bit whose bearing can directly define the workpiece edge, a guide bushing creates an offset between the template and cutter. Calculate that offset and test the setup on scrap before routing the final workpiece.
Q
How do I prevent tear-out when pattern routing?
Start by removing most of the waste before routing, then use controlled passes with a sharp bit. Pay attention to grain direction, particularly near end grain and abrupt grain changes. Support vulnerable areas and consider a suitable spiral or shear-cut bit when appropriate. Avoid using aggressive climb cuts as a routine solution, especially if you are not experienced with the technique.
✦ Wrapping Up
Conclusion
Router pattern routing is fundamentally a repeatability technique: create one accurate template, secure it correctly, and use a suitable bearing-guided bit or guide bushing to transfer the shape to the workpiece. The method is useful for curved furniture parts, duplicate components, openings, inlays, handles, and many other woodworking tasks.
The most important factors are template accuracy, secure workholding, correct bit selection, controlled material removal, and safe feed technique. Rough-cutting close to the final shape reduces the load on the router, while careful attention to grain direction helps reduce tear-out.
Before routing an expensive piece of hardwood, test the complete setup on scrap. Confirm the template position, cutter depth, bearing contact, feed direction, and final dimensions. A few minutes of testing can reveal problems before they become permanent.
💡 Key Takeaway
For your next pattern-routing project, make the template first and treat it as the master reference: refine its edge carefully, rough-cut the workpiece close to the line, secure both pieces firmly, choose the bearing or guide-bushing setup that matches the template position, and make a controlled test cut before routing the final part.