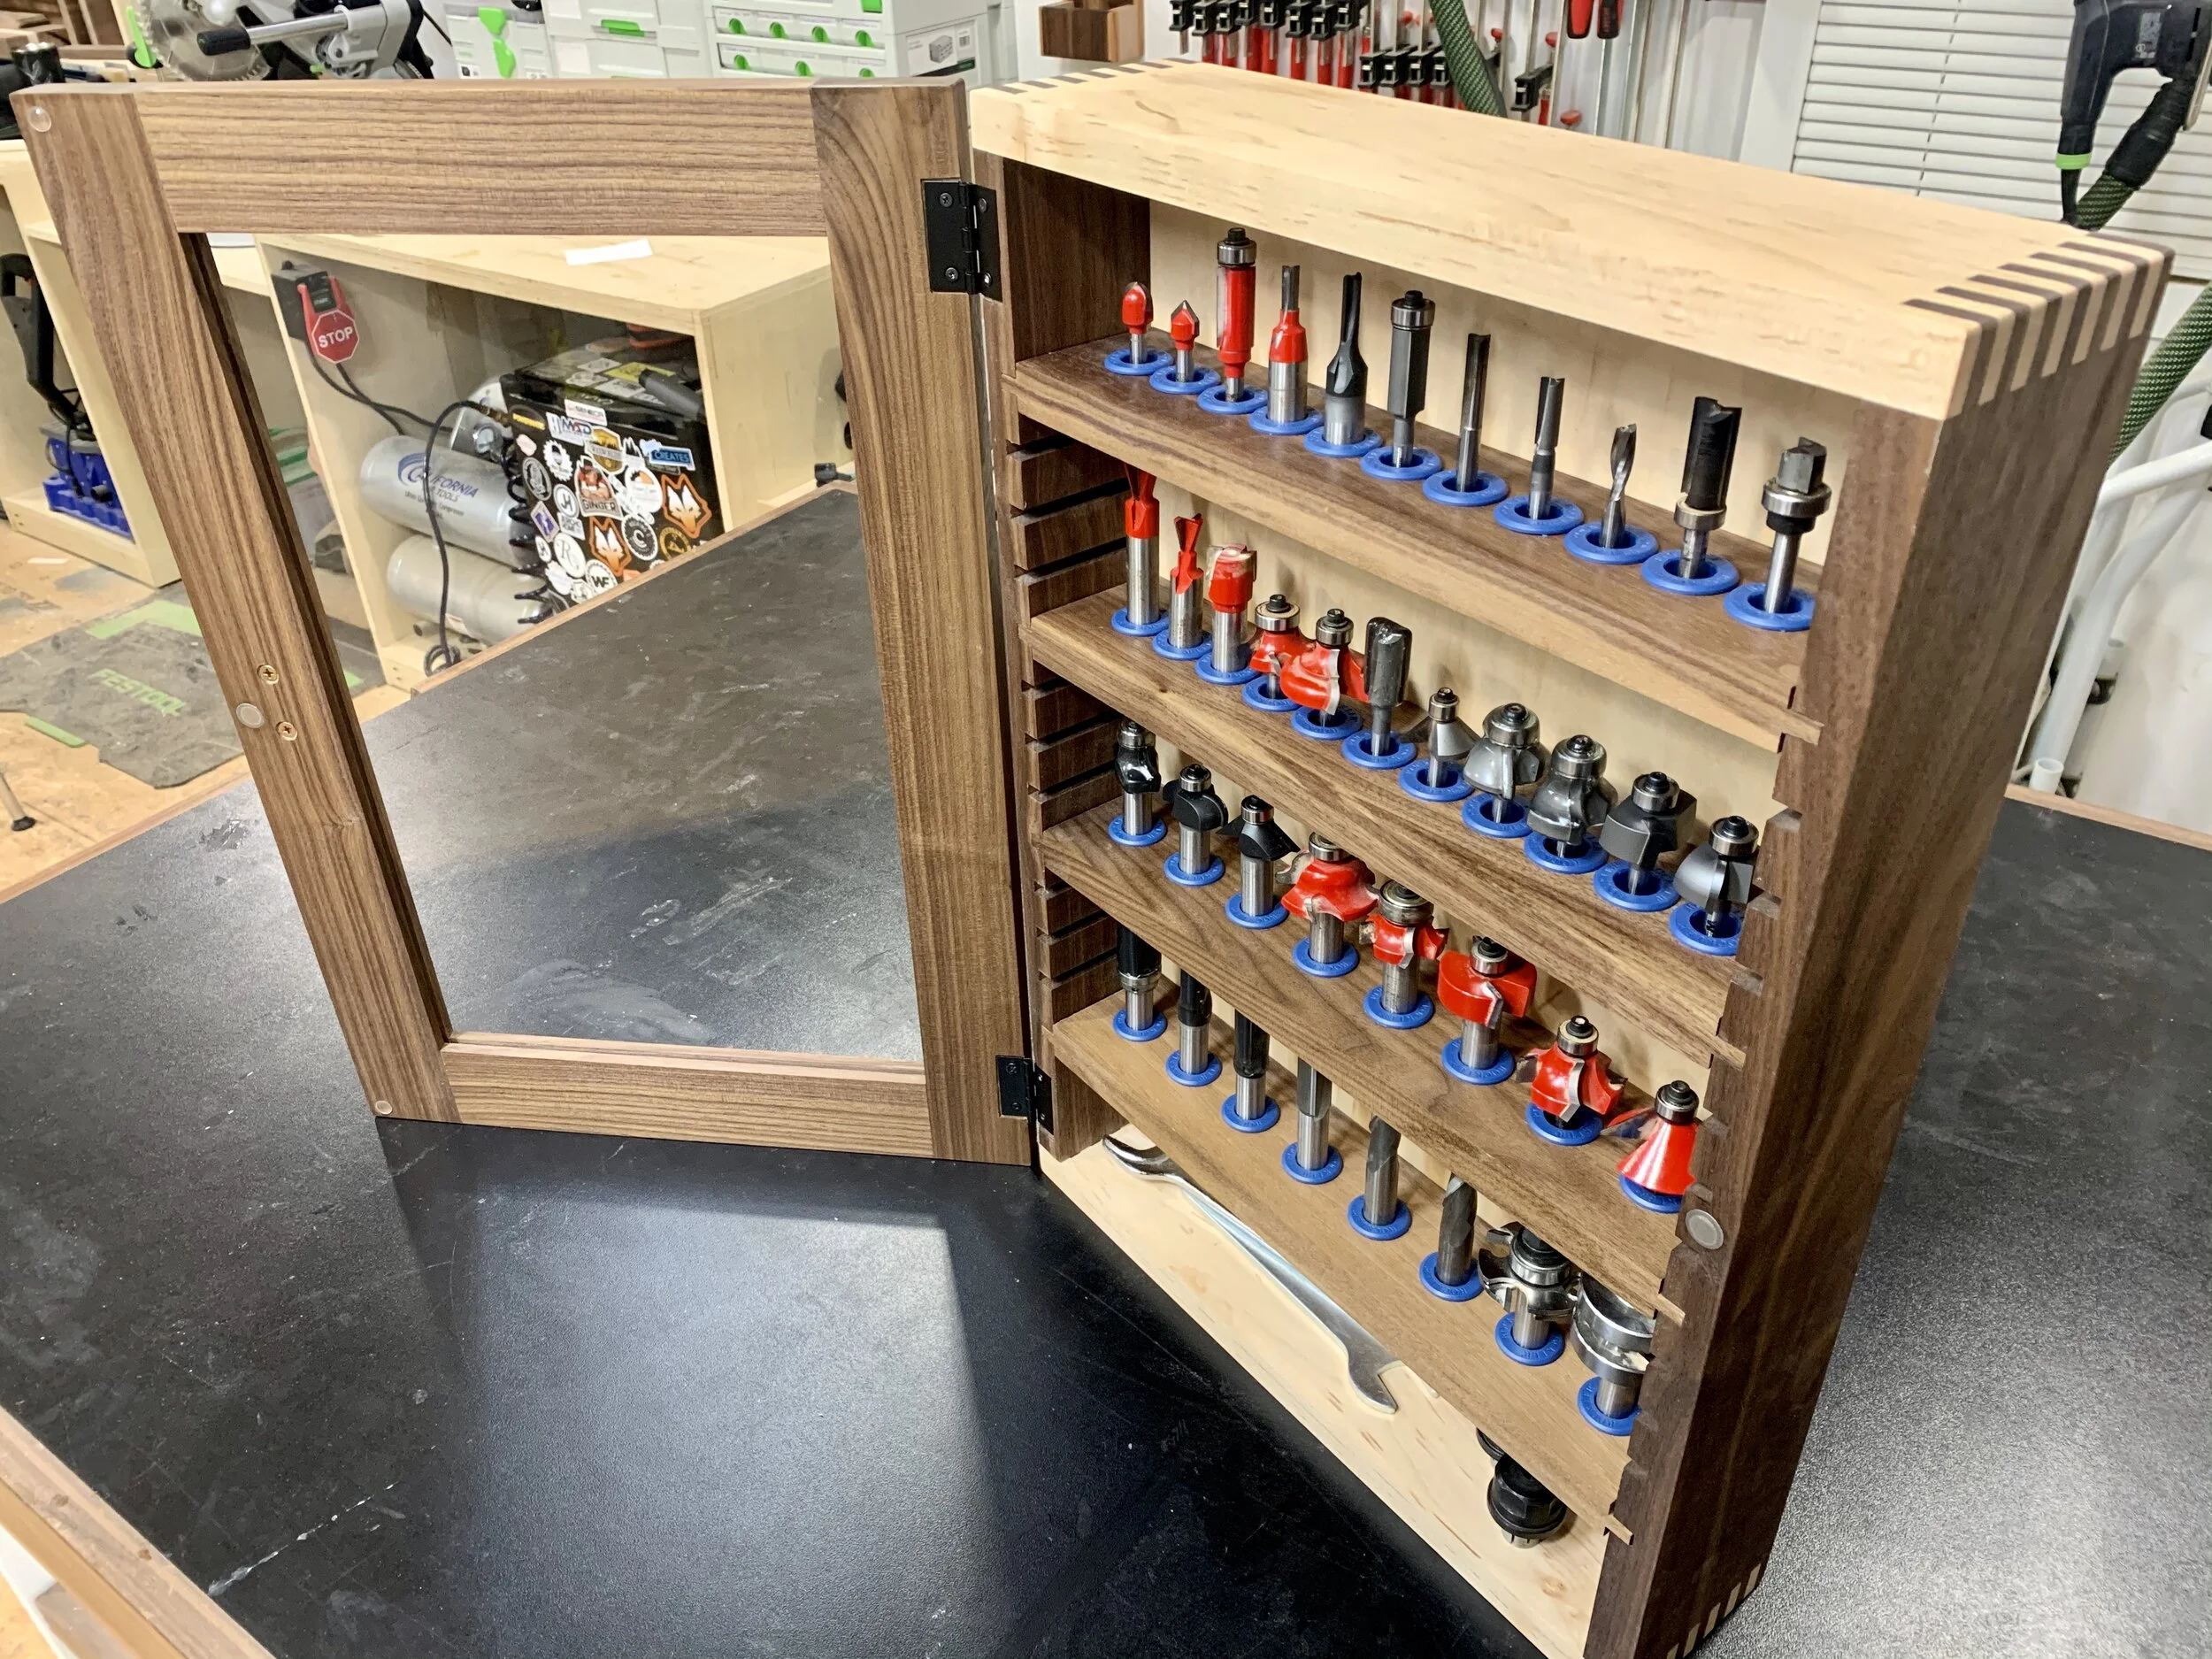
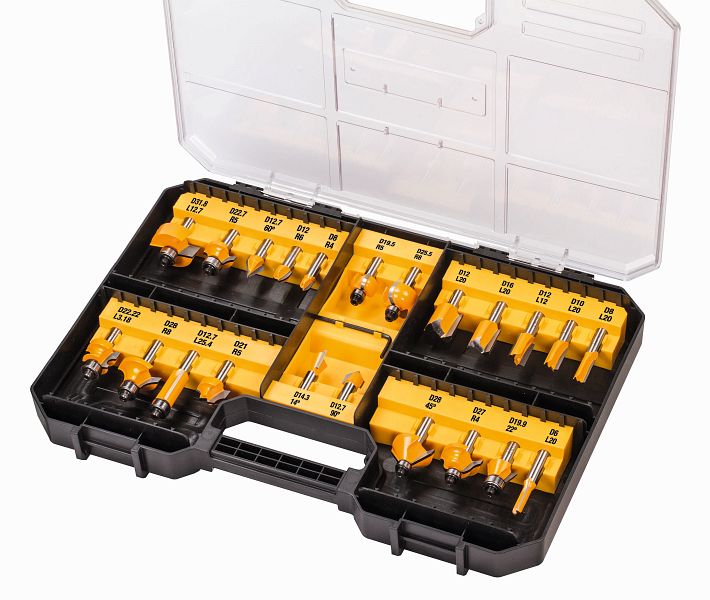
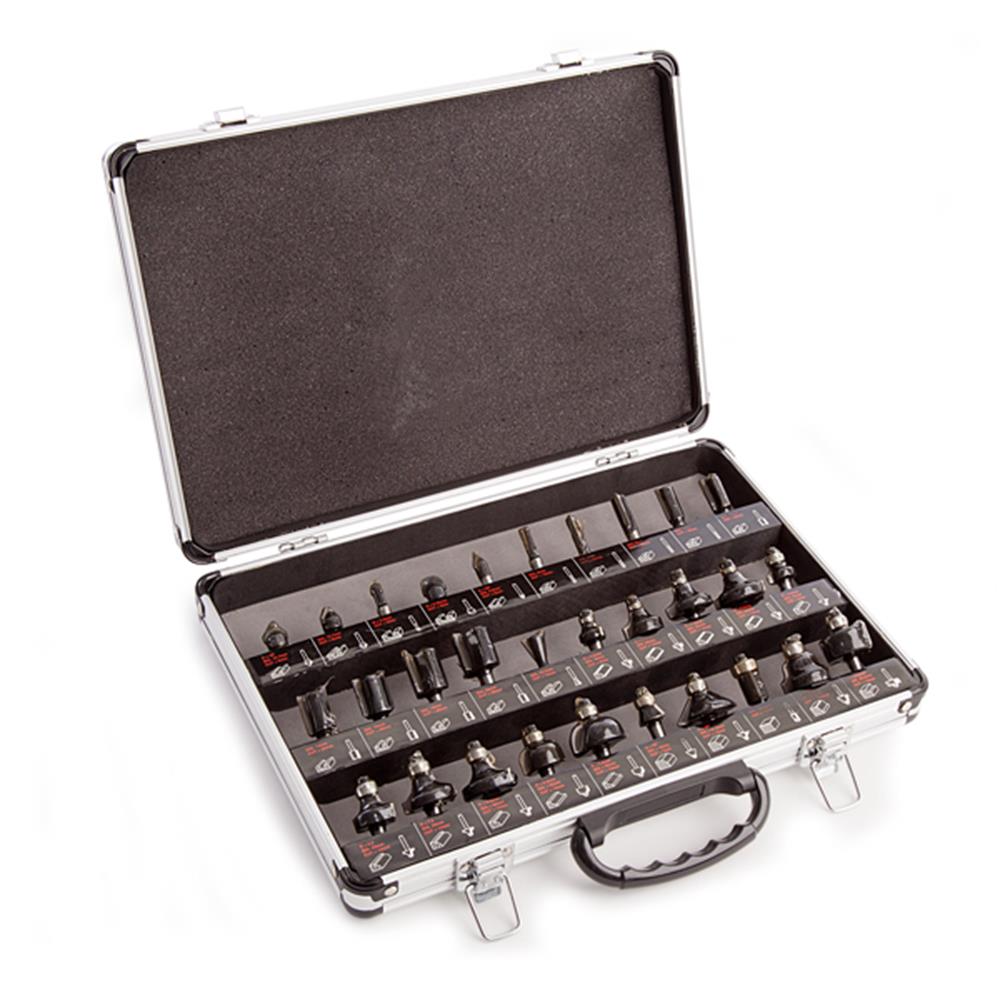
The best router bit storage keeps each bit separated, protects the cutting edges, keeps the shank clean and easy to inspect, and lets you identify the correct bit without digging through a drawer. For most U.S. woodworking shops, a dedicated tray, drawer organizer, cabinet, or case with separate positions for 1/4-inch and 1/2-inch shanks is a practical starting point.
For woodworkers in the United States, router bit storage is more than a workshop organization problem. Router bits have sharp carbide or high-speed steel cutting edges, and many collections contain expensive specialty cutters that can be damaged when they knock against one another. A good storage system should therefore control movement, prevent the cutting edges from contacting hard surfaces, and make frequently used bits easy to identify.
The right design depends on the size of your collection, available shop space, and whether you use a handheld router, router table, or both. A small drawer tray can work well for a beginner, while a growing collection may benefit from a modular cabinet or wall-mounted rack. The important principle is consistent: store bits individually and organize them so you can retrieve the correct cutter without handling the cutting edges.
Source: images.squarespace-cdn.com
What Makes Good Router Bit Storage?
Good router bit storage does four jobs: it protects the cutting edges, supports the shank, keeps bits separated, and makes identification easy. A storage system that satisfies those requirements can be made from wood, plastic, foam, metal, or a combination of materials.
The storage position should not force you to grab a sharp cutting edge when removing a bit. A slightly oversized hole or a dedicated holder can give your fingers room around the shank. Storage should also keep bits from rolling around inside a drawer or case.
Organization matters almost as much as physical protection. Grouping bits by shank size first and by profile or application second makes selection faster. Useful groups can include straight bits, flush-trim bits, round-over bits, chamfer bits, rabbeting bits, dovetail bits, spiral bits, and specialty cutters.
Source: diysprout.com
Individual positions
Give each commonly used router bit its own hole, slot, pocket, or holder so cutters cannot strike one another.
Shank-size separation
Clearly distinguish 1/4-inch and 1/2-inch shank storage, especially when the two sizes look similar in a crowded drawer.
Clear identification
Use labels, engraved markings, or a consistent layout so you can identify a profile and size before removing the bit.
Stable support
The holder should prevent bits from tipping, sliding, or falling when the drawer, cabinet, or case is moved.
Why Individual Storage Matters
Router bits should not be stored loose in a container where their cutting edges can contact other metal parts. Repeated contact can damage sharp edges, and heavy specialty bits can be particularly vulnerable to impact. Individual storage also makes it easier to inspect a cutter before installation.
Protect the cutting edge
Keep carbide and steel cutting surfaces from contacting neighboring bits, screws, wrenches, or other hard objects.
Reduce handling
A designated position lets you grip the shank instead of repeatedly picking up the bit by its cutter.
Router Bit Storage Options Compared
There is no single storage design that fits every workshop. Drawer trays maximize existing cabinet space, wall racks keep bits visible, cabinets provide protection and organization, and portable cases work well when bits need to travel between work areas.
Choose based on your collection rather than copying a storage design simply because it looks attractive. A compact tray can be more useful than a large cabinet if you own only a dozen bits, while a modular cabinet becomes more practical as the collection expands.
Source: s3.amazonaws.com
Drawer organizer
Best when you already have an available drawer and want a low-profile solution that keeps bits close to the router table.
Wall-mounted rack
Useful when bench and drawer space are limited and you want frequently used bits visible and easy to reach.
Dedicated cabinet
A good fit for larger collections because shelves, doors, drawers, and removable trays can be combined in one location.
Portable case
Useful when you move tools between a workshop, jobsite, garage, or separate work areas.
Modular storage
Allows additional holders or blocks to be added as the router bit collection grows.
Drawer Storage
A drawer-mounted router bit organizer is efficient because it uses space that would otherwise be difficult to organize. Individual holes can hold shanks upright while the drawer provides protection from accidental contact. Drawer storage is especially useful when the router table or workbench already has a cabinet underneath it.
Main advantage
It keeps the storage compact and close to the work area without using additional wall space.
Main limitation
Bits can become difficult to identify if the drawer is too deep, poorly labeled, or overloaded.
Wall and Cabinet Storage
Wall racks and cabinets provide strong visibility and can make a large collection easier to organize. A cabinet with a door adds protection from dust and accidental contact, while an open rack provides faster access. If the storage is mounted to a wall, the mounting hardware and wall structure should be appropriate for the total load.
Use visibility strategically
Place frequently used bits where their profiles can be identified without moving several other cutters.
Consider enclosed storage
A door can reduce exposure to shop dust and help protect the collection from accidental bumps.
How to Build a Simple DIY Router Bit Storage Tray
A basic router bit tray can be built from a stable sheet material or hardwood block with holes sized for the shanks. The goal is not to create a complicated cabinet; it is to give every bit a stable, protected location.
Before drilling anything, inventory the bits you actually own. Separate 1/4-inch and 1/2-inch shanks, identify unusually large cutters, and decide whether bearings or accessories need separate storage. This prevents you from building a holder that immediately becomes too small or forces large bits into unsuitable positions.
Source: profishop.de
Step 1: Inventory the collection
Count the bits and separate them by shank size and general profile.
Step 2: Choose the layout
Arrange the positions so large bits do not interfere with neighboring holes or storage walls.
Step 3: Mark each position
Lay out holes with enough spacing to remove the bits without touching adjacent cutting edges.
Step 4: Drill the holders
Drill straight, stable holes that support the shanks without making removal unnecessarily difficult.
Step 5: Ease the openings
Lightly chamfer or smooth the entry edges so the shank can be inserted and removed without catching.
Step 6: Label the positions
Mark profiles, sizes, or applications so the correct cutter can be selected quickly.
Step 7: Secure the tray
Keep the organizer from sliding inside a drawer or tipping on a shelf.
What Hole Size Should You Use?
The hole should support the router bit shank without clamping it so tightly that removal becomes awkward. A slightly oversized hole can make removal easier, but excessive clearance allows the bit to wobble or lean. The exact drilling size depends on the material, drilling method, and shank specification, so measure the actual bits and test the fit before drilling an entire tray.
Do not size storage holes according to the diameter of the cutting head. The holder normally supports the shank, while the larger cutting head remains above the storage surface.
Measure the shank
Use the shank diameter as the reference dimension for the storage hole.
Test before mass drilling
Make one test hole and confirm that the bit stands securely and can be removed without contacting the cutting edge.
How to Organize Router Bits for Fast Access
Organize router bits in a way that matches how you select them. For many woodworkers, separating by shank size first and cutter profile second is easier than arranging every bit alphabetically or by purchase date.
A useful system also separates everyday cutters from specialty bits. Bits used on nearly every project can stay in a convenient rack or top drawer, while large or rarely used cutters can occupy a deeper cabinet or separate case.
Source: abclive1caulfields.s3.amazonaws.com
Group by shank
Keep 1/4-inch and 1/2-inch shank bits in clearly separated areas.
Group by profile
Create logical groups for round-over, chamfer, straight, dovetail, rabbeting, flush-trim, spiral, and other profiles.
Separate specialty cutters
Give large panel-raising, lock-miter, stile-and-rail, and similar cutters enough room that they do not strike neighboring tools.
Label uncommon bits
Mark profiles and dimensions that are difficult to identify visually.
Keep accessories together
Store bearings, spacers, guide parts, or other removable components with the correct bit when practical.
Create a Simple Labeling System
Labels are most useful when they answer the question you ask at the router table. A practical label might include the profile and cutting dimension, such as round-over with its radius, rather than only a manufacturer’s model number. If a bit has a bearing or another removable component, note that relationship where it is easy to see.
Use consistent terms
Use the same profile names throughout the drawer or cabinet so similar bits are easy to compare.
Record measurements
Include useful dimensions such as cutting diameter, radius, angle, or shank size when they affect selection.
How to Protect Router Bits From Rust, Dust, and Damage
Physical separation is only part of router bit care. Storage should also limit unnecessary exposure to moisture, contamination, and impacts. This matters particularly in garages and workshops where temperature and humidity can fluctuate.
Keep bits clean before putting them away. Resin, pitch, and wood dust left on a cutter can make inspection harder and may contribute to corrosion on exposed metal surfaces. Follow the bit manufacturer’s cleaning recommendations, especially for carbide cutters, bearings, coatings, and specialty finishes.
Avoid storing sharp bits loosely against bare metal hardware. If a drawer contains wrenches, collets, guide bushings, or other accessories, give those parts their own compartments so they cannot strike the cutters.
Source: images.ctfassets.net
Keep the storage area dry
Avoid locations where condensation, leaks, or persistent high humidity can reach the bits.
Clean before storage
Remove accumulated dust and residue using a cleaning method appropriate for the bit material and manufacturer’s instructions.
Inspect the shank
Look for rust, pitting, scoring, or other damage before installing a bit in a collet.
Protect cutting edges
Do not allow carbide or steel cutters to rest directly against other tools.
Should Router Bits Be Stored in Wood?
Wood can be used successfully for router bit storage, and many woodworking storage systems use drilled wooden blocks or trays. The key issue is the storage environment rather than simply whether the holder is made from wood. A damp workshop, wet storage location, or material that retains moisture can create conditions that promote corrosion on exposed steel.
If you use a wooden holder, keep the storage area dry and inspect the shanks periodically. Plastic or lined storage can be useful where moisture control is a persistent concern.
Wooden holder
Works well for custom trays and cabinets when the shop environment is reasonably dry.
Plastic or lined holder
Can be useful when you want a non-porous contact surface or additional separation between the shank and storage material.
Common Router Bit Storage Mistakes
A storage system can look organized while still creating problems. The most common mistakes involve loose bits, inadequate spacing, confusing labels, unsuitable hole sizes, and storage that is difficult to access.
A good test is simple: you should be able to identify the bit, remove it by its shank, and return it to its designated position without moving several other cutters. If you cannot, the storage layout needs adjustment.
Source: media.popularwoodworking.com
Throwing bits into one container
Loose storage allows cutting edges to collide and makes inspection and identification harder.
Mixing shank sizes without labels
A crowded organizer can make it easy to select a bit that does not match the router’s collet.
Making holes too tight
An overly tight storage hole can make removal awkward and encourage users to grab the cutter instead of the shank.
Ignoring large specialty bits
Oversized cutters need enough clearance to prevent contact with neighboring positions.
Overfilling the organizer
Adding more bits than the system was designed to hold can turn a useful organizer into a crowded drawer.
Storing damaged bits
A storage system should not become a place where damaged or questionable cutters remain mixed with usable tools.
When Should You Replace or Remove a Router Bit?
Storage cannot make an unsafe or damaged router bit usable. Before installing a cutter, inspect the carbide or steel cutting edges, body, shank, and any bearing. Chipped carbide, significant corrosion or pitting, cracked components, damaged bearings, or a visibly damaged shank are reasons to stop and evaluate the bit rather than putting it into service.
If the condition is uncertain, follow the manufacturer’s guidance or have the cutter evaluated by a qualified tool professional. Never assume that cleaning or sharpening will correct structural damage.
Remove visibly damaged cutters
Do not return severely damaged bits to the normal storage area where they may be mistaken for serviceable tools.
Keep questionable bits separate
If a bit needs inspection, sharpening, repair, or replacement, place it in a clearly marked separate location.
How to Choose the Right Router Bit Storage for Your Workshop
Choose router bit storage according to collection size, available space, portability, and how often you change bits. A small collection does not require a large cabinet, while a growing collection benefits from storage that can be expanded without rebuilding the entire system.
For a small home shop, a drawer tray or compact case is often enough. If the router table has unused space underneath or beside it, a dedicated pullout organizer can make excellent use of that area. For larger collections, a cabinet or modular wall rack provides more capacity and easier visual organization.
The best layout is the one that reduces searching and handling. Put frequently used bits close to the router table, keep large specialty cutters in positions with adequate clearance, and reserve a separate location for accessories and bits awaiting inspection.
Source: i.etsystatic.com
Small collection
Use a compact tray, small case, or simple wooden block with dedicated holes.
Medium collection
Consider a drawer organizer or cabinet with separate sections for shank sizes and profiles.
Large collection
Use modular cabinets, wall racks, or multiple labeled drawers that can expand as the collection grows.
Mobile work
Choose a secure case or organizer with individual positions if bits regularly move between locations.
Limited floor space
Use drawer, under-table, cabinet-side, or wall-mounted storage instead of adding another freestanding cabinet.
A Practical Decision Guide
If you are unsure where to start, count your usable bits and measure the storage space you already have. Then select the simplest system that protects the bits and leaves room for future additions. Storage should serve your workflow rather than force you to reorganize the collection every time you buy another cutter.
Have fewer than about 15 bits
A compact tray or portable case is usually sufficient if it provides individual positions and clear identification.
Have a growing collection
Choose modular blocks, expandable drawers, or a cabinet that can accept additional storage.
Use many specialty bits
Favor deeper cabinet or rack positions with extra clearance around large cutter heads and accessories.
Change bits frequently
Keep your most-used cutters at eye level or in a nearby drawer for quick access.
Frequently Asked Questions
Q
What is the safest way to store router bits?
Store each router bit in an individual holder, tray, case, or dedicated hole that prevents the cutting edges from contacting other tools. Keep the storage area dry and make sure the bit can be removed by its shank without touching the sharp cutting edges.
Q
Should router bits be stored upright or horizontally?
Either orientation can work when the holder securely supports the bit and prevents it from moving. Upright storage is convenient for visual identification, while horizontal storage can make efficient use of drawers and cases. The deciding factor is secure separation and easy access rather than orientation alone.
Q
Can I store 1/4-inch and 1/2-inch router bits together?
They can be stored in the same cabinet or case, but they should have clearly separated positions or labels. Mixing the two sizes without a clear organization system increases the chance of selecting the wrong shank size for a router or collet.
Q
How do I prevent router bits from rusting in storage?
Keep the storage area dry, clean residue from the bits before storage, and inspect exposed steel regularly. If your shop has persistent humidity problems, consider a storage system with non-porous holders and use an appropriate rust-prevention method recommended for the particular bit.
Q
Is a wooden router bit holder a good idea?
Yes. Wooden blocks and trays are practical for custom router bit storage because they are easy to drill and configure. They work best when the workshop environment is dry and the holes provide adequate clearance for safe removal.
Q
How should large router bits be stored?
Give large cutters their own positions with enough clearance around the cutting head. Avoid forcing them into small holes or crowded compartments. A deep drawer, cabinet shelf, or dedicated rack can provide the space needed for oversized specialty bits.
✦ Wrapping Up
Conclusion
Effective router bit storage does not need to be complicated. The essential requirements are individual support, protection for cutting edges, clear organization, and a dry storage environment. From a simple drilled wooden tray to a dedicated cabinet or portable case, several designs can work well when they match the size and workflow of your collection.
Start by separating your bits by shank size, then organize them by profile or frequency of use. Give large specialty cutters extra clearance, keep accessories from striking the bits, and inspect cutters before returning them to service. If your collection is growing, choose a modular layout that lets you add storage without starting over.
💡 Key Takeaway
Inventory your router bits today, separate 1/4-inch and 1/2-inch shanks, assign each cutter a protected position, and label the storage so the correct bit can be identified and removed without touching its cutting edge.