Regular miter saw maintenance means cleaning sawdust, inspecting the blade and guard, checking fasteners and alignment, keeping moving parts clean and properly lubricated, and replacing damaged or worn components before they affect safe operation.
For homeowners, DIY woodworkers, remodelers, and contractors across the United States, a miter saw often handles everything from trim and molding to framing lumber and finish carpentry. Because the tool combines a rotating blade, moving arm, adjustable table, fence, and electrical components, routine care is more than wiping off the exterior. Sawdust can collect around the blade guard, motor vents, slides, table, and other moving parts, while vibration and repeated adjustments can gradually affect alignment.
The safest maintenance routine starts with the specific owner’s manual for your saw. Different 10-inch, 12-inch, sliding, compound, corded, and cordless models use different lubrication points, blade hardware, guards, and service procedures. Before cleaning or servicing the saw, disconnect its power source and wait until the blade has completely stopped. Never bypass a guard or continue using the saw when a damaged component could affect safe operation.
Source: support.reekon.tools
Why Miter Saw Maintenance Matters
Miter saw maintenance keeps the machine clean, mechanically sound, and capable of making predictable cuts. It also provides an opportunity to identify problems before they become more serious. A dirty fence can interfere with workpiece positioning, accumulated debris can restrict moving parts, and a damaged or dull blade can produce poor cuts while increasing the load on the saw.
Maintenance should not be treated as a universal checklist with identical intervals for every model. A homeowner who makes occasional trim cuts may need less frequent servicing than a contractor using a sliding compound miter saw throughout the workweek. Use the manufacturer’s maintenance instructions as the controlling schedule, then increase inspection frequency when the saw operates in dusty conditions or sees heavy use.
The goal is not to make every component look new. The goal is to keep the saw’s safety systems, cutting components, adjustments, and moving mechanisms in a condition suitable for the work.
Source: lowes.com
Cleaner cuts
A clean fence, table, blade, and work area make it easier for material to sit correctly and reduce problems caused by accumulated debris.
Reliable movement
Keeping appropriate moving surfaces free of sawdust helps the miter table, slides, and other adjustable mechanisms operate as designed.
Early problem detection
Routine inspections can reveal loose hardware, damaged guards, worn parts, damaged cords, blade problems, or abnormal movement before the next project.
Safer operation
Functional guards and properly maintained components are fundamental safety features, not optional performance upgrades.
How Often Should You Maintain a Miter Saw?
A practical routine is to remove obvious debris after use, perform a safety inspection before use, and carry out a more detailed inspection periodically according to the owner’s manual and workload. Heavy-use shops may need to inspect slides, dust collection, blade condition, and fasteners much more often than occasional users.
Do not rely on a calendar alone. If the saw starts producing rough or inconsistent cuts, the table becomes difficult to rotate, the slide action becomes rough, the guard does not move freely, or the machine develops unusual vibration or noise, inspect it immediately rather than waiting for the next scheduled maintenance session.
After use
Remove accumulated sawdust and debris from accessible surfaces and the dust-collection area after the machine is disconnected and the blade has stopped.
Before use
Check the blade, guard, work surface, fasteners, power connection, and general condition of the saw.
Periodically
Inspect alignment, slides, pivot areas, lubrication points, electrical components, and other model-specific service items.
How to Clean a Miter Saw
Cleaning is the most frequent part of miter saw maintenance. Disconnect the saw from electrical power, remove the battery on cordless models when applicable, and wait for the blade to stop completely before cleaning. For workplace servicing, follow the applicable hazardous-energy procedures and the manufacturer’s instructions.
Start with loose sawdust on the table, fence, base, blade area, motor housing, and accessible recesses. A soft brush or suitable vacuum can remove debris without putting your hands near the blade. Avoid reaching into the cutting area to pick out scraps, even when the saw is switched off. A blade can remain hazardous during coasting, and the safest maintenance practice is to de-energize the machine before working around it.
Pay particular attention to the lower blade guard. Dust and resin buildup can interfere with movement on some saws. The guard should move through its intended range without sticking or binding. Do not spray cleaners or lubricants onto a plastic guard unless the manufacturer specifically approves the product; some chemicals can damage plastics.
Clean the motor ventilation openings as directed by the manufacturer. Sawdust blocking ventilation can contribute to heat buildup. If your saw has sliding rails, keep them free of debris and follow the owner’s manual for cleaning and lubrication. Do not automatically coat rails with heavy oil or grease because lubricants that attract sawdust can create a paste-like buildup.
Source: space-airduct.com
Use a brush or vacuum
Remove loose sawdust from the base, table, fence, vents, blade area, and dust port using tools that keep your hands away from the cutting zone.
Clean the fence
Remove dust and chips from the fence face so the workpiece can sit flat and consistently against its support.
Clean the slides
On sliding models, remove accumulated dust from the rails and carriage area using the cleaning method specified by the manufacturer.
Check the dust port
Clear blockages from the dust port, hose, bag, or collection system so debris can leave the cutting area efficiently.
Protect plastic components
Use only cleaning products approved for the materials on your saw. Avoid petroleum-based solvents, aggressive chemicals, and unapproved aerosol products around plastic guards.
Should You Use Compressed Air to Clean a Miter Saw?
Compressed air can move sawdust into bearings, switches, motor areas, and other locations rather than actually removing it. It can also propel debris toward the operator. A vacuum and brush are generally more controlled choices for routine cleaning. If the owner’s manual provides a specific compressed-air procedure, follow that procedure and use appropriate eye protection and dust controls.
Best routine approach
Use a soft brush to loosen debris and a suitable vacuum to capture it instead of simply redistributing dust throughout the machine.
Dusty workspaces
Improve source capture with the saw’s dust port, collection bag, shop vacuum, or an appropriately designed collection system.
Blade, Guard, and Arbor Maintenance
The blade and its mounting hardware deserve a careful inspection because they directly affect cutting performance and safety. Before operating the saw, look for cracks, missing or damaged teeth, excessive resin buildup, warping, or other visible damage. A damaged blade should be removed from service rather than used until it fails.
A dull blade can create rough cuts, burning, increased resistance, and excessive tearout. Cleaning can remove resin and debris, but cleaning does not restore damaged or worn teeth. Replace the blade when it is no longer suitable for the material or when its condition falls outside the manufacturer’s requirements.
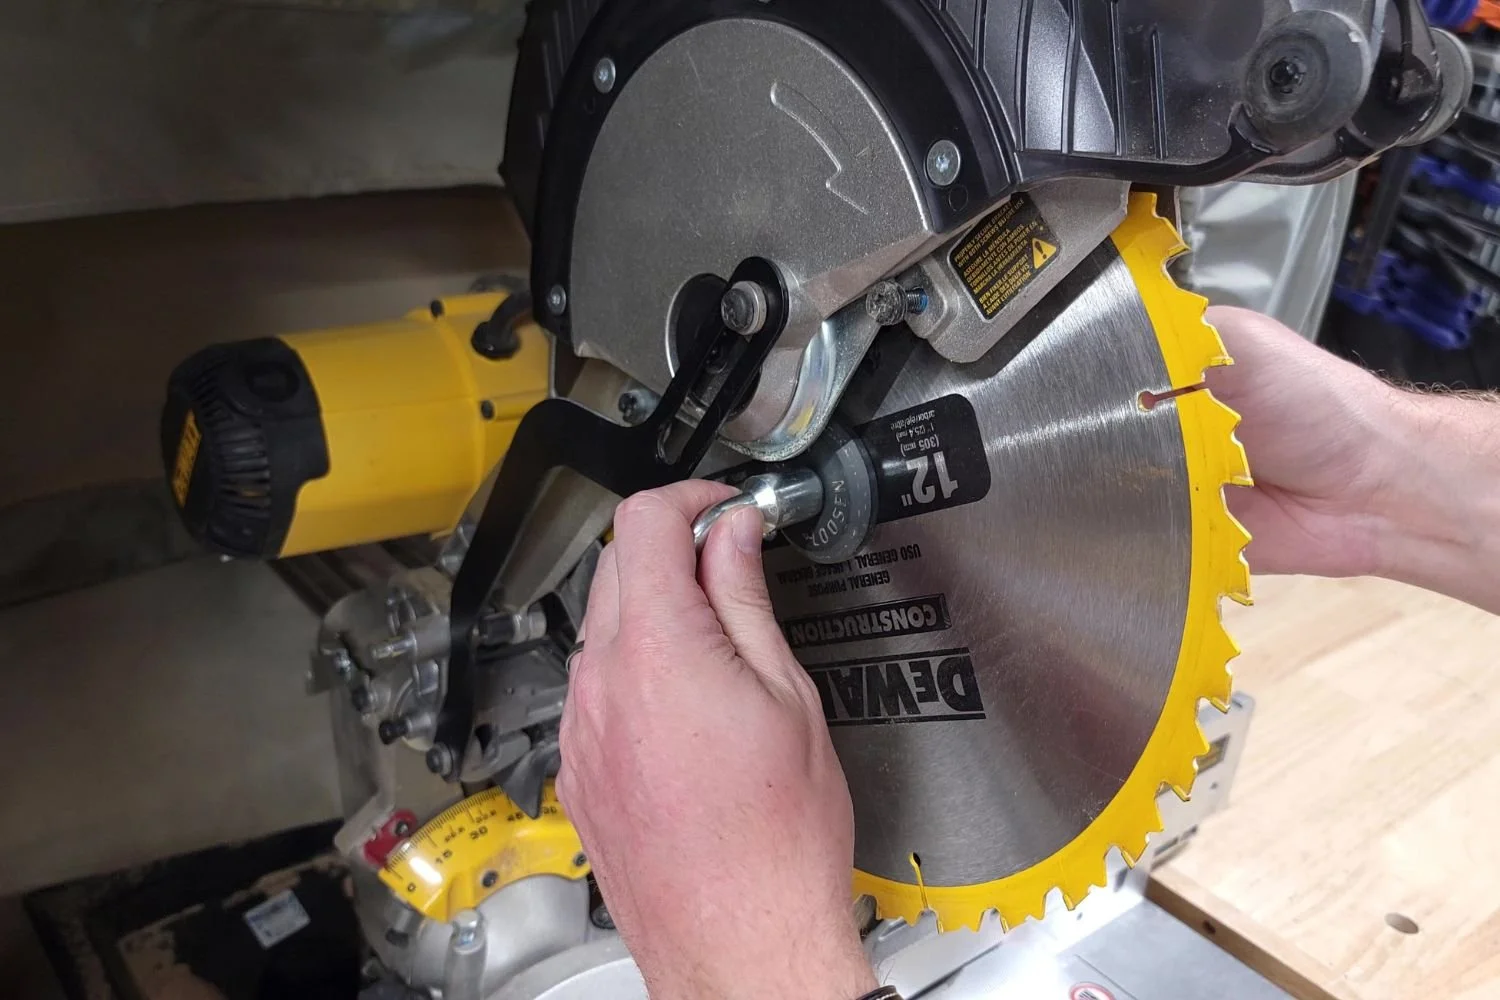
When changing a blade, follow the exact procedure in the owner’s manual. Disconnect the power source, use the specified blade size and arbor configuration, and reinstall the blade clamps and hardware in the correct orientation. Do not assume that the tightening direction or arbor hardware is identical across all miter saws.
Inspect the lower guard and its mechanism. The guard should operate as designed and should not be deliberately tied, wedged, disabled, or removed for normal cutting. If the guard is damaged or fails to function correctly, stop using the saw until the issue is corrected with an appropriate replacement or repair.
Source: images.squarespace-cdn.com
Inspect the blade
Look for cracks, damaged teeth, excessive buildup, distortion, or other conditions that could make the blade unsuitable for use.
Check the arbor area
When servicing the blade, inspect the arbor, blade clamps, and mounting surfaces for dirt, damage, or abnormal wear.
Inspect the guard
Verify that the blade guard moves correctly and returns to its intended protective position without sticking.
Check the throat or kerf plate
Replace a damaged or badly worn insert when it can no longer properly support the workpiece or maintain safe clearance around the blade.
Signs That a Miter Saw Blade Needs Attention
A sudden change in cut quality is often a reason to inspect the blade, but it should not automatically be blamed on the blade. Check the workpiece, blade selection, fence alignment, bevel setting, and cutting technique as well. Burning, excessive tearout, increased resistance, or unusual noise can justify stopping the saw and inspecting it before continuing.
Burn marks
May indicate a dull or contaminated blade, an unsuitable blade, excessive cutting resistance, or another setup issue.
Ragged cuts
Can result from a dull or inappropriate blade, poor support, incorrect setup, or damaged teeth.
Unusual vibration
Stop the saw and inspect the blade and mounting system rather than continuing to cut through the vibration.
Lubrication and Moving Parts
Lubrication is model-specific, so the owner’s manual should determine what gets lubricated, what lubricant is approved, and how much to apply. Some miter saws have sealed motor bearings that do not require routine user lubrication, while other designs specify lubrication for pivots, slides, threads, or particular contact points.
Do not assume that more lubricant means better maintenance. Excess oil or grease can collect sawdust and create abrasive buildup around moving components. Some manufacturers specifically call for dry lubricant on slides or other surfaces because it is less likely to attract dust.
Before applying any lubricant, clean the area and identify the exact service point. Keep lubricants away from the blade’s cutting surfaces unless the manufacturer explicitly provides a procedure for that purpose. Never apply lubricant to a spinning blade.
If a pivot, slide, or adjustment mechanism remains rough after proper cleaning and manufacturer-approved lubrication, do not compensate by adding more lubricant. Binding can indicate contamination, misalignment, worn components, or mechanical damage that requires inspection or service.
Source: woodsmith.com
Follow the manual
Use the lubricant type, location, and application method specified for the exact miter saw model.
Clean before lubricating
Remove dust and old residue before applying fresh lubricant so contaminants are not trapped against moving surfaces.
Avoid over-lubrication
Excess lubricant can attract sawdust and interfere with smooth movement.
Do not lubricate blindly
Sealed bearings and other components may not require user lubrication, and adding lubricant where none is specified can create problems.
What Lubricant Should You Use on a Miter Saw?
There is no single lubricant that is correct for every miter saw. Manufacturer instructions may specify a dry lubricant, light machine oil, grease, or no additional lubrication for a particular component. The correct choice depends on the model and the part being serviced. If the manual is unavailable, obtain the correct documentation for the exact model before applying lubricant to internal or mechanical components.
Sliding rails
Use the product and method specified for your saw; some manufacturers recommend dry lubrication rather than oil or grease.
Pivot mechanisms
Lubricate only designated pivot points and only with the approved lubricant.
Motor bearings
Do not add lubricant unless the manufacturer specifically identifies the bearings as user-serviceable.
Alignment, Fasteners, and Performance Checks
A miter saw should be checked for alignment when cuts become inconsistent, after significant transport or adjustment, or when the machine shows signs of movement. Alignment typically involves checking the relationship between the blade, fence, table, and bevel mechanism. The exact adjustment sequence varies by design.
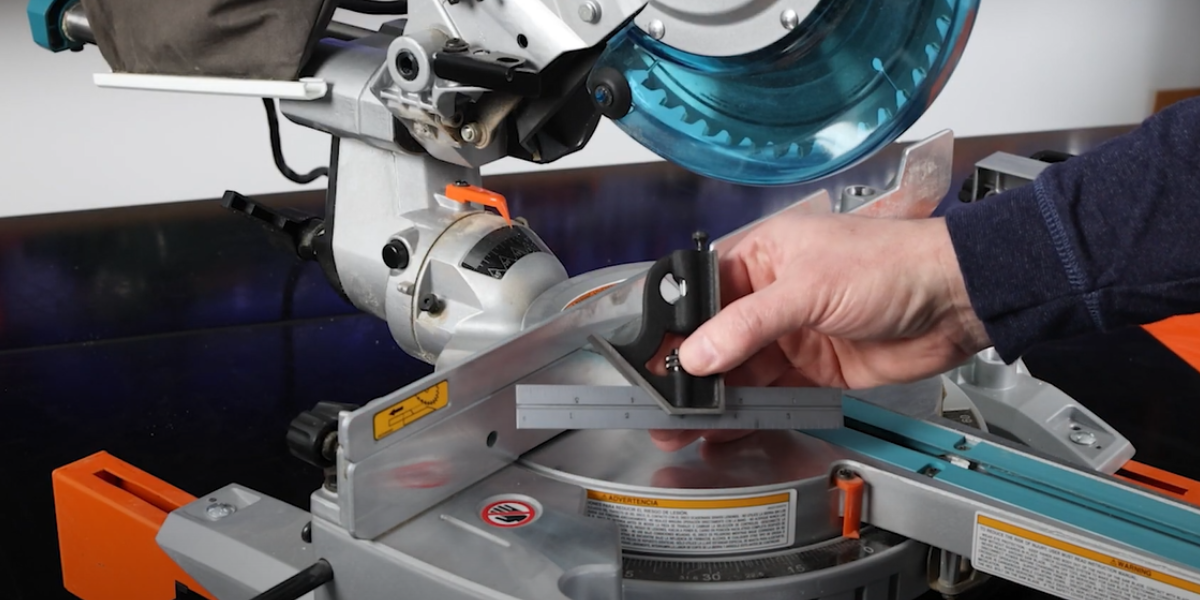
For a basic 90-degree check, disconnect the saw and use an appropriate square against the fence and the body of the blade rather than the teeth. A visible gap can indicate that the fence or blade is not square. On some saws, the fence is adjustable; on others, the table, detent plate, or carriage must be adjusted according to the manual.
Do not automatically adjust every screw you can see. Some fasteners establish factory settings, secure guards, or control mechanisms that should not be altered without the manufacturer’s procedure. Make small adjustments, tighten the appropriate hardware, and verify the result with a test cut.
A simple practical verification is to make test cuts in scrap material and check the resulting joint or angle. For repeated precision work, a combination square, reliable straightedge, or other suitable measuring tool can help identify alignment problems. The test should reflect the type of cut you actually need to make.
Source: fix.com
Check the fence
Verify that the fence is correctly positioned relative to the blade and table before making precision cuts.
Check the bevel
Verify the blade’s relationship to the table at the relevant bevel settings, following the model-specific adjustment procedure.
Check the miter setting
Confirm that the zero-degree detent and other commonly used angles correspond to the actual blade position.
Inspect hardware
Look for loose or damaged bolts, screws, knobs, clamps, and adjustment components without disturbing fasteners that require a specialized service procedure.
Miter Saw Maintenance Troubleshooting
Use the symptom to decide where to begin rather than disassembling the saw immediately. If cuts are no longer square, check alignment and debris around the fence and table. If the saw is difficult to slide, inspect the rails for dust and follow the manual’s cleaning and lubrication procedure. If the saw vibrates, stop operation and inspect the blade, mounting hardware, and other accessible components.
Persistent electrical problems, damaged internal wiring, repeated breaker trips, burning odors, severe mechanical noise, excessive arbor play, or failures that require internal disassembly should be handled according to the manufacturer’s service instructions or by a qualified service professional.
Cuts are not square
Check the blade-to-fence and blade-to-table relationships, fence condition, miter setting, and debris that could prevent the workpiece from sitting correctly.
Slide movement is rough
Disconnect power, clean the rails according to the manual, and use only the specified lubrication method.
Blade vibrates
Stop using the saw and inspect the blade, arbor hardware, mounting surfaces, and other accessible components for damage or improper installation.
Motor runs unusually hot
Check ventilation openings for sawdust and stop operation if overheating, unusual odor, or other abnormal behavior continues.
Guard sticks
Stop using the saw until the guard mechanism is cleaned, repaired, or replaced according to the manufacturer’s instructions.
A Practical Miter Saw Maintenance Routine
A simple routine is easier to follow than waiting until the saw develops a major problem. Before each cutting session, inspect the blade and guard, check for obvious damage, make sure the work surface is clean, and verify that the saw is securely supported. After cutting, remove accumulated sawdust and check the dust-collection path.
For heavier use, periodically perform a more detailed inspection. Clean the machine thoroughly, inspect the blade and mounting components, examine slides and pivot mechanisms, check fasteners, inspect the power cord or battery system, and verify alignment. The manufacturer’s manual should determine which service items can be performed by the owner and which require authorized service.
Keep a basic maintenance record if the saw is used professionally. Recording blade changes, unusual symptoms, alignment checks, and service work can make recurring problems easier to identify and can help prevent important maintenance from being forgotten.
Source: media.popularwoodworking.com
Before each use
Inspect the blade, guard, table, fence, power connection, and overall condition of the saw.
After each use
Disconnect the saw and remove accessible sawdust and debris from the work surface, blade area, vents, and collection path.
During periodic maintenance
Perform deeper cleaning, inspect moving parts and hardware, check alignment, and lubricate only the components specified by the manufacturer.
After transportation
Before precision work, verify that the fence, miter settings, bevel settings, and other adjustments remain correct.
When a problem appears
Stop operation and troubleshoot the symptom instead of continuing to cut with a machine that may have a safety or mechanical defect.
Miter Saw Maintenance Checklist
Use this checklist as a starting point, then adapt it to the exact requirements in your owner’s manual.
Blade
Check for cracks, damaged teeth, resin buildup, incorrect installation, and excessive wear.
Guard
Confirm that the guard is intact and moves as intended.
Table and fence
Remove sawdust and verify that surfaces are clean, stable, and suitable for supporting the workpiece.
Slides and pivots
Clean and lubricate only according to the manufacturer’s procedure.
Dust collection
Clear the port, hose, bag, or collection system when debris restricts airflow or accumulates around the saw.
Electrical system
Inspect the cord, plug, switch, battery, and visible electrical components for damage appropriate to the model.
Alignment
Check commonly used miter and bevel positions when accuracy changes or after moving the saw.
Hardware
Look for loose, missing, cracked, or damaged fasteners and components.
Frequently Asked Questions
Q
How often should I clean my miter saw?
Remove significant sawdust after use and inspect the saw before each use. Perform deeper cleaning as needed based on workload, dust levels, and the maintenance schedule in the owner’s manual. A heavily used contractor saw generally needs more frequent attention than a miter saw used occasionally for home projects.
Q
Can I use WD-40 or regular oil on a miter saw?
Do not assume a general-purpose oil or spray lubricant is appropriate. Miter saw manufacturers specify different lubrication methods for different components, and some recommend dry lubricants for slides. Follow the manual for the exact model and keep unapproved chemicals away from plastic guards and other sensitive components.
Q
Why is my miter saw making rough cuts after cleaning?
Cleaning does not correct every cause of poor cuts. Check blade sharpness and condition, blade selection, fence alignment, miter and bevel settings, workpiece support, and the condition of the throat or kerf plate. If the saw vibrates or produces unusual noise, stop using it and inspect the blade and mounting system.
Q
Should I lubricate the miter saw blade?
No routine blade lubrication should be assumed. Cutting blades are maintained through proper cleaning, correct selection, and replacement when damaged or excessively worn. Never apply a lubricant to a spinning blade. Follow the manufacturer’s instructions if a particular cutting application requires a specific approved treatment.
Q
When should I stop using a miter saw?
Stop using the saw when the blade or guard is damaged, the guard does not function correctly, the arbor has abnormal play, the machine develops severe or unexplained vibration, there is a burning smell, electrical damage is visible, or another defect could affect safe operation. Have the problem corrected before returning the saw to service.
Q
How do I know if my miter saw needs calibration?
Calibration or alignment is worth checking when cuts that were previously accurate become inconsistent, when miter joints do not close correctly, after significant transportation, or after an adjustment or repair. Use an appropriate square and test cuts, then follow the exact adjustment procedure for your model.
✦ Wrapping Up
Conclusion
Good miter saw maintenance is mainly a matter of consistent cleaning, inspection, correct lubrication, and timely adjustment. Keeping sawdust away from the fence, table, slides, vents, blade area, and dust port helps preserve normal operation, while regular inspection gives you an opportunity to find damaged blades, guards, fasteners, electrical components, or other problems before cutting.
The most important rule is to follow the owner’s manual for the exact saw. Miter saw designs differ, so lubrication points, service procedures, blade hardware, and adjustment methods should not be generalized across every brand or model. Disconnect the power before maintenance, keep guards functional, and stop using the machine when a defect could make operation unsafe.
💡 Key Takeaway
Before your next project, unplug or remove the battery from the miter saw, clean the sawdust from the table and blade area, inspect the blade and guard, check the fence and adjustment hardware, and verify alignment with a test cut. Then follow the manufacturer’s maintenance instructions for any lubrication or service your model requires.