The most effective miter saw dust collection setup usually combines the saw’s dust port with a properly sized vacuum and a rear or side hood that catches dust the built-in port misses.
For woodworkers in the United States, controlling miter saw dust is especially useful in garages, basements, dedicated home shops, and jobsite work areas where airborne sawdust can quickly spread beyond the cutting station. A miter saw naturally releases dust around an exposed blade, so even a connected vacuum may leave chips and fine particles around the saw.
The practical goal is not to make a miter saw completely dust-free. Its open blade area and moving head make perfect capture difficult. A better approach is to collect dust as close to the blade as possible, contain the material that escapes, and filter the air that remains. OSHA identifies local exhaust ventilation as a primary engineering method for controlling wood dust and recommends keeping collection close to the source.
Source: upload.wikimedia.org
How Miter Saw Dust Collection Works
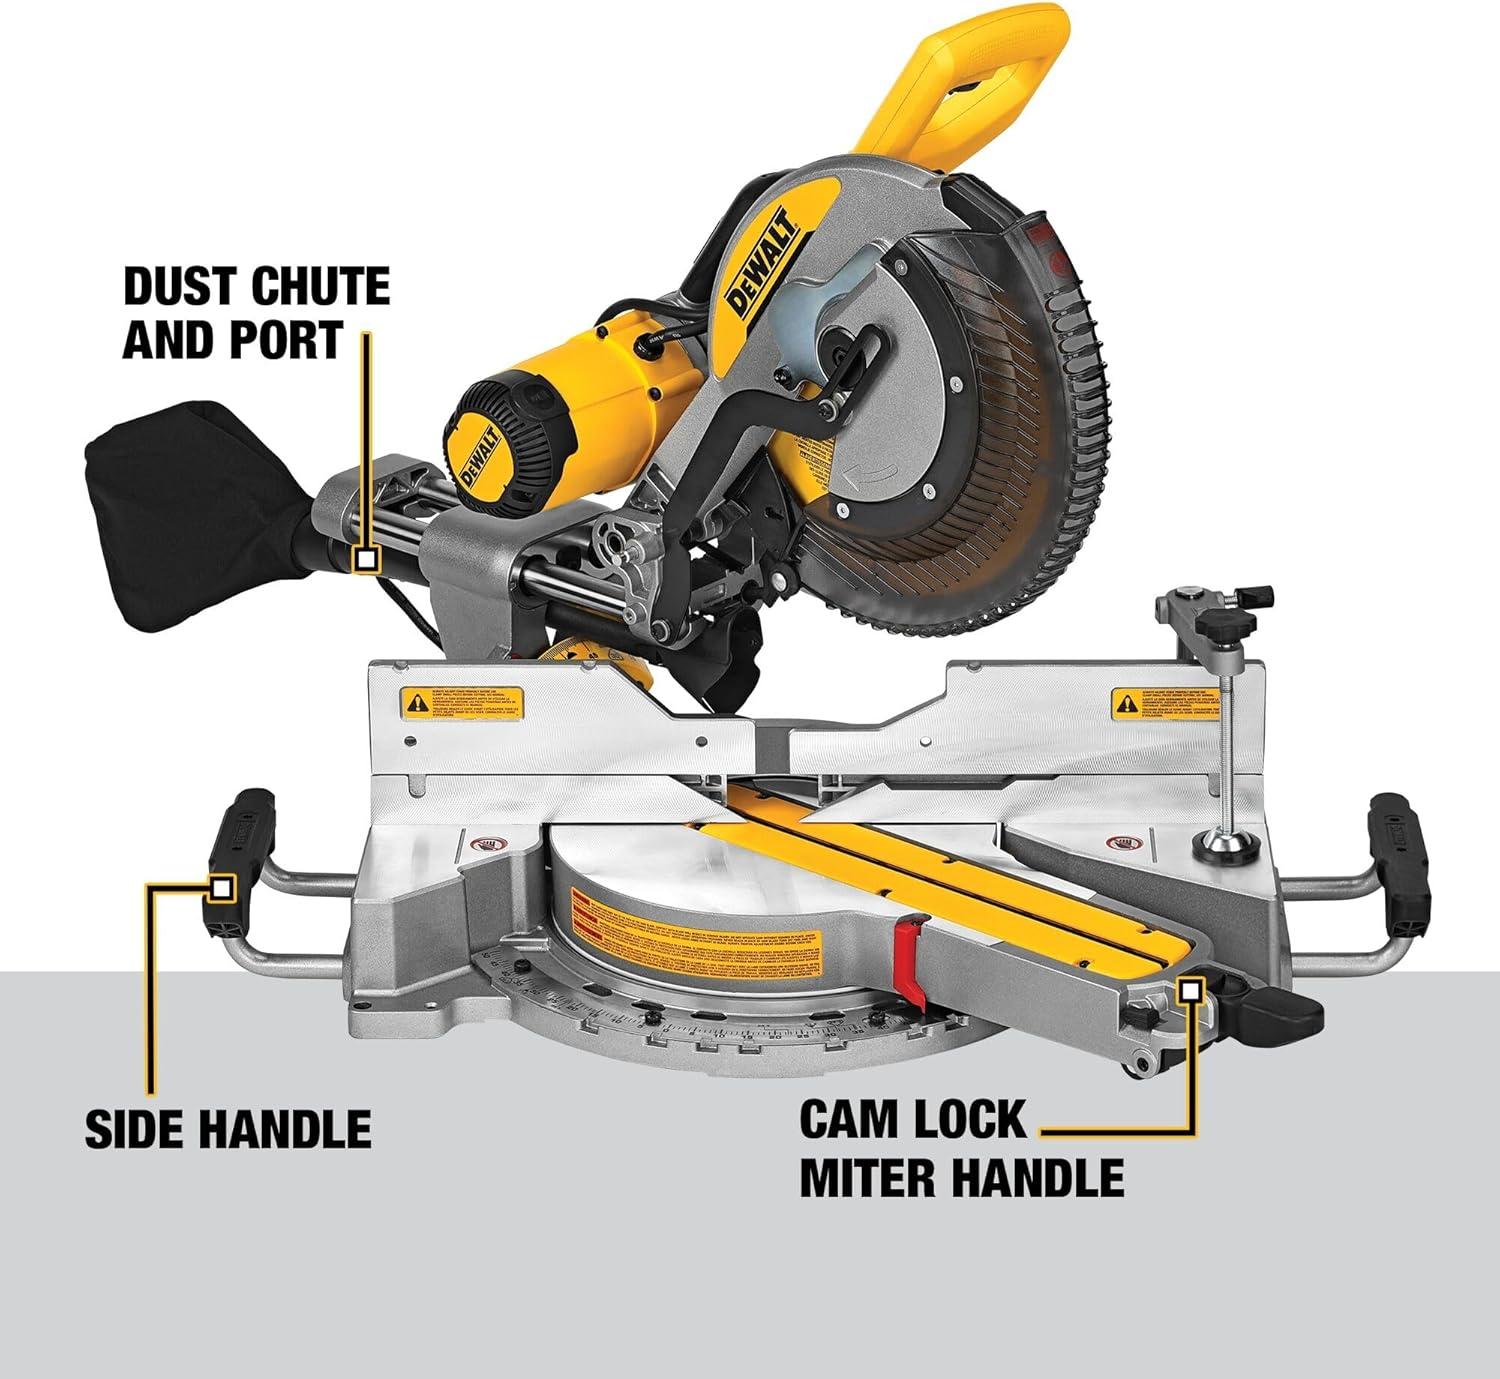
Miter saw dust collection uses airflow to move sawdust away from the cutting area and into a bag, shop vacuum, dust extractor, or larger dust collector. The factory dust chute is normally positioned near the rear of the blade housing, where it can capture some of the material thrown from the blade.
The difficulty is the saw’s geometry. Unlike a table saw cabinet, a miter saw has a relatively open cutting area and a head that can rotate, bevel, and slide. Dust can therefore leave the blade area in several directions before it reaches the collection port.
This is why simply attaching a stronger vacuum does not always solve the problem. Airflow needs a useful path to the dust source. A well-positioned hood, deflector, or enclosure can change the direction of escaping dust so the collection system has a better chance of capturing it.
Source: media.popularwoodworking.com
Source capture
The factory dust port or an aftermarket chute attempts to collect dust close to the blade before it spreads.
Containment
A rear or side hood gives escaping sawdust a physical boundary and keeps more of it near the collection inlet.
Air filtration
A suitable filter or air cleaner addresses the fine fraction that remains airborne after source collection.
Why Miter Saws Are Difficult to Collect From
The blade is exposed around much of its cutting path, and the blade teeth can carry chips away from the dust chute at high speed. Sliding models add another challenge because the saw head moves forward and backward while the hose connection must remain clear.
Bevel and miter adjustments also change the relationship between the blade, dust chute, workpiece, fence, and hose. A collection setup that works well for a straight 90-degree crosscut may interfere with a bevel cut or a wide piece of lumber.
Blade movement
The blade creates a moving stream of chips and dust that is difficult to enclose completely.
Sliding travel
Sliding miter saws require enough hose and enclosure clearance for the full forward and backward movement.
Miter and bevel movement
Collection hardware must not restrict the saw head, blade guard, fence, or workpiece at any permitted cutting angle.
Choose the Right Collection Method
For a portable setup, a shop vacuum or dust extractor connected directly to the saw is the simplest starting point. For a permanent miter saw station, a rear hood connected to a larger dust collection system can provide broader containment. Many shops benefit from using both approaches when the equipment and layout allow it.
A shop vacuum is well suited to the relatively small dust ports found on many miter saws because it can generate strong airflow through a small hose. A larger dust collector is useful when the collection hood has a larger opening and needs to move more air through a broader enclosure.
Do not choose a hose size simply because it is larger. The connection must match the saw, adapter, vacuum or collector, and the design of the hood. An oversized hose attached to a poorly sealed or badly positioned hood may perform worse than a smaller system with a clear airflow path.
Source: i.etsystatic.com
Shop vacuum
A practical choice for portable saws and direct connection to a small factory dust port.
Dust extractor
Useful when fine filtration, automatic tool activation, and portable professional extraction are priorities.
Dedicated dust collector
Often useful for a permanent station with a larger rear hood or enclosure that needs higher airflow volume.
Dust separator
A separator can intercept larger chips before they reach the vacuum filter, reducing filter loading during heavy cutting.
Shop Vac Versus Dust Collector
The practical distinction is airflow behavior. A shop vacuum is commonly designed around relatively small hoses and high suction at the tool connection. A conventional dust collector generally moves more air through larger ductwork and is better suited to a larger hood or enclosure.
For a direct factory-port connection, start with the hose and connection size specified for the saw. For a rear hood, size the collection system around the hood opening, ductwork, bends, and distance to the collector. Avoid adding unnecessary reducers, sharp bends, or long flexible hose runs because each restriction can reduce useful airflow.
For portable work
A shop vacuum or compact dust extractor is usually easier to transport and connect.
For a fixed miter station
A larger collector and rear hood can provide broader containment around the saw.
For fine dust
Pay attention to filtration rather than judging the system only by how much visible sawdust enters the container.
Improve the Miter Saw Dust Port
If your saw already has a dust port, start by making the existing system work correctly before building a complicated enclosure. Remove packed sawdust from the chute, confirm the hose is securely connected, and check that the collection bag or filter is not restricting airflow.
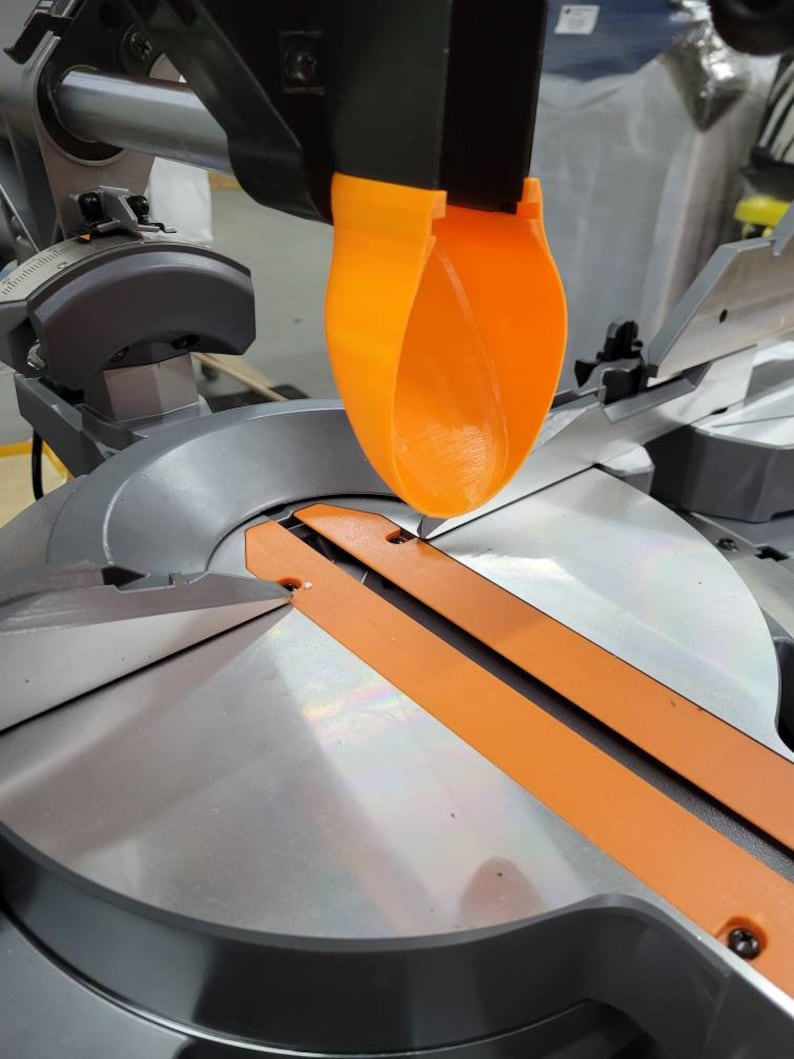
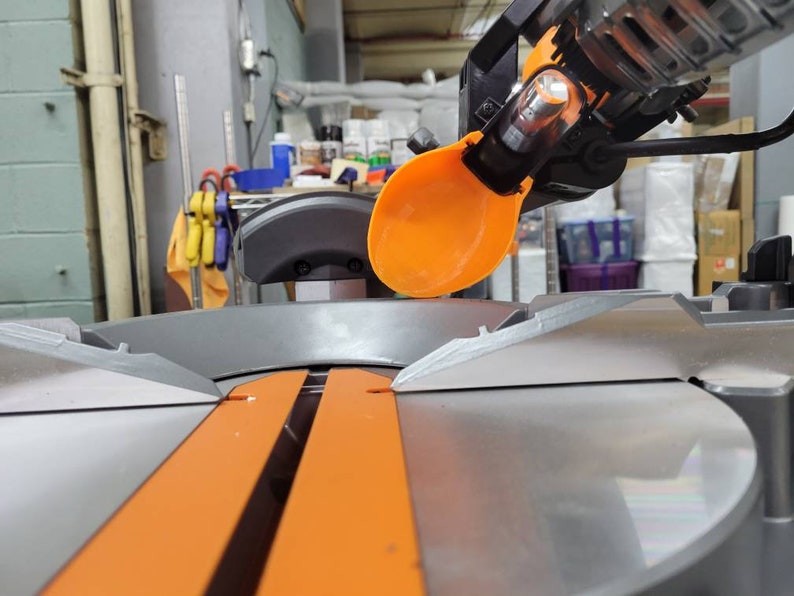
A dust chute or adapter can improve capture by bringing the hose opening closer to the stream of dust. Some aftermarket designs use flexible rubber flaps or shaped shrouds to create a more controlled path around the blade housing. Compatibility matters because the saw head needs to move freely through its full range.
Manufacturer manuals should take priority when determining whether an accessory can be fitted. A dust adapter should never prevent the blade guard from returning to its normal position or interfere with the blade, fence, workpiece, or carriage.
Source: shopnationstore.com
Check the port
Make sure the factory chute is not blocked by accumulated chips or dust.
Seal the connection
A loose hose connection allows suction to escape and can let dust leak into the work area.
Use the correct adapter
Match the adapter to the exact saw model and the hose or extractor connection.
Test full movement
Move the saw through its approved miter, bevel, and slide positions while unplugged to confirm that the collection hardware does not interfere.
When a Dust Chute Helps
A shaped chute can help when the factory port sits too far from the dust stream or allows too much material to escape around the blade housing. The benefit depends on the saw design, the cut being made, and the extraction system connected to it.
Do not assume a chute’s reported improvement on one saw applies to another model. Different blade guards, rail arrangements, fences, and dust-port locations can produce different results.
Good fit
The attachment stays secure without contacting the blade or interfering with normal saw movement.
Poor fit
The attachment restricts beveling, sliding, wide stock, or blade-guard movement.
Build a Rear Miter Saw Dust Hood
A rear dust hood is one of the most useful approaches for a permanent miter saw station because it addresses the dust that escapes around the factory chute. The basic idea is to create a partial enclosure behind and beside the saw, then connect the enclosure to a dust collector.
A hood does not need to completely surround the saw. The front must remain open enough for visibility and safe handling, while the sides and rear can redirect the dust stream toward the collection inlet. The exact shape depends on the saw’s maximum miter angle, bevel range, slide travel, and the dimensions of the material you cut.
Before cutting any panels, unplug the saw and move the head through its complete range of approved movement. Mark the largest space the saw occupies, then design the enclosure around that envelope. A hood that works at 90 degrees but blocks a 45-degree miter is not a successful design.
Source: m.media-amazon.com
Rear panel
Provides a surface for escaping dust to hit instead of allowing it to travel freely into the room.
Side panels
Help contain the sideways portion of the dust stream while leaving enough clearance for miter movement.
Collection inlet
Connect the collector to a location that pulls air through the enclosure rather than creating a dead zone.
Flexible sealing material
Rubber or similar flexible material can close selected gaps while allowing the saw head to move.
Basic DIY Hood Construction
A simple hood can be made from plywood, hardboard, or another suitable rigid sheet material. Build the rear and side panels around the saw’s movement envelope, then add a collection connection on the rear or lower portion of the enclosure.
Some woodworking designs use a curved front or perforated panel to contain sawdust while allowing air to move toward the collection system. The exact dimensions should be treated as a starting point rather than a universal plan because every miter saw station has different clearance requirements.
After assembly, make several test cuts using scrap wood. Look for dust escaping over the top, under the saw, through the sides, and around the hose connection. Those observations tell you where a small deflector or flexible flap may help.
Start with clearance
Confirm full blade, fence, carriage, bevel, and miter movement before permanently fastening the hood.
Minimize leaks
Seal unnecessary gaps around fixed panels and hose connections so the collector draws through the intended opening.
Keep access practical
The hood should still allow safe workpiece placement, blade visibility, maintenance, and cleanup.
Troubleshoot Poor Miter Saw Dust Collection
When a miter saw still leaves a large amount of dust behind, check the system from the saw outward. The most useful sequence is to inspect the collection port, hose, filter, airflow restrictions, hood position, and saw movement before changing the entire system.
Visible sawdust on the table does not necessarily mean the entire system has failed. Miter saws can still leave some chips because the blade is open and the cutting action produces material outside the capture zone. Focus on whether the system is reducing the amount of dust escaping into the room and whether the airflow remains consistent during the cut.
Source: cdn.dewalthome.com
Symptom: Weak suction
Check for a full vacuum container, clogged filter, blocked hose, loose connection, or an improperly seated dust bag.
Symptom: Dust sprays forward
The dust stream may be leaving the blade area before reaching the factory chute. A properly positioned deflector or rear hood may help.
Symptom: Dust escapes behind the saw
Check whether the rear enclosure is too open or whether the collection inlet is positioned away from the main dust path.
Symptom: Collection works on straight cuts but fails on angles
The saw’s changing position may move the blade away from the collection zone. Check miter and bevel clearances and adjust the hood geometry.
Symptom: Hose repeatedly disconnects
Use a suitable connector or clamp and provide enough slack for the saw’s full movement without allowing the hose to pull on the dust port.
A Simple Performance Test
Unplug the saw before inspecting or adjusting the collection hardware. Once the system is ready for operation, make a series of comparable cuts in scrap material while observing where the dust travels. Compare the floor, saw table, rear enclosure, and surrounding surfaces before and after each change.
Change one component at a time. For example, first verify the factory port and hose, then test a deflector, then test the rear hood. Changing several parts simultaneously makes it difficult to determine which modification actually helped.
Check airflow
Listen for changes in the vacuum or collector and inspect the hose for collapse or blockage.
Check containment
Look for the direction of escaping chips instead of focusing only on the amount collected in the container.
Check movement
Confirm that improvements do not create interference during bevel, miter, or sliding cuts.
Safety, Filtration, and Maintenance
Wood dust is not just a housekeeping issue. OSHA states that wood dust exposure can cause respiratory and skin effects and identifies local exhaust ventilation as a primary method for controlling dust at its source. A good miter saw dust collection system should therefore be treated as part of the workshop’s overall exposure-control strategy.
Do not rely on a dust collection system as a substitute for safe saw operation. Keep the blade guard functioning as designed, secure the workpiece correctly, maintain appropriate clearance from moving components, and follow the manufacturer’s operating instructions.
Fine dust can remain airborne even when larger chips are successfully collected. A suitable filter, regular housekeeping, and an appropriate respirator when required by the work environment can provide additional protection. OSHA also warns against using compressed air to blow accumulated combustible dust because it can create a hazardous dust cloud.
Source: i.etsystatic.com
Maintain filters
A clogged filter can reduce airflow and make an otherwise effective collection system perform poorly.
Empty collection containers
Do not allow bags, drums, or separators to become so full that they restrict airflow.
Inspect hoses
Look for cracks, crushed sections, loose fittings, and accumulated material inside the hose.
Clean the station
Remove settled dust regularly rather than allowing combustible dust to accumulate on floors, shelves, ledges, and other surfaces.
Never remove or defeat the blade guard, safety cover, or another manufacturer-provided safeguard to make room for a dust accessory.
When to Use Additional Respiratory Protection
Source capture should be the first layer of dust control, but it cannot guarantee that no airborne particles remain. If cutting produces visible airborne dust or the work environment requires respiratory protection, use equipment appropriate for the hazard and follow applicable workplace requirements.
For professional shops and construction environments, the required controls can depend on the work process, exposure level, material, and applicable regulations. A qualified safety professional or industrial hygienist can help evaluate conditions when ordinary shop controls are not sufficient.
Do not judge by visible chips alone
A clean floor does not prove that fine airborne dust has been completely controlled.
Use source capture first
Capture dust near the blade and supplement that control with appropriate filtration and respiratory protection when necessary.
Frequently Asked Questions
Q
What is the best way to collect dust from a miter saw?
For a portable setup, connect a suitable shop vacuum or dust extractor directly to the saw’s dust port. For a permanent station, a rear or side hood connected to a larger dust collector can contain the dust that escapes the factory chute. Using both approaches can provide broader control when the saw and workspace allow it.
Q
Does a shop vac work on a miter saw?
Yes. A shop vacuum can be a practical choice because many miter saw dust ports use relatively small hose connections. The result depends on the saw design, adapter, hose, filter condition, and how close the collection opening is to the dust stream.
Q
Why does my miter saw still make a mess with a vacuum connected?
The factory port does not capture every particle leaving the blade. Dust can escape around the blade guard, underneath the workpiece, behind the saw, or to the sides. Check for restricted airflow first, then consider a deflector or rear hood that contains the dust the factory port misses.
Q
Is a dust hood better than the factory dust bag?
A properly designed hood can contain dust that the factory bag or chute cannot reach, especially on a stationary miter saw. The hood still needs an appropriately sized collection system and enough clearance for the saw’s full movement. A factory bag can remain useful when portability is more important than maximum containment.
Q
Can I build my own miter saw dust collection box?
Yes. A DIY enclosure can be built around the rear and sides of a permanent miter saw station. The critical requirement is to leave enough clearance for every permitted miter, bevel, and sliding position. Test the enclosure with the saw unplugged before making powered cuts.
Q
How do I reduce fine dust around my miter saw?
Use source collection at the saw, contain escaping dust with a hood where practical, keep filters clean, and maintain good housekeeping. If airborne dust remains a concern, additional air filtration and suitable respiratory protection may be necessary depending on the work environment.
✦ Wrapping Up
Conclusion
Effective miter saw dust collection starts with realistic expectations. Because the blade and cutting area are relatively open and the saw head moves through multiple positions, no simple setup will necessarily capture every chip and particle. The objective is to capture as much dust as practical at the source and prevent the remainder from spreading through the workspace.
Start with the factory dust port, a properly matched vacuum or extractor, and clean filters and hoses. If that is not enough, add a carefully designed deflector or rear hood. For a permanent station, a combination of direct port extraction and rear containment can address different parts of the dust stream.
Above all, keep collection hardware clear of the blade, guard, fence, workpiece, and moving carriage. A dust-control modification is only useful if the saw remains safe and fully functional.
💡 Key Takeaway
For most home workshops, begin by optimizing the factory dust port and connecting a suitable shop vacuum or dust extractor. If significant dust still escapes, build or add a rear hood that contains the saw’s full range of movement and connect that hood to an appropriately sized collector.