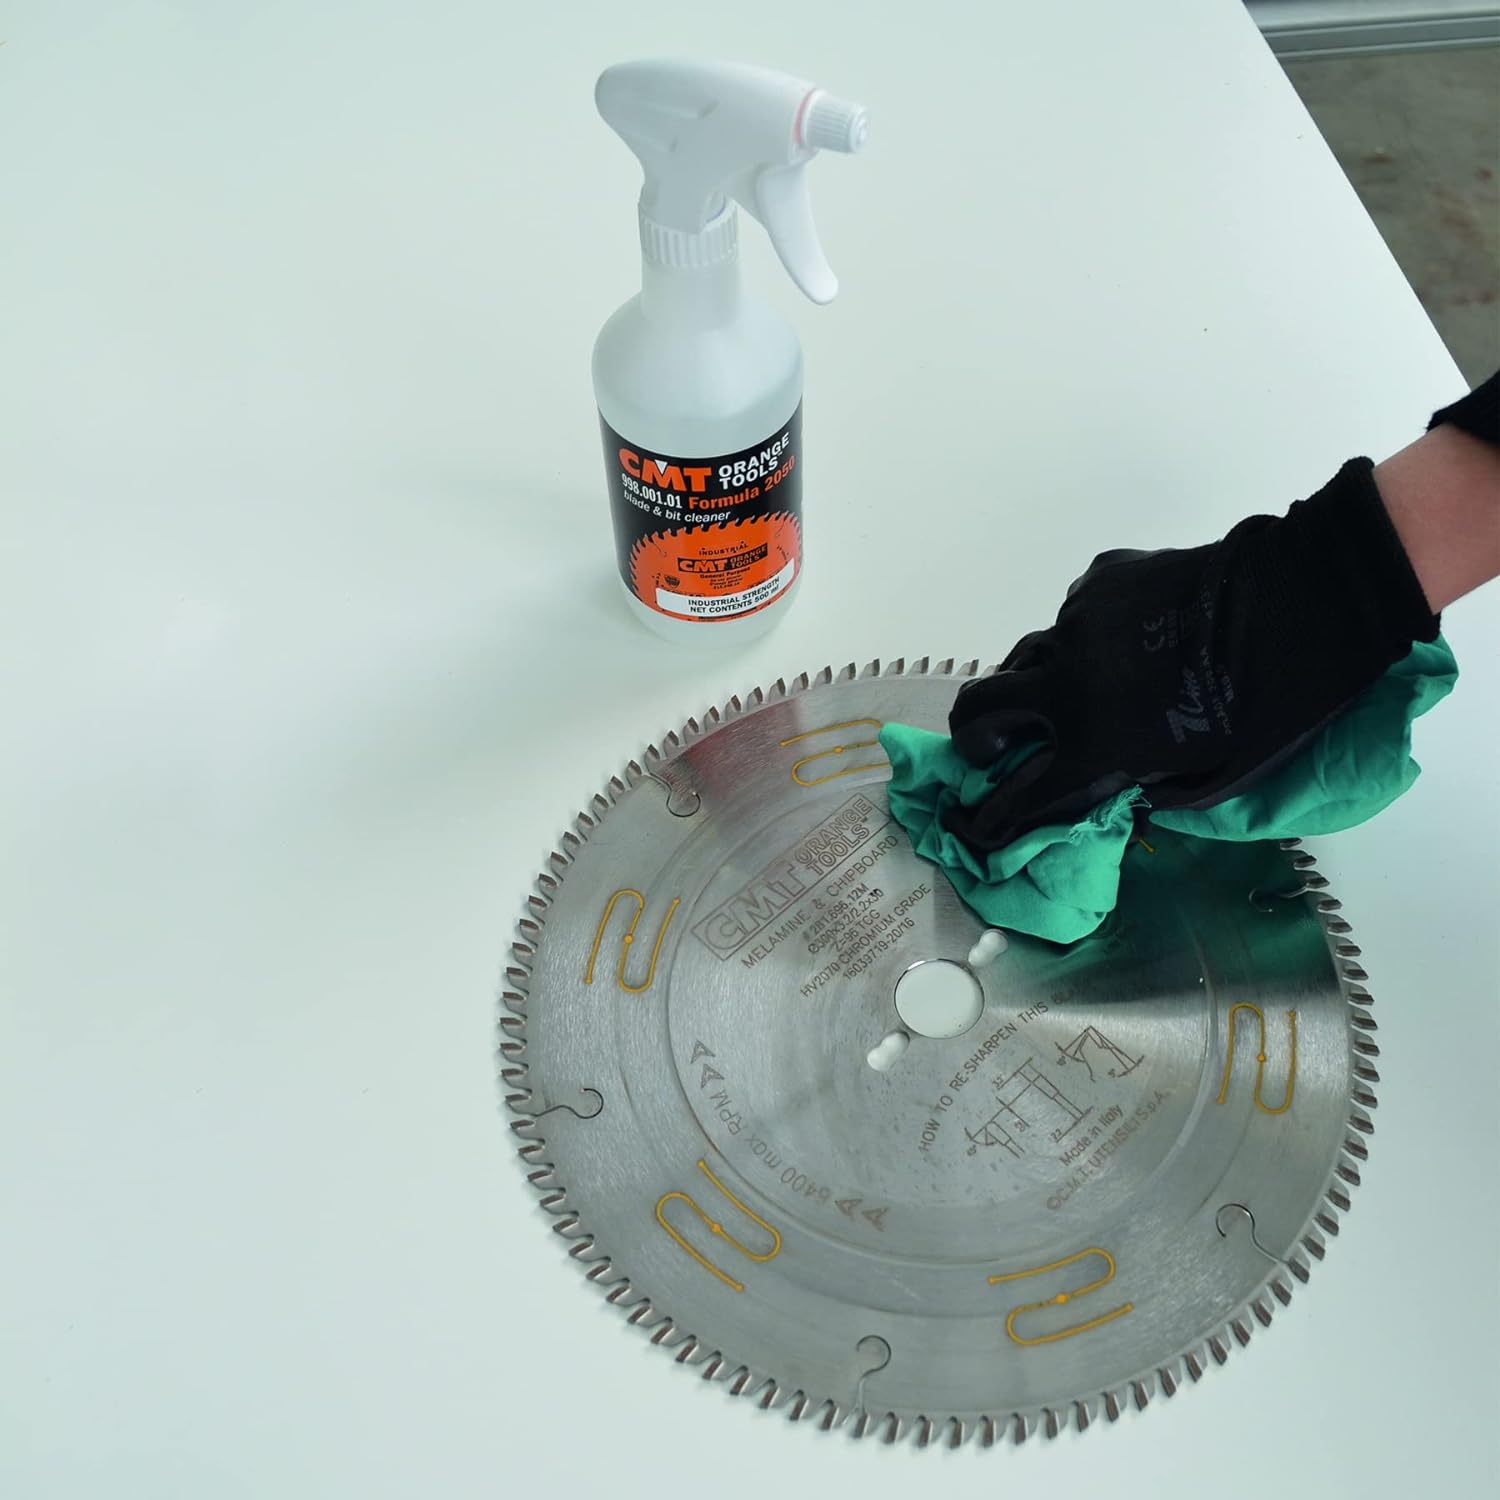
Clean a miter saw blade by removing it from the unplugged saw, placing it on a protected surface, applying a blade-safe cleaner, allowing the buildup to soften, gently scrubbing with a nylon or brass brush, rinsing or wiping according to the cleaner instructions, and drying the blade completely before reinstalling it.
For U.S. woodworkers, a dirty miter saw blade is often easier to diagnose than it first appears. If a blade begins leaving burn marks, requiring more feed pressure, or producing rougher cuts, pitch, resin, adhesive residue, and sawdust buildup may be contributing to the problem. Bosch miter saw documentation specifically notes that forcing the saw through a cut can indicate either a dull blade or a blade coated with wood pitch.
Miter saw blade cleaning is maintenance, not sharpening. Cleaning removes material that has accumulated on the blade; it does not restore carbide that has chipped away or cutting edges that have become genuinely dull. The safest approach is to follow the blade and saw manufacturers’ instructions, use a cleaner compatible with the blade’s coating and construction, avoid aggressive scrubbing of carbide teeth, and inspect the blade after cleaning.
Source: m.media-amazon.com
Why Should You Clean a Miter Saw Blade?
Cleaning removes deposits that can interfere with the way a miter saw blade cuts. Wood pitch and resin are especially troublesome when cutting resinous species such as pine, fir, and other softwoods. Adhesives and residue from plywood, MDF, laminates, and other manufactured materials can also accumulate on the teeth and blade plate.
As buildup increases, the blade can generate additional friction and heat. The result may include burning, rough cuts, increased feed resistance, and behavior that resembles a dull blade. Cleaning can therefore be a useful diagnostic step before paying for sharpening or replacing a blade.
Cleaning also gives you an opportunity to inspect the blade. Once the deposits are removed, chipped carbide, cracked areas, missing teeth, excessive corrosion, or other damage is easier to see.
Source: woodcraft.com
Pitch and resin
Sticky deposits from wood can accumulate around tooth faces, gullets, and the blade plate, particularly when cutting resinous lumber.
Manufactured-wood residue
Adhesives and other residues from plywood, MDF, laminates, and similar materials can contribute to buildup and accelerate contamination.
Cutting symptoms
Burn marks, increased feed pressure, and rougher cuts can occur when buildup interferes with the blade, although these symptoms can also have other causes.
How Often Should a Miter Saw Blade Be Cleaned?
There is no universal cleaning interval because buildup depends on the material being cut, how frequently the saw is used, dust collection, and the type of blade. Instead of cleaning strictly by calendar date, inspect the blade whenever deposits become visible or cutting performance changes.
If you frequently cut pine, fir, reclaimed wood, plywood, or other materials that leave substantial residue, the blade may need attention more often than a blade used occasionally on clean, dry hardwood.
Clean when buildup is visible
A noticeable layer of pitch, resin, or other residue around the teeth is a practical signal to clean the blade.
Clean when cutting changes
If the saw begins requiring unusual pressure or produces burning, inspect the blade before assuming that sharpening is required.
What You Need Before Cleaning a Miter Saw Blade
Prepare the work area before touching the blade. The blade should be removed from the miter saw and handled as a cutting tool, not cleaned while it is installed in the machine. Bosch documentation for miter saws instructs users to unplug the saw and remove the blade when cleaning gum and wood pitch.
Use a stable, non-slip work surface and protect the surface from the cleaning solution. A shallow plastic tray or dedicated blade-cleaning tray can make the process easier, especially when the blade needs to sit in cleaner for several minutes.
Source: rockler.com
Required safety equipment
Wear appropriate eye protection and chemical-resistant gloves suitable for the cleaner being used. Follow the cleaner’s label for ventilation and additional protective equipment.
Cleaning solution
Choose a product specifically intended for saw blades when possible, and verify that it is compatible with the blade coating and materials.
Brush
A nylon or brass brush is generally preferable to an aggressive steel-wire brush for removing deposits from carbide-tipped blades.
Clean cloth
Use a clean cloth to wipe away loosened residue and dry the blade after rinsing or cleaning.
Shallow tray
A dedicated tray helps contain cleaner and supports the blade while deposits soften.
Choosing a Blade Cleaner
A dedicated saw-blade or blade-and-bit cleaner is a practical starting point because its intended use is clearly defined. Some manufacturers and woodworking publications also describe other cleaning products, but formulations vary, so a method that is suitable for one blade may not be suitable for another.
Check the blade manufacturer’s instructions before using a solvent. Freud guidance warns against caustic soda-containing solvents, while Bosch documentation identifies several chemicals that can damage plastic components of the saw itself. These warnings illustrate why a cleaner should be selected for the specific part being cleaned rather than treated as universally safe.
Read the blade instructions
Coated blades may require different cleaning methods from uncoated blades. Follow the manufacturer’s care guidance when it is available.
Read the cleaner label
Check required ventilation, skin protection, contact time, rinsing requirements, and material compatibility before use.
Avoid unverified chemical combinations
Do not mix cleaning chemicals. Use one compatible product according to its label and dispose of used solution according to applicable local requirements.
How to Clean a Miter Saw Blade Step by Step
The basic process is remove, inspect, soften, scrub, rinse or wipe, dry, and inspect again. Work slowly around the teeth because the cutting edges remain sharp even when the blade is dirty.
Before starting, consult your miter saw and blade manuals. The exact blade-removal procedure varies by saw, and some blades have coatings or construction materials that require specific cleaning methods.
Source: wiselinetools.ca
1. Disconnect the saw
Unplug a corded miter saw or remove the battery from a cordless model according to the manufacturer’s instructions. Do not rely only on the power switch.
2. Remove the blade
Use the saw’s specified blade-removal procedure. Handle the blade by areas away from the cutting edges whenever practical.
3. Inspect the blade before cleaning
Look for cracked steel, missing or chipped carbide, loose teeth, severe corrosion, distortion, or other damage. Do not use a damaged blade.
4. Place the blade on a protected surface
Use a shallow tray or other suitable work surface that will not be damaged by the cleaner.
5. Apply the cleaner
Apply a compatible blade cleaner to the blade according to its label. Concentrate on areas with visible pitch, resin, gum, or adhesive residue.
6. Allow the deposits to soften
Give the cleaner the recommended dwell time. Do not automatically extend the soaking period because a longer exposure is not necessarily safer for the blade or its coating.
7. Scrub gently
Use a nylon or brass brush to loosen softened deposits. Work around the tooth faces and gullets without forcing the brush into the carbide.
8. Clean both sides
Turn the blade carefully and clean the opposite face and remaining deposits.
9. Rinse or wipe
Follow the cleaner’s instructions for rinsing or wiping. Remove all remaining cleaner and loosened residue.
10. Dry completely
Dry the blade thoroughly with a clean cloth and allow any remaining moisture to evaporate before storage or installation.
11. Inspect again
Check the carbide teeth, blade plate, expansion slots, bore, and overall condition. Cleaning should make defects easier to identify.
12. Reinstall correctly
Reinstall the blade using the orientation, washers, flange, and tightening procedure specified by the miter saw manufacturer.
What Does a Properly Cleaned Blade Look Like?
A successfully cleaned blade should have most visible pitch, resin, and loose residue removed from the tooth faces, gullets, and plate. The blade does not need to look cosmetically perfect to function properly. The more important result is that deposits no longer interfere with the cutting edges and that the blade remains structurally sound.
After cleaning, check whether the teeth have sharp, consistent edges and whether any carbide is chipped or missing. If the cutting edges are damaged or visibly worn, cleaning has reached its limit and further scrubbing will not restore them.
Signs of success
Visible buildup is gone, the teeth and gullets are clear, the blade is dry, and no damage is discovered during inspection.
Signs the blade needs more attention
Persistent burning, excessive force, rough cuts, or visible tooth damage after cleaning can indicate dullness, damage, incorrect setup, or another saw-related problem.
Which Brushes and Chemicals Should You Avoid?
The cleaning method matters because a blade contains more than a flat piece of steel. Carbide-tipped blades rely on carbide teeth and brazed connections, while coated blades may have surface treatments that can be affected by aggressive chemicals. A cleaner that removes resin effectively can still be inappropriate for a particular blade.
WOOD Magazine recommends nylon or brass brushes instead of steel-bristle brushes because steel bristles can damage or dull carbide teeth. Freud documentation also advises using appropriate solvents and specifically warns against solvents containing caustic soda for certain blades.
Source: byggahus.se
Avoid aggressive steel-wire brushing
Steel bristles can damage or dull carbide cutting edges. Use a softer brush appropriate for the blade instead.
Be cautious with caustic cleaners
Strongly caustic products can attack materials used in carbide blades and their brazed connections. Do not assume oven cleaner or another caustic product is safe.
Do not soak indefinitely
Long chemical exposure can create compatibility problems even when a cleaner works during short contact. Follow the product’s stated application and dwell time.
Do not clean the installed blade
Chemical cleaning belongs on a removed blade. Do not spray or pour liquid around an assembled powered miter saw.
Do not use damaged blades
Cleaning does not make a cracked, distorted, or badly chipped blade safe to operate.
Why Oven Cleaner Is a Poor Default Choice
Oven cleaner is sometimes mentioned in woodworking discussions because strong alkaline chemicals can dissolve stubborn residue. That does not make it a universal saw-blade cleaner. Historical industry guidance has warned about caustic chemicals affecting carbide binders and brazed materials, and current blade manufacturers may specify different cleaning methods.
A dedicated blade cleaner that is compatible with the specific blade provides a more controlled starting point. If the blade manufacturer explicitly specifies another solvent, follow that instruction instead of substituting a household chemical.
The key issue is compatibility
A chemical can remove pitch successfully while still being unsuitable for the blade’s carbide, brazing, coating, or base material.
Follow the exact blade guidance
When manufacturer instructions conflict with generic woodworking advice, the blade manufacturer’s documented care instructions should control.
What to Do After Cleaning the Blade
Cleaning should be followed by inspection, drying, and correct reinstallation. Do not put a wet blade back into storage or onto the saw because remaining moisture can contribute to corrosion.
Once the blade is dry, examine the teeth under good lighting. Look for chipped carbide, missing tips, cracks, bent areas, unusual discoloration, or other defects. A clean blade makes these problems easier to see than a dirty one.
If the blade is sound but still cuts poorly, consider other causes. The blade may genuinely be dull, the miter saw may need alignment, the workpiece may be difficult to cut, or the cutting technique may be producing excessive heat.
Source: images.selbst.de
Apply corrosion protection when appropriate
If the blade manufacturer permits it, a suitable rust-preventive product can help protect an uncoated steel surface during storage. Keep any protective product away from areas where it could interfere with the blade’s intended use.
Store the blade safely
Keep cleaned blades dry and protected from impact. Avoid stacking blades in a way that allows teeth to contact and damage one another.
Check the blade washers and flange
Before reinstalling, ensure the mating surfaces are clean and free of debris so the blade seats correctly.
Recheck cutting performance
After installation, make a suitable test cut and observe whether the original burning, resistance, or roughness has improved.
When Cleaning Is Not Enough
A clean blade can still be dull. Cleaning removes contamination but does not restore a worn cutting edge. If the blade remains difficult to feed, produces poor cuts, or shows damaged carbide after cleaning, it may need professional sharpening or replacement.
Professional sharpening is particularly appropriate when a quality blade has worn cutting edges but remains structurally sound. A cracked or severely damaged blade should not be returned to service simply because it has been cleaned.
Consider sharpening
A structurally sound blade with worn cutting edges may be a candidate for professional sharpening.
Consider replacement
Replace a blade when it has structural damage or other defects that make continued use inappropriate.
Check the saw
If a clean blade still performs poorly, inspect blade alignment, cutting setup, dust collection, and other saw-specific factors before blaming the blade.
Common Miter Saw Blade Cleaning Mistakes
Most cleaning problems come from treating the blade like an ordinary metal part. A miter saw blade has precision cutting geometry and, in many cases, carbide tips and protective coatings. The goal is to remove contamination without changing the cutting edges or damaging the blade materials.
A simple, controlled cleaning process is usually preferable to aggressive scrubbing or experimenting with strong household chemicals.
Source: powertecproducts.com
Cleaning without disconnecting the saw
Never attempt to clean an installed blade with liquid or a brush. Remove the blade first according to the manufacturer’s procedure.
Holding the blade by the teeth
The teeth remain sharp during maintenance. Handle the blade carefully and use appropriate hand protection.
Using the wrong brush
A hard steel-wire brush can damage carbide teeth. Use a brush recommended for the blade and cleaning task.
Using a random solvent
A solvent that works on one blade can damage another blade’s coating, carbide construction, or brazing.
Leaving cleaner on the blade
Residue from the cleaning solution should be removed according to the cleaner’s instructions, and the blade should be dried before installation or storage.
Confusing dirt with dullness
A dirty blade can act dull, but cleaning cannot restore a genuinely worn or damaged cutting edge.
Skipping the final inspection
Use the clean blade as an opportunity to look for chipped teeth, cracks, distortion, corrosion, or other defects before returning it to service.
A Simple Cleaning Decision Guide
Use the condition of the blade to decide what to do next. If there is visible pitch or resin but the teeth appear intact, cleaning is the logical first maintenance step. If the blade is clean but cuts poorly, investigate sharpness and saw setup. If the blade has structural damage, do not attempt to solve the problem with additional cleaning.
Visible buildup and intact teeth
Clean the blade using a compatible cleaner and a suitable brush, then inspect it again.
Clean blade with poor cutting performance
Investigate dullness, alignment, workpiece material, feed technique, and other saw conditions.
Cracked or badly damaged blade
Do not use it. Follow the blade manufacturer’s guidance for replacement or qualified repair.
Frequently Asked Questions
Q
Can I clean a miter saw blade without removing it?
No. The safer approach is to disconnect the saw from its power source and remove the blade before cleaning. Cleaning an installed blade creates unnecessary exposure to sharp teeth and risks getting liquid into parts of the saw that should remain dry.
Q
What is the best brush for cleaning a miter saw blade?
A nylon or brass brush is a practical choice for many carbide-tipped blades. WOOD Magazine specifically advises against steel-bristle brushes because they can damage or dull carbide teeth. Always follow the blade manufacturer’s instructions if they specify a different cleaning method.
Q
Can I use oven cleaner to clean a saw blade?
Oven cleaner should not be treated as a universal blade cleaner. Strongly caustic formulations can be incompatible with some carbide blades, brazed connections, and coatings. Use a blade-compatible cleaner or the solvent specified by the blade manufacturer instead.
Q
How long should I soak a miter saw blade?
Use the dwell time specified by the cleaning product and blade manufacturer. A longer soak is not automatically better because prolonged chemical exposure can affect coatings or blade materials. For stubborn buildup, repeat a compatible cleaning process rather than assuming that extended soaking is safe.
Q
How do I know whether my miter saw blade needs cleaning or sharpening?
Start with inspection. If pitch, resin, or other deposits are clearly visible, clean the blade first. If the blade remains difficult to feed or produces poor cuts after it is clean, it may be genuinely dull or the saw may have another setup problem. Visible chipped or missing carbide requires more than cleaning.
Q
Should I lubricate a miter saw blade after cleaning?
Do not automatically apply oil to every blade. Follow the blade manufacturer’s storage and maintenance instructions. For blades that permit corrosion protection, use a product intended for the application and ensure the blade is dry before storage or installation.
✦ Wrapping Up
Conclusion
Miter saw blade cleaning is a straightforward maintenance task when it is approached as controlled residue removal rather than aggressive scrubbing. Disconnect the saw, remove the blade, inspect it, use a compatible cleaner, allow deposits to soften, scrub gently with an appropriate brush, remove the cleaner, dry the blade, and inspect it again before installation.
The biggest variable is chemical compatibility. Blade coatings, carbide construction, brazing materials, and manufacturer instructions differ, so avoid assuming that a household solvent or caustic cleaner is safe for every blade. Cleaning can remove buildup that makes a blade behave as though it is dull, but it cannot repair damaged carbide or restore a genuinely worn cutting edge.
💡 Key Takeaway
Before your next cutting session, remove and inspect the miter saw blade. If you find pitch or resin buildup but no structural damage, clean it with a compatible blade cleaner and a nylon or brass brush, dry it completely, and then reinstall it according to the saw manufacturer’s instructions.