
Woodworking tolerances are the small size limits that make parts fit and work.
Getting tolerances right is the line between a proud build and a sticky drawer. I have spent years setting and checking fits across furniture, cabinets, and trim. In this guide, I break down Woodworking Tolerances in plain language, with real shop numbers, step-by-step methods, and lessons learned the hard way. You will see what matters, what does not, and how to dial in repeatable results.

What are Woodworking Tolerances?
Woodworking tolerances are the allowed size limits around a target size. They tell you how much error your parts can have and still work. They protect fit, function, and looks.
Unlike metal, wood moves with humidity. So Woodworking Tolerances are more about fit in the real world than chasing zero. We use reference faces, not edges, and we build in space for wood movement. We also plan for tool drift, kerf, snipe, and blade runout.
You will hear three fit types. A clearance fit slides or has a tiny gap. An interference fit needs pressure to seat. A transition fit starts snug and eases in with a light push. In the shop, most joinery aims for a gentle push fit. It should not need a hammer to go home.

Why Woodworking Tolerances Matter
Tight, smart tolerances save time, glue, and stress. Loose, random tolerances waste parts and hide gaps under putty. Good tolerances make your build repeatable. They also help you quote time and deliver on schedule.
They guard function. Drawers that bind are not only annoying. They break slides and warp faces. Doors need the right reveal so they swing and latch. Shelves need square and level lines so loads spread right.
They shape looks. Flush edges, even reveals, and clean shadow lines need numbers behind them. In my shop, I treat looks as specs. If it must look even by eye, I write the gap and tolerance on the plan.
Typical Tolerance Ranges by Project Type
You do not need the same tolerance for a shed and a jewelry box. Here are common, workable ranges I use and see across pro shops:
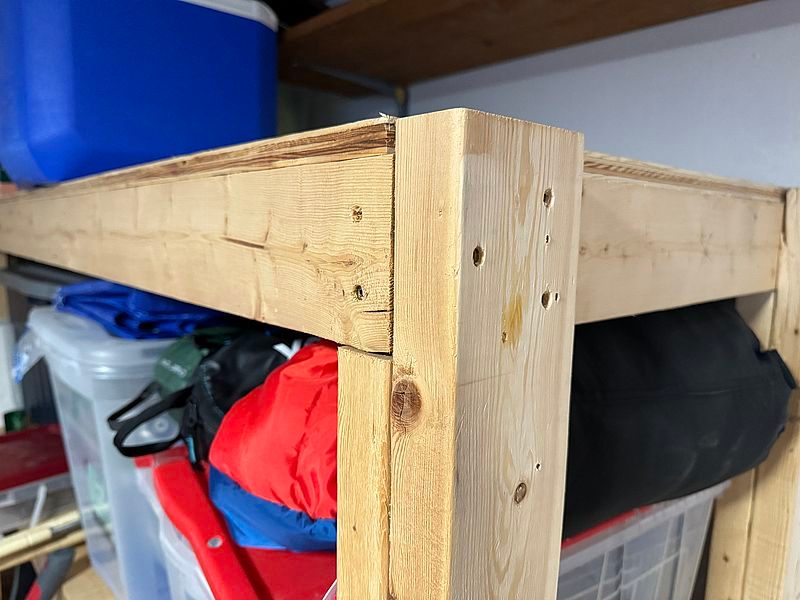
- Rough carpentry and framing: ±1/8 in on length, ±1/4 in on openings.
- Trim and baseboards: ±1/16 in on length, reveal targets at 1/8 in ±1/32 in.
- Casework and cabinets: panel sizes ±1/32 in, hole patterns ±0.010 in, reveals 1/16 in ±1/64 in.
- Furniture parts: length ±1/64 in, thickness ±0.005 to ±0.010 in, joinery fits to a gentle push.
- Boxes, drawers, and small parts: ±0.010 in on sides, bottom panels cut for a slip fit.
- Instrument or fine work: down to ±0.002 to ±0.005 in on critical fits, but only where needed.
Use these as targets, not hard laws. Your wood, tools, and climate may shift them. Write your own shop norms, test them, then lock them in.

Factors That Affect Tolerances
Wood moves across the grain with moisture change. Across the grain, many species can shrink or swell several percent from very wet to very dry. In normal homes, the change is smaller but still real. Expect noticeable movement across wide parts as seasons swing.
Tool accuracy sets the floor. Saws with wobble cut wide. Jointers with out-of-parallel tables twist boards. Planers with snipe change your final length. Calibrate, then check again.
Process control is key. Reference the same face through a build. Control cut order. Keep setups stable. Small errors stack up over many parts. Clean blades, steady feed, and good dust control also help your numbers hold.

Measuring, Marking, and Tools That Keep You On Target
Great tolerances start with how you mark and measure. Pencil lines are wide. Knife lines are crisp. A sharp knife and a light pass define truth.
Useful tools I rely on:
- 6 in steel rule and stop rule for fast, repeatable marks.
- Calipers that read to 0.001 in, used to hold ±0.005 to ±0.010 in on wood.
- Squares, winding sticks, and a good straightedge for flat and square.
- Story sticks for hole spacing and reveals when many parts repeat.
- Setup blocks and gauge blocks for blade height and fence offsets.
- Feeler gauges for checking tiny gaps and flushness.
- Dial indicator for fence drift, runout, and planer snipe.
Pick the least fussy tool that hits your need. Over-measuring slows you down and can cause errors.

Setting Tolerances For a Project
Before you cut, set the numbers. This turns guesswork into a plan you can trust.
- Define the target size for every key part.
- Mark the tolerance on your plan. Use plus and minus if needed.
- Flag what is critical to quality. These are the sizes that control fit, safety, or looks.
- Choose a datum or reference face for each part. Always measure from it.
- Map the process order. Reduce tool changes. Keep one setup as long as you can.
- Plan the tolerance stack-up. Gaps and reveals should still land right when errors add.
- Make go and no-go gauges for key fits. Wood blocks beat math when speed matters.
- Cut a test piece. Adjust, then run the batch.
In my shop, I keep a one-page spec for each build. It sits by the saw. It cuts rework in half.
Joinery Tolerances by Type
Joinery drives Woodworking Tolerances. Aim for clean, strong fits that go home with a light push.
- Mortise and tenon: Size the tenon about 0.002 to 0.008 in under the mortise width, depending on wood and glue. Aim for light hand pressure. Shoulders hide tiny gaps, but keep them tight.
- Dovetails: Parts should seat with firm finger pressure and light taps. Gaps under 0.004 in are not seen by eye. Test on offcuts from the same board.
- Dados and grooves: Match the cutter to the actual panel. Plywood often runs a bit thin. Widen the dado by a few thousandths for a slip fit. Avoid squeeze that bows the panel.
- Rabbets: Depth and width within ±0.010 in keeps back panels flush and square.
- Dowels and loose tenons: Holes should be straight and sized to a push fit. Dry fit every joint before glue.
- Pocket holes and screws: Tolerances matter on pilot size and stop collar set. Use a stop block to control repeat length.
Glue adds swell and tack. If a dry fit is tight, a glue-up can be rough. Back off a hair on very tight joints.
Wood Movement and Seasonal Change
Wood moves most across the grain. It moves far less along the grain. The wider the part, the more total change you will see.
What to allow:
- A 10 in wide hardwood panel can move around 1/8 to 3/16 in across seasons in many homes.
- Narrow rails move less, but the rules still apply.
- Quarter-sawn stock moves less across the face than flat-sawn.
Design to let parts breathe:
- Use floating panels in frames. Do not glue across the grain.
- Leave expansion gaps on table tops to aprons. Slots beat round holes for screws.
- Use breadboard ends to keep tops flat while letting the field move.
- Set drawer and door reveals to survive the humid months.
I keep a small chart of movement by species in the shop. It helps me set safe gaps fast.
Surface Prep, Sanding, and Finishing Tolerances
Finish adds thickness. Sanding removes it. Plan for both in your Woodworking Tolerances.
- Two to three coats of film finish can add about 0.003 to 0.006 in total.
- Paint builds more, and primers add too.
- Veneer is often about 1/42 in thick. Glue lines add a small amount as well.
- Edge banding thickness changes reveals. Measure your banding and record it.
Do a finish sample on scrap from the job. Measure before and after. Use those numbers on tight reveals like inset doors.
Quality Control Workflow You Can Trust
Quality control does not need to be slow. Keep it simple and steady.
- First-article check: Make one part first. Measure every key size. Approve the setup.
- In-process checks: Use go and no-go gauges every few parts. Spot drift early.
- Final check: Confirm reveals, diagonals, and flushness. Check function with real use.
Record what you measure. I note fence settings, blade height, and shim sizes. Next time, I start close to perfect.
Common Mistakes and How To Avoid Them
- Chasing zero on wood: Wood moves. Do not aim for metal-shop numbers where they do not help.
- Ignoring stack-up: Small errors add. Plan your sequence so they do not pile up.
- Switching reference faces: Pick a face and stick to it. Random flipping makes parts fight.
- Skipping test cuts: One scrap cut can save ten boards and a long night.
- Forgetting finish and hardware: Hinges, slides, and finish change fits. Measure the real parts.
Slow down at the start. Speed comes from stable setups and clear checks.
Real-World Examples and Lessons Learned
On a run of inset doors, I once set reveals at a crisp 1/16 in. It was winter. Summer came. Doors swelled and rubbed. Since then, I set 3/32 in on those jobs in humid homes. No more callbacks.
I made a wide maple top with tight screw holes. The top cupped and cracked a screw. Now I slot the holes in the battens and use washers. The top moves free, and the surface stays flat.
On a cabinet job, I wrote hole spacing as 32 mm on the plan but never set a gauge. I eyeballed it. That cost a day of rework. Now every repeat hole pattern gets a story stick or a jig. My holes line up, and hinges sit square.
Frequently Asked Questions of Woodworking Tolerances
What is a good general tolerance for cabinet parts?
For most cabinet panels, ±1/32 in works well. For shelf pin holes and hardware, aim for about ±0.010 in.
How tight should a mortise and tenon fit be?
It should press together by hand with a light push. If you need a hammer, it is too tight for glue.
Do I need calipers in woodworking?
Yes, for repeatable results on small parts and hardware fits. Use them to hold around ±0.005 to ±0.010 in when it matters.
How much gap should I leave for an inset door?
Set even reveals at 1/16 to 3/32 in depending on climate and finish. Go wider in humid areas to prevent rub.
How do I handle plywood that is undersized?
Measure the actual thickness and match your cutter or widen the dado slightly. Aim for a slip fit that does not bow the panel.
Can finish make drawer slides bind?
Yes, finish adds thickness. Mask slide areas or size parts a touch small before finishing.
What causes tolerance stack-up?
Small errors at each step add together. Use one reference face, stable setups, and gauges to control the stack.
Conclusion
Woodworking Tolerances turn craft into a repeatable system. Set targets, know your wood, control your process, and check the parts that matter. Use simple tools well, and let the wood move where it needs to.
Pick one project this week and write a one-page tolerance plan. Mark your targets, your checks, and your gaps. Build it, learn, and tune your shop standards. Want more guides like this? Subscribe, ask a question, or share your own tolerance tips in the comments.