
The Ultimate Drill Bit Guide helps you choose the right bit, cut cleaner holes, and avoid costly mistakes.
If you have ever burned through a bit, stripped a screw, or drilled a hole that looked rough and messy, you already know how much the right drill bit matters. I have spent years working with hand tools and power tools, and one lesson keeps showing up: the bit you choose is just as important as the drill itself. This guide breaks down The Ultimate Drill Bit Guide in a simple, practical way so you can pick the right bit, use it the right way, and get better results every time.
What a Drill Bit Is and Why It Matters
A drill bit is the cutting tool that makes a hole in a material. It looks simple, but the design changes a lot depending on the job. A bit made for wood will not always perform well in metal, and a masonry bit will struggle in tile if you use it the wrong way.
The right drill bit saves time, reduces wear on your drill, and gives a cleaner finish. I have seen beginners blame the drill when the real problem was the bit. Once you match the bit to the material, drilling feels easier, safer, and far less frustrating.
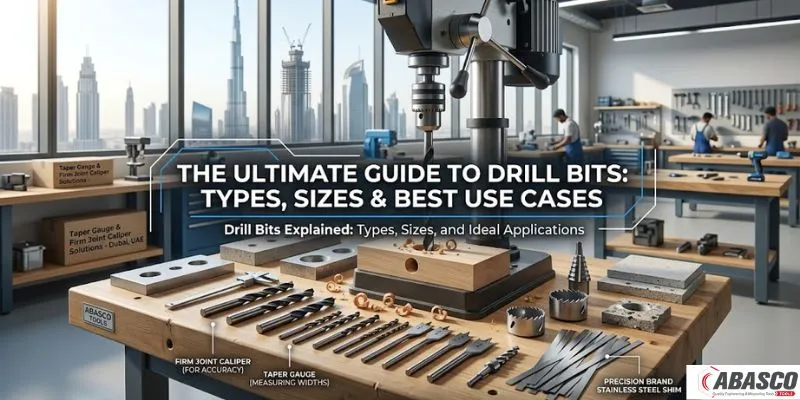
The Main Types of Drill Bits
There are many drill bit types, but most home and pro jobs use a small group of them. Knowing the basics makes shopping much easier and helps you avoid buying the wrong thing.
Twist Drill Bits
Twist drill bits are the most common type. They work well for wood, plastic, and metal depending on the material and coating. Their spiral shape helps remove chips as the bit cuts.
These are the everyday bits most people keep in a general-purpose set. For light home use, they are often the first bits you should own.
Brad Point Drill Bits
Brad point bits are best for wood. They have a sharp center point that keeps the bit from wandering when you start the hole. That makes them great for clean, precise work.
I use brad point bits when I want a neat entry hole in hardwood or softwood. They are especially helpful for furniture projects and shelving.
Spade Bits
Spade bits, also called paddle bits, are made for fast drilling in wood. They create large holes quickly, but the finish is rougher than with other bits. They are useful when speed matters more than a polished edge.
I reach for spade bits when I need to run wiring or plumbing through studs. They are simple, cheap, and effective for rough carpentry.
Forstner Bits
Forstner bits drill very clean, flat-bottomed holes in wood. They are ideal for cabinetry, hinges, and decorative woodworking. They cut slowly compared with spade bits, but the finish is much better.
If you care about a smooth look and precise depth, Forstner bits are a smart choice. They are one of my favorite upgrades once people move past basic DIY.
Masonry Bits
Masonry bits are made for concrete, brick, and stone. They usually have a carbide tip that can handle tough surfaces. You often use them with a hammer drill for best results.
Do not use a regular wood bit on concrete. It will wear out fast, overheat, and waste your time.
Countersink Bits
Countersink bits create a cone-shaped opening so a screw head sits flush with the surface. They are small tools, but they make a big visual difference in finish work. You will often use them in woodworking and trim projects.
A countersink bit can also reduce splitting in wood. That little step can make a project look much more professional.
Hole Saw Bits
Hole saws cut large round openings. They are useful for installing doorknobs, pipes, vents, and electrical fixtures. Instead of removing all the material like a standard bit, they cut only the edge of the circle.
These bits save time when you need a big clean hole. Just remember that they need steady control and the right speed.
How to Choose the Right Drill Bit
Choosing a drill bit is easier when you focus on four things: material, hole size, finish, and tool compatibility. That simple checklist solves most problems.
Match the Bit to the Material
Different materials need different cutting edges.
• Wood: use twist bits, brad point bits, spade bits, or Forstner bits
• Metal: use high-speed steel bits or cobalt bits
• Masonry: use carbide-tipped masonry bits
• Plastic: use sharp twist bits at low speed
If you match the bit to the surface, the job gets smoother right away. This is the first rule I teach because it prevents a lot of damage.
Choose the Right Bit Size
Bit size affects both the hole and the screw fit. A hole that is too small can split wood or bind the bit. A hole that is too large can make fasteners loose.
Always check the size marked on the bit and measure if precision matters. For accurate work, I keep calipers nearby.
Think About Finish Quality
Some jobs need speed, while others need a clean edge. A spade bit is fast but rough. A Forstner bit is slower but neater.
Think about what the hole is for. Hidden holes can be rough. Visible holes usually need a cleaner look.
Check Your Drill Type
Not every bit works equally well with every drill. A hammer drill helps with masonry. A cordless drill may be fine for most home tasks, but tougher jobs may need more torque.
Make sure the shank fits your chuck. A great bit is useless if it does not fit your tool properly.
Drill Bit Materials and Coatings
The body material and coating affect durability, cutting speed, and heat resistance. This matters a lot if you drill often or work with hard materials.
High-Speed Steel
High-speed steel, often called HSS, is one of the most common bit materials. It works well for general use and handles wood, plastic, and softer metals. It is a solid choice for many home toolboxes.
Cobalt
Cobalt bits are made for harder metals. They resist heat better than standard HSS bits. If you drill stainless steel or other tough metals, cobalt bits are worth it.
Carbide
Carbide is extremely hard and durable. It is often used in masonry bits and some specialty cutting tools. It handles abrasive materials well, but it can be more brittle than other options.
Coatings
Common coatings include titanium, black oxide, and other surface treatments. These can reduce friction, improve wear resistance, and extend bit life.
Here is the simple truth: coatings help, but they do not replace choosing the right bit material. A coated bit used on the wrong material will still fail too soon.
How to Use Drill Bits the Right Way
Good technique makes a huge difference. The best bit in the world can still perform badly if you use the wrong speed or pressure.
- Mark the spot clearly so the bit starts where you want it.
- Use a center punch on metal to prevent slipping.
- Start at a slow speed.
- Apply steady pressure, not force.
- Let the bit cut at its own pace.
- Pull the bit out now and then to clear debris.
- Stop if you feel heat building too fast.
I learned this the hard way on an early job where I pushed too hard and snapped a bit in the middle of a project. Since then, I treat drilling like guiding a knife, not forcing a nail. That small mindset shift saves bits and gives better results.

Common Mistakes to Avoid
Even experienced DIYers make drill bit mistakes. The good news is that most of them are easy to fix once you know what to watch for.
• Using the wrong bit for the material
• Drilling at full speed from the start
• Pushing too hard and causing heat buildup
• Skipping pilot holes in wood
• Forgetting to secure the workpiece
• Using dull bits too long
• Not clearing chips and dust
One of the biggest mistakes I see is ignoring dull bits. A dull bit does not just slow you down. It also creates heat, rough holes, and more strain on your drill.
How to Maintain Drill Bits
A little care goes a long way. Drill bits last much longer when you clean and store them properly.
Clean After Use
Wipe off dust, chips, and residue after each project. If you drilled metal, remove any oil or fine shavings too. A clean bit is easier to inspect for wear.
Store Them Properly
Keep bits in a case, rack, or organizer. Loose bits in a toolbox get damaged faster. They also become harder to find when you need them.
Sharpen When Needed
Some bits can be sharpened, especially twist bits. If the tip is worn but the bit is still solid, sharpening may bring it back to life. That said, heavily worn or damaged bits are usually better replaced.
Watch for Signs of Wear
Replace a bit if you notice:
• dull cutting edges
• chipping
• bending
• excessive heat during use
• rough holes even with good technique
Caring for bits is not glamorous, but it pays off. It is like keeping your kitchen knives sharp. Small maintenance saves time and improves every cut.
Drill Bit Safety Tips
Safety should always come first. Drill bits spin fast, and even a small mistake can cause injury or damage.
• Wear safety glasses
• Clamp the workpiece before drilling
• Keep loose clothing and hair away from the bit
• Let the bit stop fully before setting the drill down
• Use the correct speed for the material
• Do not touch the bit right after drilling metal because it can get very hot
These basics sound simple, but they matter. Most drilling accidents happen when people rush. Slow down, stay steady, and respect the tool.
Best Drill Bit Set for Homeowners and DIY Users
A good starter set does not need to be huge. It just needs to cover the most common tasks.
Look for a set that includes:
• twist bits in multiple sizes
• brad point bits for wood
• masonry bits for basic home repairs
• countersink bits for finish work
• a few larger bits or a hole saw set if needed
If you only buy one set, choose one that balances quality with variety. Cheap sets often wear out fast, while a decent midrange set can handle far more projects. That is usually the sweet spot for most homeowners.
When to Upgrade to Specialty Bits
Once you do more advanced work, specialty bits become worth the money. They can save time, improve accuracy, and help you work on tougher materials.
Upgrade when you:
• drill metal often
• work with hardwood or cabinetry
• install hardware that needs flat-bottom holes
• cut large openings for fixtures or pipes
• need cleaner, more precise results
I always tell people not to buy every specialty bit at once. Start with the basics, then add tools as your projects demand them. That approach keeps your kit useful and your budget sane.
Frequently Asked Questions of The Ultimate Drill Bit Guide
What drill bit is best for general use?
A high-speed steel twist bit is the best all-around choice for many basic tasks. It works well on wood, plastic, and some metals, making it a practical starter option.
Can I use a wood bit on metal?
You can sometimes drill very soft metal with a sharp wood bit, but it is not ideal. Metal usually calls for bits made for the job, such as HSS or cobalt bits, because they handle heat and friction much better.
Why do my drill bits keep breaking?
Bits usually break because of too much pressure, poor speed control, or the wrong bit for the material. Dull bits and loose workpieces also increase the risk of snapping.
What is the difference between a masonry bit and a regular bit?
A masonry bit has a harder tip made to cut brick, concrete, and stone. A regular bit is not built for that kind of abrasive surface and will wear out much faster.
How do I know when a drill bit is dull?
A dull bit cuts slowly, makes more heat, and leaves a rough hole. You may also notice more squealing, more pressure needed, and more smoke or dust than usual.
Conclusion
The right drill bit can turn a frustrating job into an easy one. Once you understand the main types, materials, and techniques, The Ultimate Drill Bit Guide becomes less about guesswork and more about confidence. That is the real value here: better results, fewer mistakes, and tools that last longer.
Start with the basics, choose bits that match your material, and pay attention to speed and pressure. If you do that, you will drill cleaner holes and waste less time. Keep learning, keep testing, and build your kit with purpose.