
Woodworking sharpening means keeping cutting edges razor keen for cleaner cuts, safer work, and less effort.
If you have ever fought tearout, rough edges, or tools that feel like they are dragging instead of gliding, sharpening is probably the missing piece. The Ultimate Woodworking Sharpening Guide brings the whole skill into focus, from stones and grits to bevels, angles, and real shop habits that actually work. I have seen sharp tools turn frustrating work into smooth, quiet progress, and that is exactly what this guide is built to help you do.
Why Sharpening Matters in Woodworking
Sharp tools do more than cut better. They give you control. A sharp chisel slices cleanly across end grain, a sharp plane leaves a glassy surface, and a sharp knife follows your line without forcing you to fight the wood.
In real shop life, dull tools slow everything down. You press harder, the tool slips more easily, and the finish gets worse. That is why The Ultimate Woodworking Sharpening Guide starts with a simple truth: sharpness is not a luxury, it is part of good woodworking.
A few benefits stand out:
- Cleaner cuts that reduce sanding and cleanup
- Less tearout on figured or brittle wood
- Better control and safer handling
- Less fatigue in your hands, wrists, and shoulders
- Faster work with better results
I learned this the hard way early on. I once spent nearly an hour trying to flatten a board with a plane that was just a little dull. After sharpening it properly, the same board took minutes. That change still sticks with me because it was so obvious.
Sharpening also helps tools last longer. When you force a dull edge, you often damage the bevel, the back, or the overall shape. A little maintenance now saves a lot of metal later.

Understanding What a Sharp Edge Really Is
A sharp edge is not just “pointy.” It is a very thin, even meeting point between two polished surfaces. On woodworking tools, that usually means the bevel and the back must meet cleanly at the edge.
There are a few things that affect edge quality:
- Bevel angle
- Surface flatness
- Burr removal
- Polishing level
- Steel type
For example, a bench chisel used on hardwood needs a strong enough bevel to hold up under pressure. A smoothing plane iron, on the other hand, benefits from a refined edge that glides across wood fibers instead of crushing them.
Many woodworkers talk about “sharp enough,” but that can mean different things. For rough carpentry, a serviceable edge may be fine. For fine furniture work, edge quality matters much more. The better you understand the edge, the easier it is to choose the right sharpening method.
The Core Sharpening Tools Every Woodworker Should Know
There are many ways to sharpen, but most shop systems fall into a few main groups. Each has strengths, limits, and a learning curve.
Sharpening stones
Sharpening stones are the classic choice. They come in water stones, oil stones, and diamond stones.
- Water stones cut fast and feel great for fine work
- Oil stones are durable and low maintenance
– Diamond stones stay flat and work well on hard steels
Water stones are popular in fine woodworking because they remove metal quickly. The tradeoff is that they wear faster and need flattening. Diamond stones are excellent for shaping edges and fixing damaged tools, though some users prefer a smoother finish from finer stones at the end.
Honing guides
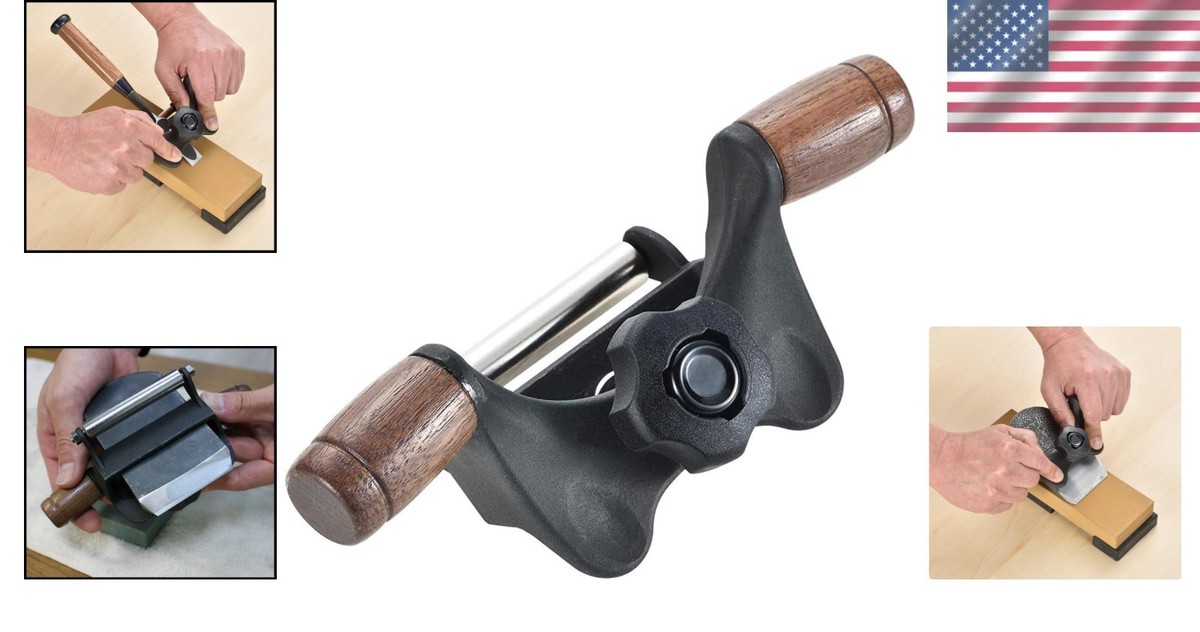
A honing guide helps hold the tool at a steady angle. For beginners, this is a huge help. Even experienced woodworkers use one for consistency, especially on plane irons and chisels.
A guide can reduce guesswork and make sharpening more repeatable. If your hands are still learning muscle memory, a guide can save a lot of frustration.
Strops and polishing compounds
A leather strop with compound is often used as a final touch. It removes the last tiny burr and polishes the edge. Think of it as the finishing cloth for your cutting edge.
A strop is not a replacement for proper sharpening. It is the last step that helps bring an edge from good to excellent.
Grinding machines and slow-speed sharpeners
Bench grinders and slow-speed systems help with reshaping and repairing damaged tools. They are especially useful when a bevel is chipped or badly worn.
Used carefully, they save time. Used poorly, they can overheat steel and ruin the temper. That is why patience matters here. Heat is one of the biggest risks in tool sharpening.
The Ultimate Woodworking Sharpening Guide to Edge Geometry
Edge geometry sounds technical, but the idea is simple. Different tools need different bevel angles based on how they are used.
Common starting points include:
- Bench chisels: about 25 degrees
- Plane irons: about 25 degrees with a slight micro bevel if needed
- Paring chisels: lower angles for slicing
- Heavy-duty tools: higher angles for durability
A lower angle cuts more easily, but it is more fragile. A higher angle is stronger, but it can feel less lively. The right choice depends on the wood, the task, and the steel.
A lot of beginners think a sharper edge always means a thinner angle. That is not always true. For example, a chisel that chips on hardwood may actually need a slightly steeper bevel, not a more delicate one. Good sharpening is about balance, not chasing one perfect number.
Step-by-Step Sharpening Process
A reliable sharpening routine does not need to be complicated. It just needs to be consistent.
1. Inspect the edge
Look for dull spots, chips, rolls, and scratches. Hold the tool under good light. If the edge reflects light, it is usually not truly sharp.
2. Flatten the back
The back of a chisel or plane iron needs to be flat near the edge. This is one of the most important steps in The Ultimate Woodworking Sharpening Guide because edge quality depends on that clean meeting point.
You do not need to flatten the whole back every time. Focus on the area close to the cutting edge.
3. Establish or refresh the bevel
Use a coarse stone or grinder if the edge is damaged. If the bevel is already in good shape, you may only need a fine stone or honing step.
Keep the angle steady. If the angle changes too much, the edge becomes harder to control and less efficient.
4. Raise a burr
A burr is a tiny fold of metal that forms on the back side when you sharpen the bevel. It tells you that you have reached the edge.
Without a burr, you may not have fully sharpened the tool yet. But once you get one, do not chase it forever. Move on to the next stage.
5. Refine with finer grits
Work through progressively finer stones or abrasives. Each step removes the scratches from the last one and makes the edge smoother.
This is where patience pays off. Skipping grit levels can leave a rough edge that feels sharp at first but dulls faster in use.
6. Remove the burr
Turn to the back of the tool and remove the burr with light strokes. Then use a strop or very fine stone if needed.
A burr left behind can weaken the edge and make the tool feel sharp for only a short time. Clean burr removal is one of the most overlooked parts of sharpening.
7. Test the edge
Try shaving end grain, slicing thin paper, or making a light cut in scrap wood. The goal is not just to pass a test. It is to see how the edge behaves in real use.
I always test on scrap before going back to the project. It saves surprises and builds confidence fast.

Choosing the Right Sharpening Method for Your Shop
There is no single best method. The best system is the one you will actually use often and use well.
For beginners
A honing guide with water stones or diamond stones is a strong start. It gives you control and reduces the learning curve.
For busy shops
Diamond plates and a slow-speed grinder can be efficient. They are good for maintenance and quick repairs.
For fine woodworking
Many woodworkers prefer a progression of stones followed by stropping. This can produce a very refined edge, especially on plane irons and chisels.
When choosing a system, think about:
- Speed
- Cost
- Maintenance
- Repeatability
- Your skill level
If your setup is simple, you are more likely to sharpen often. That matters more than owning the fanciest system. In my own shop, I have found that the most used setup is usually the most practical one, not the most expensive one.
Common Sharpening Mistakes to Avoid
Even experienced woodworkers slip up now and then. The good news is that most sharpening mistakes are easy to fix once you know them.
Rushing the process
Fast sharpening often means uneven angles and poor burr removal. Slow down and let each step do its job.
Ignoring the back
If the back is not flat near the edge, the tool will never reach its full potential. This is a common beginner mistake.
Using too much pressure
Heavy pressure can round over the edge, gouge stones, and make it hard to feel what is happening. Light, controlled strokes are better.
Skipping grit steps
Jumping from coarse to very fine leaves deep scratches behind. The edge may feel okay, but it will not last as long.
Overheating during grinding
Heat can weaken steel. If you grind, keep the tool cool and watch for color changes.
Failing to maintain stones
Dirty or uneven stones reduce accuracy. Flatten water stones and clean surfaces often.
I have made most of these mistakes myself at one point or another. Every time, the fix was the same: slow down, check the basics, and trust the process.
Maintenance Habits That Keep Tools Sharp Longer
Sharpening is only part of the job. Good maintenance keeps edges ready between sharpenings.
Helpful habits include:
- Wipe blades after use
- Store tools dry to prevent rust
- Use a light hone before a major project
- Avoid cutting dirty material when possible
- Keep stones flat and clean
- Protect edges with covers or wraps
A quick touch-up before a project can save a full sharpening session later. That is one reason professional shops stay efficient. They do small upkeep often instead of waiting until a tool is badly dull.
If you work with resinous woods, stained lumber, or reclaimed material, clean your tools more often. Gunk on an edge can act like glue and make a sharp tool feel dull.
How to Sharpen Different Woodworking Tools
Different tools need slightly different approaches. The core idea stays the same, but the details change.
Chisels
Chisels need a flat back, a consistent bevel, and a clean edge. For bench work, a polished edge helps with control and cleaner cuts.
Plane irons
Plane irons benefit from a very flat back and a refined bevel. A tiny camber may help on some planes, especially for rough planing.
Carving tools
Carving tools often need smaller profiles and more specialized slips, slips stones, or shaped abrasives. Curved edges take more attention but can be sharpened just as reliably.
Turning tools
Lathe tools are sharpened based on tool shape and use. Because turning often works at speed, edge control and repeatability matter a lot.
Hand saws
Saw sharpening is its own skill. Teeth need careful shaping and setting, and the work is different from edge tools. If you are new to saws, it is often worth starting with chisels and plane irons first.
The Ultimate Woodworking Sharpening Guide is not just about one edge. It is about understanding how each tool asks to be treated.
Signs Your Tools Need Sharpening
Some signs are obvious. Others are subtle.
Watch for these clues:
- The tool requires more force
- The cut feels rough or gritty
- Tearout increases
- The edge leaves chatter or tracks
- The tool slides instead of biting cleanly
- The blade reflects light at the edge
A dull tool can hide in plain sight. Sometimes the woodworker blames the grain, the board, or the setup when the real issue is the edge. I have done that more than once, and it usually takes one good sharpening session to remind me what the tool should feel like.
How Sharp Should Sharp Be?
This is one of the most common questions in The Ultimate Woodworking Sharpening Guide. The answer depends on the task.
For fine joinery, smoothing, and paring, you want a very refined edge. For rough shaping, a durable edge may be better than a fragile razor edge. In other words, “sharp enough” is task-based.
A practical way to think about it:
- Paring and finish cuts need refinement
- General bench work needs balance
- Heavy cuts need durability
- Quick shop tasks may need only a serviceable edge
The goal is not perfection for its own sake. The goal is the right edge for the job.
Frequently Asked Questions of The Ultimate Woodworking Sharpening Guide
What is the best sharpening method for beginners?
A honing guide with water stones or diamond stones is usually the easiest place to start. It gives you steady angles and helps you learn the feel of sharpening without too much guesswork.
How often should woodworking tools be sharpened?
There is no fixed schedule, because it depends on the wood, the tool, and how often you use it. Many woodworkers touch up tools lightly before each project and do a full sharpening when the edge stops performing well.
Is stropping enough to keep tools sharp?
Stropping helps maintain a keen edge, but it does not replace proper sharpening. If the edge is worn, chipped, or rounded, you still need stones or grinding to restore it.
Why does my chisel feel sharp but still cut poorly?
That usually means the bevel may look good, but the edge is not fully refined or the back is not properly prepared. A tiny burr, uneven bevel, or rough scratch pattern can also cause that problem.
Do expensive sharpening systems work better?
Not always. A simple, well-used setup often performs better than a fancy one that sits on the shelf. Skill, consistency, and upkeep matter more than price.
Conclusion
Sharpening is one of the most valuable woodworking skills you can learn. It improves cut quality, makes tools safer and easier to use, and gives you more control in every part of the shop. The Ultimate Woodworking Sharpening Guide comes down to a simple idea: understand your edge, build a repeatable process, and keep your tools ready before they fail you.
If you start with a basic system, practice good habits, and pay attention to how your tools feel in real work, you will improve fast. Try one new sharpening tip on your next project, and notice the difference for yourself. If this guide helped, explore more woodworking resources and leave a comment with the sharpening method you use most.