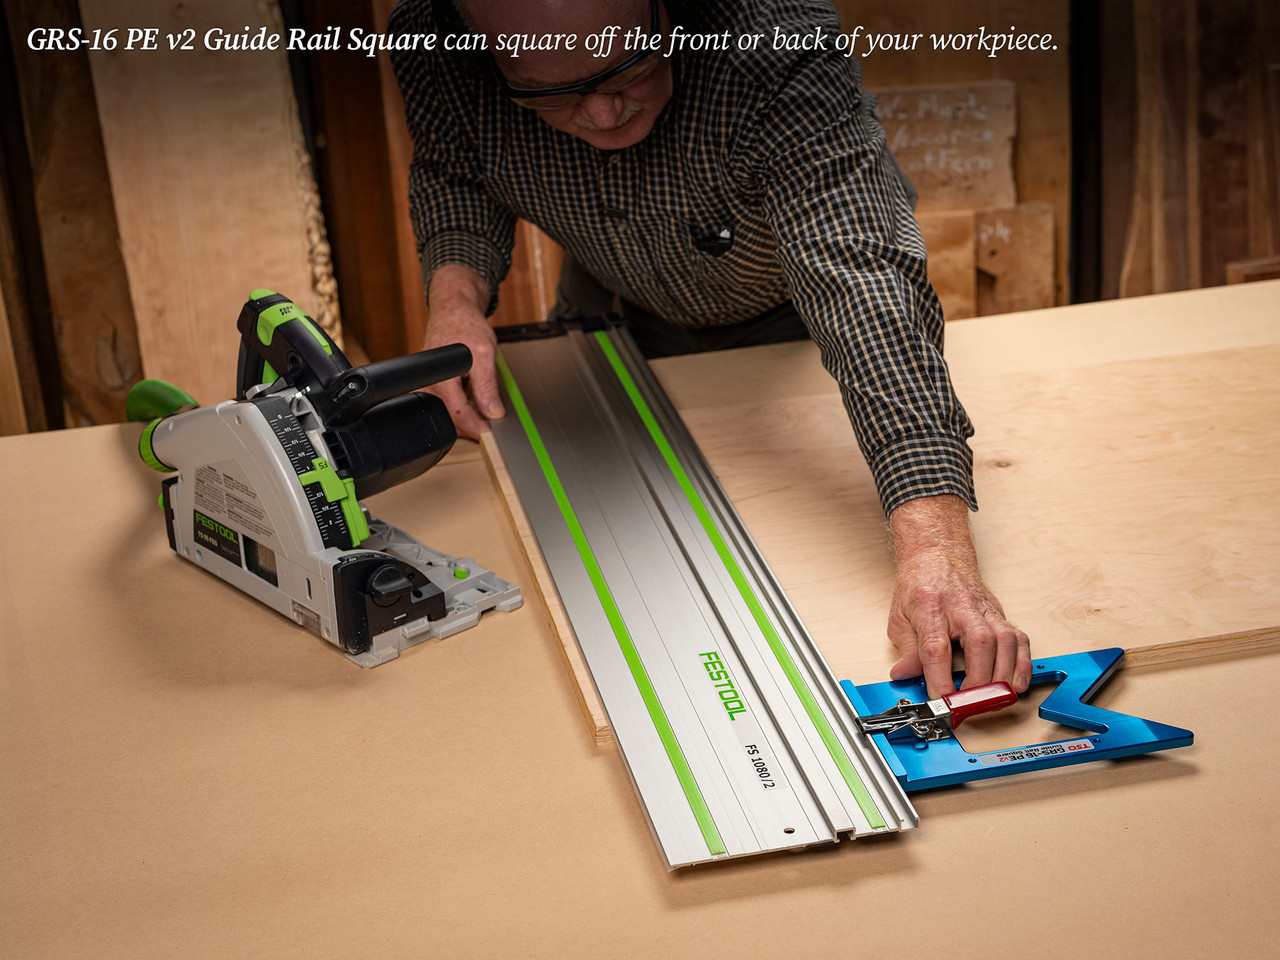
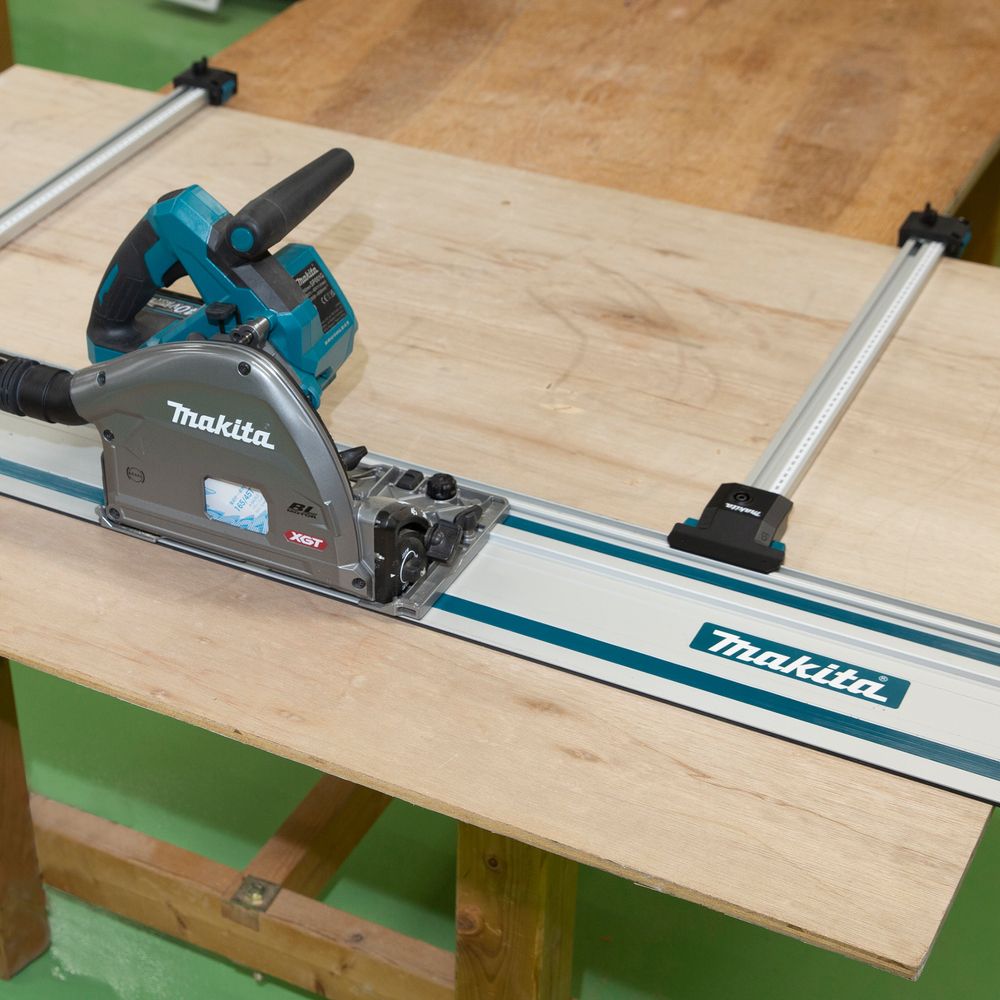
Track saw accuracy depends on the guide rail, saw-to-rail fit, blade, workpiece support, cut-line setup, and cutting technique. A properly calibrated track saw can make very straight cuts, but the rail and workpiece must be positioned correctly.
For U.S. woodworkers, cabinetmakers, remodelers, and DIYers breaking down plywood or trimming solid wood, a track saw can provide a controlled way to make long straight cuts without moving a large panel through a table saw. The accuracy comes primarily from the relationship between the saw base and guide rail, not from the motor alone.
A clean-looking cut is not necessarily an accurate cut. A track saw can produce a smooth edge while still being slightly out of square, following a bowed rail, or landing on the wrong side of a layout mark. The most reliable approach is to control the entire cutting system: establish a trustworthy reference edge, inspect the rail, eliminate play between the saw and rail, calibrate the splinter guard, support the material, and verify the result with appropriate measuring tools.
Source: boschtools.com
What Determines Track Saw Accuracy?
Track saw accuracy is the combined result of several parts working together. The guide rail controls the saw’s travel path, the saw base keeps the blade aligned with the rail, the blade determines how cleanly the material is cut, and the setup determines where that path falls on the workpiece.
A useful way to think about accuracy is to separate the result into four questions: Did the saw follow a straight path? Did the path land on the intended dimension? Is the cut square or at the intended bevel angle? Is the finished edge consistent from one end to the other?
This distinction matters when troubleshooting. A cut can be perfectly straight but positioned 1/16 inch away from the intended line. It can also be on the correct line but not square through the material. Each problem has a different likely cause.
Source: tsoproducts.com
Guide rail straightness
A rail that is bowed, damaged, improperly joined, or distorted during setup can transfer that error directly into a long cut.
Saw-to-rail fit
Excessive play between the saw base and guide rail can allow the blade to wander away from the intended path.
Blade condition
A dull, damaged, contaminated, or unsuitable blade can increase cutting resistance and make controlled cutting more difficult.
Workpiece stability
The material must remain adequately supported so it does not sag, pinch the blade, or move the rail during the cut.
Layout accuracy
Even a precise saw cannot correct a measurement, reference-edge, or cut-line error.
Straightness and Squareness Are Different
A guide rail can produce a very straight cut without producing a square crosscut. Straightness describes whether the cut follows one continuous line. Squareness describes the relationship between that cut and another reference edge.
For example, a rail can be perfectly straight but placed slightly out of square against the edge of a plywood panel. The resulting cut may be straight from end to end while the panel is still out of square.
For rip cuts
Focus on rail straightness, reference-edge quality, rail stability, and consistent saw-to-rail contact.
For crosscuts
Add a reliable method for establishing a 90-degree relationship between the rail and the workpiece edge.
For bevel cuts
Verify the saw’s bevel setting and check the finished cut rather than assuming the scale is exact.
How to Set Up a Track Saw for Maximum Accuracy
The most effective accuracy improvement is usually a careful setup rather than a more expensive saw. Before cutting valuable material, spend a few minutes checking the work surface, rail, saw fit, blade, and layout.
Use a stable cutting surface that supports the workpiece without interfering with the blade. Large sheets should not be allowed to sag significantly on either side of the cut because movement can affect both the cut and the safety of the operation.
Clean dust and debris from the underside of the rail and the surface supporting it. Dust under a rail can change its position or reduce the grip of anti-slip strips. The rail should sit naturally rather than being forced into a curve.
Source: woodworkingshop.com
Start with a reliable reference edge
If the edge of a sheet is rough, bowed, or damaged, do not automatically use it as the reference for a precision crosscut. Establish a straight reference edge first when the project requires it.
Inspect the guide rail
Look for bends, dents, damaged guide surfaces, worn grip strips, and problems at rail connections.
Check the saw fit
Adjust the guide mechanism according to the saw manufacturer’s instructions so the base does not wobble excessively on the rail.
Calibrate the splinter guard
Trim the splinter guard with the saw it will be used with so its edge corresponds to the saw’s cutting path.
Secure the rail when needed
Use compatible clamps when the rail could move, especially for narrow stock, difficult surfaces, long cuts, or situations where maximum repeatability matters.
Adjusting the Saw-to-Rail Fit
Most track saw systems use adjustable guide surfaces or jaws that control how the saw base fits the raised portion of the rail. The goal is not to make the fit extremely tight. The saw should move smoothly along the rail without noticeable lateral looseness.
If the fit is too loose, pushing the saw through the cut can allow small changes in blade position. If the fit is too tight, the saw may bind or require excessive force, which can make the cut less controlled. Follow the adjustment procedure specified for the exact saw model.
Good result
The saw glides smoothly while remaining stable against the guide rail.
Problem sign
The saw visibly rocks or shifts sideways when you gently test the base against the rail.
Another problem sign
The saw requires excessive force to move or catches at particular points along the rail.
How to Check Track Saw Accuracy Before a Critical Cut
A short test cut is one of the simplest ways to confirm whether a track saw setup is behaving as expected. Use scrap material similar to the actual workpiece and make the same type of cut you plan to make.
For a straightness check, examine the cut edge against a suitable straight reference. For a dimension check, measure the retained section at more than one location. For a square crosscut, compare the cut to a reliable square or check the diagonals of the resulting panel when appropriate.
Do not rely on a tape measure alone to diagnose every problem. A tape can establish dimensions, but it does not tell you whether a long edge has a slight curve or whether a crosscut is exactly square.
Source: ptreeusa.com
Check the cut line
Confirm that the splinter guard or other cut reference was positioned exactly where the finished cut needed to occur.
Check both ends
Measure the resulting dimension at both ends of the workpiece to identify an angled or shifted setup.
Check the middle
A long cut that matches at both ends can still have a bow in the middle, so inspect the complete edge when high accuracy is required.
Check the face and edge
If the cut looks correct from above but the parts do not fit, inspect whether the blade is cutting square through the material.
A Simple Accuracy Test
For a practical workshop test, use a stable piece of scrap that is long enough to reveal alignment problems. Mark a known cut position, position the rail, secure it, and make a controlled cut. Measure the result and inspect the cut edge with a straight reference and square.
If the measurement is consistently wrong by the same amount, investigate the layout or splinter-guard reference first. If the error changes along the length of the cut, investigate rail straightness, rail movement, or saw-to-rail play.
Constant offset
Usually suggests a layout, positioning, or cut-reference problem rather than a curved rail.
Increasing error
Can indicate rail alignment, rail straightness, or positioning problems over the length of the cut.
Localized deviation
Can point to debris, a rail joint, a damaged rail section, or a momentary movement during the cut.
How to Improve Straight Cuts With a Track Saw
For a straight track saw cut, the rail needs to remain in the intended position from the beginning to the end of the cut. The saw should then move along the rail at a controlled rate without being forced sideways.
Use enough support under the workpiece to prevent excessive flexing. The support should also allow the blade to pass safely through the material without striking the bench or other objects underneath.
For long cuts, pay attention to the entire rail rather than only the point where the saw begins. A small alignment error can become easier to see over a long distance.
Source: koempf24.de
Keep the rail fully supported
Avoid situations where the rail bridges an unsupported section of flexible material and changes position under pressure.
Use clamps when movement is possible
Anti-slip strips can provide useful grip, but clamping is appropriate when the setup can shift or when precision requirements are high.
Maintain consistent pressure
Guide the saw forward without pushing it sideways against the rail.
Let the blade cut
Forcing a dull or inappropriate blade can increase resistance and make controlled movement more difficult.
Keep the rail clean
Remove sawdust and debris from contact surfaces before positioning the guide rail.
Joining Two Guide Rails
When a single rail is not long enough, connected rails need careful alignment. The connection should be rigid, and the two rail sections should form one continuous path rather than a visible step or angle.
After joining rails, inspect the joint before making the final cut. A small alignment error at a connection can create a noticeable change in the cutting path, particularly on long panels.
Align the rail sections
Use the manufacturer’s connector and alignment procedure rather than relying on hand positioning alone.
Check the joint
Run the saw across the connection without cutting if practical and confirm that its movement remains smooth.
How Blade Choice Affects Track Saw Accuracy
Blade selection affects cutting quality and can influence how easy it is to maintain a controlled cut. Choose a blade designed for the material and finish required rather than treating every blade as interchangeable.
A dull or damaged blade can produce more resistance, heat, tear-out, or vibration. A blade with the wrong tooth configuration for the material can also produce a poor edge even when the guide rail is perfectly positioned.
Blade kerf matters when the final dimension is taken from one side of the cut. The splinter guard represents the calibrated cutting location for the specific saw and setup, but changing blades can change the relationship enough that the calibration should be checked.
Source: popularwoodworking.com
Plywood and sheet goods
A suitable fine-finish carbide blade can reduce tear-out and provide a cleaner edge on many sheet materials.
Solid wood
Select a blade appropriate for the species, grain direction, thickness, and desired finish.
Melamine and coated panels
Use a blade intended for clean cuts in the specific panel material and follow the material manufacturer’s recommendations when available.
Blade replacement
After installing a different blade, make a test cut and verify that the existing splinter guard still represents the actual cut line.
Why a Sharp Blade Matters
A sharp blade generally requires less cutting effort than a dull blade. That makes it easier for the operator to maintain a smooth feed rate and reduces the temptation to force the saw through the material.
If the blade is producing burning, unusual noise, excessive tear-out, or noticeably increased resistance, stop and investigate rather than compensating by pushing harder.
Inspect the teeth
Look for damaged, chipped, heavily contaminated, or visibly worn carbide teeth.
Listen to the cut
A sudden change in sound can indicate a blade, material, or cutting-condition problem.
Getting Accurate 90-Degree Crosscuts
A guide rail does not automatically make every crosscut square. The rail must be positioned at the correct angle relative to the reference edge of the workpiece.
For repeatable crosscuts, a dedicated guide-rail square or another reliable squaring method can reduce the amount of manual layout required. The reference edge itself still needs to be trustworthy.
If you are cutting cabinet panels or other parts that must fit together, verify the first cut before repeating the setup. A small angular error repeated across several panels can become difficult to correct later.
Source: bigfoto.name
Establish a straight reference edge
Do not assume a factory or rough-cut edge is perfectly straight simply because it appears straight.
Use a reliable square
Position the rail against a known reference and verify the relationship before cutting.
Make a test cut
Use scrap material when the final part has tight dimensional or squareness requirements.
Check the finished panel
For rectangular panels, comparing diagonals can reveal whether the corners are truly square.
The Factory Edge Is Not Always the Best Reference
Large plywood sheets can have edges that are not suitable as precision references for every project. If the reference edge is not straight, a perfectly positioned rail can still produce a crosscut that does not create the intended geometry.
When accuracy is critical, establish the reference edge first. This may mean trimming a thin strip from the sheet before using the newly created edge for subsequent measurements and crosscuts.
Good reference
Straight, stable, and long enough to establish the intended relationship with the guide rail.
Poor reference
Rough, bowed, damaged, or inconsistent along the section used for positioning.
Troubleshooting Track Saw Accuracy Problems
When a track saw produces an inaccurate cut, diagnose the pattern before adjusting the tool. Different symptoms point toward different causes, and changing several settings at once can make the original problem harder to identify.
Start with the safest and simplest checks: confirm the measurement, inspect the cut reference, clean the rail and work surface, verify the rail has not moved, and check the saw’s guide fit. Then examine the blade and the actual cut geometry.
Source: tsoproducts.com
The cut is straight but the dimension is wrong
Check the layout mark, splinter guard position, reference edge, and which side of the cut represents the finished part.
The cut curves along its length
Inspect rail straightness, rail support, rail movement, and saw-to-rail play.
The cut is straight but not square
Check the saw’s bevel setting and, for crosscuts, the angle between the rail and reference edge.
The saw binds on the rail
Check for debris, damaged rail surfaces, excessive guide adjustment, or a problem with the saw base.
The splinter guard no longer matches the cut
Recheck calibration after changing the blade, saw, rail configuration, or cutting angle.
The rail moves during the cut
Improve the work surface, clean the contact areas, increase rail support, or use compatible clamps.
Accuracy Troubleshooting Sequence
First identify exactly what is wrong: dimension, straightness, squareness, bevel angle, or surface quality. Then make one controlled change at a time.
For example, if both ends of a cut are the correct dimension but the middle bows, changing the blade is unlikely to solve the underlying problem. If the entire cut is shifted by the same amount, rail straightness is also less likely to be the first issue.
Step 1
Recheck the intended dimension and cut reference.
Step 2
Inspect the rail and workpiece for movement or debris.
Step 3
Check the saw-to-rail fit and bevel setting.
Step 4
Inspect the blade and replace or sharpen it if appropriate.
Step 5
Make another test cut and compare the result using the same measurement method.
Common Track Saw Accuracy Mistakes
Most track saw accuracy problems are setup problems rather than mysterious failures inside the saw. A few habits repeatedly create avoidable errors.
The biggest mistake is treating the guide rail as a magic straightedge. The rail provides the saw’s path, but the rail still needs to be straight, stable, clean, and correctly positioned. The second common mistake is assuming that a clean cut automatically means an accurate cut.
Source: ultimatetools.ca
Using a damaged reference edge
A crooked workpiece edge can cause a square-cut setup to be wrong even when the rail itself is straight.
Skipping splinter-guard calibration
An untrimmed or mismatched guard may not accurately indicate the blade’s cutting location.
Ignoring guide-rail play
Side-to-side movement between the saw and rail can affect the cut path.
Cutting on an unstable surface
Movement or sagging under the material can change the relationship between the blade, rail, and workpiece.
Forcing the saw
Excessive feed pressure can make controlled cutting harder, especially when the blade is dull or the material is demanding.
Measuring only once
A single measurement may not reveal a gradual or localized accuracy error along a long cut.
When to Stop and Inspect the Tool
Stop cutting if the saw begins behaving differently, the blade binds unexpectedly, the rail moves, the saw no longer glides normally, or the cut suddenly changes direction. Continuing through an unexplained mechanical or setup problem can damage the material and increase the risk of injury.
Before continuing, disconnect power according to the manufacturer’s safety procedure and inspect the blade, rail, base, clamps, and workpiece. If the tool appears damaged or a mechanical adjustment is outside the owner’s manual, use the manufacturer’s service guidance or a qualified repair provider.
Do not force a binding saw
Investigate the cause instead of increasing pressure.
Do not test a damaged blade at full speed
Replace or properly service a blade that is cracked, damaged, or otherwise unsuitable.
Frequently Asked Questions
Q
How accurate should a track saw be?
There is no single accuracy number that applies to every track saw, rail, material, and application. A properly adjusted system can produce very straight and repeatable cuts, but the actual result depends on rail condition, setup, blade condition, workpiece stability, and operator technique.
For demanding work, verify the specific result with a test cut instead of assuming a particular tolerance from the tool category alone.
Q
Why is my track saw cut straight but not square?
A straight cut and a square cut are different requirements. The rail may be straight while being positioned at an angle relative to the workpiece edge, or the saw may be set to a slight bevel.
Check the saw’s bevel setting, verify the rail against a reliable reference edge, and test the finished cut with an accurate square.
Q
Can a track saw replace a table saw for accurate cuts?
A track saw can handle many accurate ripping and crosscutting tasks, particularly when breaking down large sheet goods. It does not automatically replace every function of a table saw.
A table saw can provide different advantages for repetitive narrow cuts, certain joinery operations, and production-style work. The better choice depends on the operation, material, required repeatability, and available workspace.
Q
How do I stop my track saw from wandering?
First check that the guide rail is stable and straight, then inspect the saw-to-rail fit for excessive play. Make sure the workpiece is supported and the blade is suitable and sharp.
During the cut, guide the saw forward smoothly without applying unnecessary sideways pressure. If the rail moves, use compatible clamps or improve the contact surface.
Q
Does changing the blade affect track saw accuracy?
It can. A different blade may have a different kerf or tooth geometry, and a worn or damaged blade can change cutting behavior. After changing blades, make a test cut and verify that the splinter guard still corresponds to the actual cutting path.
This is especially useful when accuracy depends on placing the edge of the splinter guard directly on the layout line.
Q
How can I make accurate long cuts in plywood?
Use a straight, appropriate-length guide rail, provide adequate support under the sheet, clean the rail and work surface, secure the rail when necessary, and maintain consistent saw movement.
For a critical cut, make a test cut first. Check the resulting edge from end to end rather than judging accuracy only by the first few inches.
✦ Wrapping Up
Conclusion
Track saw accuracy comes from controlling the complete cutting system rather than relying on the saw alone. A straight and stable rail, minimal saw-to-rail play, proper blade selection, calibrated splinter guard, accurate layout, and adequate workpiece support all contribute to the final result.
When a cut is inaccurate, identify the type of error before making adjustments. A constant dimensional offset, a curved edge, an out-of-square crosscut, and a changing bevel angle each point toward different causes. Testing one variable at a time makes troubleshooting faster and prevents unnecessary tool adjustments.
💡 Key Takeaway
Before your next precision cut, clean and inspect the rail, verify the saw-to-rail fit, confirm the blade and splinter guard, establish a reliable reference edge, secure the workpiece and rail, and make a test cut when the final part has tight accuracy requirements.