
A good Bar Clamp Guide should help you do more than pick a clamp by length. You also need to understand throat depth, jaw shape, pressure, bar strength, and how the clamp behaves during a glue-up. These details can decide whether a project stays flat and square.
Bar clamps are common in U.S. home shops, cabinet shops, furniture shops, and jobsite tool kits. They work well for edge-glued panels, face frames, doors, boxes, benches, shelves, and repairs. A practical lesson in clamp setup is simple: **use only the pressure you need, and place that pressure where the joint needs it.**

What Is a Bar Clamp?
A bar clamp is a tool with two jaws mounted on a long bar or rail. One jaw stays fixed or nearly fixed. The other jaw slides along the bar so you can fit the clamp around work of many sizes.
Most designs use a screw, trigger, lever, or similar system to apply force. That force pulls the jaws together and holds the work in place. This Bar Clamp Guide focuses on clamps used for woodworking, furniture work, repairs, and general shop assembly.
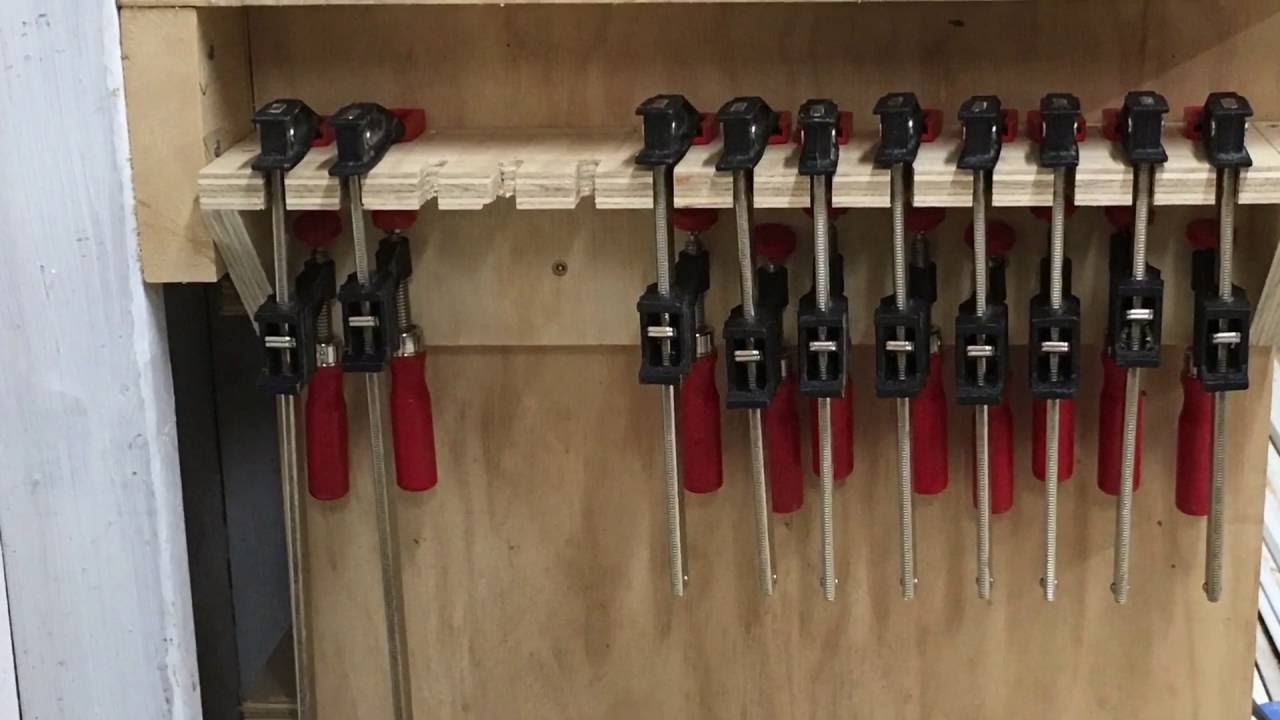
- ✦ Bar or rail
The long steel or metal section guides the movable jaw and gives the clamp its working length.
- ✦ Fixed jaw
This jaw provides one firm contact point against the workpiece.
- ✦ Sliding jaw
This jaw moves along the bar so the clamp can fit workpieces of different widths.
- ✦ Pressure mechanism
A screw, handle, or trigger closes the jaws and creates holding force.
- ✦ Jaw pads
Pads help protect wood from dents, scratches, and metal marks.
How a Bar Clamp Creates Holding Force
You first move the sliding jaw close to the work. You then tighten the handle or activate the trigger. The clamp turns that movement into pressure between the two jaws.
The goal is not maximum force. The goal is controlled force in the right place. Too much pressure can bow a panel, crush softwood, or pull a joint out of alignment.
- ✦ Close the gap first
Slide the jaw near the work before tightening. This saves time and reduces needless screw travel.
- ✦ Tighten in small steps
Bring several clamps up to pressure a little at a time instead of fully tightening one clamp first.
Main Types of Bar Clamps
The term bar clamp covers several designs. Each type changes how quickly you can work, how much pressure you can apply, and how well the clamp keeps parts aligned. Choosing the right style makes setup easier and can improve the finished joint.
For most woodworkers, there is no single best type. A small shop often works best with a mix of medium F-style clamps, quick clamps, and longer parallel clamps.

- ✦ F-style bar clamps
These have a fixed jaw and a sliding jaw on a steel bar. They are useful for furniture, general assembly, jigs, repairs, and many glue-ups.
- ✦ Parallel clamps
Their broad jaws stay close to parallel under load. They are popular for cabinets, doors, tabletops, boxes, and panel glue-ups.
- ✦ Quick-action bar clamps
A trigger or lever moves the jaw fast. These are useful when speed and one-handed use matter more than very high pressure.
- ✦ Heavy-duty bar clamps
These use stronger bars and larger pressure systems. They suit large assemblies and jobs that need more force.
- ✦ Spreader-capable clamps
Some models let you reverse a jaw so the tool pushes parts apart instead of pulling them together.
F-Style Clamps Versus Parallel Clamps
F-style clamps are lighter and often easier to place in tight areas. They work well for routine assembly and for holding small to medium parts. Many shops keep several sizes within reach.
Parallel clamps are larger and heavier. Their wide jaws offer more support during panel and cabinet work. They can also help keep parts closer to square when the setup is correct.
- ✦ Choose F-style for
Fast general work, furniture parts, jigs, repairs, narrow assemblies, and jobs where lower weight helps.
- ✦ Choose parallel clamps for
Panels, doors, cabinets, boxes, tabletops, and glue-ups where broad jaw support is useful.
Quick Clamps Versus Screw Clamps
Quick clamps save time because the jaw moves with a trigger or lever. They are useful for positioning parts before screws, drilling, routing, or light glue work.
Screw clamps usually give finer pressure control. They are a better choice when you need steady force on a wood joint for the full clamp time.
- ✦ Speed
Quick clamps are easier to place and adjust with one hand.
- ✦ Control
Screw clamps often give better control over final clamping pressure.
How to Choose the Right Bar Clamp Size
Clamp length is one of the first things buyers notice, but it is not the only size that matters. You also need enough jaw opening and enough throat depth to reach the area you want to hold. A long clamp with shallow jaws may still fail to reach the joint.
A useful rule from this Bar Clamp Guide is to buy a clamp with some extra opening beyond the project width. That extra room makes positioning easier. It also gives you space for pads, cauls, blocks, and small setup errors.

- ✦ 6 to 12 inches
Useful for small boxes, trim, jigs, craft work, and narrow furniture parts.
- ✦ 18 to 24 inches
A flexible size range for shelves, small cabinets, chair parts, drawers, and general shop work.
- ✦ 30 to 36 inches
Useful for many cabinet assemblies, doors, panels, and medium furniture projects.
- ✦ 40 to 50 inches
Better for tabletops, wide cabinets, benches, and larger edge-glued panels.
- ✦ Over 50 inches
Best for large furniture, wide assemblies, long panels, and special shop projects.
Understanding Throat Depth
Throat depth is the distance from the edge of the jaw to the bar. A deeper throat lets the clamp reach farther into a workpiece.
This matters when the joint is not close to an edge. It also matters when you clamp wide rails, cabinet parts, or thick assemblies.
- ✦ Shallow throat
Works well for edge joints and simple assembly near the edge of a board.
- ✦ Deep throat
Reaches farther across panels and can hold areas that standard jaws cannot reach.
How Many Clamp Lengths Should a Home Shop Own?
A new shop does not need every size. A practical starter set can include several 12-inch or 18-inch clamps, several 24-inch clamps, and a few 36-inch or longer clamps.
Buy sizes based on the projects you build most often. Cabinet and furniture work usually needs more long clamps than small craft work.
- ✦ Start with medium sizes
Medium clamps cover a wide range of common repairs and woodworking projects.
- ✦ Add long clamps when needed
Large clamps take more wall and rack space, so buy them when your project size justifies them.
How to Use a Bar Clamp Correctly
Correct setup starts before you tighten the clamp. Dry-fit the parts first. Check that the joint closes, the faces line up, and the clamp can reach without hitting another tool or part.
Place the jaws square to the work whenever possible. Then tighten gradually. When several clamps are in use, move from clamp to clamp so the pressure builds evenly.

- ✦ Dry-fit the project
Assemble the parts without glue first so you can find fit, alignment, and clamp problems.
- ✦ Protect finished surfaces
Use clean jaw pads, scrap wood, or cauls when the clamp could dent or mark the work.
- ✦ Place clamps near the joint
Keep pressure close to the surfaces that must close instead of placing force far away.
- ✦ Tighten gradually
Bring all clamps into contact before adding final pressure.
- ✦ Check alignment again
Look for slipping, twisting, bowing, and gaps after the clamps become snug.
Step-by-Step Bar Clamp Setup
Place the work on a flat surface when possible. Open the clamp wider than the assembly and position the fixed jaw against one side. Move the sliding jaw close to the other side.
Tighten until the joint closes. Stop and check the work. Add a little more pressure only if the joint or adhesive instructions call for it.
- ✦ Step 1
Prepare the parts and make sure mating surfaces fit cleanly.
- ✦ Step 2
Apply glue when required and assemble the parts in the correct order.
- ✦ Step 3
Position clamps so their force crosses the joint.
- ✦ Step 4
Bring each clamp to light pressure.
- ✦ Step 5
Check square, flatness, and joint closure before final tightening.
How Much Clamping Pressure Do You Need?
More pressure does not always create a stronger joint. The clamp needs enough force to bring mating surfaces into full contact. Extra force can distort the project and may squeeze too much adhesive from the joint.
The correct pressure depends on the material, joint type, adhesive, jaw size, and fit. Well-fitted woodworking joints often need less force than poorly fitted joints. A clamp should hold a good joint closed, not repair bad joinery through brute force.

- ✦ Use light pressure first
Start with enough force to seat the parts and remove visible gaps.
- ✦ Watch for bowing
A board that bends under the clamp may have too much pressure or poor clamp placement.
- ✦ Check glue squeeze-out
A small, even bead can show that the joint has closed, but squeeze-out alone does not prove correct pressure.
- ✦ Protect soft wood
Pine, cedar, and other softer woods can dent under small clamp pads.
Signs You Are Using Too Much Pressure
Wood fibers may crush under the jaws. Long parts may bow. Panels can lift from the bench, and frames can move out of square.
If the clamp handle feels extremely hard to turn, stop and inspect the setup. The joint may already be closed.
- ✦ Jaw dents
Deep marks around the pads often mean the force is too high or the pads are too small.
- ✦ Panel bow
Uneven force can bend a panel instead of holding it flat.
- ✦ Joint movement
Parts that slide out of position may need better clamp balance rather than more force.
Why Joint Fit Matters
A clean joint should close with modest force. If a large gap remains, inspect the cut, surface, angle, or alignment.
Trying to close a badly fitted joint with heavy pressure can store stress in the assembly. The joint may move after the clamps come off.
- ✦ Test before glue
A dry fit shows whether the parts can close without extreme clamp force.
Best Bar Clamp Placement for Glue-Ups
Clamp placement affects pressure, flatness, and alignment. For long edge joints, spacing the clamps across the length helps spread force. You may also alternate clamps above and below a panel to reduce the chance of bowing.
This part of the Bar Clamp Guide matters most on tabletops, doors, cabinet panels, and other wide glue-ups. The longer the assembly, the more important balanced pressure becomes.
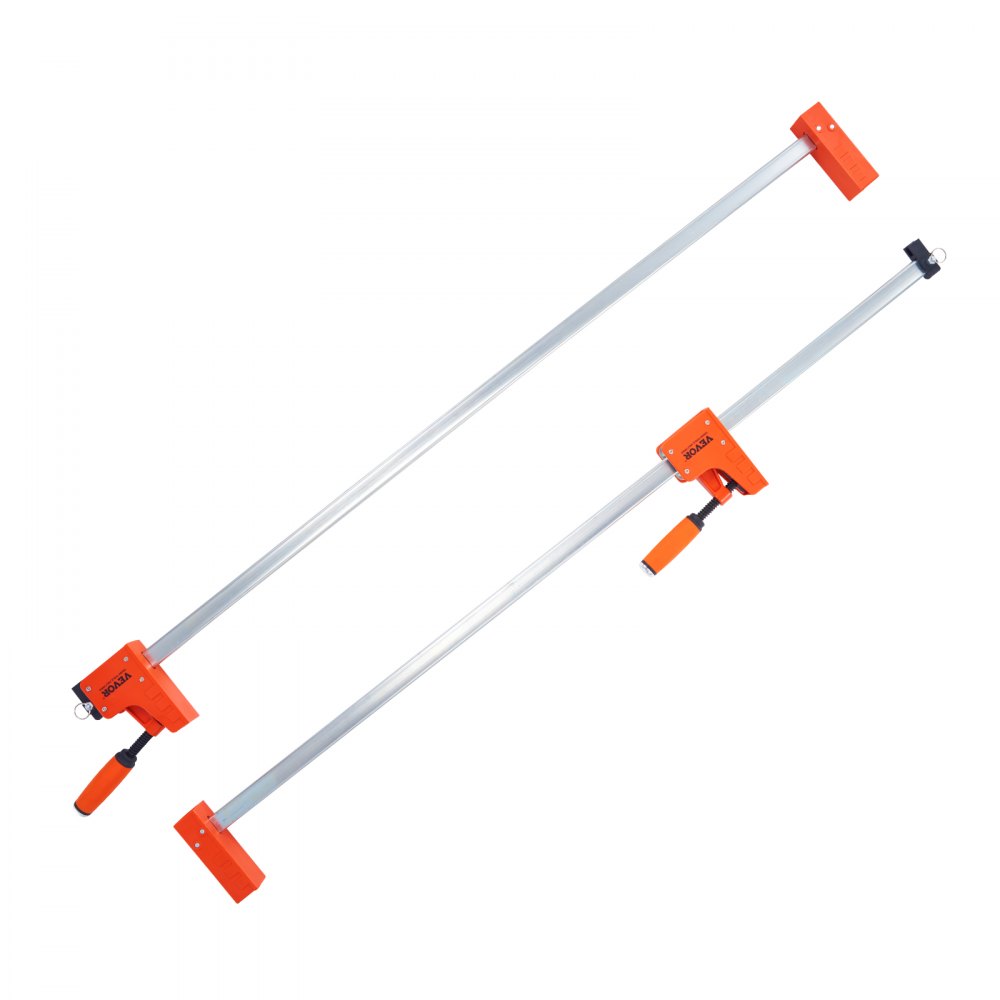
- ✦ Keep pressure centered
Try to align the clamp force with the joint instead of pulling from a steep angle.
- ✦ Spread clamps along long joints
Use several pressure points rather than expecting one clamp to control a long glue line.
- ✦ Alternate clamp direction
On some panel glue-ups, placing clamps above and below can help balance bar forces.
- ✦ Use cauls when useful
Straight cauls can help keep boards aligned and reduce steps between adjoining faces.
- ✦ Check square before curing
Measure diagonals or use a reliable square before the adhesive begins to set.
Clamping an Edge-Glued Panel
Lay out the boards in their final order first. Apply glue to the mating edges and bring the boards together. Add clamps along the panel and tighten them in stages.
Sight across the top as you work. If one board rises, reduce pressure and fix the alignment. Cauls can help hold wide panels flat.
- ✦ Start near the center
A center clamp can help stabilize the panel while you add clamps toward each end.
- ✦ Watch the seams
Each seam should close without one board riding far above its neighbor.
Clamping Frames and Boxes
Frames and boxes need both joint pressure and correct geometry. A strong clamp cannot fix a project that has shifted out of square.
Check diagonal measurements when the design allows it. Matching diagonals are a useful sign that a rectangular assembly is square.
- ✦ Use corner support
Blocks or squares can help keep parts aligned while the clamps hold the joints closed.
- ✦ Recheck after tightening
Clamp force can move a frame even after it looked square during the first dry fit.
Bar Clamp Uses in Woodworking and DIY Projects
Bar clamps are useful far beyond basic glue-ups. They can hold parts during drilling, routing, sanding, repair, fitting, and assembly. Some reversible models can also spread parts apart.
For U.S. homeowners and DIY users, a few medium-size clamps can help with shelves, cabinet repairs, furniture fixes, workbench tasks, and small remodeling projects. Professional shops often keep many sizes because several clamps may be needed at once.
- ✦ Panel glue-ups
Hold boards edge to edge while adhesive cures.
- ✦ Cabinet assembly
Hold cases, face frames, rails, stiles, and cabinet parts in alignment.
- ✦ Furniture building
Secure table, chair, bench, shelf, and frame parts during assembly.
- ✦ Repairs
Hold loose furniture joints or split wood after the correct adhesive is applied.
- ✦ Temporary workholding
Secure jigs, guides, fences, stops, and workpieces during shop tasks.
- ✦ Dry fitting
Hold parts together before glue so you can test fit and alignment.
When a Bar Clamp Is Not the Best Choice
A bar clamp needs access to opposite sides of the work. It may not fit deep inside a large panel or around an odd shape.
Other clamp styles can work better for corners, curved parts, edge banding, deep reaches, or very small pieces. Good woodworking means matching the clamp to the job instead of forcing one tool to do everything.
- ✦ Use a band clamp
A band clamp can be easier for frames, boxes, and some multi-sided assemblies.
- ✦ Use a deep-reach clamp
Choose deeper jaws when pressure must reach far from the workpiece edge.
- ✦ Use small specialty clamps
Tiny parts and narrow trim may be easier to hold with spring, hand-screw, or specialty clamps.
What to Look for When Buying Bar Clamps
A good buying decision starts with the work you plan to do. Length matters, but bar stiffness, jaw quality, throat depth, handle comfort, and sliding action also affect daily use. A cheap clamp that twists or slips can become frustrating during a large glue-up.
This Bar Clamp Guide recommends comparing clamps by real workshop needs instead of buying on pressure claims alone. A balanced set of useful sizes often gives more value than a few oversized clamps.
- ✦ Bar stiffness
A stiff bar is less likely to flex badly when the clamp is tightened.
- ✦ Jaw alignment
Jaws should meet the work cleanly and remain stable under normal pressure.
- ✦ Throat depth
Make sure the jaws can reach the areas you normally need to clamp.
- ✦ Jaw pads
Replaceable or removable pads help protect work and make cleanup easier.
- ✦ Handle comfort
A comfortable handle matters when you tighten many clamps during one assembly.
- ✦ Sliding action
The movable jaw should reposition easily but lock firmly when pressure begins.
- ✦ Weight
Heavy clamps can offer strength, but they can also make delicate assemblies harder to handle.
How Many Bar Clamps Should You Buy?
Woodworkers often discover that the number of clamps matters as much as the size. A panel may need several clamps at the same time. A cabinet assembly can use even more.
Start with enough clamps for the projects you build now. Add matching sizes as your work gets larger or more complex.
- ✦ Small project shop
Several short and medium clamps can handle boxes, shelves, repairs, and small furniture.
- ✦ Furniture shop
A wider mix of medium and long clamps helps with tables, cabinets, doors, and frames.
- ✦ Panel-heavy work
Buy long clamps in groups so you can apply pressure at several points along a panel.
Is Maximum Clamp Force the Most Important Feature?
No. High force can be useful, but most woodworking depends on controlled pressure and stable alignment. A strong clamp with poor pads, a flexible bar, or rough adjustment can still be unpleasant to use.
Look at the full design. The clamp should match your project size, material, and working style.
- ✦ Prioritize control
Good pressure control helps protect parts and maintain alignment.
- ✦ Match strength to the work
Heavy-duty pressure has more value on large assemblies than on light craft work.
Common Bar Clamp Mistakes
Most clamping problems come from setup, not from a lack of clamp power. Rushing a glue-up can lead to uneven pressure, slipped boards, dents, or an assembly that dries out of square.
A useful lesson from repeated woodworking setups is to solve fit and alignment before adding heavy pressure. Clamps hold parts in position. They should not be used to force poorly cut pieces into shape.
- ✦ Overtightening
Too much force can dent wood, bow parts, or move a project out of square.
- ✦ Using too few clamps
Long joints may develop gaps when pressure is applied at only one or two points.
- ✦ Placing clamps at an angle
Angled pressure can cause parts to slide or twist during tightening.
- ✦ Skipping the dry fit
You may discover fit or reach problems after the glue is already applied.
- ✦ Ignoring jaw protection
Bare metal or hard pads can leave marks on finished or soft surfaces.
- ✦ Failing to check square
An assembly can look correct but still cure out of square.
Why Projects Slip While You Tighten Clamps
Wet glue can make wood surfaces slide. Uneven clamp pressure can make that movement worse. Tightening one clamp fully before the others can also shift the assembly.
Use light pressure across all clamps first. Then correct alignment before adding final pressure.
- ✦ Use cauls or stops
Simple guides can help keep parts from moving during glue-up.
- ✦ Tighten in stages
Small adjustments across several clamps reduce sudden movement.
Bar Clamp Safety
Bar clamps are simple tools, but high pressure can still damage a project or hurt your hands. Inspect the clamp before use. A bent bar, cracked jaw, loose handle, or damaged pressure screw deserves attention.
Keep fingers away from closing jaws and pinch points. Large clamps can also fall or swing when you release them, so support the tool and the work during removal.
- ✦ Inspect before use
Do not use a clamp with badly damaged jaws, cracked parts, or a bar that no longer holds the sliding jaw safely.
- ✦ Protect your hands
Keep fingers clear of jaws, moving parts, and areas where the work may suddenly shift.
- ✦ Do not extend handles
Avoid using pipes or other makeshift extensions to create more torque than the clamp was designed to take.
- ✦ Support large assemblies
Do not depend on clamps alone to hold a heavy project in an unsafe position.
- ✦ Release pressure with control
Hold the clamp so it cannot fall when the jaw becomes loose.
Safe Use Around Finished Wood
Finished surfaces can scratch, dent, or react with dirty clamp pads. Clean the contact points before each setup.
Use protective pads or scrap blocks when needed. Check that the protective material itself is clean and free from grit.
- ✦ Use clean pads
Dust and dried glue under a pad can mark a finished surface.
- ✦ Spread the load
A larger pad or wood block can reduce dents on soft material.
Cleaning, Maintenance, and Bar Clamp Storage
Good maintenance keeps a bar clamp moving smoothly and helps prevent glue from building up on working parts. Remove fresh adhesive before it hardens when the glue maker’s cleanup method allows it. Keep the bar, threads, and sliding surfaces free from heavy dirt.
Storage also matters. Long clamps can take a large amount of wall or floor space. A simple rack keeps them organized and reduces the chance that bars or handles get damaged.
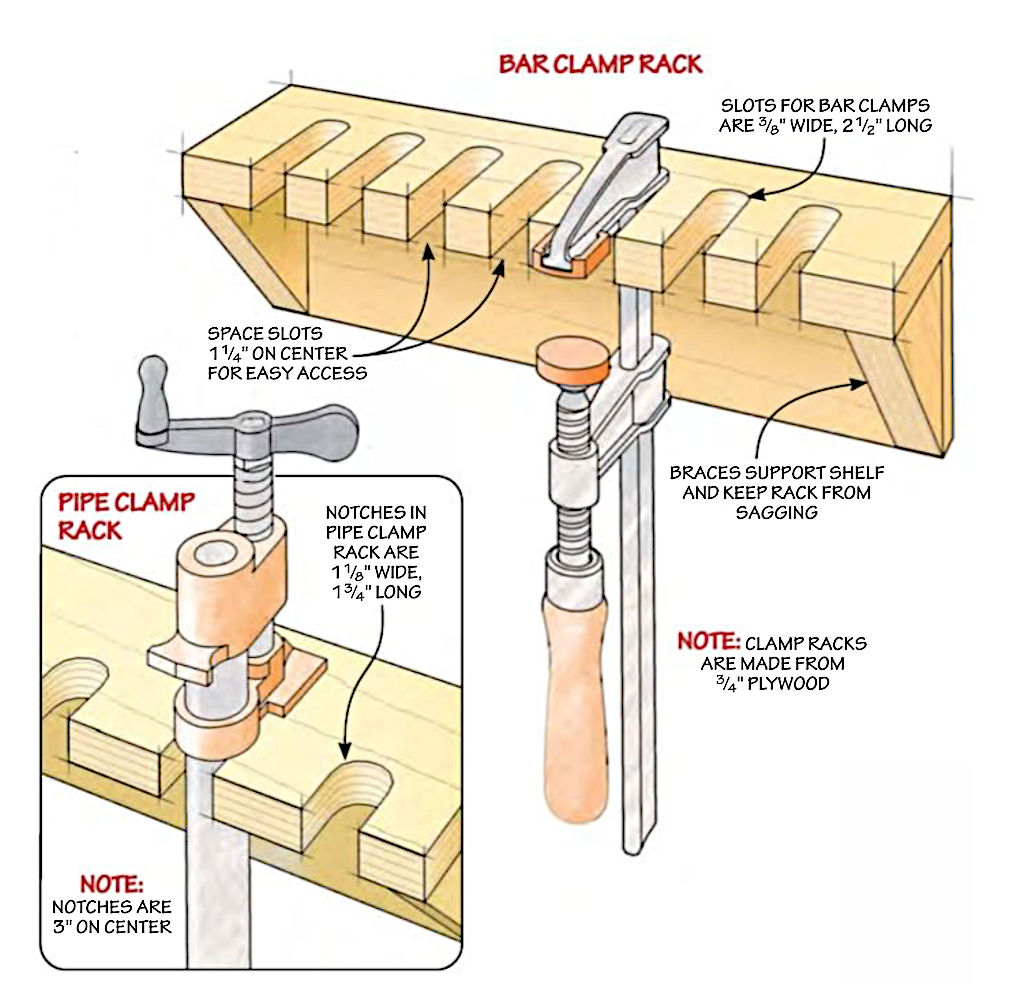
- ✦ Remove dried glue
Clean glue buildup carefully so the sliding jaw can move and lock correctly.
- ✦ Keep threads clean
Dirt and hardened adhesive can make screw clamps harder to adjust.
- ✦ Inspect jaw pads
Replace pads that are torn, missing, hard, or packed with debris.
- ✦ Control rust
Store steel clamps in a dry area and address surface rust before it becomes severe.
- ✦ Use a clamp rack
Wall storage keeps long clamps visible, organized, and easier to select.
How to Store Bar Clamps Efficiently
Store clamps by type or length so you can find matching sizes fast. Keep heavy clamps on supports that can carry the total weight.
A rack near the assembly bench can save time during glue-ups. Leave enough space between groups so handles and jaws do not lock together.
- ✦ Sort by size
Grouping similar lengths makes it easier to grab a matched set.
- ✦ Keep bars straight
Avoid storage methods that put constant bending force on long bars.
Bar Clamp Guide for Building a Practical Starter Set
You do not need a wall full of clamps on day one. Build your collection around the size of projects you make most. Short and medium clamps cover a surprising amount of home and shop work.
As projects grow, add longer clamps in pairs or small groups. Matching clamps can make balanced glue-ups easier because their jaws, bars, and adjustment systems behave in a similar way.
- ✦ Small clamps
Keep several for jigs, boxes, trim, repairs, and small assemblies.
- ✦ Medium clamps
Make these the core of a general-purpose setup because they fit many furniture and cabinet tasks.
- ✦ Long clamps
Add these for doors, tabletops, cabinets, wide panels, and benches.
- ✦ Quick clamps
Keep a few for fast positioning, holding guides, and one-handed work.
- ✦ Parallel clamps
Add them when cabinet, furniture, and panel work becomes a regular part of your projects.
A Balanced Clamp Collection Matters More Than One Premium Clamp
Many glue-ups need pressure at several points. One excellent long clamp cannot replace four suitable clamps spread across a panel.
Spend first on useful sizes and enough quantity. Upgrade special sizes and heavy-duty models as your projects demand them.
- ✦ Buy for your work
Choose sizes based on real project widths instead of collecting random lengths.
- ✦ Leave room to grow
Add specialist clamps after you know which jobs your current set cannot handle well.