
A Finish application Guide helps homeowners, DIY makers, and professionals understand how to protect and improve surfaces. The right process changes the final look, durability, and feel of wood, metal, fabric, and other materials.
From my experience working with finishing projects, most problems happen before the first coat goes on. Poor cleaning, wrong tools, and rushing between coats often create uneven results. A careful approach gives better control and a cleaner finish.

What Is Finish Application and Why Does It Matter?
Finish application is the process of adding a protective or decorative layer to a surface. This layer can improve appearance, resist moisture, reduce wear, and extend the life of a material.
A good Finish Application Guide focuses on more than applying a product. It explains preparation, product selection, application speed, coating thickness, and curing time.
- ✦ Protection
A finish helps protect surfaces from scratches, stains, moisture, and daily use.
- ✦ Appearance
The right finish can enhance color, texture, shine, and overall visual quality.
- ✦ Durability
Proper application creates a stronger surface that lasts longer.
Preparing the Surface Before Applying Finish
Surface preparation is the foundation of every successful finishing project. Even the highest-quality finish will fail if the surface contains dust, oil, moisture, or rough areas.
Before starting any Finish Application Guide process, inspect the surface carefully. Clean it, repair damage, and make sure the material is ready to accept the coating.
- ✦ Clean the surface
Remove dirt, grease, wax, and old residue before applying any finish.
- ✦ Sand when needed
Smooth rough areas with suitable sandpaper to create better finish adhesion.
- ✦ Remove dust
Use a clean cloth or proper dust removal method before coating.
Checking Surface Condition
Look for cracks, stains, uneven areas, or previous coatings. These issues can change how the finish absorbs and dries.
A smooth and clean surface gives more consistent results with fewer corrections later.
Choosing the Right Finish Type
Different materials need different finishes. A coating designed for indoor furniture may not perform well on outdoor surfaces exposed to weather.
A complete Finish Application Guide should always include product selection because the finish type affects appearance, protection, and maintenance needs.

- ✦ Oil finishes
Oil finishes soak into materials and often create a natural look with simple maintenance.
- ✦ Water-based finishes
These finishes dry faster and usually produce lower odor during application.
- ✦ Film finishes
Film finishes create a protective layer on top of the surface.
Tools Needed for Professional Finish Application
The tools you use directly affect the quality of the final result. A poor brush, dirty roller, or wrong applicator can leave marks and uneven coverage.
Professional finishers select tools based on the product, surface size, and desired appearance.

- ✦ Brushes
Quality brushes help spread finish smoothly and reduce visible marks.
- ✦ Sprayers
Sprayers can create a smooth coat when used with correct settings and preparation.
- ✦ Cloths and pads
Cloths and pads work well for some wipe-on finishes and small projects.
Maintaining Application Tools
Clean tools after every project. Dried finish can damage tools and affect future results.
Store brushes and equipment properly to keep them ready for the next application.
Step-by-Step Finish Application Process
A reliable Finish Application Guide follows a clear order. Skipping steps may save time at first, but it often creates more work later.
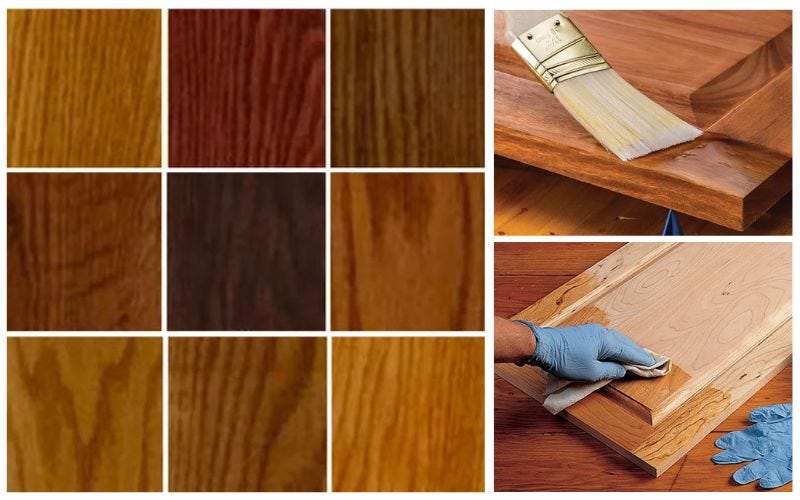
Apply the finish in controlled layers. Allow each coat to dry before adding another layer.
- ✦ Step 1: Prepare the area
Work in a clean space with proper airflow and stable conditions.
- ✦ Step 2: Apply the first coat
Use smooth strokes and avoid adding too much product at once.
- ✦ Step 3: Add additional coats
Lightly prepare between coats when needed for better bonding.
Avoiding Common Application Mistakes
Common mistakes include applying thick coats, touching wet surfaces, and ignoring drying times.
Patience creates better results than rushing through the finishing process.
Drying, Curing, and Final Inspection
Drying and curing are different stages. Drying means the surface feels dry, while curing means the finish reaches its full strength.
A proper Finish Application Guide explains why waiting matters. Using a surface before full curing can damage the coating.

- ✦ Follow product instructions
Each finish has specific drying and curing requirements.
- ✦ Inspect the surface
Check for bubbles, streaks, dust, or uneven areas.