
The Complete Sharpening Guide teaches safe, simple steps to make any edge razor-sharp.
If your knives crush tomatoes, your chisels tear grain, or your mower leaves ragged grass, you are in the right place. I wrote The Complete Sharpening Guide to help you master edges with calm, clear steps. I have sharpened tools for years in my shop and on job sites. You will learn what works, why it works, and how to keep your tools sharp with less effort and more joy.

Sharpening Basics: How Edges Actually Get Sharp
Sharp means two polished planes meet in a clean, thin line. Think of a tiny wedge that splits fibers with little force. In The Complete Sharpening Guide, we build that wedge with control and repeatable steps.
Every edge has a bevel angle, a scratch pattern, and a burr. Grit removes steel and shapes the bevel. The burr is a thin fold of metal that forms at the edge when you reach the apex. You remove the burr to reveal a clean, lasting edge.
Use this idea flow as you read The Complete Sharpening Guide. Form the edge. Refine the scratches. Remove the burr. Protect the new apex.

Abrasives and Tools: Stones, Plates, Rods, and Strops
The Complete Sharpening Guide covers common abrasives and when to use each one. Each medium cuts at a different speed and leaves a different finish. Choose the right tool for your steel, your goal, and your time.
- Water stones cut fast and come in many grits. They need water and flattening.
- Oil stones cut slower but stay flat longer. They work well on simple steels.
- Diamond plates cut very fast and stay flat. They shine on hard or wear-resistant steels.
- Ceramic rods are great for quick touch-ups. They are for honing, not heavy grinding.
- Sandpaper on glass is cheap and flat. It is great for wide blades and chisels.
- Strops with compound polish and remove the last trace of burr. They boost bite and glide.
Match the medium to the job. In my shop, I set bevels on a coarse diamond plate, then refine on water stones, then strop. It is simple and fast.

Grit Selection: Coarse to Fine Without Wasting Time
The Complete Sharpening Guide uses a grit ladder so you do not guess. Start coarse to fix damage or change an angle. Move to medium to refine. Finish fine to polish and boost bite.
- Coarse, 200–400 grit: repairs chips and sets new angles.
- Medium, 800–1200 grit: daily maintenance and fast improvement.
- Fine, 2000–3000 grit: clean push cuts and better edge life.
- Extra fine, 4000–8000+ grit: high polish for slicing soft items or pairing with a micro-bevel.
Do not jump too far between grits. If you still see deep scratches, stay on the current stone. Progress only when the scratch pattern is even. This rule saves time and steel.

Edge Angles: Pick the Right Geometry for the Job
Angle sets strength and cutting feel. The Complete Sharpening Guide gives clear ranges so you can choose with confidence. Lower angles cut easier but are weaker. Higher angles last longer but need more force.
- Chef knives, 15–20 degrees per side. Thin tips for fine cuts, thicker heels for strength.
- Pocket and outdoor knives, 18–22 degrees per side. Balanced for mixed use.
- Chisels and plane irons, 25 degrees primary with a 30 degree micro-bevel.
- Axes, 25–30 degrees per side. Hardened bits need clean, even bevels.
- Scissors, match the factory angle. Usually 20–30 degrees per blade. Do not add a burr on fabric shears.
- Mower blades, 30 degrees per side. Keep the edge straight and balanced.
Use a guide at first if your angle drifts. Over time, your hand will memorize the set angle.

Step-by-Step Workflow You Can Repeat
The Complete Sharpening Guide keeps the process simple and steady. Follow these steps for any blade.
- Clean the tool. Remove dirt and old oil.
- Mark the bevel with a marker. This shows contact on the stone.
- Set your angle. Lock your wrist or use a guide.
- Grind on a coarse grit until you raise a burr along the full edge.
- Flip and repeat to move the burr to the other side.
- Progress through medium and fine grits. Keep light, even strokes.
- Deburr with light alternating strokes, then strop.
- Test, then protect with a thin coat of oil.
Use short strokes for short blades and long strokes for long blades. Count strokes to keep sides even.

Steel Matters: Hardness, Carbides, and Edge Life
Not all steels are the same. The Complete Sharpening Guide explains how steel makes a big difference. Harder steels hold an edge longer but take more time to grind. Stainless resists rust but can be gummy on soft stones.
- Simple carbon steels sharpen fast and get very keen. They patina and need oil.
- Stainless steels resist rust. Some need diamond or high quality stones to cut well.
- Powder metallurgy steels have fine carbides. They keep bite for a long time.
If a stone skates and will not bite, switch to diamond or reduce pressure. Accuracy grows when you pick the right abrasive for the steel.

Sharpening by Tool Type
The Complete Sharpening Guide adapts to each tool you own. Use these focused tips to save time and avoid mistakes.
Kitchen Knives
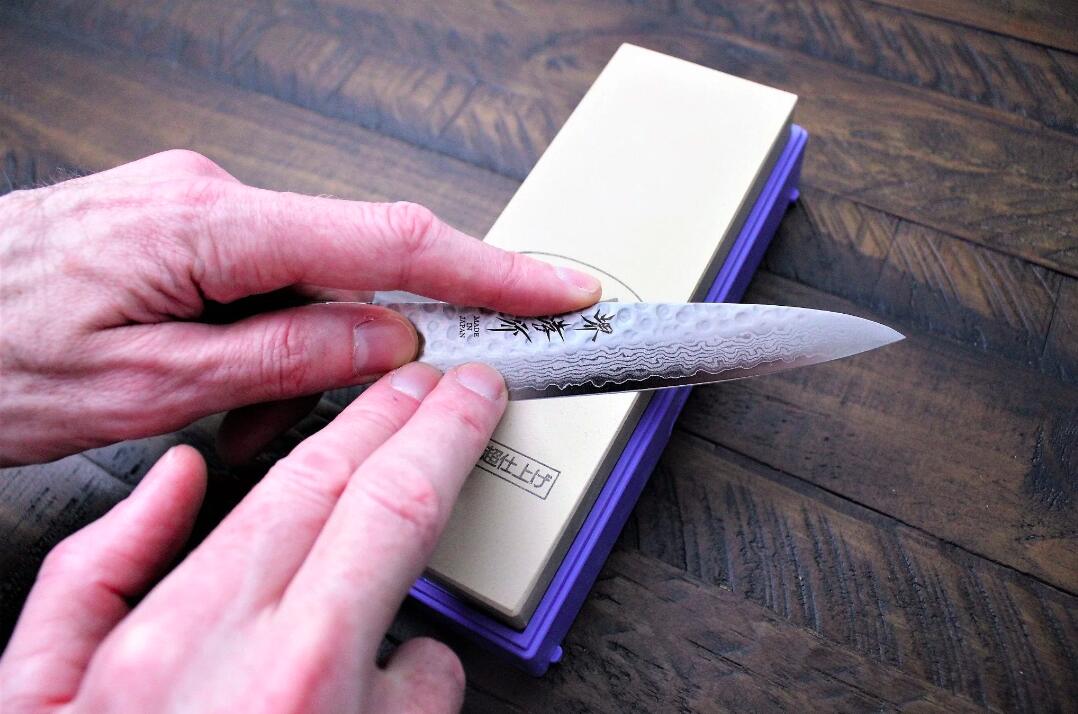
Keep a slight convex curve to support the edge. Set a 15–20 degree angle and stay steady. Raise a small burr and chase it down the blade. Finish at 2000–3000 grit, then strop. A few passes on a ceramic rod before dinner keeps it lively.
Woodworking Chisels and Plane Irons
Flatten the back first. Make it mirror bright near the edge. Grind a 25 degree primary on coarse, then add a tiny 30 degree micro-bevel on fine. This saves steel and time. I check shavings on pine. A clean, full-width ribbon means I am done.
Scissors and Shears
Sharpen only the beveled side. Keep the angle and do not create a secondary bevel unless the maker states so. Deburr by closing the blades into light cuts on scrap paper. Avoid stropping fabric shears, or you may round the edge.
Garden and Outdoor Tools
For axes and hatchets, file in the field, then refine at home. Keep both sides even. For pruners, sharpen only the outside bevel and keep the inside flat. For mower blades, keep the edge straight and balance the blade to prevent vibration.
Serrated Knives
Use a tapered ceramic rod or maker’s tool. Work each gullet with light strokes from the back. Deburr the flat side with one or two light passes on fine grit. Do not over-polish or you will lose bite.
Honing vs Sharpening: Daily Care That Saves Time
Honing realigns a slightly rolled edge. Sharpening removes steel. The Complete Sharpening Guide shows you when to pick each method. If your blade slips but still looks clean, hone. If it slides and tears, sharpen.
Use a ceramic rod for quick honing. Keep strokes light and match the existing angle. Strop to finish. I hone chef knives daily and sharpen them every few weeks. This routine adds months to edge life.

Deburring Done Right
A burr left on the edge makes cuts feel dull fast. The Complete Sharpening Guide treats deburring as a full step, not an afterthought. You should feel and see the burr before you remove it.
- Use lighter pressure as you refine.
- Make short, alternating strokes on your finest stone.
- Strop with minimal pressure to avoid rounding.
- Cut into soft wood or cork once to knock a stubborn burr.
If the edge slides on tomato skin, a hidden burr is likely. Deburr again, then test.
Troubleshooting: Fix the Most Common Problems
In The Complete Sharpening Guide, small fixes prevent big headaches. Here are issues I see the most and how to solve them.
- Inconsistent angle: use a guide, slow down, and shorten your stroke.
- Wire burr that will not leave: reduce pressure, alternate strokes, then strop.
- Rounded tip: stop lifting at the end of the stroke. Keep the spine level.
- Overheating on power tools: use light pressure and cool often. Blue steel means lost temper.
- Hollow spots on stones: flatten your stone before each session.
When in doubt, go back one grit, reset the scratch pattern, and try again.
Safety, Setup, and Ergonomics
Safe sharpening is calm and controlled. The Complete Sharpening Guide starts with the bench. Good light, a stable surface, and clear space make a big difference.
- Secure stones on a non-slip base.
- Keep water or oil within reach to flush swarf.
- Wear eye protection when grinding or using power tools.
- Dry tools before storage to prevent rust.
Stand square to the bench. Lock your elbows near your ribs. This reduces wobble and strain.
How to Judge Sharpness and When to Stop
Chasing perfect polish can waste time. The Complete Sharpening Guide helps you stop at sharp. Use simple, safe tests.
- Paper test: slice cleanly with no snagging.
- Tomato or grape test: break skin with a light touch.
- Push cut on receipt paper: shows fine bite fast.
- Arm hair test: shave a few hairs without pressure. Be careful and clean the edge after.
- Edge reflection test: under bright light, a dull spot will reflect.
If it passes your main task test, you are done. Protect the edge and get back to work.
Choosing a System: Freehand, Guided, or Powered
The Complete Sharpening Guide is brand neutral. Pick the system that fits your space, budget, and patience.
- Freehand is fast, cheap, and flexible. It takes practice but pays off.
- Guided systems give repeatable angles. They are great for tiny bevels and new users.
- Pull-throughs are quick but can tear steel. Use only in a pinch.
- Powered belts and slow grinders remove steel fast. They need skill and a light touch.
I teach freehand for most users. I use a guided jig for tough steels and tiny bevels. I use powered belts for repairs only.
Stone and Plate Care: Keep Your Gear Flat and Clean
Flat stones make flat bevels. The Complete Sharpening Guide insists on maintenance. A minute here saves many later.
- Flatten water stones with a diamond plate or lapping surface.
- Clean swarf with water and a brush. Oil stones need fresh oil to lift grit.
- Rinse diamond plates and pat dry. Do not press too hard or you can shed diamonds.
- Store stones dry and flat. Do not freeze water stones.
Mark a grid on your stone with a pencil. Lap until the lines vanish. Now you are ready to work.
Edge Maintenance Plan: Simple Routines That Stick
A plan keeps edges ready. The Complete Sharpening Guide uses small habits you can keep.
- Hone light and often.
- Sharpen on a schedule, not in a panic.
- Wipe blades dry after use. Add a drop of oil if needed.
- Use boards and surfaces that do not kill edges. Wood and soft plastic are kind.
I log sharpen dates on blue tape on the sheath. It helps me track what works and how long edges last.
Cost, Time, and Sustainability
Sharp tools save money and reduce waste. The Complete Sharpening Guide helps you buy less and use more. One coarse diamond plate, two water stones, and a strop can serve for years.
Sharpening also saves time. A sharp chisel is faster than sanding tear-out. A sharp mower blade needs less fuel. Fewer replacements mean less trash and a lighter footprint.
Real-World Tips I Learned the Hard Way
Experience makes edges better. The Complete Sharpening Guide folds in my field notes so you can skip the pain.
- Color the bevel with a marker before every grit change. It exposes misses at once.
- Count strokes when learning. It builds even edges.
- Pressure pyramid: heavy on coarse, medium on medium, light on fine, feather on strop.
- Stop early and test. Do not chase mirror finishes you do not need.
My biggest mistake was rushing the burr on coarse stones. I now stay on coarse until the burr runs heel to tip. All later steps go smoother and faster.
Frequently Asked Questions
How often should I sharpen kitchen knives?
Home cooks can hone weekly and sharpen every 2–6 weeks. Heavy use or hard boards may need more frequent touch-ups.
Do I need expensive stones to get sharp results?
No. One coarse, one medium, one fine, and a strop do the job. Technique matters more than price.
What angle is best for pocket knives?
Stay near 20 degrees per side for a strong, versatile edge. Go lower for slicing tasks and higher for rough use.
Is stropping always required?
It helps remove the last burr and adds bite. If you already have a clean apex, a light strop improves glide and feel.
Can I sharpen stainless steel on water stones?
Yes, but hard stainless can feel slow or slick. Use a quality stone or switch to diamond for faster cutting.
Conclusion
Sharp tools are safe tools. With the steps in The Complete Sharpening Guide, you can build a keen edge, keep it longer, and enjoy the work more. Start with one knife or one chisel today. Set the angle, raise a burr, refine, and strop.
Make a small kit and a simple plan. Track results, learn from each edge, and adjust as you go. Share your wins, ask questions, and subscribe for more hands-on guides and shop-tested tips.