
A scroll saw makes tight curves, crisp details, and clean inside cuts.
If you want museum-level detail from a tool that fits on a bench, you are in the right place. The Ultimate Scroll Saw Guide walks you through setup, blades, speed, safety, and advanced cuts. I have spent years cutting fretwork, marquetry, and tiny inlays. I will show you what works, what fails, and how to get sharp, smooth results without guesswork.

What Is a Scroll Saw and Why It Matters
The Ultimate Scroll Saw Guide starts with a simple idea: control. A scroll saw is a small, precise saw with a thin, reciprocating blade. It cuts curves and delicate shapes in wood, plastic, and thin metal. You can drill a hole, thread the blade, and make inside cuts without entry slots.
This tool shines when a jigsaw is too rough and a band saw is too wide. It is quiet, clean, and beginner friendly. It is also the go-to tool for fretwork, puzzles, intarsia, and marquetry.
Key reasons to choose a scroll saw:
- Tight curves with almost no tear-out
- Safe cuts on small parts
- Easy inside cuts for letters and lacework
- Variable speed for mixed materials
In my shop, the scroll saw is the tool I trust for final detail. It turns ideas into crisp lines with a light touch.

How a Scroll Saw Works: Components and Controls
The Ultimate Scroll Saw Guide builds skill by naming parts and showing what they do. A scroll saw uses an up-and-down motion, called a stroke. The blade mounts top and bottom. The table supports the work at a fixed height.
Core parts you will use:
- Table and bevel scale for angle cuts
- Blade clamps for pinned or pinless blades
- Tension lever or knob for blade stiffness
- Speed control for strokes per minute
- Hold-down foot and blower for chip and dust control
- On/off switch and often a foot pedal for safer starts
How it feels in use:
- Set tension so the blade “pings” when plucked
- Start slow, then speed up as the cut straightens
- Feed lightly and let the teeth cut
After a few practice lines, you will feel the sweet spot. The cut will track, the blade will sing, and the kerf will stay clean.
Scroll Saw Types and Drive Mechanisms
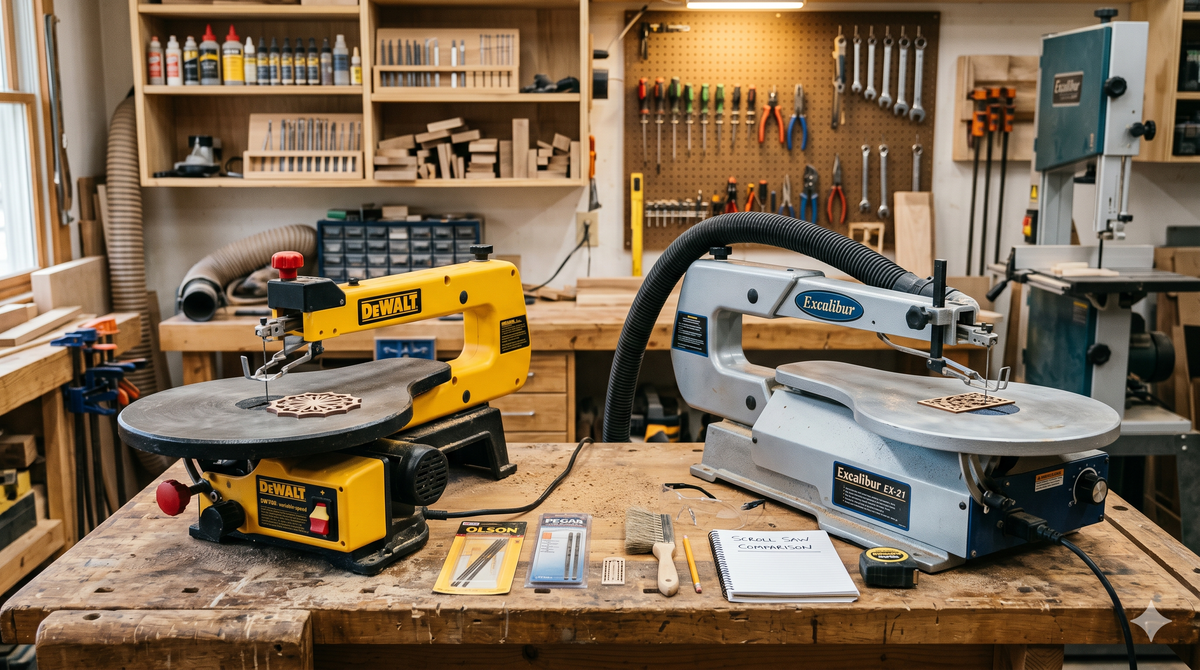
The Ultimate Scroll Saw Guide covers types so you can buy once and buy right. Not all saws feel the same. The drive system, frame, and throat depth change how smooth the cut feels.
Common types you will see:
- Parallel-arm: Smooth and accurate. Blades move straight up and down. Great for fine work.
- C-arm: Longer stroke and a bit more vibration. Often more affordable.
- Parallel-link: Premium feel with low vibration. Very consistent on detail cuts.
What the specs mean:
- Throat depth: Space from blade to frame. Common sizes are 16 to 30 inches.
- Stroke length: Longer stroke can clear chips faster but may feel rougher.
- Table tilt: A tilting table lets you cut bevels for tight inlays.
If you can, test cut on a few brands. When I first tried a low-vibration parallel-link saw, my lines got cleaner at once. That told me more than any ad ever could.

Choosing the Right Blade: TPI, Width, and Material
The blade is the voice of the saw. The Ultimate Scroll Saw Guide will save you wasted sheets by helping you pick the right one.
Key terms you will see:
- TPI: Teeth per inch. Higher TPI makes smoother cuts but slower feed.
- Width and thickness: Narrow and thin blades turn tight. Wider blades stay straighter.
- Pinned vs pinless: Pinless blades fit tiny entry holes and tight turns. Pinned blades swap fast but need larger holes.
- Tooth style: Skip-tooth clears dust well. Reverse-tooth reduces bottom tear-out. Spiral blades cut in any direction but wander if you push too hard.
- Material: High-carbon steel for wood. Bi-metal or specialty blades for non-ferrous metals. Use fine TPI for acrylic to avoid melting.
Practical picks:
- 15–20 TPI, reverse-tooth for plywood letters
- 7–12 TPI, skip-tooth for thicker hardwoods
- Spiral for large, flowing patterns where you do not want to spin the work
Mistake to avoid: forcing a dull blade. If your turns grow wide or the cut burns, swap the blade. Blades are cheap. Workpieces are not.
Setup, Safety, and Dust Control
The Ultimate Scroll Saw Guide treats safety as part of quality. Safe cuts look better and take less time.
Fast setup checklist:
- Bolt the saw to a sturdy bench or stand
- Set blade square to the table with a small square
- Adjust hold-down foot to kiss the work, not clamp it
- Aim the air blower at the cut line
- Use a foot switch so both hands stay on the work
Safe, calm habits:
- Keep fingers on both sides of the blade, never in line with it
- Let the blade clear on the upstroke before sharp turns
- Wear eye protection and use hearing protection if your saw drones
Dust control tips:
- Hook up a small shop vac under the table
- Use a fine filter so you do not blow dust back out
- For fine woods and MDF, a mask is smart
I once chased a pattern line while the board vibrated. Adding a rubber mat under the saw calmed it. The lines straightened up at once.

Essential Techniques: From Straight Cuts to Piercing and Intarsia
The Ultimate Scroll Saw Guide focuses on small wins that build skill. Learn these moves and your work will jump a level.
Straight lines and curves:
- Keep your eyes a hair ahead of the blade
- Feed with light, steady pressure
- For inside corners, pause, lift, and pivot
Inside cuts:
- Drill a small pilot hole
- Unclamp the top blade holder, thread the blade, re-clamp
- Cut inside shapes first, outside last
Stack cutting:
- Tape thin blanks together to make sets
- Cut once, get many parts that match
Bevel inlays:
- Tilt the table a few degrees
- Cut slow and test-fit often
- Adjust the angle until the inlay snaps in without gaps
Intarsia basics:
- Use varied woods for tone and depth
- Shape with files and sanders after cutting
- Glue to a backer and finish with a clear coat
Small, steady practice beats long sessions. I do three warm-up lines before any detail job. It clears my head and sets my hands.

Materials You Can Cut and Starter Project Ideas
The Ultimate Scroll Saw Guide covers more than wood. You can cut many sheet materials with the right blade and speed.
What works well:
- Woods: Basswood, maple, walnut, birch ply
- Plastics: Acrylic, polycarbonate. Go slow to avoid melting
- Metals: Brass and aluminum. Use fine TPI and light oil
Quick project ideas:
- Name signs and monograms
- Ornaments, coasters, and puzzles
- Jewelry components and small boxes
- Pierced panels for cabinets or speaker grilles
Tip for acrylic: cover both faces with masking tape. It reduces chipping and helps the blade glide.

Accuracy Upgrades, Jigs, and Pattern Transfer
The Ultimate Scroll Saw Guide also shares small shop hacks that make big gains.
Pattern transfer options:
- Blue painter’s tape on the wood, glue stick the pattern to the tape, then peel clean after
- Spray adhesive on the back of the pattern for quick stick
- Carbon paper or a scriber for light woods
Jigs and helpers:
- Zero-clearance table overlay to support thin stock
- Auxiliary fence to guide long, straight cuts
- Simple circle-cutting jig for repeat arcs
Control boosters:
- Add a foot pedal for safer starts and stops
- Use a magnifier with LED light
- Try a slow-speed test cut on scrap before the real work
I learned the hard way that bright light is worth more than a fancy blade. When I added a gooseneck light, my curves tightened up that day.

Maintenance, Troubleshooting, and Blade Life
The Ultimate Scroll Saw Guide keeps your saw cutting clean with low cost. A few habits stop most problems.
Simple maintenance:
- Vacuum and wipe the table after each session
- Check blade clamps for wear or pitch build-up
- Lube pivot points if your manual calls for it
Troubleshooting fast:
- Burning edges: reduce speed, use a sharper blade, lighten feed
- Blade wandering: increase tension, choose a wider blade, let the saw clear dust
- Vibration: level the saw, add mass under the base, check the blade is centered
Boost blade life:
- Use the right TPI for the stock
- Slow down on hardwood and metals
- Let the blade cool between long cuts
I track blade swaps with a pencil mark on the backer board. If a blade feels off, I change it. Time saved is worth the cost.
Buying Guide: Features, Brands, and Price Ranges
The Ultimate Scroll Saw Guide closes the loop with smart shopping tips. The best saw for you fits your space, budget, and work style.
What to look for first:
- Low vibration at your common speeds
- Tool-free, quick blade changes
- Easy-access tension lever near the front
- Table that stays flat and tilts with clear marks
- Strong dust blower and a usable work light
Nice-to-have features:
- Foot pedal for control
- Deep throat if you cut large panels
- Onboard blade storage and spare clamps
How to test in-store:
- Make a tight S-curve in 3/4-inch hardwood
- Try one inside cut to feel the clamp and thread step
- Listen for rattles and feel for buzz in the table
Budget thoughts:
- Entry level: fine for hobby use and small projects
- Mid-range: better blade clamps and less vibration
- Premium: silky action for pro fretwork and daily use
If you cannot test, read several owner reports across different projects. Look for notes on vibration, clamp life, and real blade swap time, not just specs.
Frequently Asked Questions
What size scroll saw should a beginner buy?
A 16- to 20-inch throat is a solid start. It offers good reach, low cost, and easy control for most home projects.
How thick of wood can a scroll saw cut?
Most saws handle up to 2 inches, but 3/4 to 1 inch cuts best. Use a lower TPI blade for thicker stock and feed slow.
Can a scroll saw cut metal or acrylic?
Yes, with the right blade and speed. Use fine TPI blades, go slow, and add tape or light oil to reduce heat.
Why does my blade keep breaking?
Too much tension, side pressure, or heat will snap blades. Reduce feed, use a wider blade for straight cuts, and let the blade cool.
Do I need pinned or pinless blades?
Pinless blades are best for fine detail and small entry holes. Pinned blades swap fast but limit tight turns and delicate work.
Conclusion
You now have the core skills to plan, cut, and finish precise work with ease. The Ultimate Scroll Saw Guide showed you setup, blades, speeds, materials, and key moves that boost control. Start small, swap blades early, and let the tool do the work.
Pick one project this week and make the first cut. Share your wins, ask questions, and keep learning. If this helped, subscribe for new guides, tips, and project plans.