A circular saw fence keeps the saw traveling at a fixed distance from a workpiece edge, making long rip cuts and repeated-width cuts straighter and more consistent.
For common U.S. woodworking and home-improvement projects, a circular saw fence is especially useful when breaking down 4-foot by 8-foot plywood, trimming shelving, cutting cabinet panels, or ripping dimensional lumber. A basic rip fence attaches to the saw shoe and references the edge of the board. A longer straightedge or guide rail works better when the cut must start away from the edge or when the material is too wide for the saw’s built-in fence.
The key to accurate results is not simply having a fence. The fence, saw shoe, blade, workpiece, and support system must all remain stable throughout the cut. The guide should be straight and firmly secured, the saw must be compatible with the fence, and the material should be supported so the kerf does not close around the blade. This guide explains the setup, measurement method, cutting technique, DIY options, common problems, and safety limits.
Source: instructables.com
What Is a Circular Saw Fence?
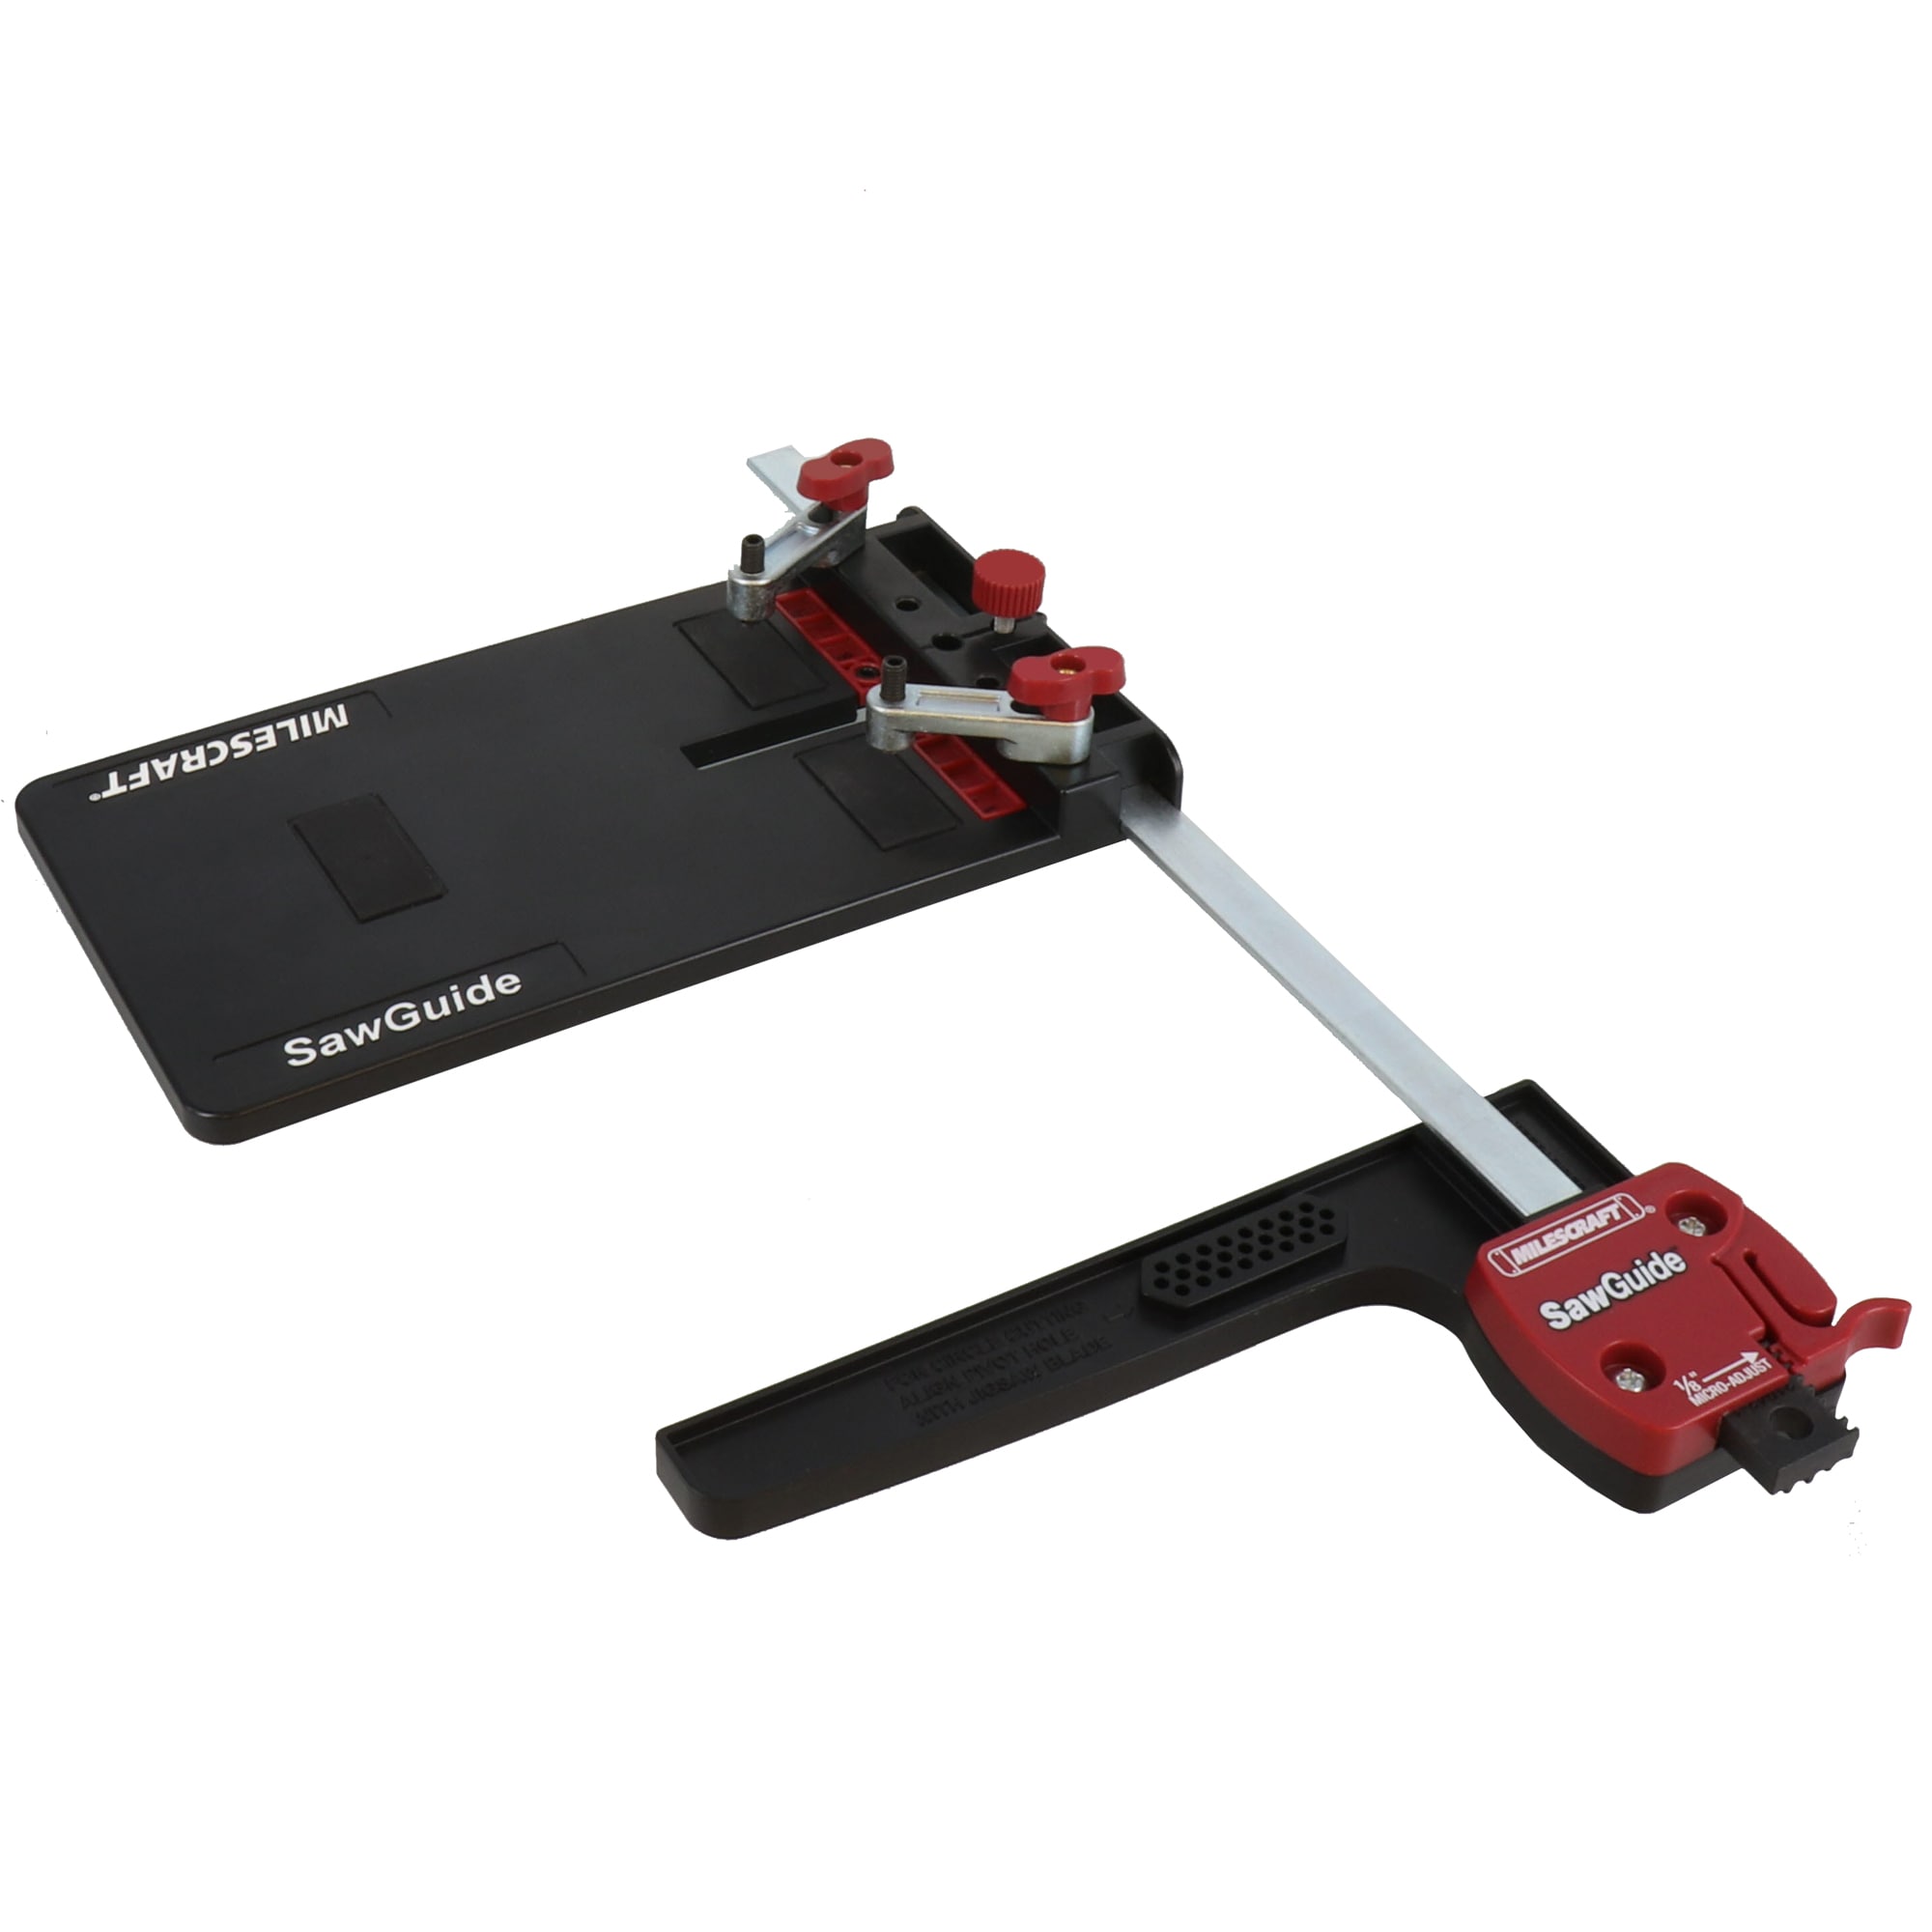
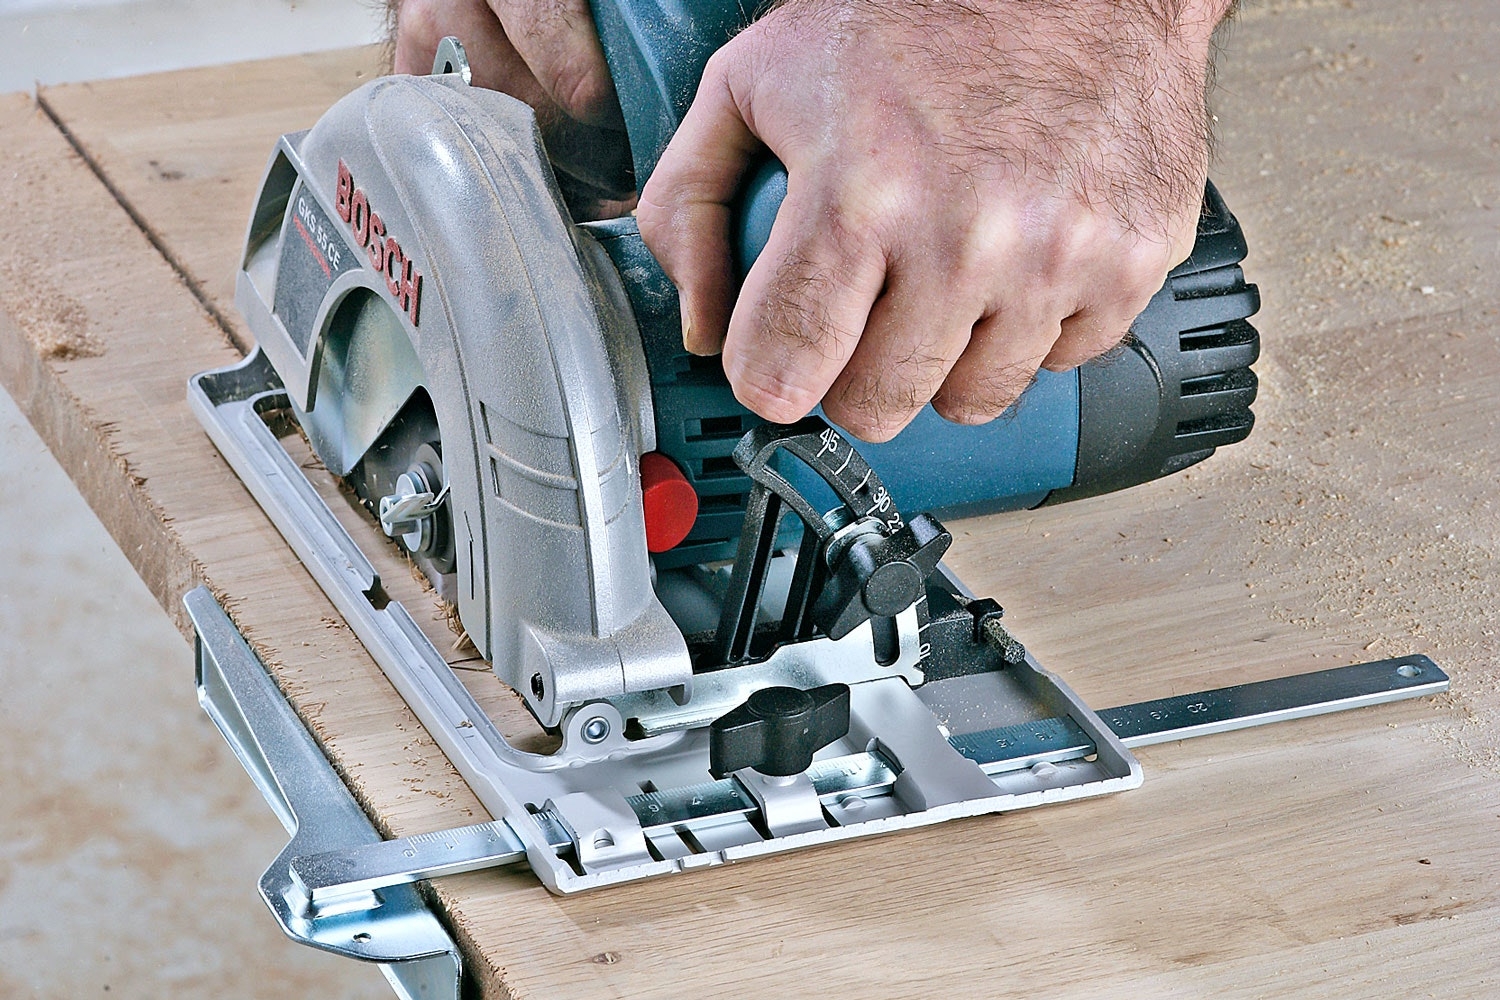
A circular saw fence is a guide that controls the sideways position of a handheld circular saw while it moves through a workpiece. On a typical rip fence, a metal or rigid guide bar slides through slots in the saw shoe. A fence surface then rides against the edge of the material, keeping the saw at a consistent distance from that edge.
A fence is different from a guide rail. A rip fence normally references the edge of the workpiece, while a guide rail or straightedge can be placed directly over the intended cut line. This distinction matters when cutting wide plywood, trimming a panel from its middle, or making a cut where there is no reliable factory edge.
Many circular saw manufacturers provide model-specific rip fences or list compatible accessories. Compatibility should be checked against the exact saw model because mounting slots, fence dimensions, blade position, and clearance around the guard can differ between tools.
Source: festoolusa.com
Rip fence
References the workpiece edge and is useful for parallel cuts and repeated widths.
Straightedge guide
A straight board or rigid guide clamped to the material creates a reference surface for the saw shoe.
Guide rail
A purpose-built rail guides a compatible saw along a defined path and is useful for long, accurate panel cuts.
DIY saw guide
A plywood, MDF, or hardboard base with a straight fence can be trimmed with the saw to create a cut-line reference edge.
When Should You Use a Fence?
Use a circular saw fence when you need a straight cut that runs parallel to a known edge. It is particularly helpful for repeated cuts because the fence can remain at the same setting while multiple pieces are cut. A fence can also reduce the amount of attention needed to keep the saw aligned with a pencil line.
A fence is less useful when the reference edge is curved, badly damaged, significantly out of square, or too short to guide the saw throughout the cut. In those cases, establish a reliable straight reference first or switch to a longer guide system.
Good application
Ripping a 12-inch-wide strip from a straight-edged board.
Cutting a large plywood panel several inches in from its edge.
How to Set Up a Circular Saw Fence
Set up the fence with the saw unplugged or the battery removed whenever you are installing, removing, or adjusting the accessory. Start by identifying the exact reference edge of the workpiece and the part of the saw shoe that will ride against the fence.
The measurement must account for the relationship between the fence and the blade. Do not assume that a number printed on the saw shoe or fence automatically represents the finished cut width. The blade kerf also removes material, so the finished dimensions should be established from the actual cutting edge and verified with a test piece.
Source: lowes.com
1. Inspect the workpiece
Choose a straight, stable edge as the reference surface. Remove loose debris that could prevent the fence from sitting consistently.
2. Check the saw
Make sure the shoe is flat, the blade is properly installed, the lower guard moves freely, and the bevel setting is locked at the intended angle.
3. Install the fence
Insert the fence bar into the saw shoe’s designated slots and position the guide surface according to the saw and fence instructions.
4. Set the cutting width
Measure from the appropriate blade or shoe reference point to the workpiece edge and adjust the fence to the required dimension.
5. Lock the fence
Tighten the locking hardware firmly without overloading the accessory. Confirm that the fence cannot shift by hand.
6. Make a test cut
Use scrap material of the same or similar thickness and material, then measure the finished piece before cutting the project stock.
How to Set the Fence for a 12-Inch Rip
Suppose a board has a straight reference edge and you want the finished strip to be 12 inches wide. Set the fence using the saw manufacturer’s specified reference method, then make a short test cut. Measure the finished strip with a reliable rule or tape measure. If it is 11 7/8 inches instead of 12 inches, correct the fence position by the measured difference and test again.
This test-cut method is more dependable than assuming the saw’s scale is perfectly calibrated. It also accounts for the particular blade, shoe geometry, fence design, and way the operator holds the saw.
The fence stays firmly against the reference edge, the saw shoe moves smoothly, and the test cut remains parallel to the edge.
Signs of incorrect setup
The fence shifts, the saw feels forced sideways, the cut changes width, or the blade begins rubbing against the workpiece.
How to Make a DIY Circular Saw Fence Guide
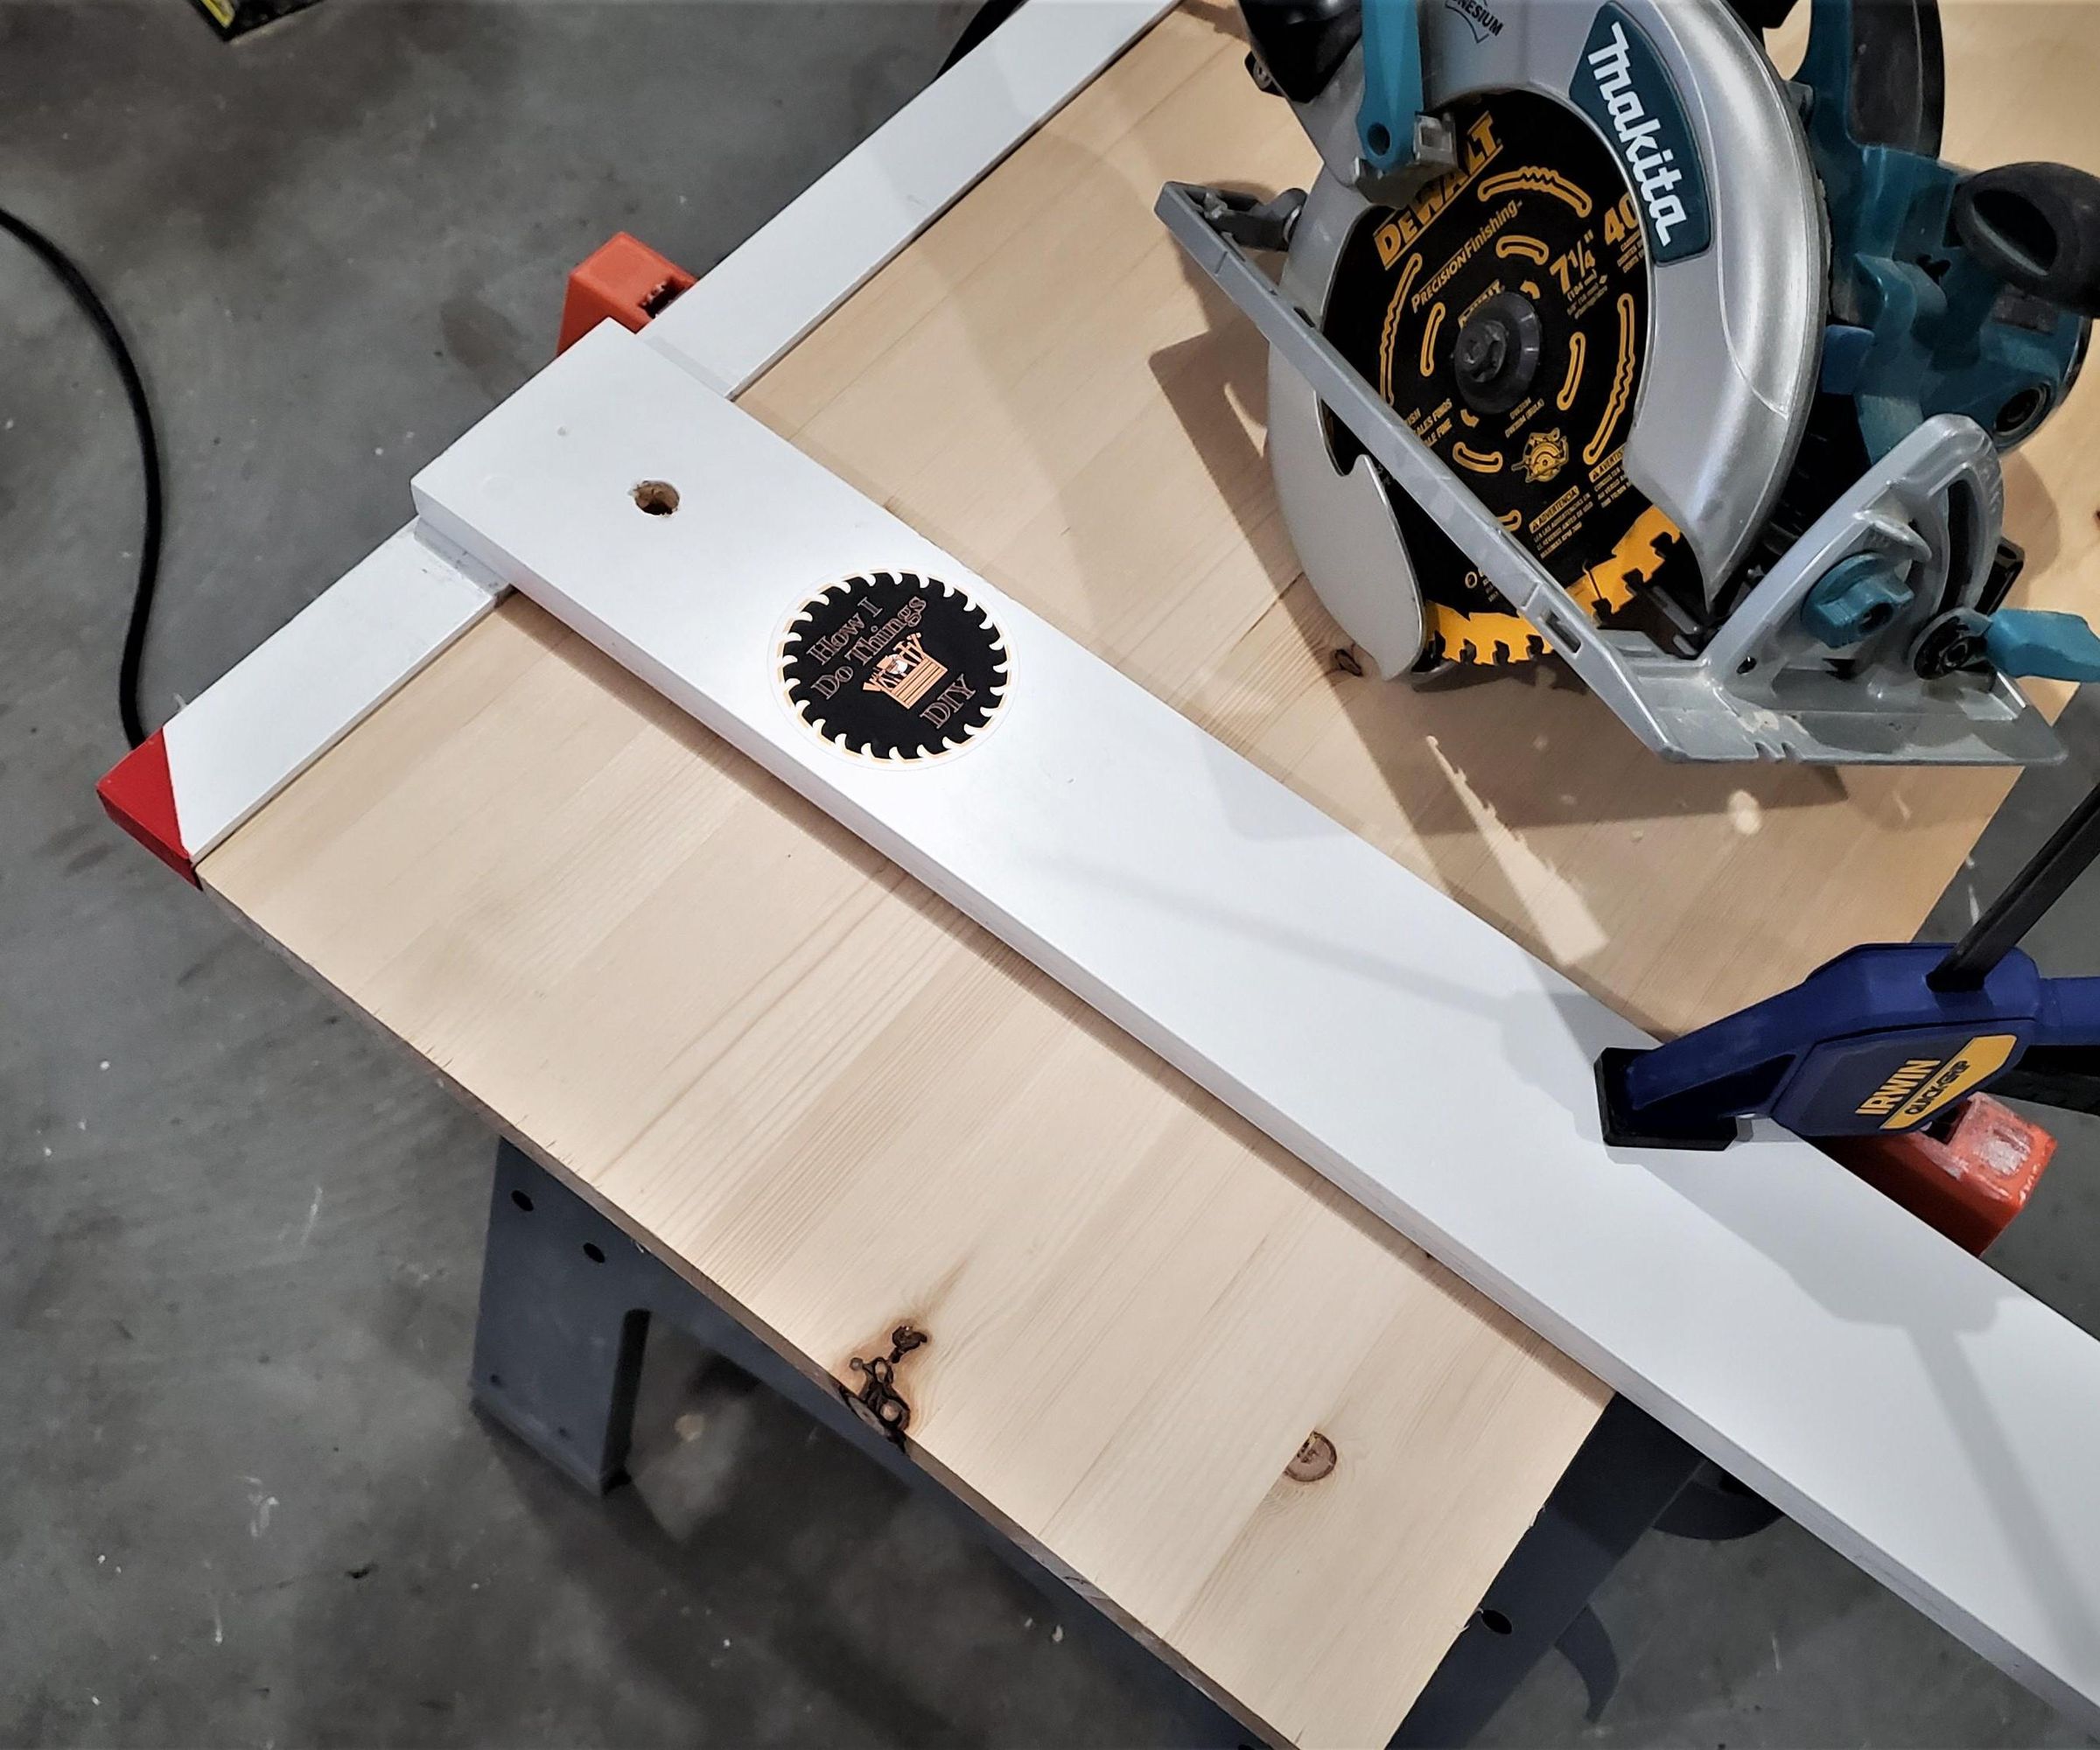
A simple DIY circular saw fence can be made from a flat sheet material and a straight strip of plywood or hardwood. The most useful design is a zero-clearance guide: the saw itself trims the base edge, leaving an edge that shows where the blade will cut.
A practical shop-made guide can use a 1/4-inch hardboard or thin plywood base with a wider plywood fence attached along one side. The base should be wide enough to support the saw shoe and leave clamping room on the opposite side. The fence must remain straight and parallel to the intended blade path.
Commercial and homemade guides use the same basic principle: establish a straight reference surface, secure it to the material, and guide the saw shoe along that surface. The zero-clearance edge is particularly useful because it removes much of the need to estimate the offset between the physical fence and the blade.
Source: woodsmith.com
Materials
Use a flat piece of plywood, MDF, or hardboard for the base and a straight, rigid strip for the fence. Choose material that is not warped or damaged.
Fence alignment
The fence must remain straight and parallel to the saw’s intended travel path. A crooked fence transfers its error directly to the cut.
Fastening
Use suitable glue and mechanical fasteners while keeping all hardware clear of the blade path and lower guard.
Zero-clearance edge
After the fence is securely attached, run the saw along the fence to trim the base. The newly cut edge becomes the guide’s blade reference.
Basic DIY Guide Construction
Start with a straight factory edge on the base material. Position the fence so the saw shoe can ride against it while the blade remains over the base. Secure the fence, then place the completed guide on a sacrificial work surface and clamp it safely.
With the blade set to an appropriate depth, run the saw along the fence to trim the base. The resulting edge represents the blade’s actual path for that saw and blade combination. Mark the guide for its intended cutting direction and store it flat so it does not warp.
Keep the base wide enough
A wider base gives the saw shoe more support and provides space for clamps on the non-cutting side.
Make separate guide lengths
A long guide is useful for sheet goods, while a shorter guide is easier to handle for smaller boards and crosscuts.
How to Use the Fence for a Straight Cut
Once the fence is positioned, the saw should move steadily along the guide without sideways pressure. The operator’s job is to maintain the shoe against the fence while allowing the blade to cut at its normal rate. Do not force the saw to maintain a speed that causes the motor or blade to struggle.
Large panels need particular attention to support. A 4-foot by 8-foot sheet of plywood can sag significantly if it is supported only at its ends. The cut area should remain supported while still allowing the blade to pass through the material without striking the support surface.
Before starting, set the blade depth according to the saw’s instructions and the material thickness. The blade should cut through the workpiece without unnecessarily extending deep into the support surface. Make sure clamps, cords, and other objects cannot enter the saw’s travel path.
Source: sparepartsworld.co.uk
Support the workpiece
Use a stable cutting surface, foam backer, properly positioned supports, or another setup that prevents the material from sagging and pinching the blade.
Clamp the guide
Use clamps where necessary to prevent the guide from shifting. Place them so the saw can pass freely without contacting the clamp.
Start safely
Keep the blade clear of the material when starting the saw unless the specific operation and manufacturer’s instructions call for another procedure.
Maintain contact
Keep the saw shoe steadily against the fence without twisting the saw or pushing it sideways into the guide.
Finish deliberately
After the blade clears the workpiece, release the trigger and allow the blade to stop before lifting or repositioning the saw.
Fence Versus Guide Rail for Plywood
A built-in rip fence is convenient when the desired cut is close enough to the workpiece edge for the accessory’s capacity. A straightedge or guide rail is usually more practical when cutting a wide panel because it can be positioned directly along the intended cut. Purpose-built guide rails can also provide features such as anti-slip backing, a splinter guard, or a dedicated interface for a compatible saw.
For a one-off home project, a straight, clamped board may be sufficient. For frequent sheet-good work, a dedicated guide system can reduce setup time and make repeatable positioning easier.
Choose a rip fence
Use it for repeated parallel cuts measured from a straight material edge.
Choose a straightedge
Use it when the cut line is far from the edge or when you need a simple, flexible setup.
Choose a guide rail
Use a compatible track system when long, repeatable and highly controlled panel cuts are a regular part of the work.
Circular Saw Fence Problems and Safety Checks
Most fence-related cutting problems come from movement, incorrect measurement, poor workpiece support, or interference between the guide and the saw. If the cut starts accurately and then drifts, stop instead of trying to steer the saw aggressively back toward the line.
A binding blade can create dangerous forces. A fence that forces the saw toward the blade path, a workpiece that closes behind the blade, or a panel that shifts during cutting can increase the risk of kickback. Manufacturer manuals also warn that a straightedge must not interfere with the lower guard or blade.
The safest troubleshooting approach is to stop the tool, disconnect its power source, identify the cause, and make the correction before restarting. Never hold a moving fence in place with your hand or reach near the blade to correct alignment.
Source: gds.se
The cut wanders
Check whether the fence is straight and locked, whether the reference edge is straight, and whether the saw shoe remains fully against the guide.
The saw binds
Stop immediately. Check workpiece support, kerf closure, fence alignment, blade condition, and whether the material is moving during the cut.
The fence slips
Disconnect power and inspect the locking mechanism, mounting slots, fasteners, and contact surfaces. Do not continue until the fence stays fixed.
The lower guard catches
Stop using the setup and reposition the guide. The fence or clamp must never restrict the lower guard’s normal movement.
The cut width changes
Recheck the measurement from the correct reference point and make a test cut. Verify the fence is parallel to the intended path.
The workpiece moves
Improve the support and clamping arrangement before cutting again. A moving panel can change the cut path and increase blade binding.
Circular Saw Fence Safety Checklist
Wear eye protection and use hearing protection where appropriate. Follow the safety instructions supplied with the specific circular saw, blade, fence, and material. Keep hands away from the blade path and never bypass or tie open the lower blade guard.
Before cutting a large panel, confirm that the cutoff and the retained workpiece are both supported. Position the supports so they do not squeeze the kerf closed as the cut progresses. When the workpiece is too large or awkward to control safely, use additional assistance or a more suitable cutting method rather than trying to manage it alone.
Disconnect power for adjustments
Remove the battery or unplug the saw before changing the blade, repositioning an accessory, or making adjustments near the cutting area.
Protect the blade path
Know where the blade will emerge beneath the workpiece and keep supports, clamps, cords, and hands outside that path.
Do not force the cut
If the blade slows, smokes, binds, or begins to deflect, stop and diagnose the setup instead of pushing harder.
Follow the tool manual
The exact fence position, blade depth, bevel procedure, and compatible accessories can vary by saw model.
Frequently Asked Questions
Q
Can I use a straight board as a circular saw fence?
Yes. A straight board can serve as a simple guide when it is securely clamped to the workpiece and positioned so the saw shoe can ride against it. Measure the distance between the saw’s reference edge and blade, then position the board accordingly. Confirm the setup with a test cut before cutting the finished material.
Q
How accurate is a circular saw fence?
A properly aligned fence can make very straight and repeatable cuts, but accuracy depends on the fence, saw shoe, blade, workpiece edge, support, measurement method, and operator technique. A test cut is the best way to verify the actual finished dimension before making production or finish cuts.
Q
Can I use a circular saw fence on plywood?
Yes. A rip fence can be used when the desired cut is within its usable distance from a straight plywood edge. For cuts farther from the edge, a clamped straightedge or compatible guide rail is generally more practical. Support the plywood adequately so it does not sag and pinch the blade.
Q
Why does my circular saw cut crooked even with a fence?
Common causes include a fence that moved, a reference edge that is not straight, incorrect fence measurement, insufficient workpiece support, a saw shoe that is not staying against the fence, or excessive sideways pressure on the saw. Stop the cut, disconnect power, and check each factor before continuing.
Q
Is a circular saw fence safer than cutting freehand?
A properly installed guide can help control the saw’s path, but it does not eliminate kickback or other hazards. The fence must not force the blade sideways, restrict the lower guard, or interfere with the saw’s movement. Safe workpiece support, correct blade depth, proper blade condition, and following the saw manufacturer’s instructions remain essential.
✦ Wrapping Up
Conclusion
A circular saw fence turns a handheld saw into a more controlled cutting tool by maintaining a consistent relationship between the saw and the workpiece edge. For parallel rip cuts, the built-in or accessory rip fence can be fast and convenient. For wide plywood sheets or cuts positioned away from an edge, a clamped straightedge or dedicated guide rail is usually more flexible.
Accuracy comes from the complete setup rather than the fence alone. Use a straight reference, measure from the correct point, lock the guide securely, support the material, make a test cut, and keep the blade and lower guard clear of every clamp and guide component. If the saw binds or the fence moves, stop and correct the cause before restarting.
💡 Key Takeaway
For your next straight cut, first choose the right guide for the job, set it from a verified measurement, clamp or lock it securely, make one test cut in scrap, and only then cut the final material.