
A Rabbet Joint Guide helps woodworkers understand one of the oldest and most useful woodworking joints. This joint looks simple, but it solves many common building problems. It creates a larger surface area for glue and gives parts a stronger connection than a basic butt joint.
In American woodworking shops, rabbet joints are common in cabinet boxes, bookcases, drawers, and picture frames. After years of working with wood projects, many builders find that mastering the rabbet joint improves accuracy and confidence with more advanced joinery methods.

What Is a Rabbet Joint?
A rabbet joint is a woodworking joint made by removing material from the edge or end of a board. The cut creates a step or shoulder that allows another piece of wood to fit into the opening.
Unlike a simple butt joint, a rabbet joint gives the connected pieces more contact area. This extra surface helps glue bond better and improves the overall strength of the assembly.
- ✦ Simple Structure
A rabbet usually has two sides: a flat bottom and a vertical wall that creates the step shape.
- ✦ Common Purpose
Woodworkers use rabbets to join boards, hold panels, and create clean edges in furniture projects.
How a Rabbet Joint Works
The rabbet works by allowing one piece of wood to sit inside a cut area on another piece. The parts lock together better and stay aligned during assembly.
This design is especially helpful when building boxes and cabinets because the joint helps keep corners square.
Types of Rabbet Joints Used in Woodworking
There are several rabbet joint variations used for different woodworking tasks. Each type changes how the boards connect and how much strength the finished project needs.
Choosing the right rabbet style depends on the material thickness, project design, and tools available in your workshop.

- ✦ Standard Rabbet Joint
This is the basic rabbet cut into the edge of a board. It is common in cabinet backs and shelves.
- ✦ Double Rabbet Joint
This joint uses matching rabbet cuts on two pieces to create a stronger connection.
- ✦ Locking Rabbet Joint
A locking rabbet adds an interlocking shape that improves mechanical strength.
Rabbet Joint vs Dado Joint
A rabbet is cut along an edge, while a dado is usually cut across the face of a board. Both joints are useful, but they serve different purposes.
Many furniture makers combine rabbets and dadoes to create strong structures that stay stable for years.
Where Rabbet Joints Are Commonly Used
A Rabbet Joint Guide is useful because this joint appears in many everyday woodworking projects. From small DIY builds to professional furniture, rabbets provide reliable connections.
Many American woodworkers use rabbet joints when making cabinets, storage boxes, and custom furniture because the joint is easy to hide and finish.
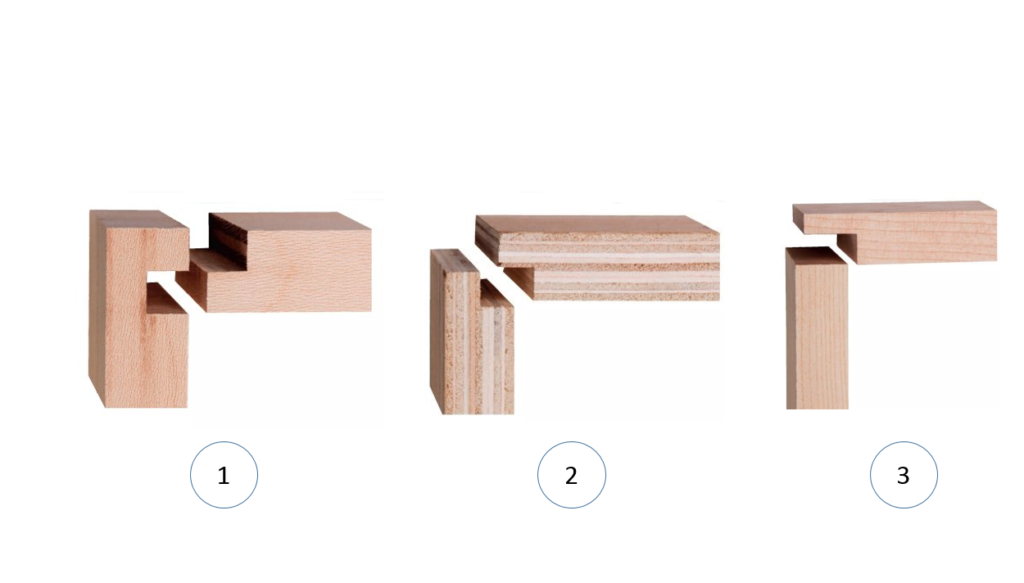
- ✦ Cabinet Construction
Cabinet makers often use rabbets to attach cabinet backs and create strong corners.
- ✦ Picture Frames
Rabbets create a small ledge where glass, artwork, and backing materials can sit securely.
- ✦ Drawers and Boxes
The joint helps create sturdy corners that handle regular use.
Tools Needed to Make a Rabbet Joint
The right tool makes cutting a rabbet joint easier and more accurate. Beginners can start with basic tools, while professionals often use powered equipment for speed.
Before cutting, always measure carefully and test the setup on scrap wood. A small test cut can prevent expensive mistakes.
- ✦ Table Saw
A table saw with a dado blade can create clean and repeatable rabbet cuts.
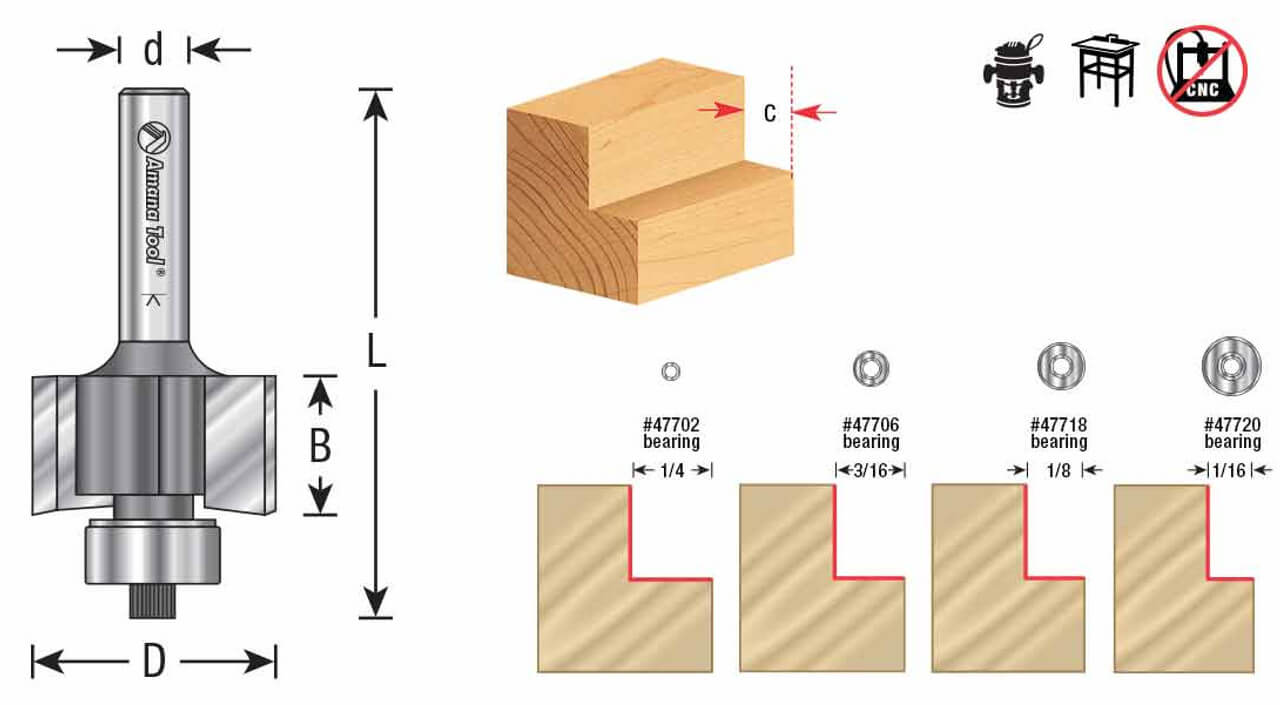
- ✦ Router
A router with a rabbeting bit is one of the easiest ways to make smooth rabbet edges.
- ✦ Hand Tools
A chisel and hand saw can create rabbets when power tools are not available.
How to Cut a Rabbet Joint Step by Step
Learning how to cut a rabbet joint is an important skill for beginners. The process starts with planning the cut depth and width based on the project design.
A clean rabbet depends on accurate measurements, stable tool control, and checking the fit before final assembly.

- ✦ Step 1: Mark the Cut
Measure the rabbet width and depth, then mark the cutting area clearly.
- ✦ Step 2: Set Up the Tool
Adjust your router, saw, or hand tools to match the required cut size.
- ✦ Step 3: Test the Fit
Use scrap wood first to confirm the joint fits correctly before cutting the final pieces.
Tips for Cleaner Rabbet Cuts
Use sharp blades and bits because dull tools can tear wood fibers. Move slowly and avoid forcing the tool through the material.
A smooth finish often requires light sanding after cutting, especially on visible furniture parts.
Advantages and Limitations of Rabbet Joints
A Rabbet Joint Guide should also explain the limits of this joint. While rabbets are useful and strong, they are not ideal for every woodworking situation.
Understanding both benefits and weaknesses helps you choose the right joint for your project.

- ✦ Advantages
Rabbets are easy to make, provide good glue strength, improve alignment, and create clean finished edges.
- ✦ Limitations
Some rabbet joints may need reinforcement when used for heavy loads or large structures.