
A Wood Plug Guide helps beginners and experienced woodworkers understand how small wooden pieces create cleaner results. In American workshops, wood plugs are common in furniture making, cabinet work, decks, and repair projects.
From my woodworking experience, the best results come from matching the plug wood with the project wood. A well-matched plug can look like part of the original board instead of a repair.

What Is a Wood Plug?
A wood plug is a small piece of wood cut into a round or shaped form. Woodworkers place it into a drilled hole to cover screws, bolts, or other openings.
This Wood Plug Guide starts with the basic purpose. A plug does more than hide a hole. It can also improve strength, protect hardware, and add a decorative detail.
- ✦ Hole coverage
Wood plugs cover visible holes and create a cleaner surface.
- ✦ Better appearance
Matching grain and color can make the repair blend into the wood.
Common Uses of Wood Plugs
Wood plugs appear in tables, chairs, cabinets, trim, and outdoor projects. Many professionals use them after pocket hole joinery because they hide connection points.
- ✦ Furniture
Plugs create smooth surfaces on handmade furniture.
- ✦ Repairs
Plugs fill damaged or unwanted holes in wood.
Types of Wood Plugs and Their Uses
Different wood plugs serve different needs. The best choice depends on the project, wood species, and desired finish.
This Wood Plug Guide recommends selecting plugs that match the movement and appearance of the main wood piece.

- ✦ Flush wood plugs
These plugs sit flat after trimming and sanding.
- ✦ Decorative plugs
These plugs highlight grain patterns and add visual detail.
- ✦ Pocket hole plugs
These plugs hide angled pocket screw openings.
Wood Species Selection
Oak, maple, cherry, walnut, and pine plugs are common choices. Matching the species helps the plug age at a similar rate as the surrounding wood.
- ✦ Hardwood plugs
Hardwood plugs work well for durable furniture and visible surfaces.
How to Install Wood Plugs Step by Step
Installing wood plugs requires careful drilling, fitting, and finishing. Small mistakes can leave gaps or uneven surfaces.
A good Wood Plug Guide should focus on preparation because clean preparation creates a professional result.

- ✦ Drill the hole
Create a clean hole with the correct diameter for the plug.
- ✦ Apply glue
Use suitable wood glue for a secure bond.
- ✦ Trim and sand
Cut the excess plug and smooth the surface carefully.
Installation Tips for Beginners
Test the plug fit before adding glue. A snug fit prevents gaps but should not require excessive force.
- ✦ Check grain direction
Aligning grain direction creates a more natural appearance.
Tools Needed for Making Wood Plugs
Woodworkers can buy ready-made plugs or make their own with a plug cutter. Making custom plugs gives better control over wood grain and color.
This Wood Plug Guide shows why the right tools matter. Sharp tools create cleaner edges and reduce finishing work.

- ✦ Plug cutter
A plug cutter creates matching wooden plugs from project material.
- ✦ Drill press
A drill press improves accuracy and consistency.
- ✦ Sandpaper
Fine sanding creates a smooth final surface.
Making Custom Wood Plugs
Custom plugs are useful when working with expensive hardwoods. The plug can come from the same board, making the repair almost invisible.
- ✦ Better matching
Same-board plugs often blend better with the project.
Common Wood Plug Mistakes to Avoid
Even simple plug work can fail without proper care. Many beginners rush the fitting and finishing steps.
This Wood Plug Guide helps avoid common problems by focusing on accurate sizing and careful finishing.
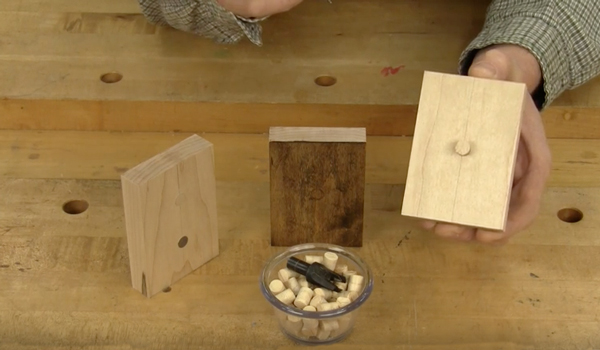
- ✦ Wrong size
A loose plug can leave visible gaps.
- ✦ Poor grain match
Different grain direction can make the plug stand out.
- ✦ Too much glue
Excess glue can create cleanup problems.
Finishing After Installation
After trimming, sand the area evenly with the surrounding surface. Apply stain or finish only after the wood is clean and smooth.
- ✦ Final inspection
Check the plug under normal lighting before finishing.